ASTRO SR-8450 User manual

8K Video Server
SR-8450
Instruction Manual
Ver. 1.20
ASTRODESIGN, Inc.

Safety precautions (Always observe)
2
Safety precautions (Always observe)
Always observe the following precautions. Failure to do so can result in fires, electric shock, serious injury or death, and damage
to property.
Warning indications and meaning of symbols
This manual uses the following warning indications and symbols. Before reading this manual, make sure that you understand the
meaning of these indications.
About Handling the Unit
Do not throw or subject to strong
impacts.
Doing so may cause a malfunction, cracking,
heat generation, or fire.
Do not use where there is a risk of fire
or explosion.
Doing so may result in fire.
Do not allow water or foreign objects
inside the unit.
Doing so may cause a fire, electric shock, or
accident.
If liquid or foreign objects should get inside,
immediately turn the power off and contact your
dealer or an ASTRODESIGN,Inc. sales
representative.
Do not disassemble, repair, or modify.
There are high-voltage components inside the unit.
There is a risk of a fire or an electric shock, burn,
or other injury, and doing so may cause a
malfunction.
If thunder is heard during outdoor use,
immediately turn the power off, unplug
the power cord from the power outlet,
and move the unit to a safe place.
Failure to do so may result in fire and
electric shock due to lightning.
About Handling the Power Cord
Do not damage the power cord.
Damage to the power cord may result in fire and
electric shock.
・Do not modify the power cord.
・Do not forcibly bend the power cord, bundle or
tie it, or place heavy objects on it.
Keep the power cord away from heaters
and do not allow it to become hot.
Always grasp the plug when unplugging
the power cord.
About foreign matter
Do not spill liquids inside or remove
flammable objects or metals.
If you use it as it is, it may cause fire, electric
shock, or malfunction.
Failure to heed this caution can
lead to injury due to electric
shock or other accidents, and
damage to the unit and other
property in the vicinity.
●Caution symbols
●Symbols for
forbidden actions
●Symbols for
required actions
Warning
Symbols
Caution
Warning
Fire
Electric
shock
Forbidden
Do not
disassemble
Required
actions
Failure to heed this warning may
lead to an accident resulting in
death, serious injury, etc. due to a
fire or electric shock.
Forbidden
Required
actions
Forbidden
Do not
disassemble
Required
actions
Forbidden

Safety precautions (Always observe)
3
About Handling the Unit
Do not use in the following
environments.
Doing so may cause a malfunction.
・Location where the ambient temperature is
outside the range of 0 to 40°C
・Location where the ambient humidity is
outside the range of 20 to 80% RH
・Location near an air conditioning unit where
there may be sudden temperature changes
or condensation
・Location subject to direct sunlight
・Location with corrosive gases or very dusty
location
・Location where strong magnetic fields are
generated
・Location where the unit may be splashed
with water, oil, chemicals, etc.
・Location where vibration is transferred
through the floor
・Unstable location
・Locations above an altitude of 2000m
・Tropical area
Do not place objects around this
device
If the ventilation holes or fan parts are blocked,
this device may fail.
About the Liquid Crystal Display (LCD)
Do not touch any liquid (liquid crystals)
that may leak from the LCD panel.
・If the LCD panel is inadvertently damaged,
liquid (liquid crystals) may leak from the
panel. Keep the liquid away from your
mouth and skin and do not inhale the
vapors.
If any liquid should contact your mouth or eyes,
wash away immediately with water.
Furthermore, if any liquid should adhere to your
skin or clothing, wipe them off with alcohol or
the like and then wash away with soap. Your
skin or clothing may be damaged if liquid
crystals are left adhered.
Be careful of glass shards from a
broken LCD panel.
If the LCD panel is inadvertently damaged, take
care not to cut your hands on glass shards.
Care in handling of the LCD panel.
・Do not wipe with benzene or thinner.
・Do not apply water (or salt water).
・Do not leave exposed to ultraviolet rays for
long periods.
・Do not use in an environment subject to
condensation.
・Do not strike, bump, or otherwise subject to
impacts.
・Do not disassemble.
About the Power Supply
Do not turn the power back on
immediately after turning it off.
Doing so may cause a malfunction.
About Strong Impacts
Do not drop the unit or subject it to
impacts.
If the unit is subjected to impacts, there is a risk
of a malfunction. Take sufficient care when
moving the unit.
Forbidden
Forbidden
Forbidden
Finger injury
hazard
Required
actions
Forbidden

Safety precautions (Always observe)
4
If the Unit Malfunctions or Trouble Occurs
Stop using the unit immediately, unplug the power cord, and contact your dealer or an ASTRODESIGN,Inc. sales representative.

Before you use
5
Before you use
At first
Thank you very much for purchasing the 8K Video Server SR-8450.
This instruction manual (hereinafter referred to as "this manual") explains how to use the SR-8450 and the precautions for use.
To ensure proper use of the SR-8450, be sure to read this document before use.
Also, please keep this book in a safe place.
About terminology
For the sake of simplicity, some terms in this document may refer to:
project
Notation in this document
8K Video Server SR-8450
This device
Remote controller RB-8428
remote controller
Recording Media
SSD
About bundled items
The items included with this device are as follows. If there is anything that is missing or damaged, please contact the dealer or the sales
department of ASTRODESIGN,Inc.
Name
product
quantity
remarks
SR-8450
8K video server
SR-8450 main unit
1
AC power cord
2
15A
75Ω Termination Resistor
1
Instruction manual
1
This book
RB-8428
Remote Controller
RB-8428 main unit
1
AC power cord
1
7A
BNC cable for
remote controller*1
1
3m
*1: If you would like to request BNC cables for remote controller of different lengths, please contact the Business Division of
ASTRODESIGN,Inc.
・Please be sure to use the included accessories. Using anything other than accessories may cause a malfunction.
・Repeated recording and erasure may degrade the performance of the SSD. In that case, the performance of the SSD may be
improved by running Disk Format of the SSD on the main unit.
・Before using this device, be sure to perform a recording test to ensure that it is recorded normally. If by any chance the recording
is not recorded due to these defects while using this device, SSD, or externally connected device, we can not compensate for
the recorded contents. Thank you for your understanding.
・Please be sure to check the operation before using this device. We will not compensate for loss of business opportunities due to
breakdowns or other reasons, regardless of whether it is within the warranty period or after the expiration of the warranty period.
Thank you for your understanding.

Contents
6
Contents
Safety precautions (Always observe) .....................2
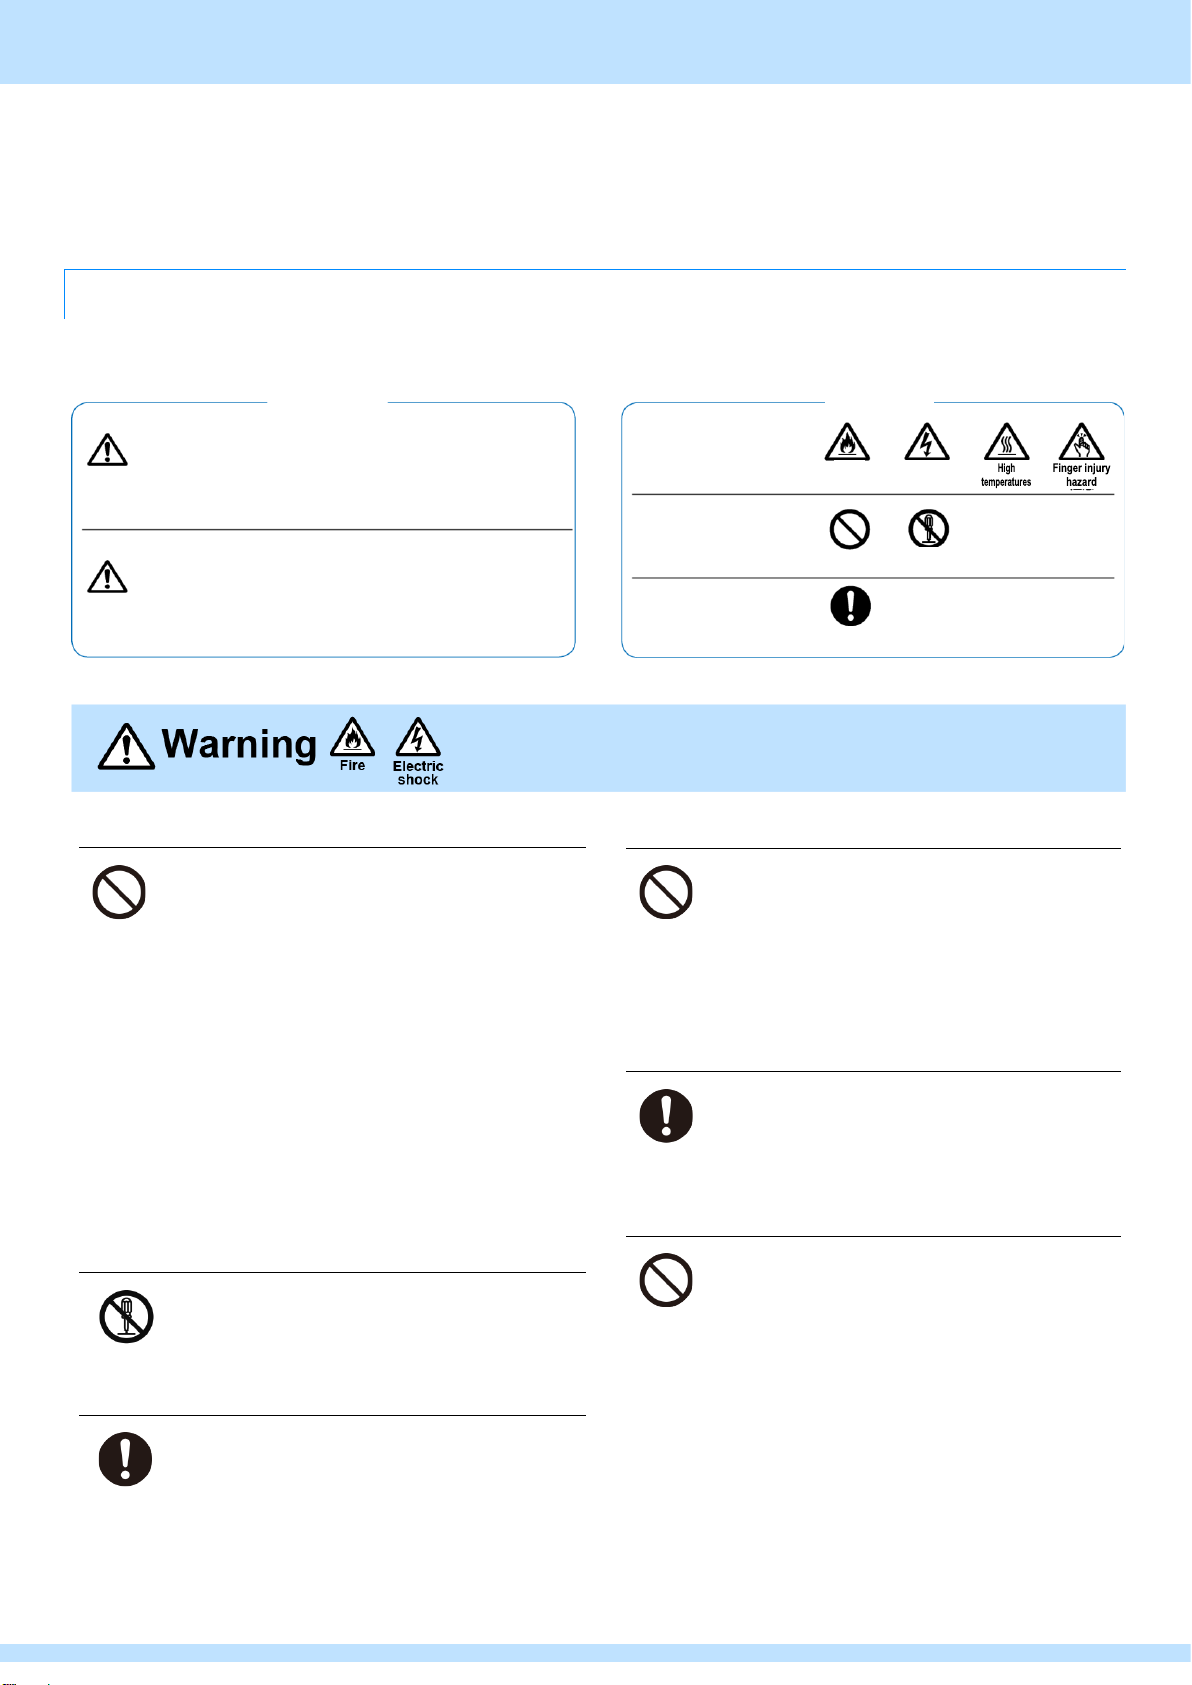
Warning indications and meaning of symbols.........2
If the Unit Malfunctions or Trouble Occurs..............4
Before you use ..........................................................5
At first.......................................................................5
About terminology....................................................5
About bundled items................................................5
Contents.....................................................................6
Chapter 1 About this device.....................................8
1.1 summary ...........................................................8
1.2 Features of this device......................................8
1.3 Names and functions of each part....................9
1.3.1 This device SR-8450 ..............................9
1.3.2 Remote Controller RB-8428.................12
Chapter 2 Preparation, connection, and adjustment of this
device...........................................................13
2.1 Preparation of this device (SR-8450) .............13
2.1.1 Connection of video signal input unit and
I/F for non-video signal.........................13
2.1.2 Video signal output unit ........................15
2.1.3 Power Connections ..............................16
2.1.4 Starting the device................................16
2.1.5 Shutting off the device..........................16
2.2 Preparing the remote controller (RB-8428) ....17
2.2.1 Connecting and Activating the Remote
Controller ..............................................17
2.2.2 Shutting off the remote controller .........17
Chapter 3 Operation in this device........................18
3.1 HOME Screen.................................................18
3.1.1 HOME Screen (SDI IN Status).............18
3.1.2 HOME Screen (POWER Status)..........19
3.1.3 HOME Screen (Temperature Status 1) 19
3.1.4 HOME Screen (Temperature Status 2) 19
3.1.5 HOME Screen (FAN Status).................20
3.2 MENU Screen .................................................21
3.2.1 Maintenance drawing ...........................21
3.3 SSD Information Screen.................................22
3.4 Thumbnail screen ...........................................22
Chapter 4 Operation from the remote controller .23
4.1 Name and function of each part of ....................
the remote controller.......................................23
4.2 Operations about simultaneous ........................
recording playback..........................................25
4.2.1 Live mode.............................................25
4.2.2 PlayBack mode.....................................25
4.2.3 Jog Mode..............................................27
4.2.4 Full end of recording.............................27
4.3 Working with Mark Points ...............................28
4.4 Operations about Goto TC..............................28
4.5 Clip operations................................................29
4.5.1 Page-BANK select................................30
4.5.2 Register a clip.......................................32
4.5.3 Play a clip .............................................34
4.5.4 Edit the IN/OUT point of a clip..............35
4.5.5 Copy/move clips ...................................35
4.5.6 Delete clips ...........................................35
4.5.7 Delete clips/playlists in BANK units......36
4.5.8 Delete clips in Page units.....................36
4.6 Operations about a playlist .............................37
4.6.1 Create a new playlist............................37
4.6.2 Playing a playlist...................................37
4.6.3 Delete a playlist ....................................38
4.6.4 Add clips to a playlist............................38
4.6.5 Insert a clip into a playlist .....................38
4.6.6 Edit the IN/OUT point of a clip in a playlist
..........................................................39
4.6.7 Edit the playback speed of clips in a
playlist...................................................39
4.6.8 Set the Transition Type of a clips in a
playlist...................................................40
4.6.9 Set the Transition Duration for clips in a
playlist...................................................41
4.6.10Set the Transition Color for clips in a
playlist...................................................42
4.6.11 Delete clips in a playlist........................42
4.7 Operations about the protect function ............43

Contents
7
4.7.1 Protecting clips (and playlists)..............44
4.7.2 Batch protection of clips included in BANK
..........................................................47
4.7.3 Batch protection of clips (and playlists)
included in the Page.............................50
4.7.4 Checking protected clips (and playlists)53
4.8 MENU..............................................................57
Chapter 5 When you are in trouble .......................60
5.1 If it doesn't work properly................................60
5.2 When an abnormality or malfunction occurs ..60
Chapter 6 Device Specifications ...........................61
6.1 This device SR-8450 ......................................61
6.1.1 Main unit specifications ........................61
6.1.2 appearance...........................................62
6.2 Remote Controller RB-8428 ...........................63
6.2.1 Main unit specifications ........................63
6.2.2 appearance...........................................63
Chapter 7 Changelog..............................................64

Chapter 1 About this device
8
Chapter 1 About this device
This chapter explains the features of this device, the names of each part, and an overview of their functions.
1.1 summary
This device is a video server that uses SSD as a recording medium and has a simultaneous recording and playback function.
1.2 Features of this device
⚫Continuous recording of four 8K60P videos and two 8K60P playback simultaneously
⚫4 input modes: Up to 4 hours of continuous loop recording is possible per input
system
⚫2 input modes: Up to 8 hours of continuous loop recording is possible per input
system
⚫You can create, edit, and delete clips and playlists with any clip while recording.
⚫Two T-bar remote controls enable independent playback control of two 8K outputs.
⚫Clip transmission with another individual by 10 GbE is possible (future support)
⚫SSD can be replaced (but hot wire insertion and removal are not possible)
⚫Supports up to 32-channel audio (uncompressed, 24-bit) recording
⚫Power Supply (AC)2 reloaded
⚫5U Rackmount Size

Chapter 1 About this device
9
1.3 Names and functions of each part
The names and functional overviews of each part of this device are as follows.
1.3.1 This device SR-8450
●front view
①
②
③
⑤
④
⑥
②
②
②
④
①
OPEN
OPEN

Chapter 1 About this device
10
number
name
explanation
①
Touch panel LCD
Displays various statuses.
②
SSD Slots
Reload the SSD.
③
SD card slot
Insert the SD card, upgrade the firmware version, and obtain log information.
Used only during maintenance.
④
STANDBY Switch
Start or Shut off this device.
⑤
Main power switch
Turn on the main power supply of this device.
⑥
Redundant power
switch
Turn on the redundant power supply of this device.

Chapter 1 About this device
11
●Rear View
number
name
explanation
①
8K 12G-SDI A
8K 12G-SDI B
8K 12G-SDI C
8K 12G-SDI D
Inputs an 8K video signal.
②
TIMECODE IN
Input an external timecode (LTC) signal.
TIMECODE OUT1
TIMECODE OUT2
In LIVE Mode
In PLAY mode
Output the input TC or the internally generated TC.
Outputs the TC recorded on the SSD.
MADI A
MADI B
MADI C
MADI D
Input an external MADI signal.
MADI OUT1
MADI OUT2
In LIVE Mode
In PLAY mode
Outputs input audio.
Output the recorded audio to the SSD.
REF IN
Enter the reference (HD3-value/BB SYNC). * Automatic termination is not supported.
LOOP THROUGH
It will be a passive through of REF IN.
③
REMOTE
Connect with the remote controller.
The left side controls 8K 12G-SDI OUT1 (output system 1) and the right side controls 8K
12G-SDI OUT2 (output system 2). The Baud Rate is 4,000,000 bps.
④
10GbE/Ethernet
1 Communicate with external devices via 10Gbit Ethernet. (Future-proof)
⑤
DOWNCON OUT1
Output the downcon video of output system 1 (4K/HD-PB /HD-LINE, from left to right).
⑥
DOWNCON OUT2
Output the downcon video of output system 2 (4K/HD-PB /HD-LINE, from left to right).
⑦
HD EE OUT
It outputs HD downcon video (EE) of the four input systems.
⑧
8K 12G-SDI OUT1
Outputs an 8K video signal of output system 1.
⑨
8K 12G-SDI OUT2
Outputs an 8K video signal of output system 2.
⑩
GPIO
Used during maintenance.
⑪
Main power supply
unit
This is the main power supply of this device. Connect the supplied AC cable.
⑫
Redundant power
supply unit
This is a redundant power supply for this device. Connect the supplied AC cable.
①
③
⑧
⑨
⑤
⑥
②
④
⑦
⑩
⑪
⑫

Chapter 1 About this device
12
1.3.2 Remote Controller RB-8428
●Rear View
●front view
Operation/Display area
For details, see Chapter 4 Operation from Remote Controller.
number
name
explanation
①
Remote Controller
Power Switch
Start or shut off the remote controller.
②
AC Inlet
Connect the supplied AC cable.
③
REMOTE PIN
Connect the supplied BNC cable for remote controller and communicate with this device.
①
②
③
R E M O T E

Chapter 2 Preparation, connection, and adjustment of this device
13
Chapter2 Preparation,connection,andadjustmentofthisdevice
2.1 Preparation of this device (SR-8450)
This section describes the connection, startup, and shutdown of this device and peripheral devices.
2.1.1 Connection of video signal input unit and I/F for non-video signal
LINK 1
LINK 2
LINK 3
LINK 4
➢12G-SDI (SMPTE ST 2082-12)
➢8K YCBCR4:2:2 59.94p 10bit
➢2sample interleave
Video signal corresponding to the
above specifications
➢12G-SDI (SMPTE ST 2082-12)
➢8K YCBCR4:2:2 59.94p 10bit
➢2sample interleave
Video signal corresponding to the
above specifications
➢12G-SDI (SMPTE ST 2082-12)
➢8K YCBCR4:2:2 59.94p 10bit
➢2sample interleave
Video signal corresponding to the
above specifications
➢12G-SDI (SMPTE ST 2082-12)
➢8K YCBCR4:2:2 59.94p 10bit
➢2sample interleave
Video signal corresponding to the
above specifications
LINK 4
LINK 3
LINK 2
LINK 1
LINK 1
LINK 2
LINK 3
LINK 4
LINK 1
LINK 2
LINK 3
LINK 4

Chapter 2 Preparation, connection, and adjustment of this device
14
External MADI
signal output B
remote controller
RB-8428
External
TIMECODE
exert oneself
External MADI
signal output A
External
TIMECODE
input
Peripherals
MADI input
External MADI
signal output C
External reference
signal output
Peripherals
Reference Input
External MADI
signal output D

Chapter 2 Preparation, connection, and adjustment of this device
15
2.1.2 Video signal output unit
➢HD-SDI (SMPTE 292M)
➢1920x1080 59.94i
Input of peripheral devices
corresponding to the above
specifications
➢12G-SDI (SMPTE ST 2082-12)
➢8K YCBCR4:2:2 59.94p 10bit
Input of peripheral devices corresponding to
the above specifications
➢HD-SDI (SMPTE 292M)
➢1920x1080 59.94i
Input of peripheral devices
corresponding to the above
specifications
➢12G-SDI (SMPTE ST 2082-12)
➢8K YCBCR4:2:2 59.94p 10bit
Input of peripheral devices corresponding
to the above specifications
LINK 1
LINK 2
LINK 3
LINK 4
LINK 1
LINK 2
LINK 3
LINK 4
➢HD-SDI (SMPTE 292M)
➢1920x1080 59.94i
Input of peripheral devices
corresponding to the above
specifications
➢12G-SDI (SMPTE ST 2082-10)
➢3840x2160 59.94p 10bit
➢2sample interleave
Input of peripheral devices
corresponding to the above
specifications

Chapter 2 Preparation, connection, and adjustment of this device
16
2.1.3 Power Connections
1 Ensure that the main power switch and redundancy power switch of this device are turned OFF.
2 Connect the supplied AC cable to the main power supply unit of this device and to the AC IN connector of the
redundant power supply.
2.1.4 Starting the device
1 Make sure that the power supply and all I/O connections are closed.
2 Turn on the main power switch and the redundant power switch.
3 Turn on the STANDBY switch.
➢The startup screen appears, followed by the HOME screen.
2.1.5 Shutting off the device
1 By operation with the remote controller, stop recording and playback completely.
2 Press and hold the STANDBY switch for 3 seconds, and then release it when the pop-up "Please Wait...” appears.
3 Verify that the touch panel LCD is off and turn off the mains power switch and the redundant power switch.
◼Never turn off the power while recording or playing. This may cause failure of this device or data damage.
◼Do not turn off the main power switch and the redundant power switch before discontinuing this device. This may cause a
malfunction.
◼If the main power switch and the redundant power switch are turned off first from the STANDBY switch, the previous state is not
recorded.

Chapter 2 Preparation, connection, and adjustment of this device
17
2.2 Preparing the remote controller (RB-8428)
This article shows how to connect, start, and shut off the remote controller.
2.2.1 Connecting and Activating the Remote Controller
This article shows how to connect, start, and shut off the remote controller.
1 Make sure the remote controller power switch is turned OFF.
2 Connect the BNC cable for the remote controller to the REMOTE terminal.
3 Connect the supplied AC cable to the AC IN connector.
4 Turn on the power switch of remote controller.
2.2.2 Shutting off the remote controller
1 By operation with the remote controller, stop recording and playback completely.
2 Turn off the power switch of remote controller.

Chapter 3 Operation in this device
18
Chapter 3 Operation in this device
3.1 HOME Screen
3.1.1 HOME Screen (SDI IN Status)
When the start of this device is completed, the following HOME screen (SDI IN status) is displayed.
●When the HOME screen (SDI IN status) is displayed
➢Press the status display toggle switch on the right side to move to 【3.1.2 HOME Screen (POWER Status)】.
➢Press the status display toggle switch on the left side to move to 【3.1.4 HOME Screen (FAN Status)】.
number
name
explanation
①
Menu
Go to MENU screen. (For details, refer to 【3.2 MENU Screen】).
②
SSD Information
SSD Remain: Displays the remaining amount of clip registration area on the SSD.
The percentage decreases according to the clip length
registered on the SSD.
When no clips are registered, 100% is displayed.
SSD Information: Displays the SSD Information screen.
(For details, refer to 【3.3 SSD Information Screen】.)
②
Log
Displays the logs of this device.
④
12G-SDI INPUT Status
Displays the Lock status of the 12G-SDI input. If it is locked normally, 【Locked】
is displayed, and if it is not Locked, 【Unlock】 is displayed.
⑤
External REF Signal Status
If BlackBurst is input as an external synchronization signal and Lock normally,
【BB】 is displayed when Lock to three-valued synchronization, and 【Unlocked】
is displayed if there is no input.
⑥
Status display toggle switch
Toggles the display of status.
⑦
thumbnail
Set the main device LCD to the thumbnail screen.
①
②
③
④
⑤
⑥
⑥
⑦
SDI A : Locked
SDI B : Locked
SDI C : Locked
SDI D : Unlock
RefIn : BB

Chapter 3 Operation in this device
19
3.1.2 HOME Screen (POWER Status)
●When the HOME screen (POWER status) is displayed
➢Press the status display toggle switch on the right side to enter 【3.1.3 HOME screen (temperature status 1)】.
➢Press the status display toggle switch on the left side to move to the 3.1.1 HOME Screen (SDI IN Status).
3.1.3 HOME Screen (Temperature Status 1)
●When the HOME screen (temperature status 1) is displayed
➢Press the status display toggle switch on the right side to go to 【3.1.4 HOME Screen (Temperature Status 2)】.
➢Press the status display toggle switch on the left side to move to 【3.1.2 HOME Screen (POWER Status)】.
3.1.4 HOME Screen (Temperature Status 2)
●When the HOME screen (temperature status 2) is displayed
➢Press the status display toggle switch on the right side to move to 【3.1.4 HOME Screen (FAN Status)】.
➢Press the status display toggle switch on the left side to enter 【3.1.2 HOME Screen (Temperature Status 1)】.
name
explanation
POWER Status
Displays the status of the supply voltage. If the power supply voltage is normal, OK is displayed,
and if it is abnormal, ERROR is displayed.
Power1 indicates the status of the mains power supply and Power2 indicates the status of the
redundant power supply.
name
explanation
FPGA Temperature
Status 1
The temperature status of each FPGA built into this device is displayed.
It becomes yellow above 78°C and red above 81°C.
name
explanation
FPGA Temperature
Status 2
The temperature status of each FPGA built into this device is displayed.
It becomes yellow above 78°C and red above 81°C.
Power2 : OK Power1 : ERROR
Mother : 49 ℃
Encoder1 : 36 ℃Decoder1 : 31 ℃
Encoder2 : 36 ℃Decoder2 : 36 ℃
Encoder3 : 34 ℃Decoder3 : 32 ℃
Encoder4 : 39 ℃Decoder4 : 31 ℃
Input1 : 37 ℃Output1 : 43 ℃
Input2 : 37 ℃Output2 : 43 ℃
Storage1 : 34 ℃
Storage2 : 79 ℃
Storage3 : 36 ℃
Storage4 : 89 ℃

Chapter 3 Operation in this device
20
3.1.5 HOME Screen (FAN Status)
●When the HOME screen (FAN status) is displayed
➢Press the status display toggle switch on the right to move to 【3.1.1 HOME Screen (SDI IN Status)】.
➢Press the status display toggle switch on the left side to enter 【3.1.3 HOME Screen (Temperature Status 2)】.
name
explanation
FAN Status
Displays the status of each FAN. If the FAN is rotated normally, 【OK】 is displayed, and if the
rotation is abnormal, 【ERROR】 is displayed.
FAN 1 : OK FAN 3 : OK
FAN 2 : OK FAN 4 : ERROR
Table of contents
Other ASTRO Server manuals
Popular Server manuals by other brands

HP
HP HPE ProLiant DL365 Gen10 Plus Server Maintenance and service guide

Nortel
Nortel Softphone 2050 user guide

Lenovo
Lenovo ThinkSERVER TS130 warranty and support information

Lenovo
Lenovo THINKSERVER RS210 manual

360 Systems
360 Systems ImageServer 2000 Operation manual

IBM
IBM System x3400 Type 7975 user guide