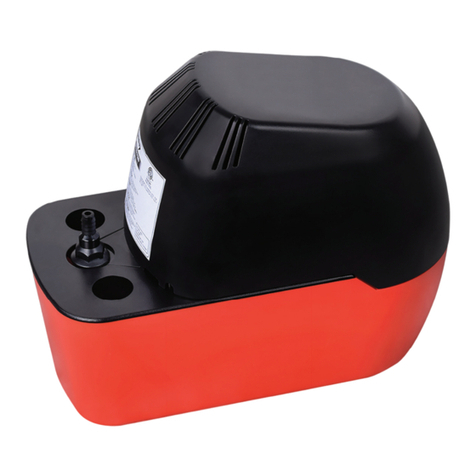
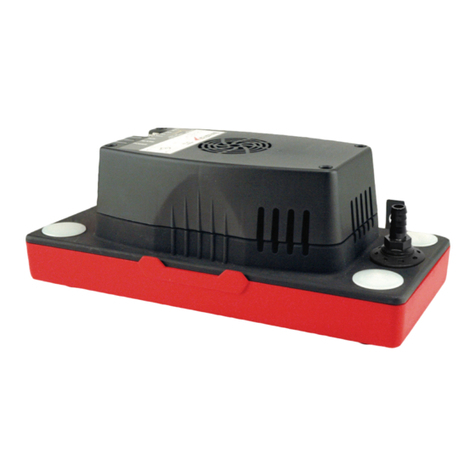
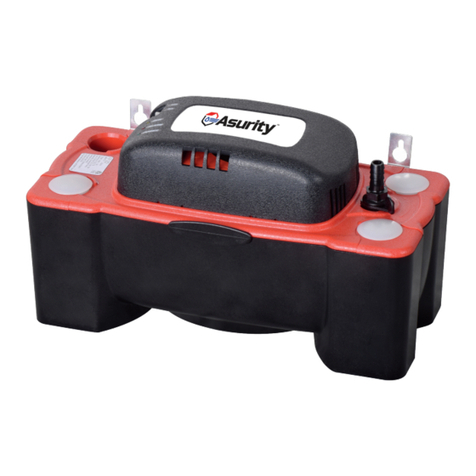
ASURITY QUIETMINI-M User manual

DESCRIPTION OF SENSOR PART
FLOW RATES AT EACH HEAD
FUNCTION OF THE PRODUCT
QUIETMINI-M condensate removal pump is designed to
remove condensate from air conditioner automatically.
ASURITYTM
COMPONENTS
ULTRA QUIET AND LOW PROFILE UNDERMOUNT PUMP
Cover
Reservoir
Siphon KitBolt, Anchor
OTHER COMPONENTS
25mm (Safety switch ON)
21mm (Pump ON)
13mm (Pump OFF)
Pump Power cable
Inlet hole
Discharge hose
*Position tolerance( 2mm)
Bottom of
Reservoir
Float
(*Magnet always
positioned on top)
Model: QUIETMINI-M
Standard Applications
Condensate
Pump Ductless
Installation Instructions
CONDENSATE MANAGEMENT
WARRANTY
All pumps manufactured by or for DiversiTech Corporation (the Company) and sold
by the Company under the Asurity or DiversiTech brand are warranted to be free of
defects in workmanship and materials for a period of 24 months from date of sale from
the distributor to the contractor. The Company will credit, repair or replace, at its option,
any Pump if deemed defective within this time period. All products returned to the
Company must include a return authorization issued by the Company. The returned
product should be suitably packaged and shipped prepaid from the point of shipment
to the point designated in the
Company’s return authorization.
This warranty is a limited warranty and shall be in lieu of any other warranties,
expressed or implied, including, but not limited to, any implied warranty of
merchantability or fitness for a particular purpose. There are no other warranties that
extend beyond the description of the face hereof. The liability of the Company
arising out of its supply of said products, or their use shall not in any case exceed
the cost of correcting defects in the products as set forth above. The Company shall
not be liable for any costs or damage incurred by its customers in the removal or
replacement of defective products from units in which the products have been
assembled. In no event shall the company be liable for loss of profits, indirect,
consequential, or incidental damages.
www.diversitech.c om | 800.995.2222
AsurityTM is a registered trademark of
DiversiTech Corporation
©2021 DiversiTech Corporation
Duluth, GA 30097
800.995.2222
CONDENSATE MANAGEMENT
Head 0m / 0ft 4m / 13ft 6m / 20ft 8m / 26ft
Rate of Flow(L/h) 29 19 15 12
Rate of Flow(gal/h) 7.66 5.01 3.96 3.17

HOW TO INSTALL THE PRODUCT
(Left side of the Reservoir)
Installation at the
lower left
(Right side of the Reservoir)
Installation at the
lower right
(Left side of the Reservoir)
Installation at the
lower left
(Right side of the Reservoir)
Installation at the
lower right
Select location at the
lower left or right of the
air conditioner.
Make holes in the wall
according to the location for
installation and then fix the pump
with bolts and anchor.
* The default product condition is for the lower right installation.
When installing on the left, move the rubber part to the opposite side
as shown in the figure, assemble it, and then install it so that the
location of the resorvoir is on the left.
(The marked rubber parts should always have 4 on the front and 2 on the rear.)
Insert the air conditioner drain hose all the way into the reservoir and connect the
pump's discharge hose to the external drain hose. (At this time, be careful that the
air conditioner drain hose does not interfere with the water level sensor inside the
product water container.)
- Hose standard: 6mm or 1/4" (inner diameter) x 9mm or 3/8" (outer diameter)
- Be careful not to kink or pinch off the hose bended.
Connect the power cable of the pump to the rated power. Power should be
continuously supplied to this equipment except when maintenance or follow-up
service is carried out after installation of this equipment.
Safety switch installation method (Optional)
After cutting one line of the temperature sensor in the indoor unit of the
air conditioner. connect COM and NC of the safety switch lead wire to the line
respectively in order to prevent a possible water overflowing. This will shut off the
compressor of the outdoor unit of the air conditioner when the drain pump runs
abnormally, making no additional condensate water generated any more.
* It is possible to connect the lead wire of the safety switch to the control circuit of
the air conditioner. However, the configuration of circuit is different depending on
the manufac turers of the air conditioner, please be sure to connect the lead line of
the safety switch to the control circuit with the help of an installation expert of the
relevant air conditioner.
AC (Light blue: COMMON)
AC (Brown: HOT)
Alarm (Brown: COM)
Alarm (Black: N.C.)
Air Conditioner
External drain hose
Pump’s discharge hose
Air conditioner
drain hose
[How to connect the lead wire of the safety switch]
Temperature
sensor of air
conditioner indoor unit
COM (Black)
NC (Black)
After installation is complete, install the cover according to the rubber parts.
Make a trial run of this equipment.
Pour a little water into the drain pan of the air conditioner’s indoor unit.
If the water level ascends to some extent while water enters the reservoir, the
pump runs for 2-3 seconds. discharging the water. Then. as the water level
descends, the pump stops. Make such operation repeat 8 to 10 times.
Check any leakage of water or generation of abnormal noise while the pump runs.
Though there may be a little bit loud noise in the first 1-2 operations until the
entering air escapes from the connection hose, this is not a failure.
PRODUCT SPECIFICATIONS
MAINTENANCE
1. Be sure to maintain the equipment in the following order when you stop
operation of the air conditioner after summer season or resume operation of the
air conditioner in earty summer.
2. Be sure to cut off the power supply before maintaining this equipment
3. Separate the reservoir by p-ng the hook part on the edge of the reservoir lid.
(Prepare for a dry towel in advance as the water can flow out from the inside
when separating the reservoir.)
4. Wash the inside of the reservoir with clean water.
5. Fit the reservoir in place.
6. Supply power to this equipment again and make a trial run according to the tip
mentioned above.
SAFETY PRECAUTIONS
While the pump runs, water should always pass from the inlet to the outlet of the
pump. If the pump runs repeatedly with the air flowing in and out while water
does not pass, it can cause failure of the pump.
This equipment is produced exclusively for draining the condensate water of air
conditioner.
DO NOT use it except for draining the condensate water of air conditioners.
DO NOT use this equipment for flammable liquid or hot water of 40°C/104°F or
higher. DO NOT place inflammables near this equipment.
This appliance is not intended for use by persons (including children) with
reduced physical, sensory or mental capabilities, or lack of experience and
knowledge, unless they have been given supervision or instruction concerning
use of the appliance by a person responsible for their safety. Children should be
supervised to ensure that they do not play with the appliance.
Before maintenance or follow-up service of this equipment. please cut off this
equipment from the power.
If the power cord is damaged in any way, DO NOT use this equipment to prevent
any danger.
Do not touch this equipment at a wet place or with wet hand.
To reduce the risk of electrical shock, be certain that the pump is connected to a
properly grounded earth.
This equipment is NOT a submersible pump. When this equipment is flooded, be
sure to cut off the power supply and then contact our A/S Center or any
installation expert of air conditioner.
Every installation or follow-up service should be done by a qualified service
technician.
As this equipment is a pump with a short time rating, do not use it for applications
requiring continuous operation for more than 3 minutes.
This pump is for indoor use only.
ASURITYTM
CONDENSATE MANAGEMENT www.diversitech.c om | 800.995.2222
Section Specification
Capacity of A/C Up to 16kw/54,000Btu/h
Power supply 100-240V / 60Hz
Power consumption
Max. flow rate
Max. discharge head
Size of outlet port
2.5W
8m / 26ft
7.66 GPH (29 LPH)
6mm or 1/4"
Available fluid Condensate of
1~40°C/33~104°C
Dry running Not allowed
Intermittent Rating
Capacity of reservoir
Safety switch
Pump size(mm)
3 minutes
Max 3A at 110VAC or
Max 3A at 240VAC
140mL
62(W) x 59(H) x 282(L)
Weight 0.5kg
Section Specification
Other ASURITY Water Pump manuals
Popular Water Pump manuals by other brands

EnviroGear
EnviroGear E Series Installation operation & maintenance

Powerhorse
Powerhorse 109270 owner's manual
Grundfos
Grundfos SCALA1 Safety instructions and other important information
Lincoln
Lincoln SAF1-YL owner's manual

BSC
BSC SRV630 instruction manual
Fervi
Fervi 0664 Operation and maintenance manual

Xylem
Xylem GOULDS LNE Series Installation, operation and maintenance manual

NOVELCA
NOVELCA JDP550PD user guide
GORMAN-RUPP
GORMAN-RUPP SUPER T SERIES Installation, operation and maintenance manual
WEDA PUMP
WEDA PUMP RL 8010 Instructions/spare parts manual

salmson
salmson THERMO SB04-15 Installation and starting instructions

Sandpiper
Sandpiper MSA2 Service manual
