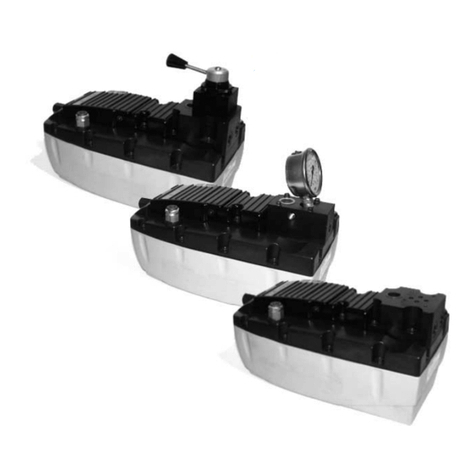
Bell UPFD User manual

LIBRETTO DI USO E MANUTENZIONE
USE AND MAINTENANCE MANUAL
GEBRAUCHS- UND WARTUNGSANLEITUNG
NOTICE D’UTILISATION ET D’ENTRETIEN
POMPA AD ARIA
AIR PUMP
DRUCKLUFTBETÄTIGTE HYDROPUMPE
POMPE HYDROPNEUMATIQUE
UPFD
s.r.l.
Leggete attentamente questo manuale prima dell'installazione e uso della pompa.
Read carefully this manual before installing and using the pump.
Avant d’installer la pompe et de la mettre en service, lire attentivement d’un bout à l’autre le présent manuel.
Vor Installation und Inbetriebnahme der Pumpe muß dieses Handbuch aufmerksam durchgelesen werden.
© 2018 BELL - 193557039 ver.0 - UPD 280318

2193557039 v.0 - UPD 280318
Fig. 1
Fig. 2

3
193557039 v.0 - UPD 280318
Fig. 4
Fig. 5
Fig.3

4193557039 v.0 - UPD 280318
INDICE
AVVERTENZE GENERALI .......................................................................................................................................................................................7
1 TRASPORTO, STOCCAGGIO E DISIMBALLO......................................................................................................................................................7
2 DESCRIZIONE ...........................................................................................................................................................................................................8
3 SICUREZZA................................................................................................................................................................................................................9
4 CARATTERISTICHE TECNICHE ...........................................................................................................................................................................10
5 INSTALLAZIONE E MESSA IN FUNZIONE.......................................................................................................................................................... 11
5.1 Riempimento del serbatoio dell'olio (se la pompa viene fornita vuota)............................................................................................................ 11
5.2 Messa in funzione della pompa ....................................................................................................................................................................... 11
5.3 Collegamentodeltubodirecuperoolio(perusoadoppioeetto) .................................................................................................................. 11
5.4 Collegamento dell'aria compressa................................................................................................................................................................... 11
6 USO .........................................................................................................................................................................................................................12
7 MANUTENZIONE.....................................................................................................................................................................................................13
7.1 Vericadelleconnessioni.................................................................................................................................................................................13
7.2 Puliziadelltrodell'aria ...................................................................................................................................................................................13
7.3 Controllo livello e sostituzione dell'olio idraulico ..............................................................................................................................................13
7.3.1 Controllo dell'olio idraulico. ......................................................................................................................................................................... 13
7.3.2 Sostituzione dell'olio idraulico.....................................................................................................................................................................13
7.4 Pulizia della pompa..........................................................................................................................................................................................13
7.5 Inconvenienti e rimedi......................................................................................................................................................................................14
8 DEMOLIZIONE E SMALTIMENTO DELLA POMPA............................................................................................................................................. 14
SCHEMA DI FUNZIONAMENTO............................................................................................................................................................................15
GARANZIA ...............................................................................................................................................................................................................15
PARTI DI RICAMBIO...............................................................................................................................................................................................15
INDEX
GENERAL PRECAUTIONS ....................................................................................................................................................................................16
1 TRANSPORT, STORAGE AND UNPACKING.......................................................................................................................................................16
2 DESCRIPTION .........................................................................................................................................................................................................17
3 SAFETY ....................................................................................................................................................................................................................18
4 TECHNICAL SPECIFICATIONS.............................................................................................................................................................................19
5 INSTALLATION AND START-UP ........................................................................................................................................................................... 20
5.1 Filling the reservoir (if the pump is supplied without oil) ..................................................................................................................................20
5.2 Start-up ............................................................................................................................................................................................................20
5.3 Connecting the oil return line (use with a double acting cylinder)....................................................................................................................20
5.4 Connecting the compressed air line.................................................................................................................................................................20
6 OPERATION.............................................................................................................................................................................................................21
7 MAINTENANCE .......................................................................................................................................................................................................21
7.1 Checking connections......................................................................................................................................................................................21
7.2 Cleaningtheairlter........................................................................................................................................................................................22
7.3 Checking level and change of the hydraulic oil................................................................................................................................................22
7.3.1 Checking the hydraulic oil........................................................................................................................................................................... 22
7.3.2 Hydraulic oil change ................................................................................................................................................................................... 22
7.4 Pump cleaning .................................................................................................................................................................................................22
7.5 Troubleshooting ...............................................................................................................................................................................................23
8 SCRAPPING AND DISPOSING OF THE PUMP...................................................................................................................................................23
OPERATION DIAGRAM..........................................................................................................................................................................................24
WARRANTY .............................................................................................................................................................................................................24
SPARE PARTS.........................................................................................................................................................................................................24

5
193557039 v.0 - UPD 280318
INHALT
ALLGEMEINE HINWEISE.......................................................................................................................................................................................25
1 TRANSPORT, LAGERUNG UND AUSPACKEN DER PUMPE ...........................................................................................................................25
2 BESCHREIBUNG.....................................................................................................................................................................................................26
3 SICHERHEIT ............................................................................................................................................................................................................27
4 TECHNISCHE MERKMALE....................................................................................................................................................................................28
5 INSTALLATION UND INBETRIEBNAHME ...........................................................................................................................................................29
5.1 Füllen des Öltanks (sofern die Pumpe leer geliefert wird) ...............................................................................................................................29
5.2 Inbetriebnahme der Pumpe .............................................................................................................................................................................29
5.3 Anschluß des Ölrücklaufschlauches (für doppelt wirkende Verwendung) ....................................................................................................... 29
5.4 Druckluftanschluß ............................................................................................................................................................................................29
6 BETRIEB...................................................................................................................................................................................................................30
7 WARTUNG................................................................................................................................................................................................................31
7.1 Überprüfung der Anschlüsse............................................................................................................................................................................31
7.2 ReinigungdesLuftlters ..................................................................................................................................................................................31
7.3 Kontrolle des Hydrauliköls und Hydraulikölwechsel.........................................................................................................................................31
7.3.1 Kontrolle des Hydrauliköls ..........................................................................................................................................................................31
7.3.2 Hydraulikölwechsel .....................................................................................................................................................................................31
7.4 Reinigung der Pumpe ......................................................................................................................................................................................31
7.5 Betriebsstörungen und Abhilfen.......................................................................................................................................................................32
8 VERSCHROTTUNG UND ENTSORGUNG DER PUMPE ....................................................................................................................................32
BETRIEBSSCHEMA................................................................................................................................................................................................33
GARANTIE ...............................................................................................................................................................................................................33
ERSATZTEILE..........................................................................................................................................................................................................33
INDEX
GENERALITES ........................................................................................................................................................................................................34
1 TRANSPORT, STOCKAGE ET DÉBALLAGE DE LA POMPE............................................................................................................................34
2 DESCRIPTION .........................................................................................................................................................................................................35
3 SÉCURITÉ................................................................................................................................................................................................................36
4 CARACTÉRISTIQUES TECHNIQUES ..................................................................................................................................................................37
5 INSTALLATION ET MISE EN SERVICE................................................................................................................................................................38
5.1 Remplissage du réservoir à huile (dans la mesure où la pompe est livrée vide)............................................................................................. 38
5.2 Mise en fonction de la pompe..........................................................................................................................................................................38
5.3 Raccordementdutubederécupérationhuile(pourutilisationàdoubleeet).................................................................................................38
5.4 Raccordement de l’air comprimé .....................................................................................................................................................................38
6 UTILISATION............................................................................................................................................................................................................39
7 ENTRETIEN..............................................................................................................................................................................................................40
7.1 Contrôle des raccordements............................................................................................................................................................................40
7.2 Nettoyagedultreàair....................................................................................................................................................................................40
7.3 Contrôle et vidange de l’huile hydraulique.......................................................................................................................................................40
7.3.1 Contrôle de l’huile hydraulique ................................................................................................................................................................... 40
7.3.2 Vidange de l’huile hydraulique....................................................................................................................................................................40
7.4 Nettoyage de la pompe....................................................................................................................................................................................40
7.5 Dérangements et remèdes ..............................................................................................................................................................................41
8 MISE À LA FERRAILLE ET ÉLIMINATION DE LA POMPE................................................................................................................................41
SCHEMA DE FONCTIONNEMENT........................................................................................................................................................................42
GARANTIE ...............................................................................................................................................................................................................42
PIECES DE RECHANGE ........................................................................................................................................................................................42

6193557039 v.0 - UPD 280318
2 - DESCRIZIONE
L'apparecchio fornito è una pompa che permette di ricavare una portata idraulica in pressione (vedi cap.4, "CARATTERISTICHE TEC-
NICHE") da un'alimentazione pneumatica.
Questapompapuòalimentaredirettamentedispositiviidrauliciasingoloeetto;adoppioeettointerponendoundistributorefrapompaeutilizzo.
E’VIETATOL’USODELLAPOMPAINAMBIENTEPOTENZIALMENTEESPLOSIVOSENONADEGUATAMENTE
PROTETTA (PROTEZIONE NON FORNITA). POSSIBILI ACCUMULI DI CARICHE ELETTROSTATICHE.
OGNIALTROUSODELLAPOMPAÈDARITENERSIINADATTOEPUÒCAUSARESERIINCIDENTI.ILCOSTRUT-
TOREDECLINAOGNI RESPONSABILITÀPER DANNICAUSATIDAUN USONON CORRETTO DELLAPOMPA.
Il costruttore è a vostra disposizione per chiarire ogni dubbio in merito all'installazione o al corretto uso della pompa.
Ing.6sonoillustratelevariepartidellapompa.
AVVERTENZE GENERALI
Prima dell'installazione e dell'uso di questa pompa leggete attentamente quanto riportato nel presente manuale poichè contiene impor-
tanti avvertenze per la vostra sicurezza.
Seguire attentamente le istruzioni di installazione contenute in questo manuale.
NOTA: La maggior parte dei problemi con nuove attrezzature è causata da operazioni o installazioni improprie.
Questo manuale dovrà sempre accompagnare la pompa e la macchina sulla quale viene installata, anche in caso di vendita o cessione
della stessa.
Primadiinstallareerendereoperativalapompavericatechenonabbiasubitodanniduranteiltrasporto,chelastrutturanonpresenti
crepeoammaccatureechenonvisianoperditedioliodallapompa.Incasocontrarionoticatealtrasportatorequantoriscontrato,NON
INSTALLATE LA POMPA e contattate il costruttore per informazioni in merito.
IL COSTRUTTORE NON RISPONDE PER DANNI A PERSONE, ANIMALI, COSE O MACCHINARI CAUSATI
DAL MONTAGGIO E DALL'USO DI UNA POMPA DANNEGGIATA.
1 - TRASPORTO, STOCCAGGIO E DISIMBALLO
Lo stoccaggio della pompa, nel caso questa venga rimessa a magazzino ed utilizzata dopo diverso tempo dall'acquisto, deve essere
eettuatoinlocaliadeguatamenteprotetticontrogliagentiatmosfericiedovelatemperaturanonsuperii50°Centigradi.
Se le pompe vengono consegnate già imballate su pallet, si raccomanda di toglierle dall'imballo originale solo nel momento del montaggio.
L'imballo vuoto deve essere smaltito secondo le prescrizioni di legge del paese in cui si esegue tale operazione.
ISTRUZIONI ORIGINALI
Raccordo
ingresso
aria compressa
Pedale di azionamento
(zona "PUMP")
Pedale di azionamento per ritorno a scarico
(zona "RELEASE")
Attaccodoppioeetto
per scarico in serbatoio.
Maniglia di
sollevamento
Tappo di riempimento
Livello olio
Attacco per tubo idraulico
di mandata olio
Corpo / serbatoio 10 litri
Corpo / serbatoio 25 litri
Attaccodoppioeetto
per scarico in serbatoio.
Maniglia di
sollevamento
Maniglia di
sollevamento

7
193557039 v.0 - UPD 280318
3 - SICUREZZA
Seguite attentamente tutte le istruzioni descritte di seguito poichè sono molto importanti per la sicurezza vostra e delle altre persone.
Oltre alle indicazioni riportate nel presente capitolo fate riferimento ad ogni altra nel manuale.
NON TENTATE DI MANOMETTERE LE PROTEZIONI INSTALLATE E NON MODIFICATE NESSUNA PARTE DELLA POMPA POICHÈ
SI POSSONO CREARE SITUAZIONI DI PERICOLO VERSO LE QUALI L'OPERATORE O IL MANUTENTORE NON SONO PREPARATI.
LA RIMOZIONE O MANOMISSIONE DI QUALSIASI DISPOSITIVO DI SICUREZZA APPLICATO ALLA POMPA, FA DECADERE
IMMEDIATAMENTE LA GARANZIA E SOLLEVA IL COSTRUTTORE DA OGNI RESPONSABILITÀ.
●L'uso della pompa e della macchina sulla quale la pompa è installata è riservato a persone maggiorenni, che conoscano bene la
macchina e la pompa ed abbiano letto per intero il presente manuale.
●È consentito l'uso a minorenni, comunque di età non inferiore a 16 anni, solo sotto la supervisione di un maggiorenne abilitato all'uso.
●Tenetelapompalontanadazonedicaloreeccessivo,ammeviveoscintille.Latemperaturamassimadiusonondevesuperarei
50°Centigradi.
●La pompa può essere azionata con i piedi o con le mani, purchè si prema esclusivamente sulle zone "PUMP" e "RELEASE", ap-
positamente indicate sulla pedaliera.
●Non lavorate con indumenti larghi o slacciati. Indossate ogni indumento protettivo richiesto dal caporeparto.
●Nonsaliteinpiedisullapompapermanovrarla.Èsucienteunaleggerapressionedelpiedeperazionareilmeccanismointerno.
●Non cambiate arbitrariamente posto alla pompa. La pompa deve essere usata nella posizione predisposta dal costruttore della
macchina sulla quale è applicata.
●Per raccordare la pompa seguite scrupolosamente le indicazioni riportate nel capitolo 5 "Installazione e messa in funzione" e usate
sempretubieraccordicerticati.
Nella scelta di tubi e raccordi, così come degli utilizzi come cilindri idraulici, tenere sempre presente che questi componenti
devono essere idonei a sopportare in sicurezza la pressione massima generata dalla pompa.
●Prima di azionare la pompa, accertarsi che tutte le connessioni con i tubi siano serrate con attrezzi adatti. Non serrare
eccessivamente. Le connessioni devono essere solamente serrate in modo sicuro e senza perdite. Un serraggio eccessivo
potrebbe causare una rottura prematura del letto oppure la rottura di impianti ad alta pressione già a pressioni inferiori
alle loro capacità dichiarate.
●Non superare la pressione idraulica dichiarata sull’etichetta della pompa e non manomettere la valvola di sicurezza interna. Lavorare
con pressione superiore alla capacità dichiarata può provocare danni a persone e cose.
●Tenetesgombral'areadilavoroalnedipotermanovrarecorrettamenteeinsicurezzalapompa.Fateattenzioneadeventualioggetti
che cadendo possono azionare inavvertitamente la pompa.
●L'area di lavoro dovrà essere pulita e in particolare si dovrà evitare la presenza di olii, grasso o altre sostanze scivolose o corrosive.
●Se fosse necessario scollegare le tubature di alimentazione e circolo idraulico, assicuratevi che non vi sia pressione scollegando
l'alimentazione pneumatica e mettendo a scarico la parte idraulica.
●Dovesse un tubo idraulico rompersi o necessitare di essere scollegato, togliere immediatamente alimentazione alla pompa e azio-
nare la valvola di controllo RELEASEduevolteperrilasciaretuttalapressione.Nontentaremaidiaerrareconlemaniuntuboin
pressionecheperde.Laforzadifuoriuscitadeluidoidraulicopotrebbecausareseridanni.
●Nonesporreiltuboapotenzialirischicome:fuoco,temperatureestremedicaldoodifreddo,supercitaglientioimpattipesanti.
Nonpermetterealtubodiattorcigliarsi,girarsi,piegarsioincurvarsicosistrettamentecheilussodell’oliodentroiltubosiblocchi
o si riduca. Periodicamente ispezionare il tubo dal momento che ognuna di queste condizioni può danneggiare il tubo e provocare
danni a cose o persone.
●Non usare il tubo per muovere l’attrezzatura ad esso collegata. Questo tipo di stress potrebbe danneggiare il tubo e causare danni
a cose o persone.
●ATTENZIONE: le caratteristiche meccaniche del tubo e dei raccordi di tenuta devono essere compatibili con il uido idraulico
utilizzato e devono essere idonei a sopportare in sicurezza la pressione massima generata dalla pompa. I tubi non devono
inoltre entrare in contatto con sostanze corrosive. Non verniciare mai i tubi e i raccordi, il deterioramento dovuto a corrosione può
comprometternel’ecienzacausandorottureimprevisteeprovocaredanniacoseopersone.
Nel caso in cui i tubi restino scoperti e quindi nelle vicinanze dell’ operatore, gli stessi devono essere inlati in apposite
guaine da ssare a protezione anche dei raccordi. In caso di rottura la guaina impedisce lo schizzo di olio sotto pressione.
●In caso di guasto, non tentate di sbloccare o riparare la pompa da soli. Togliete alimentazione alla pompa, spegnete la macchina a
cui è collegata e contattate il manutentore.
●Prima di ripristinare il livello dell’olio, assicurarsi che i cilindri collegati siano in posizione retratta.
Il volume di olio che viene scaricato nel serbatoio dai cilindri quando vengono ritratti, deve riportare l’olio al livello massimo consentito.
Un riempimento o rabbocco eccessivo senza tenerne conto potrebbe portare al superamento della capacità del serbatoio, portarlo
addirittura in pressione causandone la rottura con i danni e i rischi conseguenti per le persone.
●Spegnere e disconnettere la rete pneumatica quando la pompa non è in uso, prima di interrompere qualunque connessione idraulica
o intervenire in qualsiasi modo nel sistema.

8193557039 v.0 - UPD 280318
4 - CARATTERISTICHE TECNICHE
Modello UPFD 710 UPFD 725
Pressione ingresso aria (bar•) 2,8 ÷ 10
Pressione massima di utilizzo (bar•) 700
Portata max. nominale (l/min)• 1,1
Attacco aria (standard*) G 3/8"
Attacco olio (standard*) 3/8 -18 NPTF
Peso max. (kg) ~ 25 ~ 50
Contenuto olio / quantità utilizzabile (l) ~ 9 / 7,7 ~ 29 / 25
Dimensioni (mm) Le dimensioni delle pompe sono indicate in gura 1 a pagina 2
Rumore 75 dB(A) / 1m
Tipi di olio da usare SHELL TELLUS S2 V22/32 - MOBIL DTE 22/24 - CASTROL HYSPIN AWS 22/32 - o equivalenti
(•)Conpressionedialimentazioneparia8bar-(*)arichiestapossonoesserefornitidierentitipidiattacco
5 - INSTALLAZIONE E MESSA IN FUNZIONE
In questo capitolo vengono descritte le modalità di installazione della pompa. Tali indicazioni si consigliano come ottimali. L'acquirente
dellapompa,quindicostruttoredellamacchinachemonteràlapompastessa,puòdecideredierentitipologiedimontaggio,utilizzando
staeoognialtroaccessorioritengaopportuno,MA SENZA VARIARE IN ALCUN MODO LA FORMA O L'AGGANCIO ORIGINALE
DELLA POMPA E COMUNQUE SENZA MANOMETTERE ALCUNA PROTEZIONE APPLICATAALLA POMPA STESSA O RENDERE
LA POMPA, IN QUALCHE MODO, PERICOLOSA.Dopotalimodicheverràritenutoresponsabileunicoperqualsiasiincidendente
che possa causarsi durante l'uso.
LA POMPA PUÒ ESSERE USATA SOLO IN POSIZIONE ORIZZONTALE.
Ing.2,pag.2,èindicataladimadiforaturadautilizzareperlaprogettazionedellabasedissaggiodellapompa.
ATTENZIONE
NELCASO IN CUII COMANDIDELLAPOMPASIANO ESPOSTIACADUTADI OGGETTIOALTRO CHEPOSSA-
NOCOLPIRLI INAVVERTITAMENTE EQUINDI EFFETTUAREUNAZIONAMENTOINDESIDERATO,OCCORRE
PREVENIREQUESTOPERICOLOISTALLANDOUN’APPOSITAPROTEZIONECHE,SOVRASTANDOILPEDALE
O IL MECCANISMO DI AZIONAMENTO IN GENERE, RIPORTI IL SISTEMA IN SICUREZZA.
5.1 - Riempimento del serbatoio dell'olio (se la pompa viene fornita vuota)
Nella tabella "CARATTERISTICHE TECNICHE" sono indicate le quantità di olio da versare nel serbatoio della pompa in relazione alle
dimensionidelserbatoiostesso.Nellastessatabellasonoindicatelequantitàdiolioeettivamenteutilizzabili.
Utilizzateglioliiindicatiintabella.Oliidalledierenticaratteristichepossonocausaredanniallapompaerenderlainutilizzabile.
IL COSTRUTTORE NON RISPONDE PER DANNI APERSONE,MACCHINE O COSE CAUSATI DALL'USO DI
OLII INADATTI O ESAUSTI.
IN CASO DI DANNI ALLA POMPA PER I MOTIVI CITATI IN PRECEDENZA SI INTENDE IMMEDIATAMENTE
CESSATA LA VALIDITÀ DELLA GARANZIA.
● Svitateedestraete,noatoglierlo,iltappodiriempimento(Aing.3,pag.3).
●Versate nel serbatoio la giusta quantità di olio, come indicato nella tabella "CARATTERISTICHE TECNICHE".
●Pulite l'imbocco con uno straccio pulito e riavvitate il tappo noalcompletobloccaggio.

9
193557039 v.0 - UPD 280318
5.2 - Messa in funzione della pompa
SI CONSIGLIA L’INSTALLAZIONE DI UN DISPOSITIVO DI INTERCETTAZIONE DELL’ALIMENTAZIONE
DELL’ARIACOMPRESSA, PER POTER SCOLLEGARE RAPIDAMENTE LAPOMPAIN CASO DI NECESSITÀ
O PER FARE MANUTENZIONE.
PRIMADI EFFETTUARE TUTTI I COLLEGAMENTI, VERIFICARE LO STATO DEI RACCORDI E DELLE GUAR-
NIZIONI, LA PULIZIA E L'INTEGRITÀ DEI FILETTI E DEI TUBI.
● Collegateiltuboidraulicodimandataall'attaccoBing.3,pag.3.Iltubodovràesseredotatodiraccordoadeguato,precedentemente
avvoltoconnastrodiTeono,sedelcaso,completodirondelladitenuta.
5.3 - Collegamento del tubo di recupero olio (per uso a doppio eetto)
● Svitateetoglieteiltappo(Cing.3,pag.3),quindicollegateuntuboconraccordo1/4"GAS(BSPP)precedentementeavvoltocon
nastrodiTeon.
5.4 - Collegamento dell'aria compressa
● Avvitatenelraccordodiingressoperl'ariacompressa(Eing.4,pag.3)unraccordorapidoadeguatoalvostroimpianto,avendo
curadiavvolgereillettoconnastrodiTeon.
●L'innesto rapido andrà collegato ad una linea che possa fornire una pressione compresa fra 2,8 e 10 bar (vedi tabella "CARATTE-
RISTICHE TECNICHE" a pag.8).
ATTENZIONE
PRIMADIAZIONARE LAPOMPA,ACCERTARSI CHE TUTTE LE CONNESSIONI DEI TUBI IDRAULICI SIANO
CORRETTAMENTE STRETTE/SERRATE. OPERAZIONE DA ESEGUIRSI CON IDONEA ATTREZZATURA.
6 - USO
E’VIETATOL’USODELLAPOMPAINAMBIENTEPOTENZIALMENTEESPLOSIVOSENONADEGUATAMENTE
PROTETTA(PROTEZIONENON FORNITA).SONO POSSIBILIACCUMULI DICARICHE ELETTROSTATICHE.
L'uso della pompa mod. UPFD è molto semplice:
●per azionare la pompa premete il pedale con il piede, senza esercitare eccessiva pressione, nella zona indicata dalla scritta "PUMP"
(g.4,pag.3).Lapompainizieràagenerarepressioneidraulicaesiotterràl'azionamentodellamacchina.
●Lasciando andare il pedale, quindi togliendo il piede, la pompa si fermerà ma rimarrà in pressione, lasciando la macchina (tipicamente
un cilindro oleodinamico) ferma nel punto dove era arrivata.
●Per riportare a zero la pressione, quindi far ritornare la macchina a riposo, premete il pedale nella zona indicata dalla scritta "RE-
LEASE"(g.4,pag.3).
ATTENZIONE
È POSSIBILE, DOPO LA PRIMA INSTALLAZIONE DELLA POMPA, CHE IL CIRCUITO RISULTI SCARICO
PER LA PRESENZA DI BOLLE D'ARIA. SE LA POMPA NON RIESCE A MANDARE IN PRESSIONE L'OLIO,
ESEGUITE QUANTO DESCRITTO IN SEGUITO.
LE OPERAZIONI DESCRITTE IN SEGUITO POSSONO ESSERE EFFETTUATE SUL PEDALE USANDO LE
MANI, PURCHÉ SI PREMAESCLUSIVAMENTE SULLE ZONE "PUMP" E "RELEASE"APPOSITAMENTE IN-
DICATE SUL PEDALE STESSO.
●Sollevate il pedale nella zona indicata dalla scritta "PUMP": sotto al pedale troverete un pulsante piatto.
●Con una mano premete il pedale nella zona indicata dalla scritta "RELEASE". Contemporaneamente con l'altra mano premete il
pulsante sotto alla zona "PUMP"(g.5,pag.3).Tenetepremutientrambigliattuatoripercirca15secondi.
La pompa dovrebbe ora funzionare correttamente. Se non fosse stato suciente, potete ripetere l'operazione.

10 193557039 v.0 - UPD 280318
7 - MANUTENZIONE
Tutte le operazioni di manutenzione ordinaria descritte di seguito devono essere eseguite da personale preparato, che conosca bene la
pompa ed il suo funzionamento e che abbia letto per intero il presente manuale. La manutenzione deve essere eseguita ponendo la massima
attenzionealnedievitareincidenti.Leoperazionidescritteinquestocapitolosonolesoleconcesse.Ogni operazione di manutenzione
non autorizzata fa decadere immediatamente la garanzia della pompa e solleva il costruttore da qualsiasi responsabilità.
PRIMADI QUALSIASI INTERVENTO DI MANUTENZIONE SI DEVE DISATTIVARE IL COLLEGAMENTO DEL-
LA POMPA DALLA RETE DI ALIMENTAZIONE DELL’ARIA COMPRESSA, QUINDI PREMERE A FONDO IL
PEDALE “RELEASE” PER METTERE A SCARICO IL CIRCUITO OLEODINAMICO.
7.1 - Verica delle connessioni
Periodicamentevericateleconnessioniidraulicheepneumatiche.Controllatecheiraccordisullapompanonsianosvitatioallentatie
nonpresentinorotture,crepeoammaccature.Vericatecheletubaturenonsianodanneggiateotagliate.
Se si utilizza la pompa in modo intensivo, si consiglia un controllo settimanale.
7.2 - Pulizia del ltro dell'aria
Periodicamenteènecessariopulireilltroperl'aria.
Se si utilizza la pompa in modo intensivo, si consiglia un controllo settimanale.
Illtroperl'ariasitrovaall'internodelraccordopneumaticodiingresso(Eing.4,pag.3).
●Conl'ausiliodiuncacciavitealamapiattadidimensioniadeguate,svitatenoallacompletaestrazione,illtroinseritonelraccordo
di ingresso per l'aria compressa.
●Pulitelosoandoconariacompressaquindireinseriteloeavvitatelonellasuasedesenzaforzareeccessivamenteperevitarediromperlo.
●Ricollegateilraccordoadinnestorapidoavvolgendolo,primadiavvitarlo,connastrodiTeon.
Nelcasoincuiilltrorisultasseeccessivamentesporcoodanneggiato,ènecessariosostituirloconunonuovo.Ordinateloalcostruttore,
riferendoviallalistaricambiallanedelpresentemanuale.
7.3 - Controllo livello e sostituzione dell'olio idraulico
ATTENZIONE
PRIMADI CONTROLLARE IL LIVELLO OAGGIUNGERE OLIO AL SERBATOIO,ASSICURARSI CHE I CILINDRI COLLE-
GATI SIANO IN POSIZIONE RETRATTA. IL VOLUME DI OLIO CHE VIENE SCARICATO NEL SERBATOIO DAI CILINDRI
QUANDO VENGONO RITRATTI, DEVE RIPORTARE L’OLIOAL LIVELLO MASSIMO CONSENTITO. UN RIEMPIMENTO
O RABBOCCO ECCESSIVO SENZA TENERNE CONTO POTREBBE PORTARE ALSUPERAMENTO DELLACAPACITÀ
DEL SERBATOIO, PORTARLO ADDIRITTURA IN PRESSIONE CAUSANDONE LA ROTTURA CON I DANNI E I RISCHI
CONSEGUENTI PER LE PERSONE.
7.3.1 - Controllo dell'olio idraulico.
● Saltuariamentecontrollatechelapompacontengalacorrettaquantitàdiolioidraulico,vericandolanell'appositooblòpostosul
serbatoiodellapompa(Ding.3,pag.3).Quandoillivellodell'olio,concilindrorientrato,raggiungeilminimovisibile,rabboccate
usando gli olii consigliati a pag.8.
● Svitateedestraete,noatoglierlo,iltappodiriempimento(Aing.3,pag.3),quindiaggiungetelaquantitàd'olionecessaria.
● Pulitel'imboccoeiltappodiriempimentoconunostracciopulitoeriavvitateiltapponoalcompletobloccaggio.
7.3.2 - Sostituzione dell'olio idraulico
Ogni 250 ore di lavoro l'olio dovrà essere sostituito, operazione da eseguire con il cilindro completamente rientrato:
● Svitateedestraete,noatoglierlo,iltappodiriempimento(Aing.3,pag.3).
●Rovesciate la pompa sopra ad un contenitore che possa raccogliere l'olio esausto.
●Lasciate scolare tutto l'olio contenuto nel serbatoio quindi riempite la pompa con olio nuovo. Quantità e tipi di olio sono indicati a pag.8.
●Pulite l'imbocco e il tappo di riempimento con uno straccio pulito e riavvitate il tappo noalcompletobloccaggio.
7.4 - Pulizia della pompa
Deve essere prevista una pulizia sistematica della pompa per mantenerla il più possibile libera da sporco e detriti. Tutti i raccordi non
utilizzatidovrebberoesseresigillaticonproteggiletti.
Tutte le connessioni del tubo dovrebbero essere liberate da grasso e polvere.
Qualunque attrezzatura attaccata alla pompa dovrebbe essere mantenuta pulita.
Utilizzare solamente olio idraulico pulito, conforme alle caratteristiche in tabella (pag. 8) e sostituirlo come raccomandato (ogni 250 ore).

11
193557039 v.0 - UPD 280318
7.5 - Inconvenienti e rimedi
Nel paragrafo seguente sono indicate alcune anomalie riscontrabili durante il funzionamento della pompa e il loro rimedio. Se, applicando
quanto descritto, non si dovesse risolvere la situazione critica, consultate il costruttore.
8 - DEMOLIZIONE E SMALTIMENTO DELLA POMPA
Nel caso in cui la pompa debba essere gettata, la si dovrà svuotare dell'olio contenuto che verrà smaltito secondo le prescrizioni di legge
in vigore nel paese in cui avviene lo smaltimento. Lo stesso vale per le altre parti della pompa considerando la tipologia dei materiali
che la costituiscono, plastici e ferrosi.
INCONVENIENTE
La pompa non si avvia
La pompa si blocca sotto carico
La pompa funziona ma non manda olio
in pressione
La pompa non raggiunge la massima
pressione
La pompa va in pressione ma il carico
non si muove
Il pistone rientra anche se non viene
premuto il pedale "RELEASE"
Il pistone non ritorna
(Cilindroasempliceeetto)
Il pistone non ritorna
(Cilindroadoppioeetto)
Portatadellapompainsuciente.
POSSIBILE CAUSA
La linea dell'aria compressa è chiusa o
ostruita.
Pressione dell'aria troppo bassa.
Filtro dell'aria sporco o intasato.
Perdita di olio nell'impianto idraulico gene-
rale.
Perdita interna alla pompa.
Livello dell'olio troppo basso.
Pressione dell'aria troppo bassa.
Valvola interna di sicurezza fuori taratura.
Perdita di olio nell'impianto idraulico gene-
rale.
Carico eccessivo.
L'olio non circola correttamente.
Perdita di olio nell'impianto idraulico gene-
rale.
Guastointernoallapompa.
Linea di alimentazione olio strozzata o inne-
sto collegato male.
Se il ritorno è previsto a gravità, possibile
mancanza di carico sul cilindro.
Molla del cilindro rotta.
Valvola di rilascio del cilindro non funzio-
nante.
Linea di alimentazione olio strozzata o inne-
sto collegato male.
Valvola di rilascio del cilindro non funzio-
nante.
Pressione dell'aria troppo bassa.
Filtro dell'aria sporco o intasato.
RIMEDIO
Vericarechearriviariacompressaalla
pompa.
Vericarechelapressionedialimenta-
zione della pompa (aria compressa) sia
compresa fra 2,8 e 10 bar.
Pulireosostituireilltrodell'aria.
Vericare la presenza della perdita e
riparare dove necessario.
Vericarelaperditanellapompaerispe-
dirla al costruttore per la riparazione.
Vericareillivellodell'olioe,senecessa-
rio, rabboccare.
Vericarechelapressionedialimenta-
zione della pompa (aria compressa) sia
compresa fra 2,8 e 10 bar.
Contattare il costruttore.
Vericare la presenza della perdita e
riparare dove necessario.
Diminuire il carico.
Vericare che le tubature siano prive
di strozzature e che il cilindro non sia
difettoso.
Vericare la presenza della perdita e
riparare dove necessario.
Vericarelaperditanellapompaecon-
tattare il costruttore.
Vericarelalineadialimentazioneolio.
Caricare il cilindro.
Riparare il cilindro.
Vericarelalineadialimentazioneolio.
Riparare il cilindro.
Vericarechelapressionedialimenta-
zione della pompa (aria compressa) sia
compresa fra 2,8 e 10 bar.
Pulireosostituireilltrodell'aria.

12 193557039 v.0 - UPD 280318
SCHEMA DI FUNZIONAMENTO
P = Ingresso aria
U = Utilizzo olio
S = Serbatoio olio
M1e M2= motore
GARANZIA
La pompa mod. UPFD è coperta da garanzia di difetti di materiale e fabbricazione per un periodo di 12 (dodici) mesi dalla data di consegna.
LIMITAZIONI:
1) Il concessionario deve essere autorizzato dal costruttore prima di intervenire
sulla macchina per riparazioni in garanzia.
2) La garanzia si intende limitata alle sole parti che verranno riconosciute
difettose dal costruttore.
3) Non è riconosciuta nessuna spesa di trasporto per interventi in garanzia.
4) Non è riconosciuta alcuna garanzia per prodotti di cui non è stata eseguita
corretta manutenzione periodica, che sono stati utilizzati impropriamente, che
hanno subito incidenti, riparazioni non autorizzate o alterazioni di ogni genere.
PARTI DI RICAMBIO
PER ORDINARE PARTI DI RICAMBIO
Quandoordinatepartidiricambio,specicatesempreiseguentipunti:
1) Numero di codice di ricambio
2) Descrizione del particolare
3) Tipo della pompa
4) Numero di matricola della pompa

13
193557039 v.0 - UPD 280318
GENERAL PRECAUTIONS
This manual contains important safety information: read carefully before installing and using the pump.
Carefully follow the installation instructions contained in this manual.
NOTE: Most of problems with new equipment results from inappropriate operations or installations.
This manual must always accompany both the pump and the machine on which the pump is installed, even when pump and machine
or the pump alone is sold, loaned or otherwise transferred to other premises.
Before installing the pump and setting it up for operation make sure it has not been damaged during transportation: check that there are
no cracks or dents on the body and that there are no traces of oil leaks. If damage is noticed, inform the carrier of the problem imme-
diately. DO NOT INSTALL THE PUMP. Ask the manufacturer for instructions.
THE MANUFACTURER SHALL NOTBE HELD LIABLE FOR INJURY TO PEOPLE ORANIMALS OR DAMAGE
TO PROPERTY CAUSED BY INSTALLATION AND OPERATION OF A DAMAGED PUMP.
TRANSLATION OF ORIGINAL INSTRUCTIONS
1 - TRANSPORT, STORAGE AND UNPACKING
Is the pump set aside to be used some time after purchasing, it must be stored in a place adequately protected against weather condi-
tionswherethetemperaturedoesnotexceed50°C.
If the pumps are delivered packed on pallets, they should be left in their original packing and unpacked immediately prior to use.
Dispose of packing materials in accordance with the laws of the country where the pump is unpacked.
Compressed air
inlet connection
Treadle
(PUMP side)
Treadle
(RELEASE side)
Double acting cylinder
port (oil return)
Lifting handle
Filler plug.
Oil level sight
glass
Oil pressure
port
Pump body/reservoir 10 litres
Pump body/reservoir 25 litres
Double acting cylinder
port (oil return)
Lifting handle
Lifting handle
2 - DESCRIPTION
Thedevicesuppliedisanair-poweredhydraulicpumpthatconvertsacompressedairsupplyintoapressurizedhydraulicow(see
“TECHNICAL SPECIFICATIONS” Chapter 4).
Thepumpcanbeutilizedtopowersingleanddoubleactinghydraulicactuators;inthelattercaseadirectionalcontrolvalvemustbe
interposed between pump and user.
THEUSEOFTHEPUMPINPOTENTIALLYEXPLOSIVEENVIRONMENTS,IFNOTDULYPROTECTED(PROTECTION
NOT SUPPLIED)IS STRICTLY FORBIDDEN.ACCUMULATION OF ELECTROSTATIC CHARGESARE POSSIBLE.
ALL OTHER USES OF THE PUMP SHALL BE CONSIDERED IMPROPERAND CAN CAUSE SERIOUS ACCI-
DENTS.THE MANUFACTURER DECLINES ALLLIABILITY FOR DAMAGES RESULTING FROM IMPROPER
USE OF THE PUMP.
Ask the manufacturer if in doubt about the correct installation and use of the pump.
Figure 12 shows the main components of the pump.

14 193557039 v.0 - UPD 280318
3 - SAFETY
Observe all the following safety instructions. They are of the maximum importance for your own safety and the safety of others. In addition
to the indications in this chapter, observe also the prescriptions in all other sections of the manual.
DO NOT TAMPER WITH THE PROTECTIONS AND SAFETY DEVICESAND DO NOT MODIFY THE PUMP INANY WAY TO AVOID CRE-
ATING POTENTIALLY HAZARDOUS SITUATIONS FOR WHICH THE OPERATOR OR THE SERVICE TECHNICIAN IS UNPREPARED.
REMOVING OR TAMPERING WITH ANY OF THE SAFETY DEVICES ON THE PUMP AUTOMATICALLY INVALIDATES THE WAR-
RANTY AND ABSOLVES THE MANUFACTURER FROM ALL LIABILITY.
●The pump and the machine on which the pump is installed must be used exclusively by people over 18 years of age who have read
this manual and have a thorough knowledge of the machine and the pump.
●The pump may be used by people over the age of 16 provided they are supervised by an adult.
● Keepthepumpwellclearofheatsources,nakedamesandsparks.Maximumoperatingtemperatureofthepumpis50°C.
●The pump may be operated with hands and feet, as long as you only press the "PUMP" and "RELEASE" zones indicated on the
pedal board.
● Workclothesmustbeclosettingandbuttonedup.Weartheprotectiveclothingstipulatedintheplacewherethepumpisinstalled.
●Do not attempt to operate the pump by standing on the treadle, use only light foot pressure to operate the pump mechanism.
● Donotarbitrarilymovethepumptodierentlocations.Thepumpmustbeusedinthepositiondesignatedbythemanufacturerof
the machine to which it is connected.
●Whenconnectingthepumpfollowtheprescriptionsinchapter5“Installationandstart-up”andalwaysusecertiedhosesandcouplings.
For the choice of hoses and coupling, as well as hydraulic cylinders, remember that these components must be t to safely
support the max. pump pressure.
●Before operating the pump, ensure that all connections with pipes are clamped with appropriate tools. Do not tighten exces-
sively. Connections need to be clamped safely only and without leakage. Excessive tightening may cause an early thread
breakage or the breakage of high-pressure systems already with pressures lower than the capacities declared.
●Do not exceed the hydraulic pressure indicated on the pump label and do not tamper with the internal safety valve. Working with a
higher pressure than the stated capacity may cause damage to persons or objects.
●The work area must be kept clear of obstructions so that the pump can be operated in safe conditions.
Pay attention to falling objects which could strike the pump treadle and set the pump into operation.
● Theworkareamustbekeptcleanandtheoormustbearnotracesofoil,greaseoranyotherslipperyorcorrosivesubstances.
●If it were necessary to disconnect the air supply hose or the hydraulic oil hose, ensure that there is no pressure by disconnecting the
pneumatic power supply and by draining the hydraulic system.
●If a hydraulic pipe breaks or needs to be disconnected, immediately cut the supply to the pump and operate the RELEASE control
valve twice in order to release all pressure. Never try to grasp with your hands a leaking pipe under pressure. The power of hydraulic
liquid jets under pressure may cause serious damage.
● Donotexposethepipetopotentialdangers,suchas:re,extremehotorcoldtemperatures,cuttingsurfacesorheavyweights.Do
nottwist,turn,foldorbendthepipetoanextentthattheoilowinthepipeblocksordecreases.Asoneoftheseconditionsmay
cause damage to persons or objects, periodically inspect the pipe.
●Do not use the pipe to remove the equipment connected to it. This kind of stress may cause damage to the pipe, as well as persons
or objects.
●WARNING: the mechanical features of the pipe and the seal ttings must be compatible with the hydraulic liquid used and
must be t to safely support the max. pump pressure.
Thepipesmustnotcomeintocontactwithcorrosivesubstances.Neverpaintpipesorttings:thedeteriorationduetocorrosionmay
damagetheireciencycausingunexpectedbreaksanddamagetopersonsorobjects.
If the pipes are uncovered and the operator is nearby them, they should be inserted into appropriate sheaths they have to
be xed in order to protect also the ttings. In event of break, the sheath prevents oil jets under pressure.
● If the pump develops a fault, do not attempt to repair it unassisted. Disconnect the compressed air supply, switch o the
machine to which the pump is connected and call a maintenance technician.
●Before restoring the oil level, ensure that the connected cylinders are in a pulled-back position.
The oil volume that is discharged into the tank from the cylinders when are retracted, must bring the oil to the maximum level allowed.
Excessivellingortoppingup,withouttakingthisfactorintoaccount,maycausetheexceedingofthetankcapacity,putthetank
even under pressure and result in breaks with damage and consequent risks to persons.
● Whenthepumpisnotbeingusedandbeforeinterruptinganyhydraulicconnectionorworkingonthesysteminanyway,turnoand
disconnect the pneumatic supply.

15
193557039 v.0 - UPD 280318
4 - TECHNICAL SPECIFICATIONS
(•)With8barcompressedairsupplypressure-(*)Dierentconnectiontypesareavailableonrequest
Model UPFD 710 UPFD 725
Air inlet pressure (bar•) 2.8 ÷ 10
Maximum working pressure (bar•) 700
Maximum rated ow (l/min•) 1.1
Air connection (standard*) G 3/8"
Oil connection (standard*) 3/8" -18 NPTF
Max. weight (kg) ~ 25 ~ 50
Reservoir capacity / usable capacity (l) ~ 9 / 7.7 ~ 29 / 25
Dimensions (mm) Pump dimensions are shown on page 2, g. 1
Noise level 75 dB(A) / 1m
Recommended oil types SHELL TELLUS S2 V22/32 - MOBIL DTE 22/24 - CASTROL HYSPIN AWS 22/32 - or equivalent
5 - INSTALLATION AND START-UP
This chapter describes the methods of installation of the pump. The method here recommended will give excellent results. The purchaser
ofthepump,i.e.themanufacturerofthemachineonwhichthepumpwillbeinstalled,mayoptfordierenttypesofinstallation,using
brackets or any other types of accessories considered to be necessary. HOWEVER, THE ORIGINAL SHAPE AND ATTACHMENT OF
THE PUMP MUST NOT BE MODIFIED, THE PROTECTIONS APPLIED TO THE PUMP MUST NOT BE TAMPERED WITH AND NO
ACTION MUST BE TAKEN THAT COULD MAKE THE PUMP POTENTIALLY DANGEROUS. If these instructions are disregarded, the
personwhoisresponsibleforthemodicationsautomaticallyassumesfullliabilityforanyaccidentsthatmayoccurduringuseofthepump.
THE PUMP MAY BE USED IN HORIZONTAL POSITION ONLY.
Figure 2 on page 2 shows the drilling template to use when designing the pump baseplate
WARNING
IF THE PUMP’S CONTROLS ARE EXPOSED TO FALLING OBJECTS OR SOMETHING OTHER THAT COULD
ACCIDENTALLY HIT THEM AND CAUSE AN UNEXPECTED START-UP, IT IS NECESSARY TO INSTALL AN
APPROPRIATE PROTECTIONINORDER TOAVOID THISHAZARDAND RESTORE THESYSTEMSECURITY.
THE PROTECTION MUST STAND ON TO THE CONTROL MECHANISM.
5.1 Filling the reservoir (if the pump is supplied without oil)
Thetable"TECHNICALSPECIFICATIONS"showstheoilquantitiesrequiredtollthepumpreservoirinrelationtothesizeofthereservoir
itself.Thesametableshowstheactualusableoilcapacitiesalso.Usetheoiltypesspeciedinthetable.Theuseofoilwithdierent
characteristics can damage the pump and make it unsuitable for use.
THE MANUFACTURER SHALL NOT BE HELD RESPONSIBLE FOR INJURY TO PEOPLE OR DAMAGE TO
PROPERTY CAUSED BY THE USE OF UNSUITABLE OR EXHAUST OIL.
DAMAGE TO THE PUMP RESULTING FROM THE ABOVE MENTIONED CAUSES IS NOT COVERED BY
WARRANTY.
● Unscrewthellplug(Aing.3,page3)untilitisremoved.
●Pour the correct quantity of oil into the reservoir (refer to the table "TECHNICAL SPECIFICATIONS")
● Cleantheedgesofthelleropeningandthellplugwithacleancloththantightentheplugagainuntilitiscompletelylocked.

16 193557039 v.0 - UPD 280318
5.2 - Start-up
THE INSTALLATION OFA DEVICE THAT INTERCEPTS THE PNEUMATIC AIR SUPPLY IS RECOMMENDED
TO RAPIDLY DISCONNECT THE PUMP FROM PNEUMATIC CIRCUIT IN CASE OF NEED OR MAINTENANCE.
BEFORE CARRYING OUT ANY CONNECTIONS, VERIFY THE CONDITION OF FITTINGS AND SEALS AND
ENSURE THREADS AND PIPES ARE CLEAN AND INTACT.
● ConnectthehydraulicpressurehosetotheconnectionBing.3,pag.3.Thehosemustbeequippedwithanappropriatetting,
previouslywrappedwithTeontapeor,ifnecessary,completewithsealingwasher.
5.3 - Connecting the oil return line (use with a double acting cylinder)
● UnscrewtheplugCing.3,page3,untilitisremoved,thanconnectahosewitha1/4"GAS(BSPP)ttingpreviouslywrappedwith
Teontape
5.4 - Connecting the compressed air line
● Selectaquickcouplerthatissuitableforyourairline,wrapthethreadwithTeontape,andthenscrewitintothecompressedair
inletconnection(Eing.4,page3)
●The quick coupler must be connected to an air line supplying compressed air at between 2.8 and 10 bar (see "TECHNICAL SPE-
CIFICATIONS", page 15).
WARNING:
BEFOREOPERATINGTHEPUMP,ENSURETHATALLHYDRAULICPIPESCONNECTIONSARECORRECTLY
TIGHTENED . THIS OPERATION MUST BE CARRIED OUT WITH APPROPRIATE EQUIPMENT
6 - OPERATION
THEUSEOFTHEPUMPINPOTENTIALLYEXPLOSIVEENVIRONMENTS,IFNOTDULYPROTECTED(PROTECTION
NOT SUPPLIED)IS STRICTLY FORBIDDEN.ACCUMULATION OF ELECTROSTATIC CHARGES ARE POSSIBLE.
The UPFD pump is extremely simple to use:
●To activate the pump press gently down with your foot on the end of the treadle marked “PUMP”(g.7,page3).Thepumpwillstart
to deliver pressurized oil and thereby cause the connected machine to operate.
●When the treadle is released, i.e. when you remove your foot, the pump stops but the pressure is maintained on the oil side so that
the connected machine cylinder holds the load in the position it has reached.
●To return the pressure to zero and hence retract the machine cylinder to its starting position, press the treadle in the area marked
“RELEASE”(g.8,page3).
WARNING
IMMEDIATELY AFTER THE PUMP INSTALLATION, THE CIRCUIT MAY CONTAIN AIR LOCKS WHICH PRE-
VENT PRESSURIZATION. IF THE PUMP IS UNABLE TO PRESSURIZE THE OIL CIRCUIT, PROCEED AS
DESCRIBED BELOW.
THEOPERATIONSDESCRIBEDBELOWMAYBE PERFORMED ON THE PEDALUSINGTHEHANDS,SOLELY
IF YOU PRESS ONLY "PUMP" AND "RELEASE" ZONES, INDICATED ON THE PEDAL ITSELF
●Lift the treadle at the “PUMP”side.Thereisaatpushbuttonbeneaththetreadle.
●Use one hand to press the “RELEASE” side of the treadle while pressing the pushbutton under the “PUMP” side with your other hand
(g.9,page3).Maintainthepressureonthe“RELEASE” side and the “PUMP” pushbutton for about 15 seconds.
The pump should now work correctly. If you still have problems, repeat the above mentioned procedure.

17
193557039 v.0 - UPD 280318
7 - MAINTENANCE
The routine maintenance work described below must be performed exclusively by a skilled technician who has a thorough knowledge of
the pump and its operation and who has read this manual completely. Maintenance must be carried out with maximum caution to avoid
possible accidents. This chapter describes the only maintenance procedures permitted. Execution of any unauthorised maintenance
work will automatically invalidate the warranty and free the manufacturer from all liability.
BEFORE ANY OPERATION OF MAINTENANCE THE PUMP MUST BE DISCONNECTED FROM THE PNEU-
MATIC CIRCUIT. THEN PRESS “RELEASE” ON THE PEDAL TO UNLOAD THE OIL PRESSURE IN THE
HYDRAULIC CIRCUIT.
7.1 - Checking connections
Periodically check the hydraulic and pneumatic connections. Ensure that the connections on the pump are screwed down tightly and
show no signs of breakage, cracks or other damage. Ensure that the hoses are not damaged in any way (cuts, abrasion, cracks, etc.).
If you use the pump in an intensive manner, we suggest a weekly check.
7.2 - Cleaning the air lter
Periodicallycleantheairlter.
If you use the pump in an intensive manner, we suggest a weekly check.
Theairlterisinsidetheinletpneumatictting(Eing.4,page3).
● Useaslottedtipscrewdriveroftheappropriatesizetounscrewthelterfromtheairinletconnectionuntilitisextracted.
● Cleanthelterwithcompressedairandthenretandscrewitintoposition.Donotover-tightenthelterordamagemayensue.
● ReconnecttheairlinequickcouplerafterbindingthethreadwithTeontape.
Iftheairlterisexcessivelycontaminatedordamaged,itmustberenewed.Orderanewlterfromthemanufacturer,referringtothelist
of spare parts at the end of this manual.
7.3 - Checking level and change of the hydraulic oil
WARNING:
BEFORE RESTORING THE OIL LEVEL, ENSURE THAT THE CONNECTED CYLINDERS ARE INA PULLED-
BACK POSITION. THE OILVOLUME THATIS DISCHARGEDINTOTHE TANK FROMTHECYLINDERS WHEN
ARE RETRACTED, MUST BRING THE OIL TO THE MAXIMUM LEVELALLOWED. EXCESSIVE FILLING OR
TOPPING UP WITHOUT TAKING THIS FACTOR INTO ACCOUNT MAY CAUSE THE EXCEEDING OF THE
TANK CAPACITY,PUT THE TANK EVEN UNDER PRESSURE AND RESULT IN BREAKS WITH DAMAGEAND
CONSEQUENT RISKS TO PERSONS.
7.3.1 - Checking the hydraulic oil
●Periodicallycheckthatthepumpcontainsthecorrectquantityofhydraulicoilbycheckingthelevelonthesightglass(Ding.3,page3).
Iftheoillevel,withcylinderclosed,isbelowminimum,rellusingthereccomendedtypesofoilonpage15.
● Unscrewthellplug(Aing.3,page3)untilitisremoved,thenaddthenecessaryoilamount.
● Cleantheedgesofthelleropeningandthellplugwithacleancloththantightentheplugagainuntilitiscompletelylocked.
7.3.2 - Hydraulic oil change
Change the oil at intervals of 250 duty hours. This operation must be performed when the cylinder is fully retracted:
● Unscrewthellplug(Aing.3,page3)untilitisremoved.
●Empty the pump of oil by turning it upside down over a suitable container.
● Allowalltheoiltoowintothecontainerandthenllthepumpwiththequantityandtypeofnewoilspeciedonpage15.
● Cleantheedgesofthelleropeningandthellplugwithacleancloththantightentheplugagainuntilitiscompletelylocked.
7.4 - Pump cleaning
Thepumpshouldbecleanedperiodicallyinordertoprotectitasmuchaspossiblefromdirtanddebris.Allunusedttingsshouldbe
sealed with protections for threads.
Greaseanddustshouldberemovedfromallpipeconnections.
Anyequipmentttedtothepumpshouldbekeptclean.
Use clean hydraulic oil only, which complies with the features in the table on page 15 and change it as recommended (every 250 hours).

18 193557039 v.0 - UPD 280318
PROBLEM
Pump cannot be started
Pump stops working under load
Pump operates but no pressurized oil is
delivered
Pump fails to reach maximum pressu-
re
Pump delivers pressurized oil but load
is not lifted
Piston retracts although treadle is not
pressed on RELEASE side
Piston fails to perform retract stroke (sin-
gle acting cylinder)
Piston fails to perform retract stroke
(double acting cylinder)
Pumpowrateinsucient
POSSIBLE CAUSE
Compressed air line closed or clogged
Insucientairpressure
Airlterdirtyorclogged
Oil leak in the main hydraulic circuit
Pump internal leak
Low oil level
Insucientairpressure
Internal relief valve incorrectly set
Oil leak in the main hydraulic circuit
Excess load
Oil circulation fault
Oil leak in the main hydraulic circuit
Pump internal fault
Oil pressure line obstructed or coupling
incorrectly connected
If piston is designed to return under gravity,
ensureloadissucient.
Cylinder spring broken
Cylinder release valve not working
Oil pressure line obstructed or coupling
incorrectly connected
Cylinder release valve not working
Insucientairpressure
Airlterdirtyorclogged
Reservoir breather screw not opened
CORRECTIVE ACTION
Check compressed air supply to pump
Check compressed air supply to pump is
between 2.8 and 10 bar
Clean or renew
Check the circuit for leaks and repair as
necessary
Check for leaks and return pump to ma-
nufacturer for repair
Check level and top up as necessary
Check compressed air supply to pump is
between 2.8 and 10 bar
Contact the manufacturer
Check the circuit for leaks and repair as
necessary
Reduce
Check if pipelines are obstructed or if
cylinder is working correctly
Check the circuit for leaks and repair as
necessary
Check for leaks and ask the manufac-
turer
Check oil pressure line
Increase load on cylinder
Repair
Repair cylinder
Check oil pressure line
Repair cylinder
Check compressed air supply to pump is
between 2.8 and 10 bar
Clean or renew
Open breather screw as described in
chapter 5
8 - SCRAPPING AND DISPOSING OF THE PUMP
If the pump is no longer required for duty, empty the oil and dispose of it in accordance with the law of your country.
The same procedure must be followed for other parts of the pump, in observance of the type of material (plastics or metal).
7.5 - Troubleshooting
The following chart describes the main problems that could occur during operation of the pump, together with an indication of the ap-
propriate corrective action. If the prescribed action fails to solve the problem, contact the manufacturer.

19
193557039 v.0 - UPD 280318
OPERATION DIAGRAM
WARRANTY
The pump is guaranteed against material and manufacturing defects for a period of 12 (twelve) months from the date of delivery.
LIMITATIONS:
1) The dealer must get authorization from the manufacturer before carrying out
any repair work on equipment still under warranty.
2) The warranty is limited only to parts acknowledged by the manufacturer as
being defective.
3) Transportation expenses will not be refunded for repairs carried out under
warranty.
4) Any products that have not been maintained with the correct routine mainte-
nance procedures, that have been used improperly, involved in accidents or
subject to unauthorised repairs or alterations of any kind will not be covered
by the warranty in any way.
SPARE PARTS
HOW TO ORDER SPARE PARTS
When ordering spare parts, always provide the following:
1) Part number
2) Part description
3) Pump type
4) Serial number
P = Air inlet
U = Oil use
S = Oil reservoir
M1and M2= motor

20 193557039 v.0 - UPD 280318
1 - TRANSPORT, LAGERUNG UND AUSPACKEN DER PUMPE
Falls die Pumpe zunächst eingelagert, und erst längere Zeit nach ihrem Kauf benutzt werden soll, muß diese in Räumlichkeiten aufbewahrt
werden,dieeinenangemessenenSchutzgegenWitterungseinüssegewährleisten,undderenTemperatur50°Cnichtüberschreitet.
WenndiePumpenaufPalettengeliefertwerden,empehltessich,sieerstbeiMontageausderOriginalverpackungzunehmen.
DieleereVerpackungmußgemäßdenimbetroenenLandgeltendengesetzlichenVorschriftenentsorgtwerden.
ALLGEMEINE HINWEISE
Vor Installation und Benutzung dieser Pumpe muß das vorliegende Handbuch aufmerksam durchgelesen werden, da es wichtige Hin-
weise für Ihre Sicherheit enthält.
Die in diesem Handbuch enthaltenen Installationsanweisungen müssen strikt befolgt werden.
HINWEIS: Die meisten Probleme mit neuen Geräten treten aufgrund falscher Verfahren oder unsachgemäßer Installation auf.
Dieses Handbuch muß immer bei der Pumpe und der Maschine, an der sie installiert wird, bleiben, auch wenn sie verkauft bzw. veräußert wird.
Vor Installation und Inbetriebnahme der Pumpe muß sichergestellt werden, daß sie während des Transports nicht beschädigt wurde, daß
das Pumpengehäuse keine Risse oder Beulen aufweist, und daß kein Öl aus der Pumpe austritt. Eventuell festgestellte Mängel sind der
Spedition zu melden. INSTALLIEREN SIE DIE PUMPE IN DIESEM FALL NICHT, sondern erbeten Sie vom Hersteller weitere Anweisungen.
DER HERSTELLER HAFTET NICHT FÜR PERSONEN-, TIER-, SACH- ODER MASCHINENSCHÄDEN, DIE
DURCH MONTAGE UND BENUTZUNG EINER BESCHÄDIGTEN PUMPE VERURSACHT WERDEN.
ÜBERSETZUNG DER ORIGINALANLEITUNGEN
2 - BESCHREIBUNG
BeidemgeliefertenGeräthandeltessichumeinePumpe,mitdemausDruckluftzufuhreinehydraulischeDruckleistung(sieheKap.4
“TECHNISCHE MERKMALE”) gewonnen werden kann.
Einfach-wirkendehydraulischeVorrichtungenkönnenmitdieserPumpedirektversorgtwerden;fürdieVersorgungvondoppelt-wirkenden
hydraulischen Vorrichtungen muß zwischen Pumpe und Verbraucher ein Wegeventil eingesetzt werden.
ES IST STRENG VERBOTEN DIE PUMPEN IN EINEM POTENZIEL EXPLOSIVRAUM ZU BENUTZEN, WENN
NICHT GESCHUTZ (SCHUTZ NICHT VON UNS BELIEFERT). SPEICHERUNGEN VOM ELEKTROSTATIKLA-
DUNGEN KÖNNEN MÖGLICH SEIN.
JEDE SONSTIGE VERWENDUNG DER PUMPE IST ALS UNSACHGEMÄSS ZU BETRACHTEN UND KANN
GEFÄHRLICHE UNFÄLLE VERURSACHEN. DER HERSTELLER LEHNT JEDE HAFTUNG FÜR SCHÄDEN,
DIE DURCH DEN UNVORSCHRIFTSMÄSSIGEN GEBRAUCH DER PUMPE VERURSACHT WERDEN.
Der Hersteller steht jederzeit für Rückfragen zur Verfügung, um jeden Zweifel bezüglich Installation und korrekter Benutzung der
Pumpe zu klären.
Auf Abb.12 sind die verschiedenen Teile der Pumpe dargestellt.
Anschluß
Drucklufteinlaß
Pumpepedal
(Feld “PUMP”)
Druckablaß-Pedal
(Feld “RELEASE”)
Anschluß für den Rücklauf
bei doppelt-wirkende
Vorrichtungen
Hebebügel
Einfülldeckel
Ölstand Anblickglas
Anschluß für den
Hydraulikschlauch
Gehäuse/Tank10-L
Gehäuse/Tank25-L
Hebebügel
Hebebügel
Anschluß für den Rücklauf
bei doppelt-wirkende
Vorrichtungen
Table of contents
Languages:
Other Bell Water Pump manuals
Popular Water Pump manuals by other brands

BUSCH
BUSCH R5 ATEX instruction manual

Nastec
Nastec 4HS Installation and operating manual

ViscoTec
ViscoTec Preeflow eco-PEN700 3D Operation & maintenance manual

Desmi
Desmi S70-50-175N/A11-02 Operation and maintenance instructions

EBARA
EBARA CDX 70 manual

AL-KO
AL-KO TBP 6000/7 Original instructions for use