Asus ET2012E User manual
1
User Guide for Windows® 8
Conguring the audio output via an HDMI device
If you want to use a high-denition TV as an audio output device, connect it to your Home
Theater PC and follow the steps below to congure the audio settings.
1. From the Start screen, click Desktop to launch the Desktop Mode.
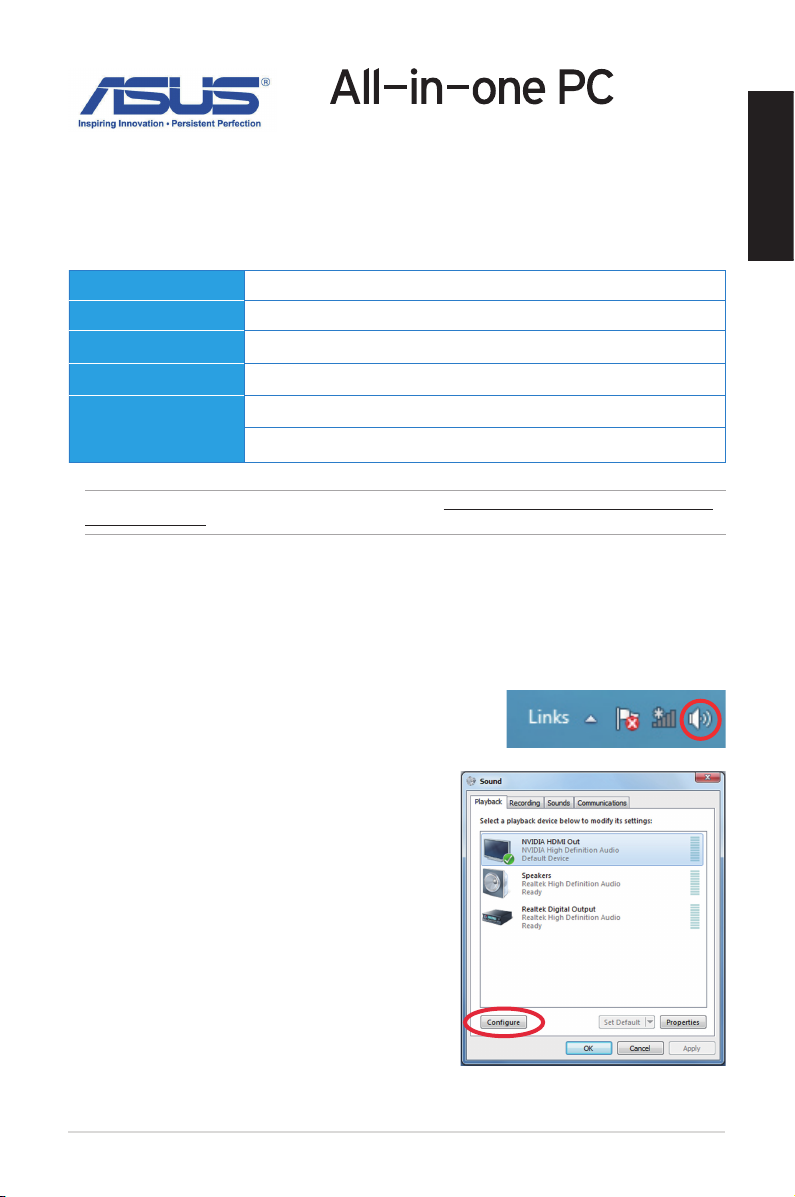
2. Right-click the Volume Mixer icon on the Windows®
taskbar and click Playback devices.
3. From the Playback screen, select Digital Audio
(HDMI).
4. Click Congure and the Speaker Setup window
pops up.
NOTE: For updates on these system requirements, visit http://www.windows.microsoft.com/en-
us/windows-8/faq
Processor
1GHz or faster
RAM
1GB (32-bit) or 2 GB (64-bit)
Hard disk space
16 GB (32-bit) or 20 GB (64-bit)
Graphics card
Microsoft DirectX9 graphics device with WDDM driver
Screen resolution
1024 x 768 for Windows® apps
1366 x 768 for Snap feature
System requirements
To facilitate a smoother transition from your previous operating system, read the system
requirements below before upgrading to Windows® 8:
English
E7671 / First Edition / August 2012

2
English
5. Select Stereo and click Next.
6. Tick the Front left and right option, and
click Next.
7. Click Finish to exit the speaker setup.
Turning your All-in-one PC off
Do any of the following to shut down your All-in-one PC:
• Tap from the Charm bar then tap > Shut down to do a normal shutdown.
• From the log-in screen, tap > Shut down.
• If your All-in-one PC is unresponsive, press and hold the power button for at least four
(4) seconds until your All-in-one PC turns o.

3
English
Entering the BIOS Setup
Windows
®
8 boot time is quite fast, so we developed three ways for you to quickly access
the BIOS (Basic Input and Output System), which stores system hardware settings that are
needed for system startup in your All-in-one PC.
To quickly access the BIOS, do any of the following:
When your All-in-one PC is o, press the power button for at least four (4) seconds to
access the BIOS directly.
Press the power button for at least four (4) seconds to shut down your All-in-one PC,
then press the power button again to turn your All-in-one PC back on, and press <F2>
during POST.
When your All-in-one PC is o, disconnect the power cord from your All-in-one PC’s
power connector. Reconnect the power cord and press the power button to turn on your
All-in-one PC. Press <F2> during POST.
NOTE: POST (Power-On Self Test) is a series of software controlled diagnostic tests that run when
you turn on your All-in-one PC.
WARNING! Inappropriate BIOS settings may result to instability or boot failure. We strongly
recommend that you change the BIOS settings only with the help of a trained service personnel.
•
•
•

4
English
Connecting to the Internet
Access emails, surf the Internet, and share applications via social networking sites on or from
your All-in-one PC using wireless/Wi-Fi or wired connection.
Wi-Fi connection
To set up your Wi-Fi connection:
1. Do the following steps to activate Wi-Fi in your All-in-one PC:
a) Launch the Charm bar.
b) Tap and tap .
c) Select an access point from the list of available Wi-Fi connections.
2. Tap Connect to start the network connection.
NOTE: You may be prompted to enter a security key to activate the Wi-Fi connection.
3. If you want to enable sharing between your All-in-one PC and other wireless-enabled
systems, tap Yes, turn on sharing and connect to devices. Tap No, don't turn on
sharing or connect to devices if you do not want to enable the sharing function.
Wired connection
To set up your wired connection:
1. Use a network (RJ-45) cable to connect your All-in-one PC to a DSL/cable modem or a
local area network (LAN).
2. Turn on your computer.
3. Congure the necessary Internet connection settings.
NOTES:
• For more details, refer to the sections Conguring a dynamic IP/PPPoE network connection or
Conguring a static IP network connection.
• Contact your Internet Service Provider (ISP) for details or assistance in setting up your Internet
connection.

5
Conguring a dynamic IP/PPPoE network connection
To congure a dynamic IP/PPPoE or static IP network connection:
1. From the Start screen, click Desktop to launch the Desktop mode.
2. From the Windows
®
taskbar, right-click the network icon and click Open Network
and Sharing Center.
3. From the Open Network and Sharing Center screen, click Change Adapter settings.
4. Right-click on your LAN and select Properties.
5. Click Internet Protocol Version 4(TCP/IPv4) and click Properties.
6. Click Obtain an IP address automatically and click OK.
NOTE: Continue to the next steps if you are using PPPoE connection.
7. Return to the Network and Sharing Center and then click Set up a new connection
or network.
8. Select Connect to the Internet and click Next.
9. Select Broadband (PPPoE) and click Next.
10. Enter your User name, Password, and Connection name. Click Connect.
11. Click Close to nish the conguration.
12. Click the network icon in the taskbar and click the connection you just created.
13. Enter your user name and password. Click Connect to connect to the Internet.
Conguring a static IP network connection
To congure a static IP network connection:
1. Repeat steps 1 to 4 of the previous section Conguring a dynamic IP/PPPoE network
connection.
2 Click Use the following IP address.
3. Enter the IP address, Subnet mask and Gateway from your service provider.
4. If needed, enter the preferred DNS Server address and alternative address.
5. When done, click OK.
English

6
English
Recovering your system
Resetting your All-in-one PC
The Reset your PC option restores your PC to its factory default settings.
IMPORTANT! Back up all your data before using this option.
To reset your All-in-one PC:
1. Press <F9> during bootup.
2. From the screen, click Troubleshoot.
3. Select Reset your PC.
4. Click Next.
5. Select Only the drive where the Windows is installed.
6. Select Just remove my les.
7. Click Reset.
Recovering from a system image le
You can create a USB recovery drive and use this to recover your All-in-one PC’s settings.
Creating a USB recovery drive
WARNING! All les on your USB storage device will be permanently deleted during the process.
Before you proceed, ensure that you back up all your important data.
To create a USB recovery drive:
1. Launch the Control Panel from the All Apps screen.
2. From the Control Panel’s System and Security, click Find and x problems.
3. Click Recovery > Create a recovery drive.
4. Click Next.
7
English
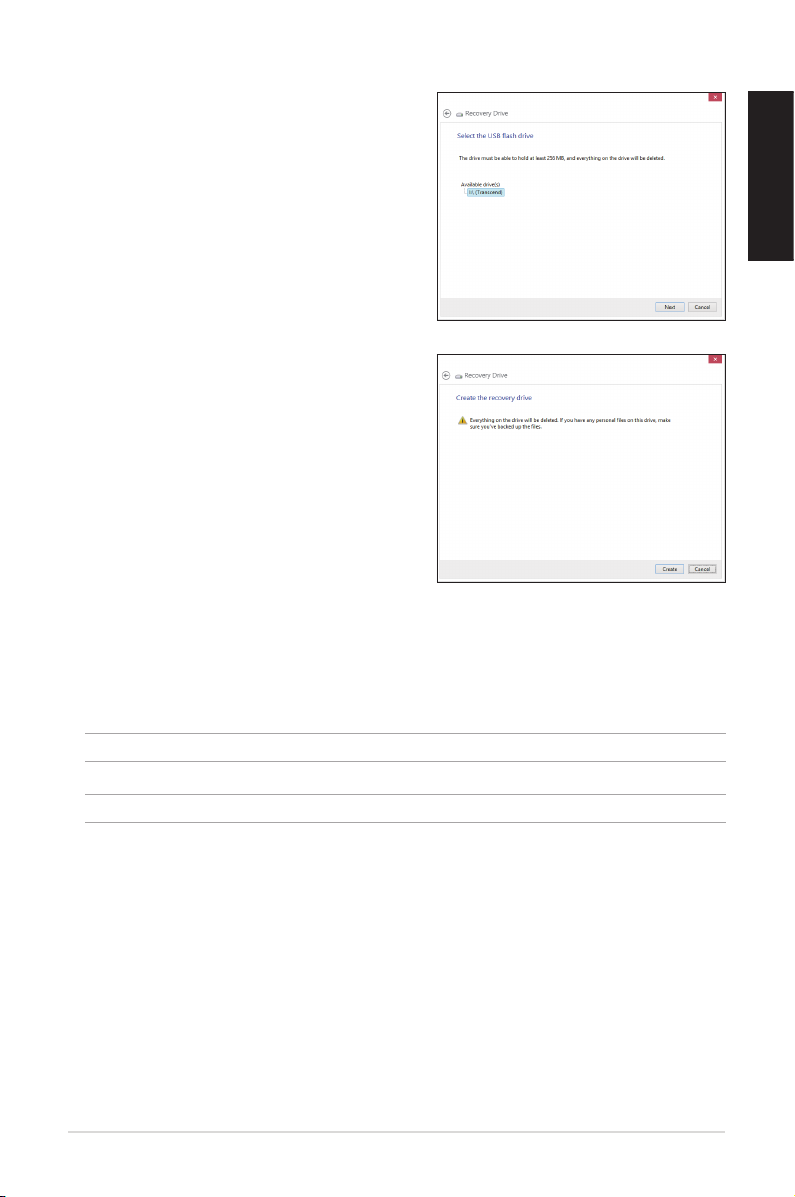
5. Select the USB storage device where you
want to copy the recovery les.
6. Click Next.
7. Click Create. Wait for a while for the process
to complete.
8. When the process is completed, click Finish.
Removing everything and reinstalling Windows
Restoring your All-in-one PC to its original factory settings can be done using the Remove
everything and reinstall option in PC Settings. Refer to the steps below to use this option.
IMPORTANT!
Back up all your data before using this option.
NOTE: This process may take a while to complete.
1. Launch the Charm bar.
2. Click Settings > Change PC Settings > General.
3. Scroll down to view the Remove everything and reinstall Windows option. Under this
option, click Get Started.
4. Follow the onscreen instructions to complete the reinstallation and reset process.

8
English
NOTE: Download the multi-language versions
of this user manual from the ASUS Support site at
http://support.asus.com
9
Guide Windows® 8
Congurer la sortie audio HDMI
Si vous souhaitez utiliser un téléviseur HD comme dispositif de sortie audio, connectez-le à
votre ordinateur et suivez les instructions suivantes.
1. À partir de l’écran d’accueil, cliquez sur Bureau pour basculer vers ce mode d’achage.
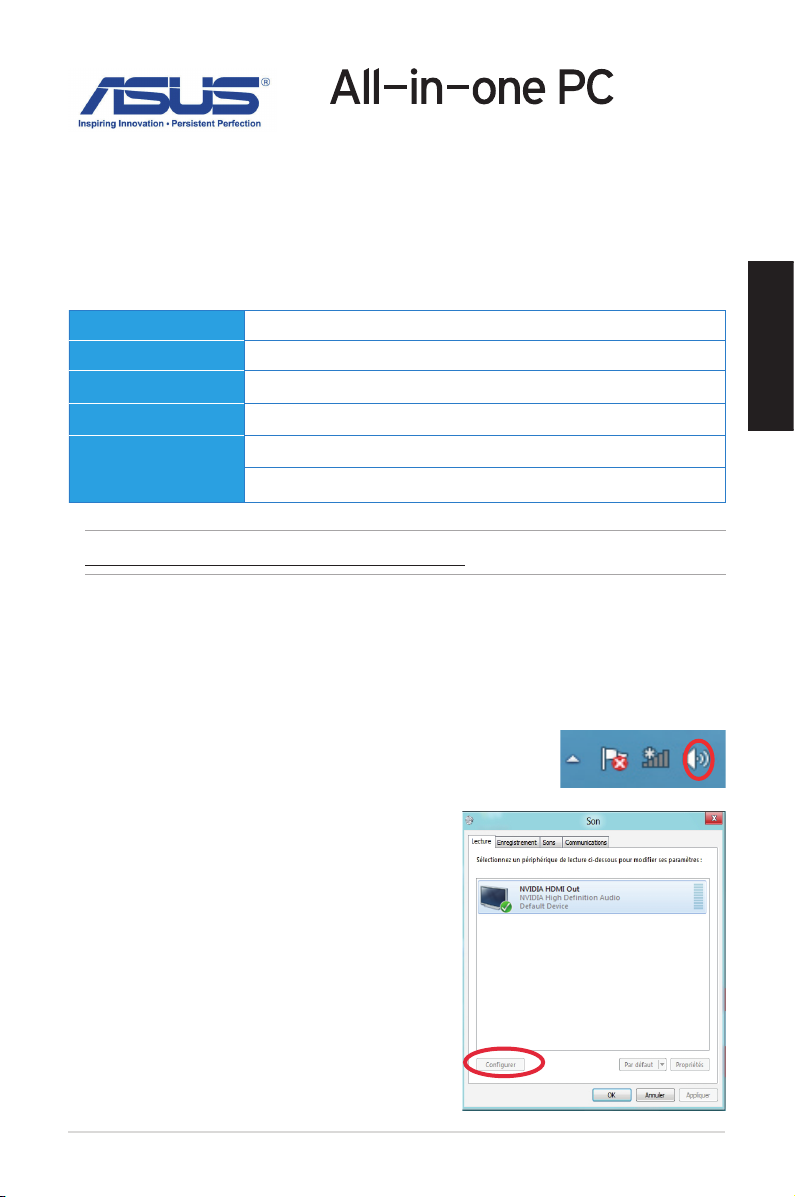
2. Faites un clic droit sur l’icône Volume de la barre des tâches
du Bureau de Windows® puis cliquez sur Périphériques de
lecture.
3. Sur l’onglet Lecture, sélectionnez le
périphérique de sortie HDMI utiliser.
4. Cliquez sur Congurer pour voir apparaître la
fenêtre de conguration des haut-parleurs.
REMARQUE :consultez le lien suivant pour d’éventuelles mises à jour de ces pré-requis système
http://www.windows.microsoft.com/fr-fr/windows-8/faq
Processeur
1GHz ou plus
Mémoire vive
1 Go (32-bits) ou 2 Go (64-bits)
Espace disque libre
16 Go (32-bits) ou 20 Go (64-bits)
Processeur graphique
Puce graphique compatible Microsoft DirectX9 et pilote WDDM
Résolution d’écran
1024 x 768 pour les applications Windows
1366 x 768 pour la fonctionnalité Snap
Pré-requis système
Pour faciliter la mise à niveau de votre système d’exploitation, assurez-vous que votre
système puisse satisfaire aux critères de transition vers Windows® 8 :
Français
Français
F7671 / Première édition / Août 2012
10
Français
Français
Français
Français
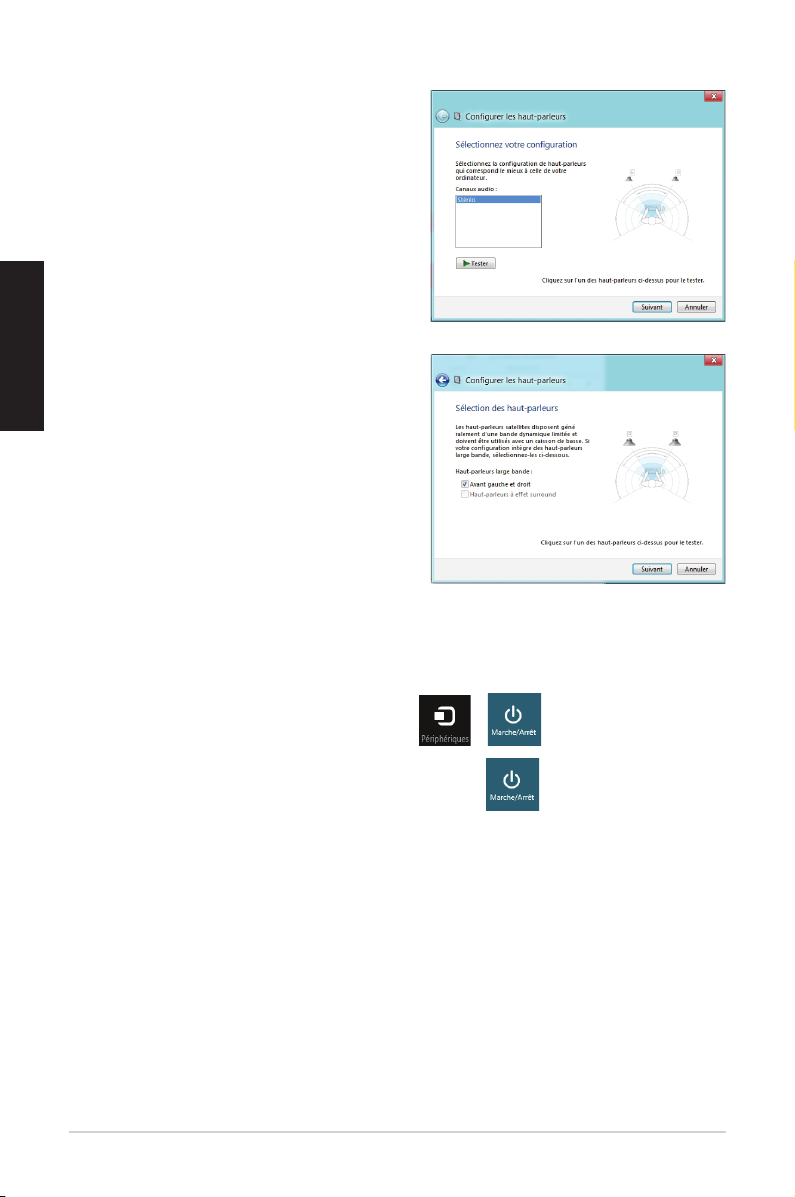
5. Sélectionnez Stéréo et cliquez sur Suivant.
6. Cochez les cases Avant gauche et droit,
puis cliquez sur Suivant.
7. Cliquez sur Terminé pour quitter.
Éteindre votre All-in-one PC
Utilisez l’une des trois méthodes suivantes pour éteindre votre ordinateur :
• À partir de la Barre des charmes, cliquez sur > > Arrêter.
• À partir de l’écran d’ouverture de session, cliquez sur > Arrêter.
• Si l’ordinateur ne répond pas ou s’il est bloqué, maintenez le bouton d’alimentation
enfoncé pendant environ quatre (4) secondes pour forcer l’ordinateur à s’éteindre.
This manual suits for next models
1
Table of contents
Languages:
Other Asus Desktop manuals


Asus
Asus CP5140 User manual

Asus
Asus ZenAiO Z272SD User manual

Asus
Asus CM1740-US-2AE User manual

Asus
Asus EB1035 User manual

Asus
Asus D700SD User manual

Asus
Asus Book Size Barebone System Prodigy User manual

Asus
Asus D500TD User manual

Asus
Asus T4 Series User manual

Asus
Asus PE100A User manual

Asus
Asus G15CS User manual


