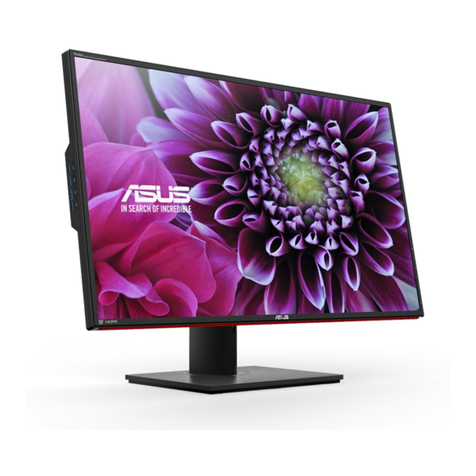
Asus PA246Q User manual

PA246 Series
LCD Monitor
User Guide

ii
Contents
Contents ....................................................................................................... ii
Notices......................................................................................................... iii
Safety information ...................................................................................... iv
Care & Cleaning........................................................................................... v
Chapter 1: Product introduction
1.1 Welcome! .................................................................................... 1-1
1.2 Package contents......................................................................... 1-1
1.3 Monitor introduction .................................................................... 1-2
1.3.1 Front view ....................................................................... 1-2
1.3.2 Back view........................................................................ 1-3
1.3.3 QuickFit Function ............................................................ 1-4
Chapter 2: Setup
2.1 Detaching the arm/base
(for VESA wall mount) ................................................................. 2-1
2.2 Adjusting the monitor.................................................................. 2-2
2.3 Connecting the cables................................................................. 2-3
2.4 Turning on the monitor................................................................ 2-3
Chapter 3: General instructions
3.1 OSD (On-Screen Display) menu ................................................ 3-1
3.1.1 Howtorecongure.......................................................... 3-1
3.1.2 OSD function introduction ............................................... 3-1
3.2 Specicationssummary(PA246) ............................................... 3-7
3.3 Troubleshooting (FAQ)................................................................ 3-8
3.4 Supported operating modes ....................................................... 3-9

iii
Notices
Federal Communications Commission Statement
This device complies with Part 15 of the FCC Rules. Operation is subject to the
followingtwoconditions:
• Thisdevicemaynotcauseharmfulinterference,and
• Thisdevicemustacceptanyinterferencereceivedincludinginterferencethat
maycauseundesiredoperation.
Thisequipmenthasbeentestedandfoundtocomplywiththelimitsfora
ClassBdigitaldevice,pursuanttoPart15oftheFCCRules.Theselimitsare
designedtoprovidereasonableprotectionagainstharmfulinterferenceina
residentialinstallation.Thisequipmentgenerates,usesandcanradiateradio
frequencyenergyand,ifnotinstalledandusedinaccordancewithmanufacturer’s
instructions,maycauseharmfulinterferencetoradiocommunications.However,
thereisnoguaranteethatinterferencewillnotoccurinaparticularinstallation.If
thisequipmentdoescauseharmfulinterferencetoradioortelevisionreception,
whichcanbedeterminedbyturningtheequipmentoffandon,theuseris
encouragedtotrytocorrecttheinterferencebyoneormoreofthefollowing
measures:
• Reorientorrelocatethereceivingantenna.
• Increasetheseparationbetweentheequipmentandreceiver.
• Connecttheequipmenttoanoutletonacircuitdifferentfromthattowhichthe
receiver is connected.
• Consultthedealeroranexperiencedradio/TVtechnicianforhelp.
Theuseofshieldedcablesforconnectionofthemonitortothegraphicscardis
requiredtoassurecompliancewithFCCregulations.Changesormodications
tothisunitnotexpresslyapprovedbythepartyresponsibleforcompliance
couldvoidtheuser’sauthoritytooperatethisequipment.
Canadian Department of Communications Statement
ThisdigitalapparatusdoesnotexceedtheClassBlimitsforradionoiseemissions
fromdigitalapparatussetoutintheRadioInterferenceRegulationsofthe
Canadian Department of Communications.
ThisclassBdigitalapparatuscomplieswithCanadianICES-003.
ThisClassBdigitalapparatusmeetsallrequirementsoftheCanadianInterference
-CausingEquipmentRegulations.
CetappareilnumériquedelaclasseBrespectetouteslesexigencesdu
RéglementsurlematérielbrouillerduCanada.

iv
Safety information
• Beforesettingupthemonitor,carefullyreadallthedocumentationthatcame
withthepackage.
• Topreventreorshockhazard,neverexposethemonitortorainormoisture.
• Nevertrytoopenthemonitorcabinet.Thedangeroushighvoltagesinsidethe
monitormayresultinseriousphysicalinjury.
• Ifthepowersupplyisbroken,donottrytoxitbyyourself.Contactaqualied
servicetechnicianoryourretailer.
• Beforeusingtheproduct,makesureallcablesarecorrectlyconnectedandthe
powercablesarenotdamaged.Ifyoudetectanydamage,contactyourdealer
immediately.
• Slotsandopeningsonthebackortopofthecabinetareprovidedfor
ventilation.Donotblocktheseslots.Neverplacethisproductnearorovera
radiator or heat source unless proper ventilation is provided.
• Themonitorshouldbeoperatedonlyfromthetypeofpowersourceindicated
onthelabel.Ifyouarenotsureofthetypeofpowersupplytoyourhome,
consultyourdealerorlocalpowercompany.
• Usetheappropriatepowerplugwhichcomplieswithyourlocalpower
standard.
• Donotoverloadpowerstripsandextentioncords.Overloadingcanresultin
reorelectricshock.
• Avoiddust,humidity,andtemperatureextremes.Donotplacethemonitorin
anyareawhereitmaybecomewet.Placethemonitoronastablesurface.
• Unplugtheunitduringalightningstormorifitwillnotbeusedforalongperiod
oftime.Thiswillprotectthemonitorfromdamageduetopowersurges.
• Neverpushobjectsorspillliquidofanykindintotheslotsonthemonitor
cabinet.
• Toensuresatisfactoryoperation,usethemonitoronlywithULlisted
computerswhichhaveappropriateconguredreceptaclesmarkedbetween
100-240VAC.
• Ifyouencountertechnicalproblemswiththemonitor,contactaqualied
servicetechnicianoryourretailer.
Thissymbolofthecrossedoutwheeledbinindicatesthattheproduct(electrical,
electronicequipment,andmercury-containingbuttoncellbattery)shouldnot
beplacedinmunicipalwaste.Pleasechecklocalregulationsfordisposalof
electronic products.

v
Care & Cleaning
• Beforeyouliftorrepositionyourmonitor,itisbettertodisconnectthecables
andpowercord.Followthecorrectliftingtechniqueswhenpositioningthe
monitor.Whenliftingorcarryingthemonitor,grasptheedgesofthemonitor.
Donotliftthedisplaybythestandorthecord.
• Cleaning.Turnyourmonitoroffandunplugthepowercord.Cleanthemonitor
surfacewithalint-free,non-abrasivecloth.Stubbornstainsmayberemoved
with a cloth dampened with mild cleaner.
• Avoidusingacleanercontainingalcoholoracetone.Useacleanerintended
forusewiththemonitor.Neverspraycleanerdirectlyonthescreen,asitmay
drip inside the monitor and cause an electric shock.
The following symptoms are normal with the monitor:
• Thescreenmayickerduringtheinitialuseduetothenatureoftheuorescent
light.TurnoffthePowerSwitchandturnitonagaintomakesurethatthe
ickerdisappears.
• Youmayndslightlyunevenbrightnessonthescreendependingonthe
desktoppatternyouuse.
• Whenthesameimageisdisplayedforhours,anafterimageoftheprevious
screenmayremainafterswitchingtheimage.Thescreenwillrecoverslowlyor
youcanturnoffthePowerSwitchforhours.
• Whenthescreenbecomesblackorashes,orcannotworkanymore,contact
yourdealerorservicecentertoxit.Donotrepairthescreenbyyourself!
Conventions used in this guide
WARNING:Informationtopreventinjurytoyourselfwhentryingto
complete a task.
CAUTION:Informationtopreventdamagetothecomponentswhen
tryingtocompleteatask.
IMPORTANT:InformationthatyouMUSTfollowtocompleteatask.
NOTE:Tipsandadditionalinformationtoaidincompletingatask.

vi
Wheretondmoreinformation
Refertothefollowingsourcesforadditionalinformationandforproductand
software updates.
1. ASUS websites
TheASUSwebsitesworldwideprovideupdatedinformationonASUS
hardwareandsoftwareproducts.Refertohttp://www.asus.com
2. Optional documentation
Yourproductpackagemayincludeoptionaldocumentationthatmayhave
beenaddedbyyourdealer.Thesedocumentsarenotpartofthestandard
package.

1-1ASUSPA246SeriesLCDMonitor
1.1 Welcome!
ThankyouforpurchasingtheASUS®LCDmonitor!
The latest widescreen LCD monitor from ASUS provides a crisper, broader, and
brighterdisplay,plusahostoffeaturesthatenhanceyourviewingexperience.
With these features, you can enjoy the convenience and delightful visual
experiencethatthemonitorbringstoyou!
1.2 Package contents
Checkyourpackageforthefollowingitems:
LCDmonitor
Quickstartguide
Warrantycard
Power cord
VGAcable
DVIcable
DisplayPortcable
USBcable
Support CD
Cable tie
ColorCalibrationTestingReport
Ifanyoftheaboveitemsisdamagedormissing,contactyourretailer
immediately.

1-2 Chapter1:Productintroduction
1.3 Monitor introduction
1.3.1 Front view
1 2 6 743 5
1. QuickFitbutton:
• ActivatestheQuickFitfunctiondesignedforalignment.
• TheQuickFitfunctioncontains7pagesofcommongridpatternsandpaper
andphotosizes.(Pleasereferto1.3.3QuickFitFunction).
2. button:
• Selects a desired preset mode.
• ExitstheOSDmenuorgoesbacktothepreviousmenuwhentheOSD
menu is active.
• Automaticallyadjuststheimagetoitsoptimizedposition,clock,andphase
bypressingthisbuttonfor2-4seconds(forVGAmodeonly).
3.
• Decreasesvaluesormovesyourselectionleft/down.
• Contrasthotkey
4. MENUbutton:
• TurnsontheOSDmenu.EnactstheselectedOSDmenuitem.
• ExitsthehotkeyOSDmenu.

1-3ASUSPA246SeriesLCDMonitor
5.
• Increasesvaluesormovesyourselectionright/up.
• Brightnesshotkey
6. button:
• Selects an available input source.
Press button(InputSelectbutton)todisplayHDMI/DisplayPort
signalsafteryouconnectHDMI/DisplayPortcablewiththemonitor.
7. Powerbutton/powerindicator
• Turnsthemonitoron/off.
• Thecolordenitionofthepowerindicatorisasthebelowtable.
Status Description
White ON
Orange Standbymode
OFF OFF
1.3.2 Back view
123 4 5 6 7 8 9
10
11
Rear connectors
1. Power switch.Presstheswitchtoturnon/offpower.
2. AC-IN port. This port connects the power cord.
3. DisplayPort.ThisportisforconnectionforaDisplayPortcompatibledevice.
4. HDMI port.ThisportisforconnectionwithanHDMIcompatibledevice.

1-4 Chapter1:Productintroduction
5. DVI port.This24-pinportisforPC(PersonalComputer)DVI-Ddigitalsignal
connection.
6. VGA port.This15-pinportisforPCVGAconnection.
7. Earphone jack.
8. USB upstream port.ThisportisforconnectionwithaUSBupstreamcable.
ThecableenablestheUSBportsandcardreaderonthemonitor.
9. Kensington lock slot.
10. Card reader. See below for more information about the card reader
specications.
11. USB downstream ports.TheseportsareforconnectionwithUSBdevices,
suchasUSBkeyboard/mouse,USBashdrive,etc.
Card reader specifications
Supported
Media Types :
MemoryStick(MS),
HighSpeedMemoryStick(HSMS),
MemoryStickPRO(MSPRO),
MemoryStickDuo(wAdapter),
MSDuoSecureDigital(Mini-SD),SecureDigitalCard,
MiniSecureDigital(wAdaptor),
TransFlash(SD,includingSDHC),
MultiMediaCard(MMC),ReducedSizeMultiMediaCard(RS-
MMC),
NANDFlash,
xD
Card Slots :
LowerSlot(built-inPushEjectionMechanism):
SD/MS/MMC/xD–directinsertion
MSDuo/Mini-SD/TransFlashCard/RS-MMC–with
adapter
1.3.3 QuickFit Function
TheQuickFitfunctioncontainsthreekindsofpatterns:(1)Gridpatterns(2)Paper
size(3)Photosize.
1.Gridpatterns
Thegridpatternsfacilitatedesignersanduserstoorganizecontentandlayoutona
pageandachieveaconsistentlookandfeel.
Centimeters Inches

1-5ASUSPA246SeriesLCDMonitor
AlignmentGrid
2.Papersize
QuickFitprovidesnumerouscommonlyusedstandardpapersizesforuserstoview
theirdocumentsinrealsizeonthescreen.
A4 Letter
3.Photosize
ThevariousrealphotosizesdisplayedintheQuickFitfunctionprovides
photographersandotheruserstoaccuratelyviewandedittheirphotosinrealsize
on the screen.
Photo4x6,3x5,2x2 Photo8x10,5x7

1-6 Chapter1:Productintroduction

2-1ASUSPA246SeriesLCDMonitor
2.1 Detaching the arm/base
(for VESA wall mount)
Thedetachablearm/baseofthismonitorisspeciallydesignedforVESAwallmount.
Todetachthearm/base:
1. Have the front of the monitor face down on a table.
2. Useascrewdrivertoremovethefourscrewsonthearm(Figure1),andthen
detachthearm/basefromthemonitor(Figure2).
Werecommendthatyoucoverthetablesurfacewithsoftclothtoprevent
damagetothemonitor.
(Figure1) (Figure2)

2-2 Chapter2:Setup
2.2 Adjusting the monitor
• Foroptimalviewing,werecommendthatyoulookatthefullfaceofthe
monitor,thenadjustthemonitortotheanglethatismostcomfortableforyou.
• Holdthestandtopreventthemonitorfromfallingwhenyouchangeitsangle.
• Youcanadjustthemonitor’sanglefrom+20˚to-5˚anditallows60˚swivel
adjustmentfromeitherleftorright.Youcanalsoadjustthemonitor’sheight
within+/-10cm.
10cm
+20° ~ -5°
60°
0°
60°
Pivoting the monitor
1. Liftthemonitortothehighestposition.
2. Tiltthemonitortoitsmaximumangle.
3. Pivotthemonitorclockwisetotheangleyouneed.
+20° ~ -5°
Itisnormalthatthemonitorslightlyshakeswhileyouadjusttheviewingangle.
(Tilt) (Swivel) (Heightadjustment)

2-3ASUSPA246SeriesLCDMonitor
2.3 Connecting the cables
1. Connectthecablesasthefollowinginstructions:
• To connect the power cord:connectoneendofthepowercordsecurelyto
themonitor’sACinputport,theotherendtoapoweroutlet.
• To connect the VGA/HDMI/DVI/DisplayPort cable:
a. PlugoneendoftheVGA/HDMI/DVI/DisplayPortcabletothemonitor’s
VGA/HDMI/DVI/DisplayPortjack.
b. ConnecttheotherendoftheVGA/HDMI/DVI/DisplayPortcabletoyour
computer'sVGA/HDMI/DVI/DisplayPortjack.
c. TightenthetwoscrewstosecuretheVGA/DVIconnector.
• To use the earphone:connecttheendwithplugtypetothemonitor’s
earphonejackwhenanHDMIorDisplayPortsignalisfed.
• To use the USB ports:Plugthesmallerend(typeB)oftheUSBupstream
cabletothemonitor’sUSBupstreamport,andthelargerend(typeA)toyour
computer’sUSBport.ThatwillenabletheUSBportsandcardreaderonthe
monitor to work.
Whenthesecablesareconnected,youcanchoosethedesiredsignalfromthe
InputSelectitemintheOSDmenu.
2.4 Turning on the monitor
Press the power button .Seepage1-2forthelocationofthepowerbutton.The
power indicator lightsupinwhitetoshowthatthemonitorisON.

2-4 Chapter2:Setup

3-1ASUSPA246SeriesLCDMonitor
3.1 OSD (On-Screen Display) menu
3.1.1 How to reconfigure
1. PresstheMENUbuttontoactivatetheOSDmenu.
2. Press ,and tonavigatethroughthefunctions.Highlightthe
desiredfunctionandpresstheMENUbuttontoactivateit.Ifthefunction
selectedhasasub-menu,press and againtonavigate
throughthesub-menufunctions.Highlightthedesiredsub-menufunctionand
presstheMENUbuttontoactivateit.
3. Press ,and tochangethesettingsoftheselectedfunction.
4. ToexitandsavetheOSDmenu,pressthe buttonrepeatedlyuntilthe
OSD menu disappears. Toadjustotherfunctions,repeat steps 1-3.
3.1.2 OSD function introduction
1. Splendid
Thisfunctioncontainssixsub-functionsyoucanselectforyourpreference.
EachmodehastheResetselection,allowingyoutomaintainyoursettingor
return to the preset mode.
• Standard Mode:bestchoicefordocumenteditingwithSPLENDID™
VideoEnhancement.
• sRGB Mode:compatiblewithsRGBcolorspace,sRGBmodeisthebest
choicefordocumentediting.

3-2 Chapter3:OSD(On-ScreenDisplay)menu
Color
Space
White Point Primaries
Xw Yw Xr Yr Xg Yg Xb Yb
sRGB 0.3127 0.329 0.64 0.33 0.3 0.6 0.15 0.06
• Adobe RGB Mode:compatiblewithAdobeRGBcolorspace.
Color
Space
White Point Primaries
Xw Yw Xr Yr Xg Yg Xb Yb
Adobe
RGB 0.3127 0.329 0.64 0.33 0.21 0.71 0.15 0.06
• Scenery Mode:bestchoiceforsceneryphotodisplaywithSPLENDID™
VideoEnhancement.
• Theater Mode:bestchoiceformovieswithSPLENDID™Video
Enhancement.
• User Mode:MoreitemsareadjustableintheColormenu.

3-3ASUSPA246SeriesLCDMonitor
Function Standard
Mode
sRGB
Mode
Adobe
RGB
Mode
Scenery
Mode
Theater
Mode
User
Mode
Brightness Yes Yes Yes Yes Yes Yes
Contrast Yes No No Yes Yes Yes
Saturation No No No Yes Yes Yes
Hue No No No No No Yes
Color Temperature Yes No No Yes Yes No
Gamma Yes No No No No Yes
Advanced
Setting
Six-axis
Hue No No No No No Yes
Six-axis
Saturation No No No No No Yes
Gain No No No No No Yes
Offset No No No No No Yes
2. Color
Setadesiredcolorsettingfromthismenu.
• Brightness:theadjustingrangeisfrom0to100. isahotkeyto
activate this function.
• Contrast:theadjustingrangeisfrom0to100. isahotkeyto
activate this function.
• Saturation:theadjustingrangeisfrom0to100.
• Hue:shiftstheimagecolorbetweengreenandpurple.
• Color Temp.:contains3modesincluding9300K,6500Kand5000K.
• Gamma:allowsyoutosetthecolormodeto2.2or1.8(D50).
• Advanced Setting:
* 6-axisHueadjustment.

3-4 Chapter3:OSD(On-ScreenDisplay)menu
* 6-axisSaturationadjustment.
* AdjuststhegainlevelsforR,G,B.
* AdjuststheblackleveloffsetvaluesforR,G,B.
• Color Reset:
* CurrentSplendidcolormodereset:
Resetsthecolorsettingsofcurrentcolormodetothefactory
default value.
* AllSplendidcolormodereset:
Resetsthecolorsettingsofallcolormodestothefactorydefault
value.
3. Image
Settheimagerelatedsettingfromthismenu.
• Sharpness:theadjustingrangeisfrom0to100.
• Aspect Control:adjuststheaspectratiotofull,4:3,1:1,orOverScan
(onlyavailablefortheHDMIinput).
• ASCR:turnson/offtheASCR(ASUSSmartContrastRatio)function.
Other manuals for PA246Q
2
This manual suits for next models
1
Table of contents
Other Asus Monitor manuals

Asus
Asus VP229 Series User manual

Asus
Asus ROG STRIX XG259CM User manual

Asus
Asus VA246 Series User manual

Asus
Asus VE278H User manual

Asus
Asus CP220 Series User manual

Asus
Asus SP1920 series User manual

Asus
Asus VE278Q Series User manual

Asus
Asus VS228D User manual

Asus
Asus VG24VQE User manual

Asus
Asus VK278Q Series User manual

Asus
Asus VY249 Series User manual

Asus
Asus VW202B User manual

Asus
Asus ROG STRIX XG27UQ User manual

Asus
Asus VG255 Series User manual

Asus
Asus VK221S User manual

Asus
Asus VH222 User manual

Asus
Asus ROG SWIFT PG27U User manual

Asus
Asus VA279 Series User manual

Asus
Asus VH242xL Series User manual

Asus
Asus VS238 Series User manual