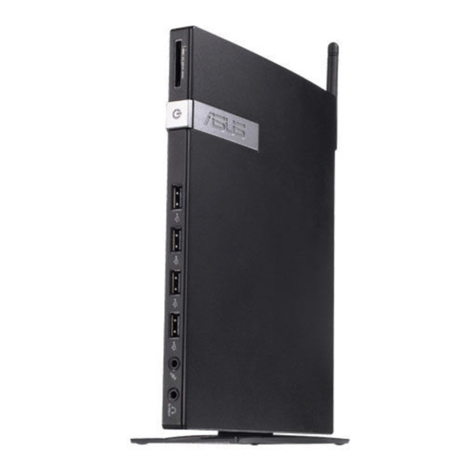
Asus Z5 User manual

Z5 Zero Client
User Guide

ii
Copyright © 2012 ASUSTeK COMPUTER INC. All Rights Reserved.
No part of this manual, including the products and software described in it, may be reproduced, transmitted,
transcribed, stored in a retrieval system, or translated into any language in any form or by any means,
except documentation kept by the purchaser for backup purposes, without the express written permission
of ASUSTeK COMPUTER INC. (“ASUS”).
ASUS provides this manual “as is” without warranty of any kind, either express or implied, including but not
limited to the implied warranties or conditions of merchantability or tness for a particular purpose. In no
event shall ASUS, its directors, ofcers, employees, or agents be liable for any indirect, special, incidental,
or consequential damages (including damages for loss of prots, loss of business, loss of use or data,
interruption of business and the like), even if ASUS has been advised of the possibility of such damages
arising from any defect or error in this manual or product.
Specications and information contained in this manual ae furnished for informational use only, and are
subject to change at any time without notice, and should not be construed as a commitment by ASUS.
ASUS assumes no responsibility or liability for any errors or inaccuracies that may appear in this manual,
including the products and software described in it.
Product warranty or service will not be extended if: (1) the product is repaired, modied or altered, unless
such repair, modication of alteration is authorized in writing by ASUS; or (2) the serial number of the
product is defaced or missing.
Products and corporate names appearing in this manual may or may not be registered trademarks or
copyrights of their respective companies, and are used only for identication or explanation and to the
owners’ benet, without intent to infringe.
E7022
First Edition
April 2012
iii
Contents
Notices.......................................................................................................... v
Safety information ...................................................................................... vi
About this guide ....................................................................................... viii
Chapter 1: Product introduction
1.1 Package contents......................................................................... 1-2
1.2 Z5Zeroclientspecicationssummary...................................... 1-3
1.3 Knowing your Z5 Zero Client ...................................................... 1-4
1.3.1 Front panel...................................................................... 1-4
1.3.2 Rear panel ...................................................................... 1-5
1.3.3 LED indications ............................................................... 1-6
Chapter 2: Hardware setup
2.1 Installing the stand ...................................................................... 2-2
2.2 Installing the Z5 Zero Client to a monitor .................................. 2-2
2.3 Connecting a display................................................................... 2-3
2.3.1 Connecting an LCD monitor............................................ 2-3
2.3.2 Connecting an HDMI monitor.......................................... 2-3
2.4 Connecting USB devices............................................................. 2-4
2.5 Connecting to a network device................................................. 2-5
2.5.1 Connecting to a router .................................................... 2-5
2.5.2 Connecting to a network switch ...................................... 2-5
2.6 Turning on the system................................................................. 2-6
Chapter 3: Driver installation
3.1 Installing the drivers.................................................................... 3-2
3.1.1 Using the ASUS InstAll Client support ............................ 3-2
3.1.2 Installing the drivers manually......................................... 3-3
Chapter 4: Client-server setup
4.1 Managing your client-server setup............................................. 4-2
4.1.1 Installing the Windows® Multipoint server........................ 4-2
4.1.2 Setting up your client-server system............................... 4-3

iv
Contents
4.2 Running the Windows®MultiPoint Server OS ........................... 4-6
4.2.1 Logging in to the MultiPoint Manager ............................. 4-6
4.2.2 Knowing the Windows®MultiPoint Manager user
interface ........................................................................................ 4-7
4.3 Knowing your network stations................................................ 4-11
Appendices
ASUS Z5 Zero client solution ..................................................................A-1
Suggested conguration table........................................................A-1
Suggested host server conguration table.....................................A-2
ASUS contact information .......................................................................A-3

v
Notices
Federal Communications Commission Statement
This device complies with Part 15 of the FCC Rules. Operation is subject to the
following two conditions:
•
This device may not cause harmful interference, and
•
This device must accept any interference received including interference that
may cause undesired operation.
This equipment has been tested and found to comply with the limits for a Class
A digital device, pursuant to Part 15 of the FCC Rules. These limits are designed
to provide reasonable protection against harmful interference in a residential
installation. This equipment generates, uses and can radiate radio frequency
energy and, if not installed and used in accordance with manufacturer’s instructions,
may cause harmful interference to radio communications. However, there is
no guarantee that interference will not occur in a particular installation. If this
equipment does cause harmful interference to radio or television reception, which
can be determined by turning the equipment off and on, the user is encouraged to
try to correct the interference by one or more of the following measures:
•
Reorient or relocate the receiving antenna.
•
Increase the separation between the equipment and receiver.
•
Connect the equipment to an outlet on a circuit different from that to which the
receiver is connected.
•
Consult the dealer or an experienced radio/TV technician for help.
Canadian Department of Communications Statement
This digital apparatus does not exceed the Class B limits for radio noise emissions
from digital apparatus set out in the Radio Interference Regulations of the
Canadian Department of Communications.
This Class B digital apparatus complies with Canadian ICES-003.
WARNING! The use of shielded cables for connection of the monitor to the
graphics card is required to assure compliance with FCC regulations. Changes
or modications to this unit not expressly approved by the party responsible for
compliance could void the user’s authority to operate this equipment.

vi
Safety information
Electrical Safety
• Before installing or removing signal cables, ensure that the power cables for
the system unit and all attached devices are unplugged.
• To prevent electrical shock hazard, disconnect the power cable from the
electrical outlet before relocating the system.
• When adding or removing any additional devices to or from the system, contact
a qualied service technician or your dealer. Ensure that the power cables for
the devices are unplugged before the signal cables are connected. If possible,
disconnect all power cables from the existing system before you service.
• If the power supply is broken, do not try to x it by yourself. Contact a qualied
service technician or your dealer.
Operation Safety
• Servicing of this product or units is to be performed by trained service
personnel only.
• Before operating the server, carefully read all the manuals included with the
server package.
• Before using the server, make sure all cables are correctly connected and the
power cables are not damaged. If any damage is detected, contact your dealer
as soon as possible.
• To avoid short circuits, keep paper clips, screws, and staples away from
connectors, slots, sockets and circuitry.
• Avoid dust, humidity, and temperature extremes. Place the server on a stable
surface.
This product is equipped with a three-wire power cable and plug for the user’s
safety. Use the power cable with a properly grounded electrical outlet to avoid
electrical shock.

vii
DO NOT throw the motherboard in municipal waste. This product has been
designed to enable proper reuse of parts and recycling. This symbol of the
crossed out wheeled bin indicates that the product (electrical and electronic
equipment) should not be placed in municipal waste. Check local regulations for
disposal of electronic products.
DO NOT throw the mercury-containing button cell battery in municipal waste.
This symbol of the crossed out wheeled bin indicates that the battery should not
be placed in municipal waste.
REACH
Complying with the REACH (Registration, Evaluation, Authorization, and Restriction
of Chemicals) regulatory framework, we published the chemical substances in our
products at ASUS website at http://csr.asus.com/english/REACH.htm.
ASUS Recycling/Takeback Services
ASUS recycling and takeback programs come from our commitment to the highest
standards for protecting our environment. We believe in providing solutions for you
to be able to responsibly recycle our products, batteries, other components as well
as the packaging materials. Please go to http://csr.asus.com/english/Takeback.htm
for detailed recycling information in different regions.

viii
Conventions
To make sure that you perform certain tasks properly, take note of the following
symbols used throughout this manual.
DANGER/WARNING: Information to prevent injury to yourself when
trying to complete a task.
NOTE: Tips and additional information to help you complete a task.
IMPORTANT: Instructions that you MUST follow to complete a task.
CAUTION: Information to prevent damage to the components when
trying to complete a task.
About this guide
Audience
This user guide is intended for system integrators, and experienced users with at
least basic knowledge of conguring a server.
Contents
This guide contains the following parts:
1. Chapter 1: Product Introduction
This chapter describes the general features of the Z5 Zero Client, including
sections on front panel and rear panel specications.
2. Chapter 2: Hardware setup
This chapter lists the hardware setup procedures that you have to perform
when installing the system components.
3. Chapter 3: Driver information
This chapter provides instructions for installing the necessary drivers for
different system components.
4. Chapter 4: Client setup
This chapter tells how to setup and deploy your Z5 Zero Client. Detailed
descriptions of the connections are also provided.

ix
References
Refer to the following sources for additional information, and for product and
software updates.
1. ASUS websites
The ASUS websites worldwide provide updated information for all ASUS
hardware and software products. Refer to the ASUS contact information.
Typography
Bold text Indicates a menu or an item to select.
Italics
Used to emphasize a word or a phrase.
<Key> Keys enclosed in the less-than and greater-than
sign means that you must press the enclosed key.
Example: <Enter> means that you must press
the Enter or Return key.

x

ASUS Z5 Zero Client
This chapter describes the general
features of the Z5 Zero Client,
including the front panel and rear panel
specications.
Chapter 1
Product introduction

Chapter 1: Product introduction1-2
• If the device or its components fail or malfunction during normal and proper
use within the warranty period, please visit the ASUS Service Center for
repair or replacement of the defective components.
• If any of the components is damaged or missing, contact your retailer.
• The accessories may vary in your country of purchase.
1.1 Package contents
Z5 Zero Client Stand Power adapter and power plug
User Manual
VESA mount and screw pack User Manual Support DVD
ESC
F1 F2 F3 F4 F5 F6 F7 F8 F9 F10 F11 F12 Mute
Pause
PrtSc
SysRq
Backspace
Home
Home
Num LK
Scr LK
PgUp
PgUp
PgDn
PgDn
Enter
Enter
Shift
Shift
Ctrl
Alt GrAlt
Ctrl
Fn
End
End
Delete
Delete
Insert
Insert
Break
7 8 9
4 5 6
1
2
0
3
Tab
Caps Lock
Keyboard (optional) Mouse (optional)

ASUS Z5 Zero Client 1-3
1.2 Z5Zeroclientspecicationssummary
VGA Supports up to 1920*1200 (HDMI) / 2048*1152 (VGA)
DDR2 512 MB video memory
IO ports
1 x HDMI port
1 x VGA port
3 x USB 2.0 ports
- 1 x USB 2.0 port at the front panel
- 2 x USB 2.0 ports at the rear panel
1 x LAN (RJ-45) port
1 x MIC-in port
1 x Headphone port
Accessories
1 x VESA mount
1 x Power (AC) adapter
1 x Power plug
1 x stand
Dimension Without stand: 140mm x 153mm x 28mm (width x height x depth)
With stand: 140mm x 176.3mm x 70mm (width x height x depth)
Environment
Operating temperature: 0oC - 35oC
Humidity: 20% - 85% RH (non-condensing)
Non-operating temperature: -40oC - 60oC
Non-operating humidity: 20% - 95% (non-condensing)
Server OS support
Windows® Multipoint Server 2011
1. Use the same type of keyboard and mouse for the host server (i.e.
both USB keyboard and mouse, both PS/2 keyboard and mouse).
Do not use a USB keyboard with a PS/2 mouse or vice versa.
2. When the host server is using a USB keyboard and mouse and if it
is logged-in as a multipoint station, connect a USB audio device
(e.g. speaker) for audio support.
All specications are subject to change without notice.

Chapter 1: Product introduction1-4
1.3.1 Front panel
LED indicator
Power button
Headphone/Audio Out jack
MIC-in port
USB port
Restore button
To restore the system to its default setting, insert a blunt object to press the restore
button for ve seconds, or until the Power LED turns to orange.
1.3 Knowing your Z5 Zero Client

ASUS Z5 Zero Client 1-5
1.3.2 Rear panel
The USB ports support one USB keyboard, one USB mouse, and one 500mA USB
device (2.5” USB HDD).The Z5 Zero Client’s USB ports do not support a USB hub.
HDMI port
Power input
(+5V 2A, 10W)
D-Sub (VGA) port
2 *USB 2.0 ports
LAN port
Kensington® anti-theft lock slot

Chapter 1: Product introduction1-6
1.3.3 LED indications
LED Color Display status Description
Power button
Orange ON Initializing
Blue ON Standby mode
Alternating
orange and blue Blinking Server identifying the client.
LED indicator
Green Blinking The client is searching the IP.
Green ON The client is connected to the
server.
LED indicator
Power button

ASUS Z5 Zero Client
This chapter lists the hardware setup
procedures that you have to perform
when installing the system components.
Chapter 2
Hardware setup

Chapter 2: Hardware setup2-2
2.1 Installing the stand
2.2 Installing the Z5 Zero Client to a monitor
Stand screw
1
2
$
Each side of the device has different notch shapes that matches with the slot on the
stand. Ensure that the side notches match correctly with the slots on the stand.
1
2
3

2-3ASUS Z5 Zero Client
2.3 Connecting a display
2.3.1 Connecting an LCD monitor
2.3.2 Connecting an HDMI monitor
This device supports EDID-supported monitors. Contact ASUS if your
monitors are not EDID-supported.
A dual-monitor setup is not supported. The VGA and HDMI ports
cannot work at the same time.
•
•

Chapter 2: Hardware setup2-4
2.4 Connecting USB devices
Table of contents
Other Asus Server manuals

Asus
Asus AP2400R-E1 User manual

Asus
Asus RS720Q-E8-RS12 User manual

Asus
Asus RS160-E4 - 0 MB RAM User manual

Asus
Asus Pentium 4 Pedestal Server AP130-D User manual

Asus
Asus RS300-H8-PS12 User manual

Asus
Asus AP5000 User manual

Asus
Asus RS300-E9-PS4 User manual

Asus
Asus RS520-X5 PS8 User manual

Asus
Asus RS300-E7 RS4 User manual

Asus
Asus RS100-E6/PI2 User manual

Asus
Asus RS720-E9-RS8 User manual

Asus
Asus ESC4000 G3 Series User manual

Asus
Asus AP1600R-E2BA2 - AP - 1600R-E2 User manual

Asus
Asus RS500-E9 Series User manual

Asus
Asus RS300-E8-PS4 User manual

Asus
Asus RS720-E7-RS24-EG User manual

Asus
Asus DS300f User manual

Asus
Asus RS100-E6 PI2 User manual

Asus
Asus RS920-E7/RS8 User manual

Asus
Asus TS300-E8-PS4 User manual