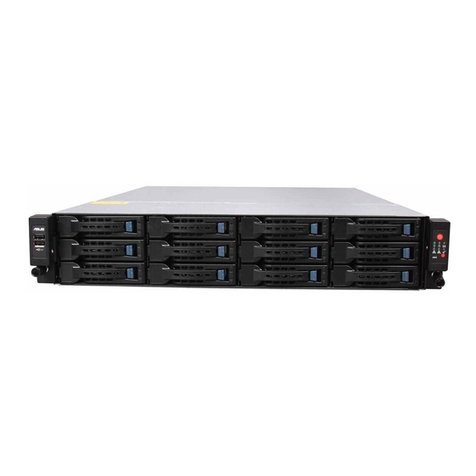
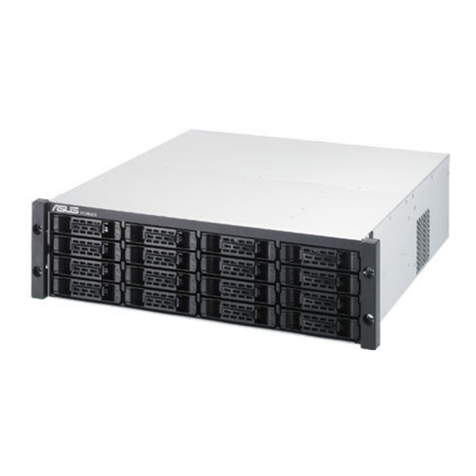
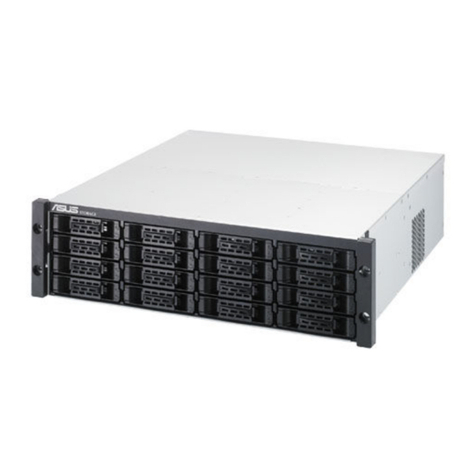
Asus DS300j G2 Series User manual

ASUS Storage
DS300 G2 Series

Contents
Chapter 1: IntroduCtIon 1
about thIs Manual 2
asus ds300fG2 overvIew 3
Performance 3
GreenraID 3
ServIce anD SuPPort 3
new featureS In the aSuS DS300fG2 3
arChIteCtural desCrIptIon 4
features 6
controller moDule featureS 6
oPeratIonal featureS 6
SyStem manaGement 7
General speCIfICatIons 9
Chapter 2: hardware InstallatIon 12
unpaCkInG the asus ds300fG2 13
MountInG asus ds300fG2 In araCk 14
InstallInG physICal drIves 16
number of DrIveS requIreD 16
DrIve Slot numberInG 16
InStallInG your DrIveS 17
MakInG ManaGeMent and data ConneCtIons 18
fIbre channel San 18
fIbre channel DaS 20
fIbre channel wIth JboD exPanSIon 21
fIbre channel San – noSInGle PoInt of faIlure 22
IScSI StoraGe area network (San) 24
IScSI DIrect attacheD StoraGe (DaS) 27
IScSI wIth JboD exPanSIon 28
MakInG serIal Cable ConneCtIons 29
ConneCtInG the power 30
led behavIor 30
front Panel leDS31
DrIve StatuS InDIcatorS 32
controller leDS32
Chapter 3: setup 35
settInG-up the serIal ConneCtIon 35
about Ip addresses 36
aSuS DS300fG2 Default IP aDDreSSeS 36
chooSInG DhcP or aStatIc IP aDDreSS 36
acceSSInG the mac aDDreSS In the clI 36
acceSSInG the mac aDDreSS In the clu 37
settInG-up asus ds300fG2 wIth the ClI 37
makInG SubSyStem Date anD tIme SettInGS 37
vIrtual manaGement Port SettInGS 38
maIntenance moDe SettInGS 39
settInG-up asus ds300fG2 wIth the Clu 41
acceSSInG the clu quIck SetuP menu 42
makInG SubSyStem Date anD tIme SettInGS 42
vIrtual manaGement Port SettInGS 42
maIntenance moDe SettInGS 43
exItInG the clu 44
settInG up asus ds300fG2 wIth asus storaGe ManaGeMent 44
loGGInG Into aSuS StoraGe manaGement 44
CreatInG dIsk arrays and loGICal drIves 45
wIzarD - automatIc confIGuratIon 46
wIzarD - aDvanceD confIGuratIon 47
enablInG lun maPPInG anD maSkInG 49
loGGInG out of aSuS StoraGe manaGement 49
uSInG aSuS StoraGe manaGement over the Internet 49
Chapter 4: ManaGe wIth asus storaGe ManaGeMent 50
loGGInG Into aSuS StoraGe manaGement 50
chooSInG the DISPlay lanGuaGe 51
PeruSInG the Interface 51
loGGInG out of aSuS StoraGe manaGement 52
vIewInG the storaGe network 53
loGGInG onto aSubSyStem 53
fIlterInG the SubSyStem lISt 53
refreShInG the lISt 53
ManaGInG subsysteMs 53
vIewInG SubSyStem InformatIon 54
makInG SubSyStem SettInGS 54
lockInG or unlockInG the SubSyStem 54
reStorInG factory Default SettInGS 55
clearInG StatIStIcS 55
SavInG aServIce rePort 56
ImPortInG aconfIGuratIon ScrIPt 57
exPortInG aconfIGuratIon ScrIPt 57
reStartInG the SubSyStem 57
ShuttInG Down the SubSyStem 58
reStartInG the SubSyStem after aShutDown 58
ManaGInG raId Controllers 58
vIewInG controller InformatIon 58
makInG controller SettInGS 59
vIewInG controller StatIStIcS 60
vIewInG the flaSh ImaGe InformatIon 60
uPDatInG fIrmware on araID SubSyStem 61
vIewInG battery InformatIon 62
reconDItIonInG abattery 62
buzzer SettInGS 63
SIlencInG the buzzer 63
ManaGInG enClosures 63
vIewInG encloSure toPoloGy 64
vIewInG the encloSureS Summary 65
locatInG an encloSure 65
vIewInG encloSure InformatIon 65
makInG encloSure SettInGS 65
vIewInG fru vPD InformatIon 66
vIewInG Power SuPPly StatuS 66
vIewInG coolInG unIt StatuS 66
vIewInG temPerature SenSor StatuS 66
vIewInG voltaGe SenSor StatuS 66
ManaGInG ups unIts 67
vIewInG alISt of uPS unItS 67
makInG uPS SettInGS 67
vIewInG uPS InformatIon 68
ManaGInG network ConneCtIons 68
makInG vIrtual manaGement Port SettInGS 68
makInG maIntenance moDe SettInGS 69
ManaGInG users 69
vIewInG uSer InformatIon 69
creatInG auSer 70
makInG uSer SettInGS 70
chanGInG uSer PaSSworDS 70
DeletInG auSer 71
SettInG uSer event SubScrIPtIonS 71
ImPortInG auSer DatabaSe 71
exPortInG auSer DatabaSe 72
ManaGInG baCkGround aCtIvItIes 72
vIewInG current backGrounD actIvItIeS 73
vIewInG ScheDuleD backGrounD actIvItIeS 73
aDDInG aScheDuleD backGrounD actIvIty 73
chanGInG abackGrounD actIvIty ScheDule 74
enablInG or DISablInG aScheDuleD backGrounD actIvIty 74
DeletInG aScheDuleD backGrounD actIvIty 74
meDIa Patrol 75
reDunDancy check 75
InItIalIzatIon 75
rebuIlD 76
mIGratIon 76
PDm 76
tranSItIon 77
SynchronIzatIon 77
battery reconDItIonInG 77
ManaGInG storaGe servICes 78
vIewInG alISt of ServIceS 78
emaIl ServIce 78

SlP ServIce 79
webServer ServIce 79
telnet ServIce 80
SSh ServIce 80
SnmP ServIce 81
netSenD ServIce 82
workInG wIth the event vIewer 84
vIewInG runtIme eventS 84
SavInG runtIme eventS 84
clearInG runtIme eventS 84
vIewInG nvram eventS 85
SavInG nvram eventS 85
clearInG nvram eventS 85
MonItorInG perforManCe 85
monItorInG I/o Performance 85
monItorInG PSu wattaGe 86
ManaGInG physICal drIves 87
vIewInG alISt of PhySIcal DrIveS 87
vIewInG PhySIcal DrIve InformatIon 87
makInG Global PhySIcal DrIve SettInGS 88
makInG InDIvIDual PhySIcal DrIve SettInGS 88
vIewInG PhySIcal DrIve StatIStIcS 88
vIewInG PhySIcal DrIve Smart loG InformatIon 89
SavInG the PhySIcal DrIve Smart loG 89
locatInG aPhySIcal DrIve 89
forcInG aPhySIcal DrIve offlIne 90
clearInG aStale or aPfa conDItIon 90
uPDatInG fIrmware on aPhySIcal DrIve 90
ManaGInG dIsk arrays 91
vIewInG alISt of DISk arrayS 91
vIewInG DISk array InformatIon 91
creatInG aDISk array manually 92
creatInG aDISk array wIth the wIzarD 92
DeletInG aDISk array 93
locatInG aDISk array 93
makInG DISk array SettInGS 93
runnInG meDIa Patrol on aDISk array 94
runnInG PDm on aDISk array 94
PreParInG aDISk array for tranSPort 95
rebuIlDInG aDISk array 95
ManaGInG loGICal drIves 96
vIewInG alISt of loGIcal DrIveS 96
vIewInG loGIcal DrIve InformatIon 96
vIewInG loGIcal DrIve StatIStIcS 97
vIewInG loGIcal DrIve check tableS 97
creatInG aloGIcal DrIve manually 97
DeletInG aloGIcal DrIve 98
makInG loGIcal DrIve SettInGS 98
locatInG aloGIcal DrIve 98
InItIalIzInG aloGIcal DrIve 99
reDunDancy check on aloGIcal DrIve 99
mIGratInG aloGIcal DrIve’SraID level 100
creatInG alun clone 100
ManaGInG spare drIves 101
vIewInG alISt of SPare DrIveS 101
vIewInG SPare DrIve InformatIon 102
creatInG aSPare DrIve manually 102
DeletInG aSPare DrIve 102
makInG SPare DrIve SettInGS 102
locatInG aSPare DrIve 103
runnInG SPare check 103
runnInG atranSItIon on aSPare DrIve 103
ManaGInG InItIators 104
vIewInG alISt of InItIatorS 104
aDDInG an fc InItIator 104
DeletInG an fc InItIator 104
aDDInG an IScSI InItIator 105
ManaGInG luns105
vIewInG alISt of lun maPS 105
lun maPPInG anD maSkInG 105
aDDInG alun maP 106
eDItInG alun maP 106
DeletInG alun maP 107
enablInG anD DISablInG lun maSkInG 107
ManaGInG fIbre Channel ConneCtIons 107
vIewInG fc noDe InformatIon 107
vIewInG fc Port InformatIon 107
makInG fc Port SettInGS 108
vIewInG fc Port StatIStIcS 108
vIewInG alISt of fc InItIatorS on the fabrIc 108
vIewInG alISt of fc loGGeD-In DevIceS 109
vIewInG alISt of fc SfPS109
ManaGInG IsCsI ConneCtIons 109
vIewInG alISt of IScSI tarGetS 110
vIewInG IScSI tarGet InformatIon 110
makInG IScSI tarGet SettInGS 111
vIewInG alISt of IScSI PortalS 111
vIewInG IScSI Portal InformatIon 111
aDDInG IScSI PortalS 111
makInG IScSI Portal SettInGS 112
DeletInG IScSI PortalS 112
vIewInG alISt of IScSI PortS 112
vIewInG IScSI Port InformatIon 113
makInG IScSI Port SettInGS 113
vIewInG alISt of IScSI trunkS 113
aDDInG IScSI trunkS 113
makInG IScSI trunk SettInGS 114
DeletInG IScSI trunkS 114
vIewInG alISt of IScSI SeSSIonS 114
vIewInG IScSI SeSSIon InformatIon 114
DeletInG an IScSI SeSSIon 115
vIewInG IScSI ISnS InformatIon 115
makInG IScSI ISnS SettInGS 115
vIewInG alISt of IScSI chaPS116
aDDInG IScSI chaPS116
makInG IScSI chaP SettInGS 116
DeletInG IScSI chaPS116
PInGInG ahoSt or Server on the IScSI network 117
Chapter 5: ManaGeMent wIth the Clu 118
InItIal ConneCtIon 119
makInG aSerIal connectIon 119
makInG atelnet connectIon 119
makInG aSSh connectIon 120
loGGInG Into the clI 120
acceSSInG onlIne helP 121
exItInG the clu 121
loGGInG out of the clI 121
loGGInG back Into the clI anD clu 121
ManaGInG the subsysteM (Clu) 122
makInG SubSyStem SettInGS (clu) 122
runnInG meDIa Patrol (clu) 122
lockInG or unlockInG the SubSyStem (clu) 122
SettInG SubSyStem Date anD tIme (clu) 123
makInG ntP SettInGS (clu) 123
SynchronIzInG wIth antP Server (clu) 123
ManaGInG the raId Controllers (Clu) 124
vIewInG controller InformatIon (clu) 124
clearInG an orPhan watermark (clu) 124
makInG controller SettInGS (clu) 124
locatInG the controller (clu) 125
ManaGInG the enClosure (Clu) 126
vIewInG the encloSureS Summary (clu) 126
vIewInG encloSure InformatIon (clu) 126
makInG encloSur eSettInGS (clu) 126
vIewInG fru vPD InformatIon (clu) 127
vIewInG Power SuPPly StatuS (clu) 127
tovIew the StatuS of the Power SuPPlIeS: 127
locatInG aPower SuPPly (clu) 127
vIewInG coolInG unIt StatuS (clu) 127
vIewInG temPerature SenSor StatuS (clu) 127
vIewInG voltaGe SenSor StatuS (clu) 127
vIewInG battery InformatIon (clu) 128
reconDItIonInG abattery (clu) 128

locatInG an encloSure (clu) 128
vIewInG encloSure toPoloGy (clu) 129
physICal drIve ManaGeMent (Clu) 129
vIewInG alISt of PhySIcal DrIveS (clu) 129
makInG Global PhySIcal DrIve SettInGS (clu) 129
vIewInG PhySIcal DrIve InformatIon (clu) 130
vIewInG PhySIcal DrIve StatIStIcS (clu) 130
SettInG an alIaS (clu) 130
clearInG Stale anD Pfa conDItIonS (clu) 130
forcInG aPhySIcal DrIve offlIne (clu) 131
locatInG aPhySIcal DrIve (clu) 131
ManaGInG dIsk arrays (Clu) 132
vIewInG alISt of DISk arrayS (clu) 132
creatInG aDISk array (clu) 132
creatInG aDISk array – automatIc (clu) 132
creatInG aDISk array – exPreSS (clu) 132
creatInG aDISk array – aDvanceD (clu) 133
DeletInG aDISk array (clu) 134
makInG DISk array SettInGS (clu) 134
vIewInG DISk array InformatIon (clu) 134
accePtInG an IncomPlete array (clu) 135
enablInG meDIa Patrol, PDm, anD Power manaGement on aDISk array (clu) 135
PreParInG the DISk array for tranSPort (clu) 135
rebuIlDInG aDISk array (clu) 135
runnInG meDIa Patrol on aDISk array (clu) 135
runnInG PDm on aDISk array (clu) 136
runnInG tranSItIon on aDISk array (clu) 136
locatInG aDISk array (clu) 136
ManaGInG spare drIves (Clu) 137
vIewInG alISt of SPare DrIveS (clu) 137
creatInG aSPare DrIve (clu) 137
makInG SPare DrIve SettInGS (clu) 137
runnInG SPare check (clu) 138
DeletInG aSPare DrIve (clu) 138
toDelete aSPare DrIve: 138
ManaGInG loGICal drIves (Clu) 138
creatInG aloGIcal DrIve (clu) 138
DeletInG aloGIcal DrIve (clu) 139
vIewInG loGIcal DrIve InformatIon (clu) 139
vIewInG loGIcal DrIve StatIStIcS (clu) 139
vIewInG the loGIcal DrIve check table (clu) 139
makInG loGIcal DrIve SettInGS (clu) 140
InItIalIzInG aloGIcal DrIve (clu) 140
runnInG reDunDancy check (clu) 140
locatInG aloGIcal DrIve (clu) 140
mIGratInG aloGIcal DrIve (clu) 141
creatInG alun clone (clu) 141
ManaGInG the network ConneCtIon (Clu) 142
makInG vIrtual manaGement Port SettInGS (clu) 142
makInG maIntenance moDe SettInGS (clu) 143
ManaGInG fIbre Channel ConneCtIons (Clu) 143
vIewInG noDe InformatIon (clu) 143
vIewInG fIbre channel Port InformatIon 143
vIewInG fIbre channel loGGeD-In DevIceS (clu) 144
makInG fIbre channel Port SettInGS (clu) 144
vIewInG fIbre channel Port StatIStIcS (clu) 144
vIewInG SfP InformatIon (clu) 144
vIewInG fIbre channel Port StatIStIcS (clu) 145
vIewInG fIbre channel InItIatorS (clu) 145
ManaGInG IsCsI ConneCtIons (Clu) 146
vIewInG alISt of IScSI tarGetS (clu) 146
vIewInG IScSI tarGet InformatIon (clu) 147
makInG IScSI tarGet SettInGS (clu) 147
vIewInG alISt of IScSI PortS (clu) 148
vIewInG IScSI Port InformatIon (clu) 148
makInG IScSI Port SettInGS (clu) 148
vIewInG alISt of IScSI PortalS (clu) 148
vIewInG IScSI Portal InformatIon (clu) 149
aDDInG IScSI PortalS (clu) 149
makInG IScSI Portal SettInGS (clu) 149
DeletInG IScSI PortalS (clu) 150
vIewInG alISt of IScSI SeSSIonS (clu) 150
DeletInG an IScSI SeSSIon (clu) 150
vIewInG IScSI SeSSIon InformatIon (clu) 151
vIewInG IScSI ISnS InformatIon (clu) 151
makInG IScSI ISnS SettInGS (clu) 151
vIewInG alISt of IScSI chaPS(clu) 152
aDDInG IScSI chaPS(clu) 152
makInG IScSI chaP SettInGS (clu) 152
DeletInG IScSI chaPS(clu) 152
PInGInG ahoSt or Server on the IScSI network (clu) 152
vIewInG alISt of IScSI trunkS (clu) 153
aDDInG IScSI trunkS (clu) 153
makInG IScSI trunk SettInGS (clu) 153
DeletInG IScSI trunkS (clu) 153
ManaGInG baCkGround aCtIvIty (Clu) 154
vIewInG current backGrounD actIvItIeS (clu) 154
makInG backGrounD actIvIty SettInGS (clu) 154
workInG wIth the event vIewer (Clu) 155
vIewInG runtIme eventS (clu) 155
clearInG runtIme eventS (clu) 155
vIewInG nvram eventS (clu) 155
clearInG nvram eventS (clu) 155
workInG wIth lun MappInG (Clu) 156
enablInG lun maPPInG (clu) 156
vIewInG alISt of InItIatorS (clu) 156
aDDInG an InItIator (clu) 156
DeletInG an InItIator (clu) 157
vIewInG alISt of lun maPS (clu) 157
aDDInG alun maP (clu) 157
eDItInG alun maP (clu) 158
DeletInG alun maP (clu) 158
chanGInG the actIve lun maPPInG tyPe (clu) 158
ManaGInG ups unIts (Clu) 159
vIewInG alISt of uPS unItS (clu) 159
makInG uPS SettInGS (clu) 159
vIewInG uPS InformatIon (clu) 160
ManaGInG users (Clu) 160
vIewInG uSer InformatIon (clu) 160
creatInG auSer (clu) 160
chanGInG another uSer’SSettInGS (clu) 161
chanGInG your own uSer SettInGS (clu) 161
chanGInG another uSer’SPaSSworD (clu) 161
DeletInG auSer (clu) 162
workInG wIth software ManaGeMent (Clu) 163
makInG emaIl SettInGS (clu) 163
makInG SlP SettInGS (clu) 163
makInG web Server SettInGS (clu) 163
makInG telnet SettInGS (clu) 164
makInG SSh SettInGS (clu) 164
makInG SnmP SettInGS (clu) 164
manaGInG SnmP traP SInkS (clu) 164
makInG netSenD SettInGS (clu) 165
manaGInG netSenD recIPIentS (clu) 165
flaShInG throuGh tftP 166
vIewInG flash IMaGe InforMatIon (Clu) 166
ClearInG statIstICs (Clu) 167
restorInG faCtory defaults (Clu) 167
shuttInG down the subsysteM (Clu) 168
ShuttInG Down the aSuS DS300fG2 – telnet connectIon 168
ShuttInG Down the aSuS DS300fG2 – SSh connectIon 168
ShuttInG Down the aSuS DS300fG2 – SerIal connectIon 168
startInG upafter shutdown 169
StartInG uP the aSuS DS300fG2 – telnet connectIon 169
StartInG uP the aSuS DS300fG2 – SSh connectIon 169
StartInG uP the aSuS DS300fG2 – SerIal connectIon 170
restartInG the subsysteM 170
reStartInG aSuS DS300fG2 – telnet connectIon 170
reStartInG aSuS DS300fG2 – SSh connectIon 171
reStartInG aSuS DS300fG2 – SerIal connectIon 171
buzzer 171
makInG buzzer SettInGS 171

SIlencInG the buzzer 171
Chapter 6: MaIntenanCe 172
updatInG the subsysteM fIrMware 172
uPDatInG wIth aSuS StoraGe manaGement 172
uPDatInG wIth the clu 173
uPDatInG wIth uSb SuPPort 174
updatInG physICal drIve fIrMware 175
aSuS StoraGe manaGement 175
reStartInG aSubSyStem 176
replaCInG apower supply 177
removInG the olD Power SuPPly 177
InStallInG anew Power SuPPlyt 177
replaCInG aCoolInG unIt 178
replaCInG aCaChe baCkup battery 179
replaCInG araId Controller – dual Controllers 180
removInG the olD controller 180
InStallInG the new controller 181
replaCInG araId Controller – sInGle Controller 181
removInG the olD controller 182
InStallInG the new controller 182
Chapter 7: teChnoloGy baCkGround 183
dIsk arrays 183
meDIa Patrol 183
PDm 184
loGICal drIves 184
raID levelS 184
raID level mIGratIon 189
StrIPe SIze 192
Sector SIze 192
PreferreD controller ID 192
InItIalIzatIon 192
PartItIon anD format 192
spare drIves 193
DefInItIon 193
oPtIonS 193
requIrementS 193
tranSItIon 193
raId Controllers 194
lun affInIty 194
alua 194
cache PolIcy 195
PreferreD controller ID 196
Power SavInG 196
caPacIty coercIon 196
IsCsI ManaGeMent 197
IScSI on avlan 197
InItIator 198
tarGet 198
Port 199
trunk 199
SeSSIon 199
ISnS 199
chaP 199
PInG 199
Internet protoCols 200
Chapter 8: troubleshootInG 201
asus ds300fG2 Is beepInG 201
SIlencInG the buzzer 201
ledsdIsplay aMber or red 202
front Panel leDS202
DrIve carrIer leDS203
back Panel leDS203
checkInG comPonent InStallatIon 206
Clu reports aprobleM 206
vIewInG runtIme eventS 206
vIewInG nvram eventS 207
checkInG arePorteD comPonent 207
asus storaGe ManaGeMent reports aprobleM208
heaDer 208
DaShboarD tab 208
DevIce tab 208
StoraGe tab 208
aDmInIStratIon tab 208
usb support reports aprobleM 209
enClosure probleMs 209
DIaGnoSInG an encloSure Problem 209
overheatInG 210
Power SuPPlIeS 210
batterIeS 210
raId Controller probleMs 211
maIntenance moDe 211
fInDInG anD correctInG the cauSe of the Problem 211
takInG araID controller out of maIntenance moDe 211
unSaveD Data In the controller cache 212
physICal drIve probleMs 213
dIsk array and loGICal drIve probleMs 213
DISk array DeGraDeD / loGIcal DrIve crItIcal 213
DISk array offlIne / loGIcal DrIve offlIne 214
rePaIrInG an offlIne DISk array or loGIcal DrIve 214
rebuIlDInG aDISk array 215
IncomPlete array 215
ConneCtIon probleMs 216
SerIal connectIonS 216
network connectIonS 216
fIbre channel connectIonS 217
SaS connectIonS 217
browSer DoeS not connect to aSuS StoraGe manaGement 217
power CyClInG the subsysteM 218
event notIfICatIon response 218
Chapter 9: support 225
frequently asked questIons 225
PhySIcal DrIveS 225
StartuP 226
loGGInG In226
connectIon 226
tImeoutS 226
emaIl meSSaGeS 226
uSer manaGement 226
lock 226
creatInG aDISk array or loGIcal DrIve 227
DISk array DeGraDeD 227
DeletInG aDISk array or loGIcal DrIve 227
rebuIlDInG aDISk array 227
meDIa Patrol anD PDm 227
ContaCtInG teChnICal support 228
appendIx a: useful InforMatIon 232
snMp MIb fIles 232
addInG aseCond raId Controller 233
InstallInG aseCond raId Controller 233
raID controller In maIntenance moDe 233
new SettInGS for Dual controllerS 233
Dual controllerS anD Sata DrIveS 234
appendIx b: MultIpathInG on wIndows 235
before you beGIn 235
InstallInG perfeCtpath 236
verIfyInG InstallatIon236
Start menu 236
ServIceS lISt 236
DevIce manaGer 237
runnInG perfeCt path vIew 237
StartInG PerfectPath vIew 237
quIttInG PerfectPath vIew 237
MonItorInG your lunsand paths 238
vIewInG lun ProPertIeS 238
vIewInG Path ProPertIeS 238
vIewInG lun Performance StatIStIcS 238

vIewInG Path Performance StatIStIcS 239
vIewInG eventS 239
clearInG Path StatIStIcS 239
features and settInGs 240
automatIc loaD balancInG for faIlover PolIcy 240
loaD balance PolIcy 240
Path verIfIcatIon 241
PDo removal 241
Performance tab refreSh rate 242
rounD robIn count 242
refreShInG the obJectS 242
vIewInG SyStem InformatIon 243
troubleshootInG 243
updatInG perfeCtpath 244
repaIrInG perfeCtpath 244
reMovInG perfeCtpath 245
PreferreD methoD 245
alternate methoD 1 245
alternate methoD 2 245
appendIx C: MultIpathInG on lInux 246
before you beGIn 246
check InItIal SetuP 246
task 1: MeetInG paCkaGe requIreMents 247
InStallInG PackaGeS 247
verIfyInG PackaGeS – reDhat 247
verIfyInG PackaGeS – SuSe 248
task 2: preparInG the ConfIGuratIon fIle 248
reDhat SyStemS 248
SuSe SyStemS 248
eDItInG aconfIGuratIon fIle 248
task 3: MakInG InItIal host settInGs 249
SettInG the Daemon to run 249
verIfyInG the moDuleS are loaDeD 250
verIfyInG the Daemon IS runnInG 250
task 4: Create and ConfIGure devICes 250
task 5: settInG-up alua 251
reDhat lInux rhel 5.4 251
reDhat lInux rhel 5.5 251
SuSe lInux SleS 10 SP3 251
SuSe lInux SleS 11 252
SuSe lInux SleS 11 SP1 252
rpM paCkaGes and doCuMents for lInux MpIo 253
lInux MpIo: known Issues 254
saMple MultIpath.Conf fIle 255

DS300f G2 Series User Manual
1
Chapter 1: IntroduCtIon
This chapter covers the following topics:
• "About This Manual" on page 2
• "ASUS DS300f G2 Overview" on page 3
• "New Features in the ASUS DS300f G2" on page 3
• "Architectural Description" on page 4
• "Features" on page 6
• "GeneralSpecications"onpage9
• "Warranty and Support" on page 11

DS300f G2 Series User Manual
2
about thIs Manual
This Product Manual describes how to setup, use, and maintain the ASUS DS300f G2 Series and DS300j G2
external disk array subsystems. The manual is organized into chapters as follows:
• "Chapter1:Introduction"onpage1,thischapterprovidesageneraloverviewoftheavailabledevices
intheASUSDS300fG2SeriesandDS300jG2.
• "Chapter2:HardwareInstallation"onpage12describesthestepsnecessaryforinstallingsubsystem
hardwareincludinginstallingharddisksandplacingthedeviceintoaracksystem.
• "Chapter3:Setup"onpage35describessettingupaserialconnectionandthebasicsofhowtouse
thebuilt-incommand-lineinterface(CLI),thebuilt-incommand-lineutility(CLU),andtheembeddedWeb-
basedASUSStorageArrayManagement–Professional(ASUSStorageManagement)software.
• "Chapter4:ManagewithASUSStorageManagement"onpage50providesamoredetaileddescription
ofthevariousmenususedformanagingtheASUSDS300fG2andconnectedDS300jG2expansion
devices.
• "Chapter5:ManagementwiththeCLU"onpage118describesusingtheCLUandCLI(accessto
theCLUisdonethroughtheCLI)tomanagetheASUSDS300fG2throughthenetworkorviaserial
connection.
• "Chapter6:Maintenance"onpage172describeshowtoreplacehardwarecomponentsincludingRAID
controllers,powersupplies,andcoolingunits;howtoupdatermwareforsubsystemsandphysicaldrives.
• "Chapter7:TechnologyBackground"onpage183providesadescriptionofthetechnologiesand
conceptsthatunderlienetworkedRAIDstoragesystemsgenerallyandtheASUSDS300fG2andDS300j
G2subsystemsinparticular.
• "Chapter8:Troubleshooting"onpage201describeswhattodoinresponsetospecicproblemsthat
mightbeencounteredoverthelifetimeoperationoftheASUSDS300fG2andDS300jG2subsystems.
Includedinthechapteraredescriptionsofthevarioustypesofalertsandnoticesdeliveredthoughthe
managementinterfaces(ASUSStorageManagement,CLU,CLI)orhardware(LEDsandaudiblesignals).
• "Chapter9:Support"onpage225includesFrequentlyAskedQuestions(FAQ),howtocontacttechnical
support,howtoreturnasystemforrepair,andwarrantyinformation.
• "AppendixA:UsefulInformation"onpage232
• "AppendixB:MultipathingonWindows"onpage235
• "AppendixC:MultipathingonLinux"onpage246
This manual includes a full table of contents, index, chapter task lists and numerous cross-references to help
youndthespecicinformationyouarelookingfor.
The terms “ASUS DS300f G2” or “subsystem” are used in examples or descriptions throughout this manual to
refer to any of the available ASUS DS300f G2 Series models. The terms “unit” or “device” can refer to any ASUS
DS300f G2 Series or DS300j G2 model.
Also included are four levels of notices:
Warning
A Warning noties you of probable equipment damage or loss of data,
or the possibility of physical injury, and how to avoid them.
Caution
A Caution informs you of possible equipment damage or loss of data and how to
avoid them.
Important
An Important message calls attention to an essential step or point required to complete a
task, including things often missed.
Note
A Note provides helpful information such as hints or alternative ways of doing a task.

DS300f G2 Series User Manual
3
asus ds300fG2 overvIew
All ASUS Storage ASUS DS300f G2 and DS300j G2 models support use of 6 Gb/s SAS and SATA disks.
The DS300 G2 models are coupled with high speed 8 Gb/s Fibre Channel host connectivity and 1 Gb/s iSCSI
host connectivity.
The ASUS DS300f G2 model is coupled with high speed 1 Gb/s iSCSI host connectivity.
Performance
The ASUS Storage ASUS DS300f G2 is built using a 64bit 6-core processor per RAID controller, and support for
6 Gb/s SAS and SATA hard disk drives and solid state drives (SR1). Dual active-active controller modules with
cache mirroring over a PCIe Gen 2 link allow for redundant data paths to ensure data availability while dual power
supply/cooling units minimize downtime and any disruption to business continuity.
GreenraID
ASUS Storage cares about the environment. ASUS DS300f G2 products utilize environmentally friendly production
methodsandmaterialsandaredesignedwithhigh-efciencyinmind.Poweredby80Pluscertiedpowersupplies
thatofferupto85%powerefciency,allASUSDS300fG2devicesimprovetotalcostofownershipbyconserving
power, reducing heat output and improving cooling costs. Additionally, the ASUS Storage as GreenRAID story
includes advanced power management support for hard disk drives providing up to 65% energy savings.
ServIce anD SuPPort
Every ASUS DS300f G2 subsystem is backed by the ASUS Storage Three-Year limited warranty with 24-hour,
7-day English language telephone and e-mail support. In addition to our industry leading warranty, ASUS Storage
offers extended warranty and onsite parts replacement options with service levels with response times as low
four hours.
new featureS In the aSuS DS300fG2
Perfectrebuild™
ThePerfectRebuild™featureisaninnovativeapproachtorebuildingaRAIDarrayinordertosignicantly
reduce the amount of time needed for completion. This frees up CPU resources more quickly to be available for
I/O and other demands. PerfectRebuild™ ignores any portion of the logical drive where no write changes have
occurred, focusing only on the parts that have changed. The conventional approach has been to rebuild the
entire logical drive, even sections with no write changes. This reduction in the total time needed for a rebuild
isespeciallysignicantforverylargedrives.
AdvAnced bAttery flAsh bAckuP
Use the optional Backup Battery Unit (BBU) and Flash modules for maximum data protection in the event of
power loss. High performance RAID arrays operating in write-back mode present a write loss risk in the event
of a power loss. Since data is considered committed as soon as the controller has received it in cache memory,
it will be lost if power is interrupted. The conventional solution is to use a BBU to maintain the RAID cache
for 72 hours. A better solution is to use power from the BBU to write the content of the RAID controller write
cachetonon-volatileashmemoryinordertoextendtheperiodofcacheprotectionbeyondthestandard72
hours provided by a typical BBU.
hArd disk cAche Protection
HD Cache Protection is another capability available for use with high performance RAID arrays that employ
the optional BBU and USB Flash modules. HD Cache Protection uses the BBU and USB Flash modules to protect
against loss of HDD cache data, eliminating the need to add an expensive universal power supply (UPS). The
HDDcacheiswrittentoashmemory,again,usingpowerfromtheBBUinordertoprotecttheHDDcache
beyond the standard 72 hours.

DS300f G2 Series User Manual
4
arChIteCtural desCrIptIon
The ASUS DS300f G2 subsystems are suitable for Direct Attached Storage (DAS), Storage Area Network (SAN),
and Expanded Storage with the DS300j G2.
Figure 1 - 1: ASUS DS300f G2 front view
• 16-bay SATA/SAS
Figure 1 - 2: ASUS DS300f G2 back view
• Two 8Gb/s FC ports per controller
• Four 1Gb/s iSCSI ports per controller
• One JBOD Expansion port per controller
• Three PSU
• Two Cooling Units (each Cooling Unit for ASUS DS300f G2 models include two fans and a BBU)


DS300f G2 Series User Manual
6
features
controller moDule featureS
drive suPPort
• 3.5-inch and 2.5-inch form factor
• Hard disk drives (HDDs) and Solid State drives (SSDs)
• SAS, 6 Gb/s and 3 Gb/s
• SATA, 6 Gb/s and 3 Gb/s
• Supports any mix of SAS and SATA drives simultaneously in the same enclosure
For a list of supported drives, go to ASUS Storage support:
http://www.ASUS Storage.com/support/
SATA physical drives require a SAS-to-SATA adapter, available from ASUS Storage.
externAl i/o Ports Per controller
• ASUS DS300f G2: Two 8 Gb/s Fibre Channel ports compatible with 4 Gb/s and 2 Gb/s and four 1 Gb/s iSCSI
ports
• ASUS DS300f G2: Four 1 Gb/s iSCSI ports
• All models: One external SAS port with an SFF-8088 SAS connector, supports up to 4 cascading JBOD
expansion units (FCS), up to 6 cascading JBOD expansion units (SR1)
dAtA cAche
• 2 GB data cache per controller.
Aportionofthedatacacheissharedwiththecontrollerrmware
• Protected with hot-swappable battery backup unit (BBU)
oPeratIonal featureS
rAid level suPPort
• 0, 1, 1E, 3, 5, 6, 10, 30, 50, and 60
rAid striPe size suPPort
• 64K, 128K, 256K, 512K, and 1MB
hot sPAre drives
• Global
• Dedicated
• Revertible option
MAxiMuM lunssuPPorted
• Total LUNs: 256
• Per Array: 32
AdvAnced storAge feAtures
• Perfect Rebuild
• Advanced Battery Flash Backup
• HDD Cache Backup (SR3)
• Online LUN Clone (SR1)
• Advanced Cache Mirroring over PCIe Gen2
• Simple, drag-and-drop LUN Masking and Mapping
• Asymmetric LUN Unit Access (ALUA)
• Volume Copy
• PerfectFlash - Non-Disruptive Software Update
• I/O performance & power monitoring tools
• Guaranteed Latency Technology (an advanced OEM feature)
• USB Service Log
Note
A maximum of 30 logical drives (LD) are supported.

DS300f G2 Series User Manual
7
bAckground Activities
• Media Patrol
• Background Synchronization
• Foreground Initialization
• Rebuild
• Redundancy Check
• Disk SMART Polling
• Online Capacity Expansion (OCE)
• RAID Level Migration (RLM)
• UPS Monitoring
• Feature rich task scheduler for background activities
PerfectrAid feAtures
• Predictive Data Migration (PDM)
• Intelligent Bad Sector Remapping
• SMART Error Handling
• NVRAM Error Logging
• Disk Slot Power Control
• Read/Write Check Table
• Write Hole Table
greenrAid feAtures
• Four levels of advanced power management disk drive (MAID) support
• Efcient80PlusBronzeCertiedpowersupplies
SyStem manaGement
MAnAgeMent interfAces
Note
There are two options to provide the physical connection for system management for the
ASUS DS300f G2 models, an RJ-11 serial port or an RJ-45 Ethernet network port An RJ-
11-to-DB9adapterisshippedwitheachASUSDS300fG2model.
• Browser-based management with ASUS Storage Management over Ethernet
• Command Line Interface (CLI) over Serial Port, Ethernet via Telnet, or SSH
• Command Line Utility (CLU) over Serial Port, Ethernet via Telnet, or SSH
• Third Party Management Support via SNMP

DS300f G2 Series User Manual
8
suPPorted oPerAting systeMs
Operating systems run on the Host PC, from which you monitor and manage the ASUS DS300f G2 subsystem.
Supported Operating Environments
Core Platform Type Notes
Microsoft
WindowsServer2003EnterpriseEditionR2withSP2 x86/x64
WindowsServer2008DatacenterEditionwithSP2 x86/x64
WindowsServer2008R2SP1DatacenterEdition x64
RedHat
EnterpriseLinux5.7 x86/x64
EnterpriseLinux6.3 x86/x64
SuSE
LinuxEnterpriseServer10+SP4 x86/x64 SUSELINUXEnterpriseServer10+
SP4-32bitcan’tsupportdualcontroller
bootfromSAN
LinuxEnterpriseServer11+SP2 x86/x64 SUSELINUXEnterpriseServer11+
SP2-32bitcan’tsupportdualcontroller
bootfromSAN
suPPorted browsers
Browsers run on the host PC or server, from which you monitor and manage the ASUS DS300f G2 subsystem
using ASUS Storage Management. The browsers listed here meet the minimum version requirements for browser
compatibility:
• Mozilla Firefox 14.0.1
• Google Chrome 20.0.1132.57 m
• Internet Explorer 7 (Version: 7.0.5730.13)
• Internet Explorer 8 (Version: 8.0.6001.18702)
• InternetExplorer9(Version:)
• Safari 5.1.7 for Windows
• Safari 5.1.7 for MAC
• Mozilla Firefox for Linux 3.6.13
For the latest list of supported browsers, go to ASUS Storage support:
http://www.ASUS Storage.com/support/

DS300f G2 Series User Manual
9
General speCIfICatIons
Power suPPlies
• Hot swap and redundant with PFC, 100-240 Vac auto-ranging, 50 -60 Hz, N+1 design. Meets 80Plus bronze.
voltAge
• 100-240 VAC
• Auto-Ranging
current (MAxiMuM)
• 4 A @ 115 VAC
• 2 A @ 230 VAC
Power conversion efficiency
• >80% @ 110V (>20% load)
• >80% @ 240V (>20% load)
oPerAting environMent
teMPerAture rAnge
• Operational:5°to35°C(41°to95°F)
• Non-Operational: -40° to 60°C (-40° to 140°F)
huMidity rAnge
• Operational:10%to90%(Non-Condensing)
• Non-Operational:5%to95%(Non-Condensing)
noise, shock, And vibrAtion
Acoustic noise levels
• Typical: 55 dB
• Maximum: 75 dB
shock
• Operational: 5G, 11 ms duration
• Non-Operational: 30G, 11ms duration
vibrAtion
• Operational: 0.2G, sinewave, 0.5 oct/min, 5 to 500 Hz
• Non-Operational: 1G, 5 to 500 Hz
diMensions
(Height, Width, Depth)
• 131x447x507mm(5.2x17.6x19.96in)
weight
• 31.3kg/69lbs(withdrivesinstalled)
• 20.1 kg / 44.3 lbs (without drives installed)

DS300f G2 Series User Manual
10
sAfety And environMentAl
eMi / rfi stAteMents
bsMi
ce
Warning: This is a class A product. In a domestic environment this product may cause
radio interference in which case the user may be required to take adequate measures.
fcc
This device complies with Part 15 of the FCC Rules. Operation is subject to the following two conditions: (1) this
device may not cause harmful interference, and (2) this device must accept any interference received, including
interference that may cause undesired operation.
gost-r
kcc
vcci
environMentAl stAndArds
• RoHS
• GreenPC
• WEEE
wArnings And cAutions
Warnings and Cautions are placed in this Product Manual beside the user actions to which they apply.
Youcanndthesewarningsandcautionsunder:
• "Unpacking the ASUS DS300f G2" on page 13
• "Mounting ASUS DS300f G2 in a Rack" on page
14
• "Installing Physical Drives" on page 16
• "Logging into ASUS Storage Management" on
page 44
• "Restoring Factory Default Settings" on page
55
• "ImportingaCongurationScript"onpage57
• "ExportingaCongurationScript"onpage57
• "Silencing the Buzzer" on page 63
• "Making Virtual Management Port Settings" on
page 68
• "Importing a User Database" on page 71
• "Changing a Background Activity Schedule" on
page 74
• "Enabling or Disabling a Scheduled Background
Activity" on page 74
• "Battery Reconditioning" on page 77
• "ForcingaPhysicalDriveOfine"onpage90
• "Deleting a Disk Array" on page 93
• "Deleting a Logical Drive" on page 98
• "Initializing a Logical Drive (CLU)" on page 140
• "Deleting an FC Initiator" on page 104
• "Updating with ASUS Storage Management" on
page 172
• "Updating with the CLU" on page 173
• "Updating with USB Support" on page 174
• "Updating Physical Drive Firmware" on page
175
• "Replacing a Cache Backup Battery" on page
179
• "Replacing a RAID Controller – Single Controller"
on page 181
• "Initialization" on page 192
• "USB Support Reports a Problem" on page 209
• "Unsaved Data in the Controller Cache" on page
212

DS300f G2 Series User Manual
11
wArrAnty And suPPort
wArrAnty
• Three year complete system limited warranty
• Battery Backup Unit has a one year limited warranty
• Optional 2-year extended warranty
• Optional onsite parts replacement program
ASUS Storage Technology, Inc. (“ASUS Storage”) warrants that for three (3) years from the time of the delivery
of the
product to the original end user except for one (1) year warranty on the battery backup unit:
a)theproductwillconformtoASUSStorage’sspecications;
b) the product will be free from defects in material and workmanship under normal use and service.
This warranty:
a)appliesonlytoproductswhicharenewandincartonsonthedateofpurchase;
b)isnottransferable;
c)isvalidonlywhenaccompaniedbyacopyoftheoriginalpurchaseinvoice;
d) is not valid on spare parts.
This warranty shall not apply to defects resulting from:
a)improperorinadequatemaintenance,orunauthorizedmodication(s),performedbytheend
user;
b)operationoutsidetheenvironmentalspecicationsfortheproduct;
c) accident, misuse, negligence, misapplication, abuse, natural or personal disaster, or maintenance
by anyone other than a ASUS Storage or a ASUS Storage authorized service center.
suPPort
• 24 hour, 7 days a week, 365 days a year e-mail and phone support (English only)
• 24 hour, 7 days a week, 365 days a year access to ASUS Storage support site
• Firmware and compatibility lists

DS300f G2 Series User Manual
12
Chapter 2: hardware InstallatIon
This chapter covers the following topics:
• "Unpacking the ASUS DS300f G2" on page 13
• "Mounting ASUS DS300f G2 in a Rack" on page 14
• "Installing Physical Drives" on page 16
• "Making Management and Data Connections" on page 18
• "Making Serial Cable Connections" on page 29
• "Connecting the Power" on page 30
• "LED Behavior" on page 30

DS300f G2 Series User Manual
13
unpaCkInG the asus ds300fG2
The ASUS DS300f G2 box contains the following items:
• ASUSDS300fG2Unit(PTVR2K)
• Quick Start Guideprinted
• RJ11-to-DB9serialdatacable
• Screwsfordiskdrives
(70piecesfor16-bay)
• 1.5m(4.9ft)Powercords(3cordsfor3PSUinstalled,4cordsfor4PSUinstalled)
• CDwithSNMPles,Product Manual andQuick Start Guide inPDFformat
• Slidingrailassemblyforrackmounting
The DS300j G2 box contains the following items:
• DS300jG2Unit(PTVJ2K)
• QuickStartGuideprinted
• RJ11-to-DB9serialdatacable
• Screwsfordiskdrives
(70piecesfor16-bay)
• Slidingrailassemblyforrackmounting
• 1.5m(4.9ft)Powercords(3cordsfor3PSUinstalled,4cordsfor4PSUinstalled)
• SAScable(1cableJ2600sS/2cablesJ2600sD)
• CDwithSNMPles,Product Manual and Quick Start GuideinPDFformat
Warning
The electronic components within the ASUS DS300f G2 enclosure are
sensitive to damage from Electro-Static Discharge (ESD). Observe
appropriate precautions at all times when handling the ASUS DS300f G2 or its
subassemblies.
Cautions
There is a risk of explosion if battery is replaced by an incorrect type.
Dispose of used batteries according to the instructions.

DS300f G2 Series User Manual
14
MountInG asus ds300fG2 In araCk
Cautions
• Do not populate any unit with hard drives until it has been securely installed in the rack.
• At least two persons are required to safely lift, place, and attach the ASUS DS300f G2 or
DS300j G2 unit into a rack system.
• Do not lift or move the ASUS DS300f G2 or DS300j G2 unit by the handles, power supplies
or the controller units. Hold the subsystem itself.
• Do not install the ASUS DS300f G2 or DS300j G2 unit into a rack without rails to support the
subsystem.
• Onlyaqualiedtechnicianwhoisfamiliarwiththeinstallationprocedureshouldmount
and install the ASUS DS300f G2 or DS300j G2 unit.
• Mounttherailstotherackusingtheappropriatescrewsandangenuts,fullytightened,at
each end of the rail.
• Do not load the rails unless they are installed with screws as instructed.
• The rails available for the ASUS Storage ASUS DS300f G2 or DS300j G2 unit are designed
to safely support that ASUS Storage ASUS DS300f G2 or DS300j G2 unit when properly
installed. Additional loading on the rails is at the customer’s risk.
• ASUS Storage Technology, Inc. cannot guarantee that the mounting rails will support your
ASUS Storage ASUS DS300f G2 or DS300j G2 unit unless you install them as instructed.
Note
In order to reduce the weight of the ASUS DS300f G2 enclosure, you can remove the
power supplies. If your ASUS DS300f G2 shipped with physical drives installed, you can
remove all of the drive carriers as well.
Mounting rails are included with the ASUS DS300f G2.
To install the ASUS DS300f G2 subsystem into your rack:
1. Attach the mounting rail assemblies to the rack posts, using screws and nuts from your
rack system.
• Therailhalvesarerivetedtogetherandusenoadjustmentscrews.
• Thefront-leftandfront-rightmountingrailendsarelabeled.
Figure 2 - 1: Installing the rails onto your rack
• Allrailends,frontandrear,attachattheoutsideoftherackposts.
• Theguidepinsattherailendsalignwiththeholesintherackposts.
• Tightenthescrewsandnutsaccordingtoinstructionsforyourracksystem.
This manual suits for next models
2
Table of contents
Other Asus Storage manuals

Asus
Asus Travelair-AC User manual

Asus
Asus DS300j User manual

Asus
Asus AN200 External HDD User manual

Asus
Asus Leather External HDD User manual

Asus
Asus RS720-E7/RS12 User manual

Asus
Asus WL-HDD User manual

Asus
Asus Vento BS-F3 User manual

Asus
Asus AR200 User manual

Asus
Asus DS300i User manual

Asus
Asus Zendisk AS400 User manual

Asus
Asus Hyper Express User manual

Asus
Asus Leather External HDD USB 3.0 User manual

Asus
Asus EHD-A1T Instruction manual

Asus
Asus KR 2.5" User manual

Asus
Asus KR External HDD User manual

Asus
Asus PN250 External HDD User manual

Asus
Asus DS300i User manual

Asus
Asus SDRW-08D2S-U User manual

Asus
Asus WHD-A1 User manual

Asus
Asus Travelair N User manual