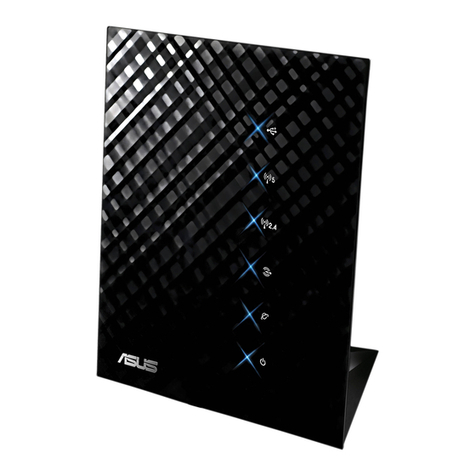
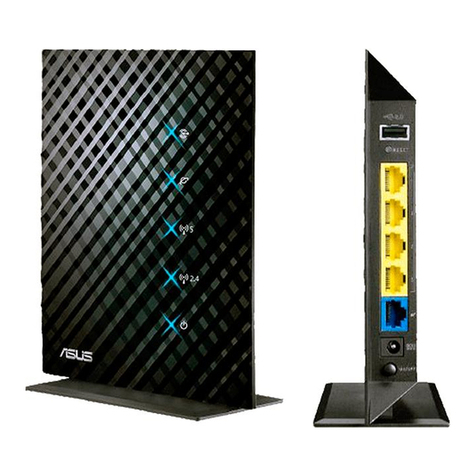
Asus RT-N53 User manual

RT-N53

Q6780 / First Edition / July 2011
English.................................................................................................................................................3
Español................................................................................................................................................16
Français ...............................................................................................................................................29
Português do Brasil.........................................................................................................................42

3
Package contents
English
RT-N53 Wireless Router Network cable
Power adapter Quick Start Guide
Support CD (User Manual/utility software) Warranty card
Hardware features
NOTES:
•If any of the items is damaged or missing, contact ASUS for technical inquiries
and support. Refer to the ASUS Support Hotline list at the back of this guide.
•Keep the original packaging material in case you would need future warranty
services such as repair or replacement.
Hardware features
LAN LED
WAN LED
5GHz LED
2.4GHz LED
Power LED
Stand
WPS
WAN (Internet)
port
Power (DC-In)
port
WPS button
Power switch
Reset button
Wall mounting
hole
LAN 1~4 ports

4
Positioning your wireless router
For the best wireless signal transmission between the wireless router and the network
devices connected to it, ensure that you:
•Place the wireless router in a centralized area for a maximum wireless coverage for the
network devices.
•Keep the device away from metal obstructions and away from direct sunlight.
•Keep the device away from 802.11g or 20MHz only Wi-Fi devices, 2.4GHz computer
peripherals, Bluetooth devices, cordless phones, transformers, heavy-duty motors,
prevent signal interference or loss.
•For the best front-to-rear coverage, place the wireless router in an upright position.
•For the best up-and-down coverage, place the wireless router in an inclined position.
•http://www.asus.com to
English

5
English
Mounting options
Mounting to the stand
1. Locate the mounting holes at the bottom of the wireless
router.
2. Align and insert the stand’s mounting hooks to the
wireless router’s mounting holes.
Dismount from the stand
1. Hold the wireless router with one hand on the upside
and the other hand under the stand, ensuring that the
I/O ports facing you.
2. Follow the direction of the arrow shown below to apply
force and remove the stand.
NOTE:
It's normal if you hear squeaking while
dismounting the RT-N53 from the stand.
WPS

6
Dismount from the wall
1. Hold the edge of the front
cover (near the I/O ports).
2. Follow the direction of the
arrow shown below to apply
force and dismount the
RT-N53.
2. Locate the mounting holes at the back of the wireless router.
3. Align and insert the stand’s mounting hooks to the wireless router’s
mounting holes.
Mounting on the wall
1. Locate the two holes on the stand and
secure the stand to the wall with screws.
or
English

7
Before you proceed
1. Unplug and disconnect the wires/cables from your existing modem setup and
release your computer’s outmoded IP address.
1. Unplug the AC adapter from the power outlet and disconnect it from your cable/ADSL
modem.
2. Disconnect the network cable from your cable/ADSL modem.
3. Reboot your computer (recommended).
WARNING! Before disconnecting the wires/cables, ensure that your cable/ADSL
battery, remove it as well.
4
English
Modem
OFF!
12
3

8
3. Using another network cable, connect your modem to your wireless router’s WAN
port.
4. Insert your modem’s AC adapter to the DC-In port and plug it to a power outlet.
1. Insert your wireless router’s AC adapter to the DC-In port and plug it to a power outlet.
2. Using the bundled network cable, connect your computer to your wireless router’s
LAN port.
2. Set up your wireless environment.
Modem
WPS
1
2
3
4
IMPORTANT! Ensure that the WAN and LAN LEDs are blinking.
3. Disable some settings on your computer.
A. Disable the proxy server, if enabled.
B. Set the TCP/IP settings to automatically obtain an IP address.
C. Disable the dial-up connection, if enabled.
NOTE: For more details on disabling your computer settings, refer to Frequently
Asked Questions (FAQs).
English

9
English
1. Congure your wireless settings via the wireless router’s web graphics user
interface (web GUI).
a. Launch your web browser such as Internet Explorer, Firefox, Google Chrome, or Safari.
Getting started
NOTE: If QIS does not launch automatically, follow these steps to manually
launch QIS:
• On your web browser, key in http://192.168.1.1.Use the default username
admin and password admin to log into the user interface.
• Click GO
Map page.
b. The wireless router’s Quick Internet Setup (QIS) feature automatically detects if your
ISP connection type is Dynamic IP, PPPoE, PPTP, L2TP, and Static IP. Key in the
necessary information for your connection type.
NOTES:
•
default settings.
• If QIS does not detect your Internet connection type, click Skip to manual
setting
IMPORTANT! Obtain the necessary information about your Internet connection
type from your Internet Service Provider (ISP).

10
c. Assign the network name (SSID) and security key
for your 2.4GHz and 5GHz wireless connection.
NOTE: You can assign a network name with up to 32 characters.
d. Internet connection and wireless setup are
completed.
2.4GHz Wireless Settings
Network Name (SSID):
Security Key:
5GHz Wireless Settings
Network Name (SSID):
Security Key:
Router Settings
Username:
Password:
IMPORTANT! Keep this information in a secure location.
2. Write down your router’s settings.
English

11
English
Frequently Asked Questions (FAQs)
After following the steps, I still cannot access the wireless router’s web
graphics user interface (web GUI) to congure the wireless router settings.
A. Disable the proxy server, if enabled.
Windows® 7
1. Click Start > Internet Explorer to launch the web
browser.
2. Click Tools > Internet options > Connections tab > LAN
settings.
3. From the Local Area Network (LAN) Settings screen,
untick Use a proxy server for your LAN.
4. Click OK when done.
MAC OS
1. From your Safari browser, click Safari >Preferences >
Advanced > Change Settings...
2. From the Network screen, deselect FTP Proxy and Web
Proxy (HTTP).
3. Cllick Apply Now when done.
NOTE: Refer to your browser's help feature for
details on disabling the proxy server.

12
B. Set the TCP/IP settings to automatically obtain an IP address.
Windows® 7
1. Click Start > Control Panel > Network and Internet
> Network and Sharing Center > Manage network
connections.
2. Select Internet Protocol Version 4 (TCP/IPv4), then
click Properties.
3. To obtain the IPv4 IP settings automatically, tick Obtain
an IP address automatically.
4. Click OK when done.
MAC OS
1. Click the Apple icon located on the top left of your
screen.
2. Click System Preferences > Network > Congure...
3. From the TCP/IP tab, select Using DHCP in the
Congure IPv4 dropdown list.
4. Cllick Apply Now when done.
NOTE: Refer to your operating system’s help
and support feature for details on configuring
your computer’s TCP/IP settings.
English

13
English
C. Disable the dial-up connection, if enabled.
D. Close all running web browsers.
NOTE: Refer to your browser's help feature for details on disabling the dial-up
connection settings.
Windows
®
7
1. Click Start > Internet Explorer to launch the browser.
2. Click Tools > Internet options > Connections tab.
3. Tick Never dial a connection.
4. Click OK when done.
The client cannot establish a wireless connection with the router.
Out of Range:
• Put the router closer to the wireless client.
• Try to change the channel settings.
Authentication:
• Use wired connection to connect to the router.
• Check the wireless security settings.
• Press the Reset button at the rear panel for more than ve seconds.
Cannot nd the router:
• Press the Reset button at the rear panel for more than ve seconds.
• Check the setting in the wireless adapter such as SSID and encryption settings.

14
Cannot access the Internet via wireless LAN adapter.
• Move the router closer to the wireless client.
• Check whether the wireless adapter is connected to the correct wireless router.
• Check whether the wireless channel in use conforms to the channels available in your
country/area.
• Check the encryption settings.
• Check if the ADSL or Cable connection is correct.
• Retry using another Ethernet cable.
If the ADSL “LINK” light blinks continuously or stays off, Internet access is
not possible - the Router is unable to establish a connection with the ADSL
network.
• Ensure that all your cables are all properly connected .
• Disconnect the power cord from the ADSL or cable modem, wait a few minutes, then
reconnect the cord.
• If the ADSL light continues to blink or stays OFF, contact your ADSL service provider.
Network name or encryption keys are forgotten.
• Try setting up the wired connection and conguring the wireless encryption again.
• Press the Reset button of the wireless router for more than ve seconds.
• Factory default settings:
User name / Password:
admin / admin IP address:
192.168.1.1 SSID: ASUS
Where can I nd more information about the wireless router?
• User Manual in the support CD
• Online FAQ site: http://support.asus.com/faq
• Technical Support site: http://support.asus.com/techserv
• Customer Hotline: Refer to the Support Hotline in this Quick Start Guide
English

15
English
SUPPORT HOTLINE
Area Hotline Number Support
Languages Availability
USA/Canada 1-812-282-2787 English Mon. to Fri.
8:30-12:00am EST
(5:30am-9:00pm PST)
Sat. to Sun.
9:00am-6:00pm EST
(6:00am-3:00pm PST)
Brazil 4003 0988 (Capital) Portuguese Mon. to Fri.
9:00am-18:00
0800 880 0988
(demais localidades)

16
Español
Contenido del paquete
Router inalámbrico RT-N53 Cable de red
Adaptador de alimentación Guía de inicio rápido
CD de soporte (Manual/software de utilidad) Tarjeta de garantía
Características de hardware
LAN LED
WAN LED
5GHz LED
2.4GHz LED
LED de ali-
mentación
Base
WPS
Puerto WAN
(Internet)
Puerto de alimen-
tación (entrada
de DC)
Botón WPS
Conmutador
de encendido y
apagado
Botón Restablecer
Oricio para
instalación en
pared
LAN 1~4 Puertos
NOTAS:
• Si cualquiera de los artículos falta o está dañado, póngase en contacto con
ASUS para realizar preguntas técnicas u obtener soporte técnico. Consulte la
lista de números de teléfono de soporte técnico de ASUS que se encuentra en
la parte posterior de esta guía.
• Conserve el material de embalaje original por si necesitara hacer uso de la
garantía para realizar reparaciones o sustituciones.

17
Español
Ubicar el router inalámbrico
Para conseguir la mejor transmisión de señal inalámbrica entre el router inalámbrico y los
dispositivos de red conectados a él, asegúrese de:
• Colocar el router inalámbrico en un área centralizada para conseguir la máxima cobertura
inalámbrica para los dispositivos de red.
• Mantenga el dispositivo alejado de obstáculos metálicos y de la luz solar directa.
• Mantenga el producto alejado de dispositivos WiFi de 802.11g o 20 MHz, equipos periféricos
de 2,4 GHz, dispositivos Bluetooth, teléfonos inalámbricos, transformadores, motores de alto
rendimiento, luces uorescentes, hornos microondas, frigorícos y otros equipos industriales
para evitar interferencias o pérdidas de señal.
• Para conseguir la mejor cobertura horizontal, coloque el router inalámbrico en posición
vertical.
• Para conseguir la mejor vertical, coloque el router inalámbrico en posición inclinada.
• Actualícese siempre a la versión be rmware más reciente. Visite el sitio Web de ASUS en
http://www.asus.com para obtener las actualizaciones de rmware más recientes.

18
Español
Opciones de instalación
Instalación en la base
1. Localice los oricios de instalación situados en la parte
inferior del enrutador inalámbrico.
2. Alinee los ganchos de la base con los oricios de
instalación del enrutador inalámbrico e inserte los
primeros en los segundos.
Desmontar la base
1. Sujete el enrutador inalámbrico con una mano por la
parte de arriba y coloque la otra mano debajo de la
base, asegurándose de que los puertos de E/S están
orientados hacia usted.
2. Siga la dirección de la echa que se muestra a
continuación para aplicar fuerza y quite la base.
NOTA:
Es normal que escuche un chasquido al
desmontar el dispositivo RT-N53 de la base.

19
Español
Instalación en la pared
1. Localice los dos oricios de la base y asegure
esta a la pared con tornillos.
2. Localice los oricios de instalación situados en la parte posterior del
enrutador inalámbrico.
3. Alinee los ganchos de la base con los orificios de instalación del
enrutador inalámbrico e inserte los primeros en los segundos.
Desmontar el dispositivo de la
pared
1. Sujete el borde de la tapa
frontal (junto a los puertos de
E/S).
2. Siga la dirección de la echa
que se muestra a continuación
para aplicar fuerza y desmonte
el dispositivo RT-N53. o

20
Español
Antes de proceder
1. Desenchufe y desconecte todos los cables de la instalación de módem exis-
tente y libere la dirección IP obsoleta de su PC.
1. Desenchufe el adaptador de CA de la red eléctrica y desconéctelo del módem por
cable/ADSL.
2. Desconecte el cable de red del módem por cable/ADSL.
3. Reinicie su PC (recomendado).
¡ADVERTENCIA! Antes de desconectar todos los cables, asegúrese de que el
módem por cable/ADSL haya permanecido apagado durante, al menos, dos
minutos. Si el módem tiene una batería de reserva, quítela también.
Modem
OFF!
12
3
Other manuals for RT-N53
2
Table of contents
Languages:
Other Asus Wireless Router manuals

Asus
Asus RT-AC68U User manual

Asus
Asus RT-AX86U User manual

Asus
Asus ExpertWiFi EBR63 User manual

Asus
Asus WL-330N3G User manual

Asus
Asus RT-AX89X User manual

Asus
Asus ZenWiFi XD6 User manual

Asus
Asus WL-500gP V2 User manual

Asus
Asus WL-330N User manual

Asus
Asus RT-AC68U User manual

Asus
Asus RT-AC59U V2 User manual

Asus
Asus WL-AM604g User manual
Asus
Asus ZenWiFi Pro ET12 User manual

Asus
Asus RT-AC66U B1 User manual
Asus
Asus RT-N12HP User manual

Asus
Asus RT-AX5400 User manual

Asus
Asus RT-ACRH17 User manual

Asus
Asus RT-N10E EZ N User manual

Asus
Asus WL-107G User manual

Asus
Asus RT-G32 - Wireless Router User manual

Asus
Asus RT-AX57 GO User manual