INSTALLATION . . . . . . . . . . . . . . . . . . . . . . 3
BeforeYou Install ...........................3
Table/Desk Installation...................5
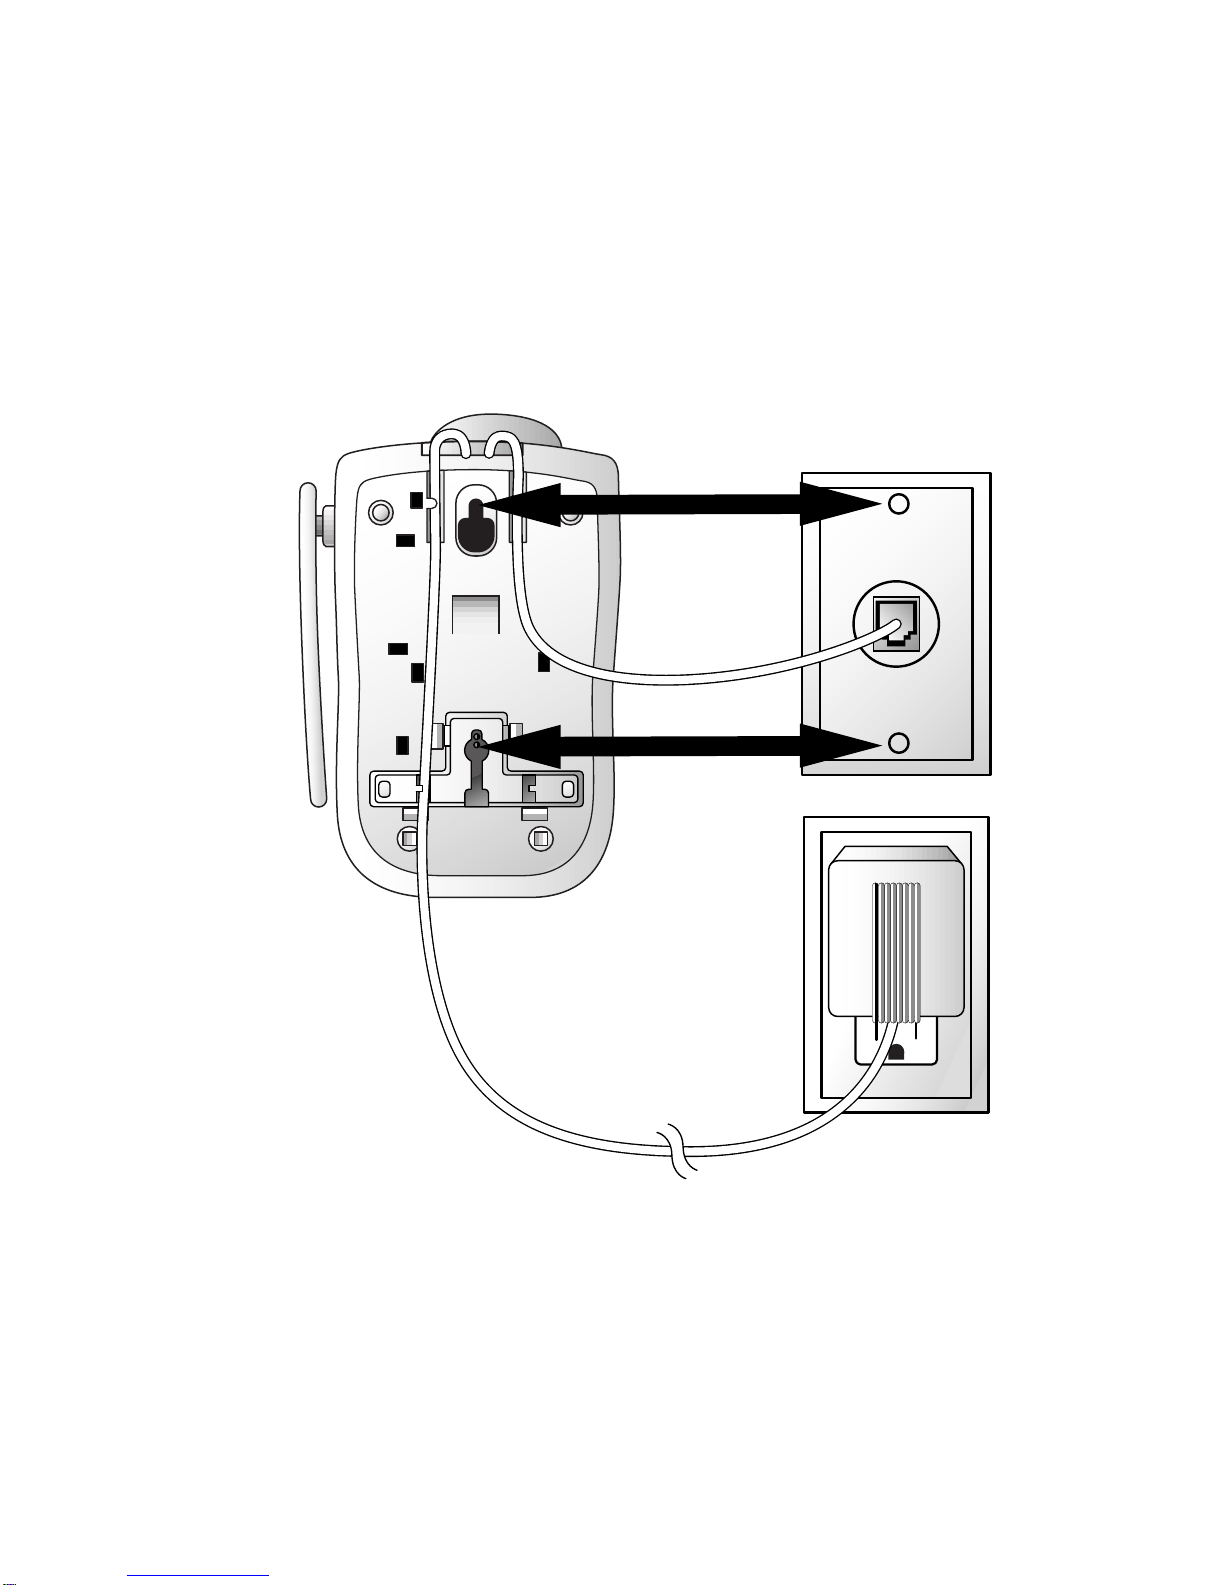
Wall Installation..............................6
TELEPHONE OPERATION . . . . . . . 8
Make orAnswer a Call ...................8
End a Call.......................................8
Change Channel.............................8
Redial .............................................8
HandsetVolume .............................8
Flash/CallWaiting...........................8
Page/Handset Locator....................9
TemporaryTone Dialing...............10
Handset Ringer Style....................10
Ringer Off/Battery Save ...............10
Headset Jack.................................11
Operating Range ..........................11
TELEPHONE MEMORY . . . . . . . . . .12
Store Memory Numbers...............12
Change/Replace a Stored
Memory Number......................12
Dial Memory Numbers.................12
Store a Pause in a
Memory Number......................12
Directory Label............................12
BATTERIES. . . . . . . . . . . . . . . . . . . . . . . . . . .13
Charging the Handset
Battery Pack..............................13
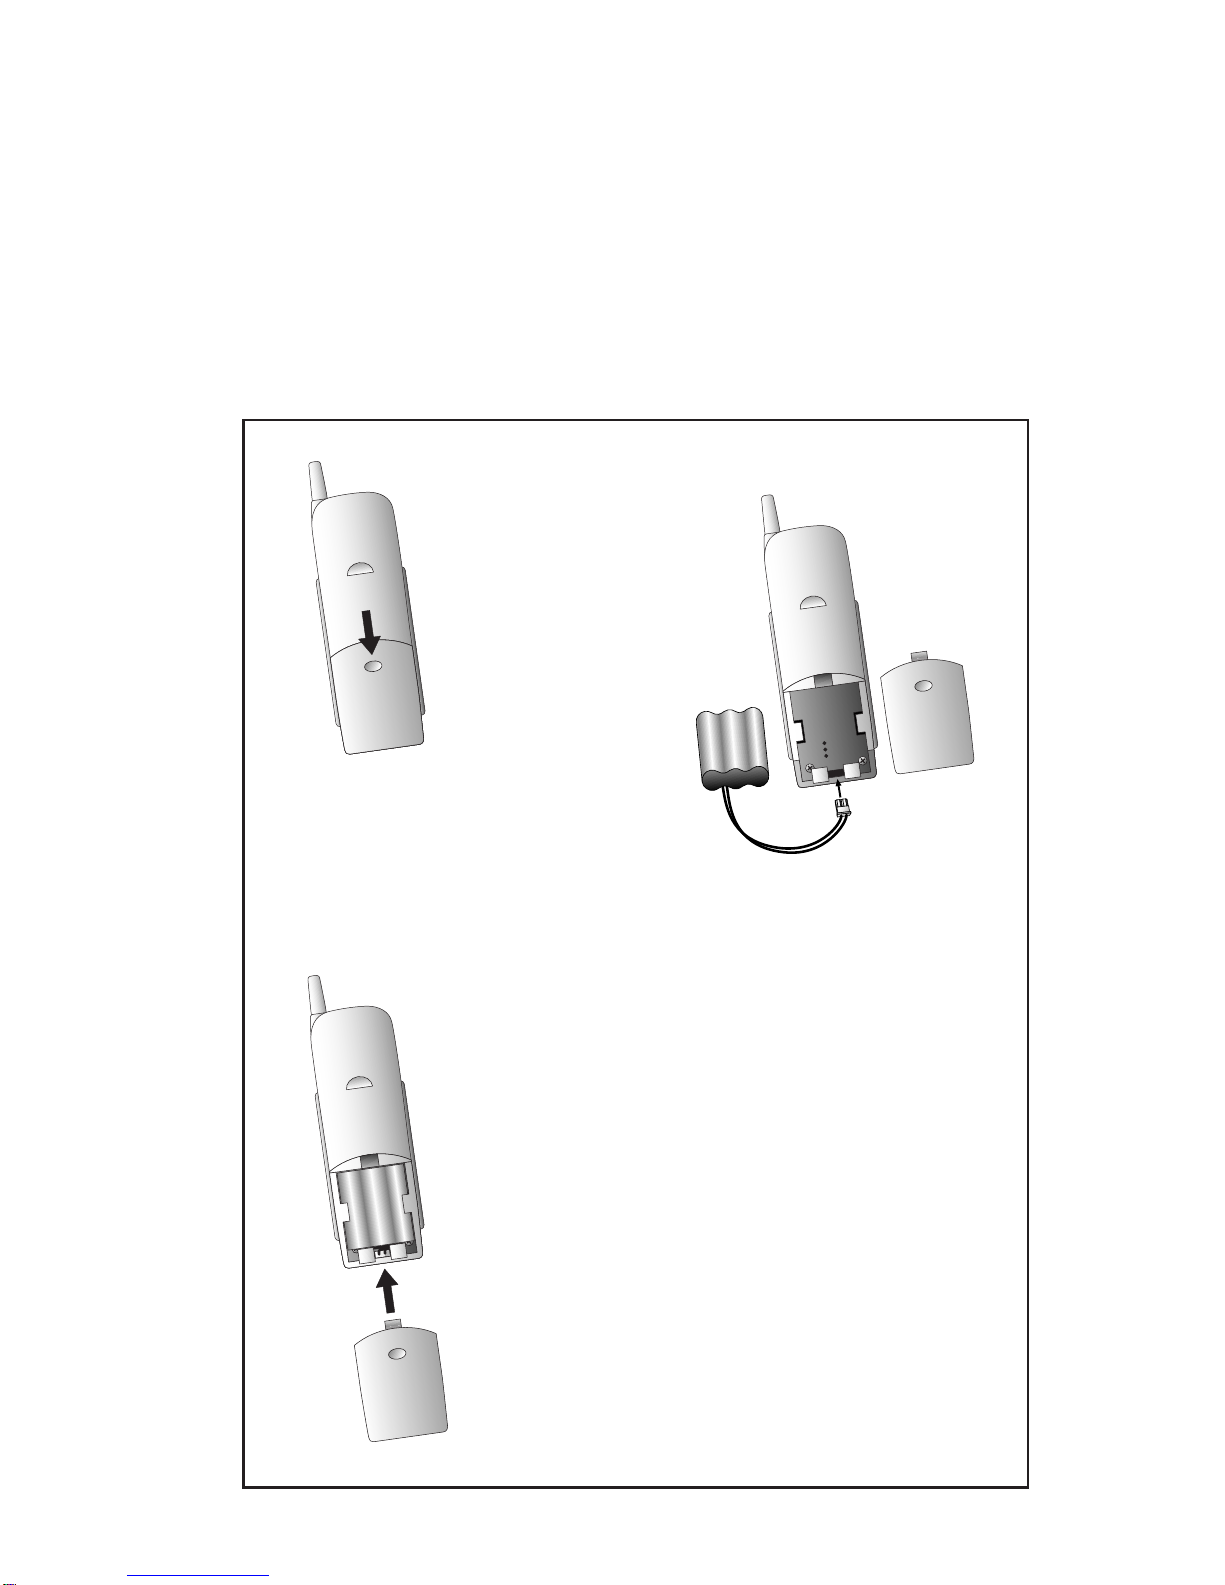
Replacing the Handset
Battery Pack..............................14
IN CASE OF DIFFICULTY . . . . . . . . .15
CONTENTS
1