Getting started
1
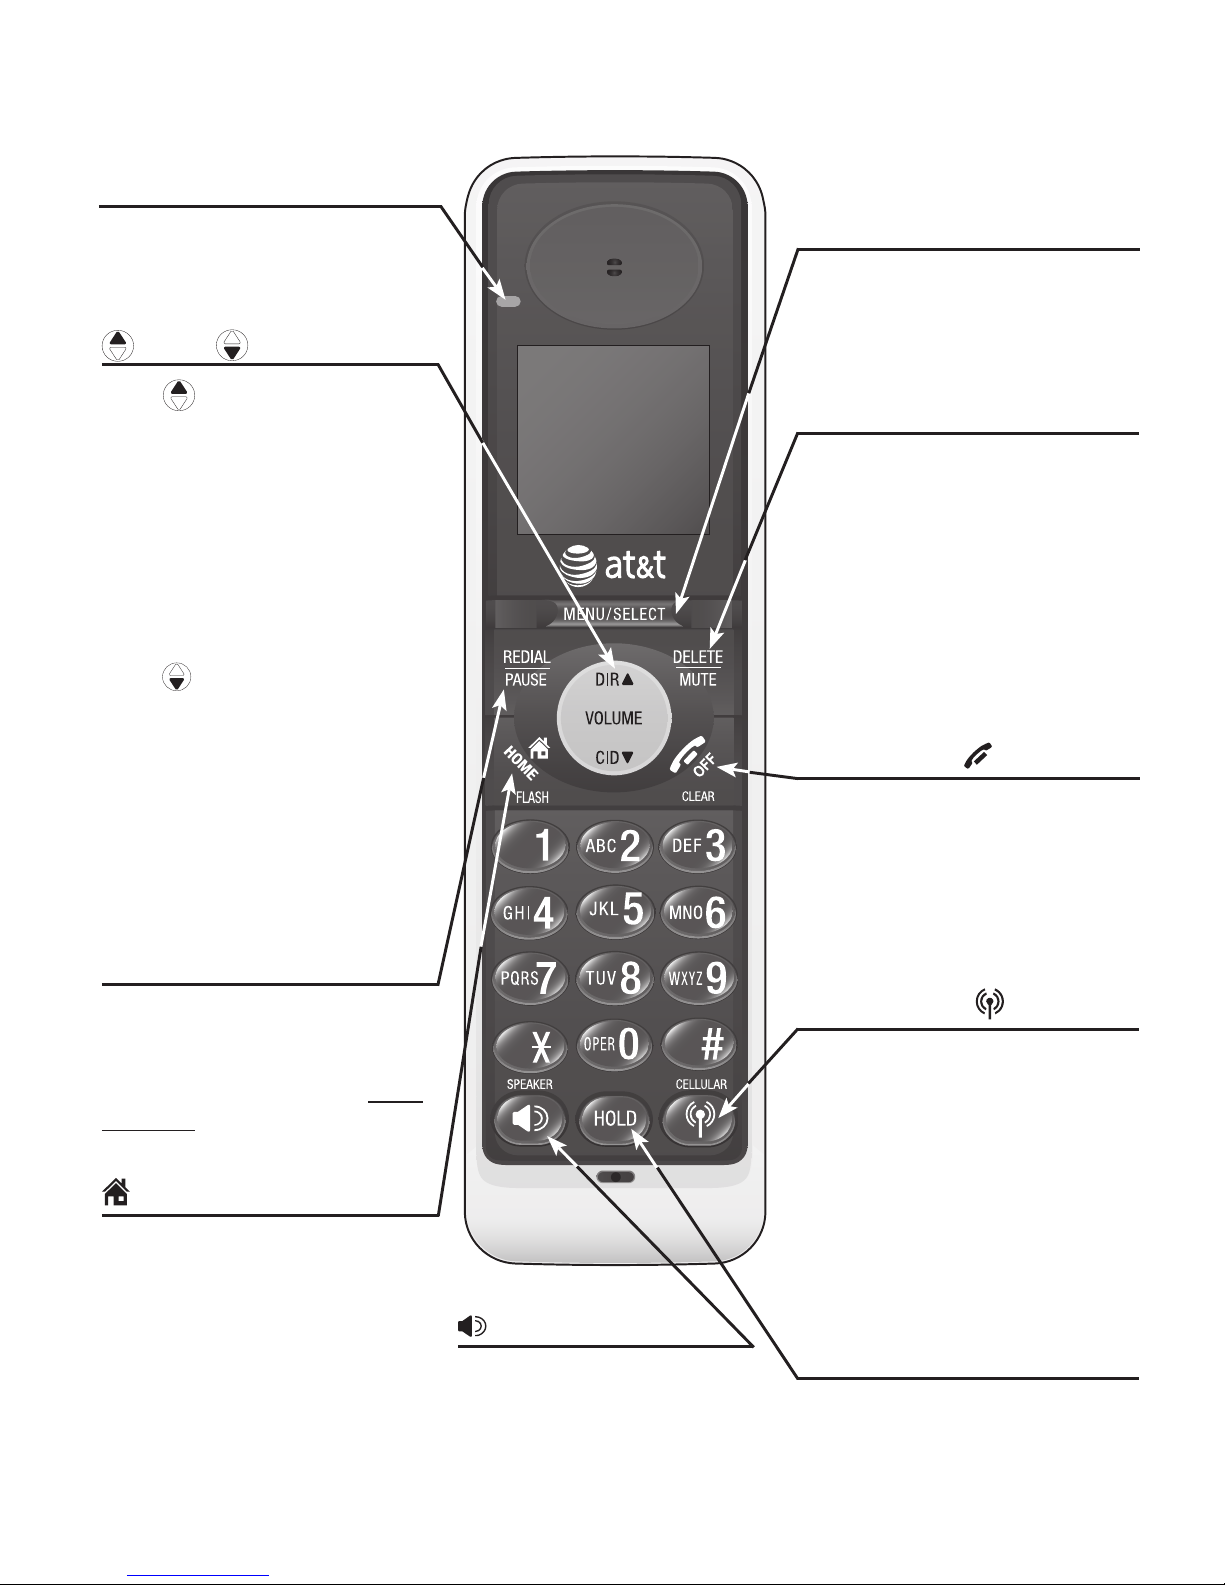
MENU/SELECT
Press to show the menu.
While in the menu, press to
select an item or save an entry
or setting.
Quick reference guide - handset
DELETE/MUTE
During a call, press to mute
microphone (page 34).
While reviewing the caller ID
history, the directory or the
redial memory, press to delete
an individual entry
(page 54, page 46 and page 31
respectively).
While predialing, press to delete
digits (page 27).
REDIAL/PAUSE
Press repeatedly to view the
last five numbers dialed
(page 31).
While entering numbers, press
and hold to insert a dialing
pause (pages 42 and 46).
SPEAKER
Press to turn on the
handset speakerphone.
Press again to resume
normal handset use
(page 31).
HOME/FLASH
Press to make or answer a
HOME call.
Flashes rapidly when there israpidly when there is
an incoming HOME call.
Flashes slowly when a HOME
call is on hold.
During a HOME call, press to
receive an incoming call if call
waiting is activated (page 27).
CELLULAR
Press to make or answer a
CELLULAR call.
Flashes rapidly when there is an
incoming CELLULAR call.
Flashes slowly when a
CELLULAR call is on hold.
During a CELLULAR call, press
to receive an incoming call if
call waiting is activated
(page 30).
OFF/CLEAR
During a HOME or CELLULAR
line call, press to end the call.
While in a menu, press to
cancel an operation, back up to
the previous menu, or exit the
menu display.
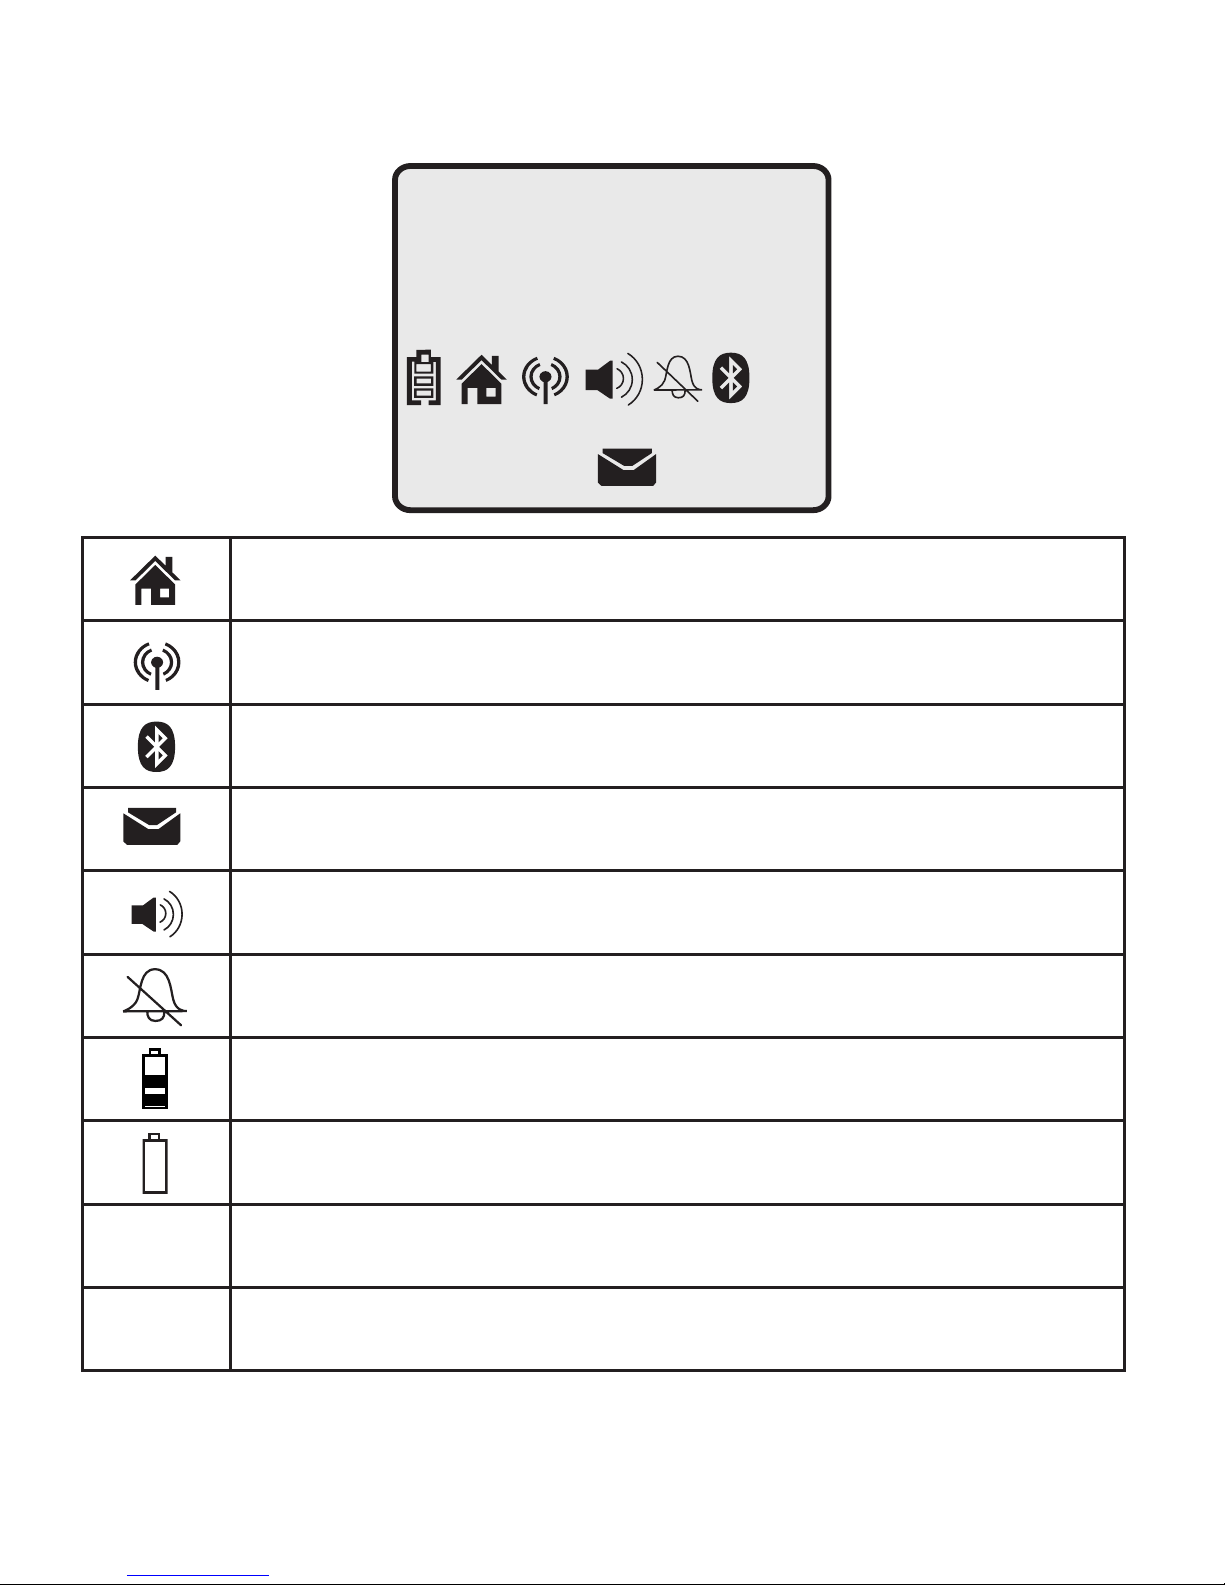
CHARGE indicator
On when the handset is
charging in the telephone base
or charger.
DIR / CID
Press DIR to show directory
entries (page 44).
Press to scroll up while in
menus.
While entering names or
numbers, press to move the
cursor to the right.
Press to increase the listening
volume when on a call.
Press CID to show caller ID
history (page 53).
Press to scroll down while in
menus.
While entering names or
numbers, press to move the
cursor to the left.
Press to decrease the listening
volume when on a call.
HOLD
Press to put the HOME or
CELLULAR call on hold
(page 35).