ATC entry Series User manual
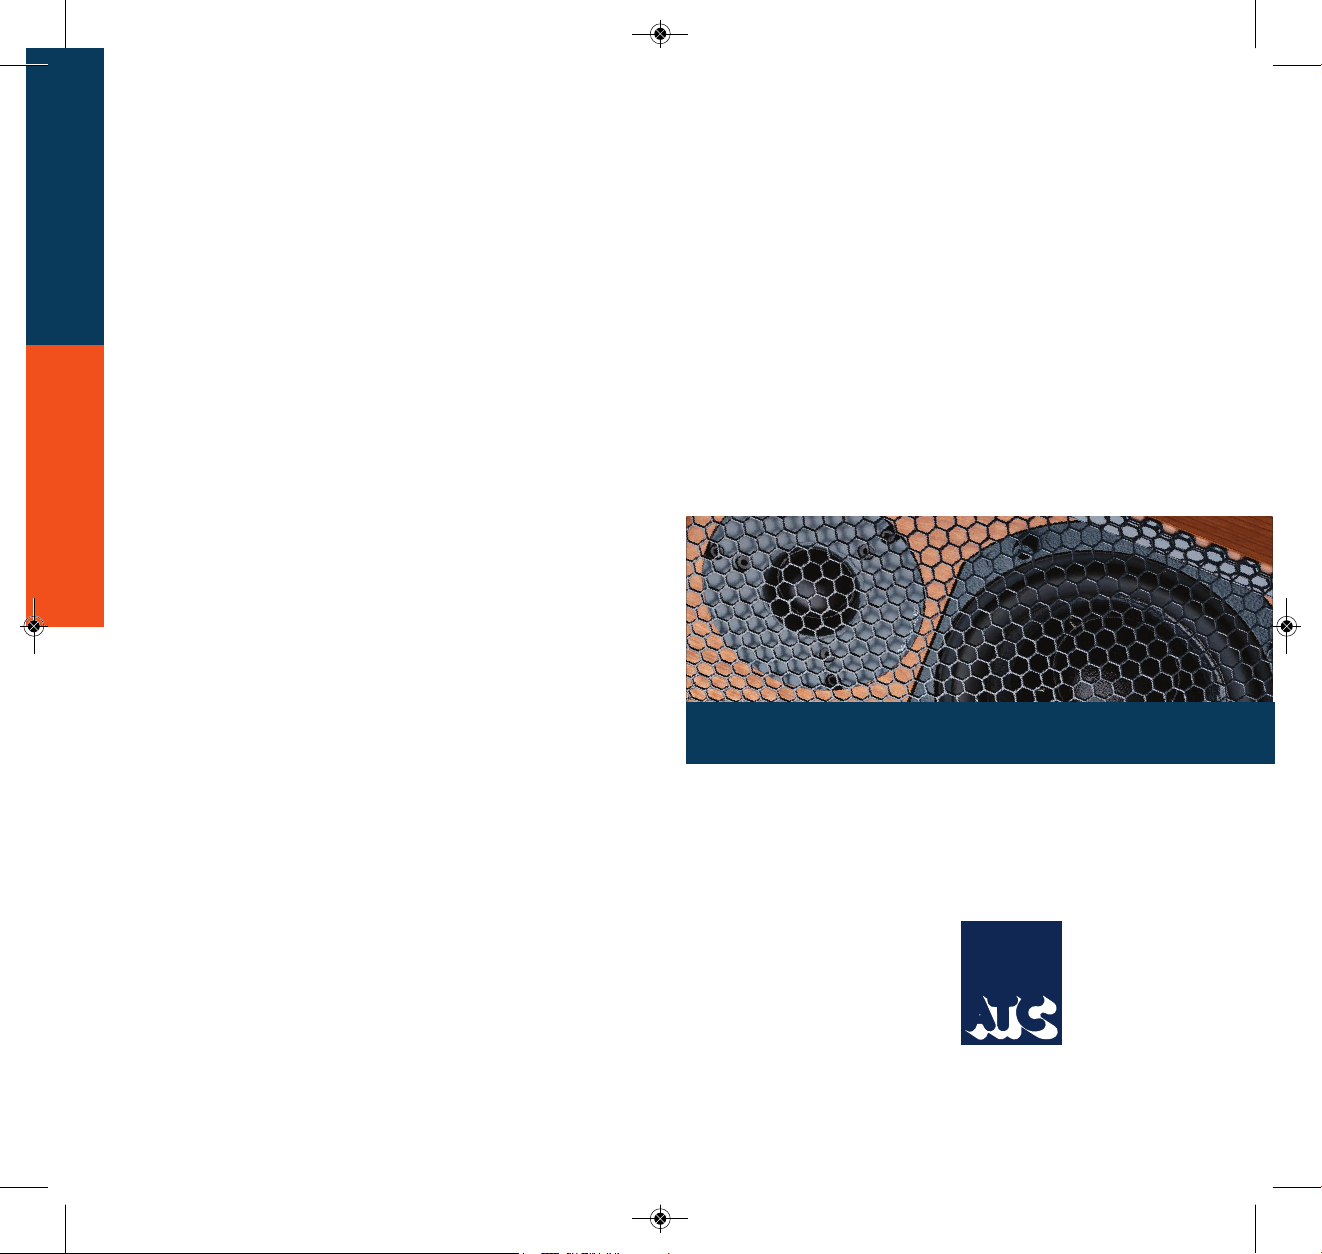
entry series
ACOUSTIC
ENGINEERS
®
user manual
ENTRY MANUAL 040919_ENTRY BROCHURE 13.3 10/09/2019 15:19 Page 1

Welcome. In selecting ATC you have chosen an example of the finest audio engineering available.
ATC was founded on a principle of engineering excellence, and that principle still defines our products
today. Given the right opportunities,ATC products will deliver exceptional audio performance, but the
opportunities will only arise from careful and thoughtful installation and use. Please read the following
manual fully. It will help you understand the product and to realise its full potential.We are happy to
answer questions and offer advice on any issues that arise through installation or use of ATC products.
Contact details can be found at the back of this manual.
ATC was founded in London in 1974 by Australian émigré Bill Woodman, who still heads the company today.
An enthusiastic pianist and engineer he was naturally drawn to loudspeaker design and, after a period working at
Goodmans (where many of the names that went on to found British loudspeaker companies began their careers),
he struck out on his own. The premise on which ATC began is a simple one – and one that, in many respects, is still
true today: hi-fi loudspeakers tend to be detailed and accurate, but of limited dynamic range, while professional
monitor speakers tend to express the opposite character. ATC products were designed from the outset to
offer the best of both. It’s an easy concept to describe, but surprisingly difficult to engineer.
The difficulty inherent in designing such loudspeakers is one of scale. Hi-fi levels of accuracy and detail call for
lightweight moving parts and delicate engineering. Professional monitor levels of performance, however, demand far
entry
ENTRY MANUAL 040919_ENTRY BROCHURE 13.3 10/09/2019 15:19 Page 2

more robust components engineered to survive the rigours of high level use for extended periods.
The only way to combine the two is through precision engineering of a class and scale more often associated
with aerospace or motorsport. But the results are worth the effort and the cost. ATC loudspeakers, with their
unique in-house designed drivers, combine the best of hi-fi and professional to devastating effect.
ATC has become synonymous with active systems. Choosing to offer active loudspeakers (where the passive
systems still have their place, and ATC engineering skills can still bring remarkable results from them) is a
fundamentally better solution to the problems posed by accurate, high level music reproduction.
The ATC instinct is always for the better solution. Not cheaper, not quicker, but better.
It was the development of active loudspeakers that first brought ATC into electronics design and engineering.
Active speakers demand multiple power amplifiers, so ATC from the mid 1980s became not just a loudspeaker
manufacturing company but an electronics manufacturer, too. The further step from electronics for active speakers
to a range of stand-alone amplifier products was natural and now means that ATC engineering is available from the
recording desk or CD player output to the ears.
From modest beginnings ATC has grown to become one of the very few manufacturers successful across both
domestic and professional audio. By selecting ATC you join a group of music lovers, professional audio engineers,
studios and musicians across the world that understand and value the engineering that goes into an ATC product.
series
ENTRY MANUAL 040919_ENTRY BROCHURE 13.3 10/09/2019 15:19 Page 3

Safety Warnings
1. Read instructions – all the safety and operating instructions
should be read before the appliance is operated.
2. Retain these instructions – the safety and operating
instructions should be retained for future reference.
3. Heed warnings – all warnings on the appliance and in the
operating instructions should be adhered to.
4. Follow instructions – all operating and other instructions
should be followed.
5. Water and moisture - the appliance should not be exposed
to dripping or splashing and no objects such as vases, should
be placed on the appliance.
6. Ventilation - a minimum of 80mm is required at the rear of
appliances to ensure sufficient ventilation.The ventilation
should not be impeded by covering the appliance with items
such as table-cloths, curtains etc. Further, the appliance
should not be built into an installation, such as a bookcase
or cabinet, that may impede the flow or air around the
appliance.
7. Heat – the appliance should be situated away from heat
sources such as radiators, stoves or other appliances that
produce heat.
8. Power sources - the appliance is of Class1 construction
and shall be connected to a MAINS socket outlet with a
protective earthing connection.
9. Power cord protection – power supply cords should be
routed so that they are not likely to be walked on or
pinched by items placed upon or against them, paying
particular attention to cords at plugs, convenience
receptacles and the point where they exit the appliance.
10. Cleaning – the appliance should be cleaned only as
recommended by the manufacturer.
11. Unattended periods – the power cord of the appliance
should be unplugged from the outlet when left unused for
a long period of time.
12. Object entry – care should be taken so that objects do
not fall into the appliance.
ENTRY MANUAL 040919_ENTRY BROCHURE 13.3 10/09/2019 15:19 Page 4

13. Damage requiring service – the appliance should be serviced
by qualified service personnel when:
i. the power supply cord or the plug has been damaged
ii. objects have fallen or liquid has been spilled into the
appliance
iii. the appliance has been exposed to rain or other serious
liquid exposure
iv. the appliance does not appear to operate normally or
exhibits a marked change in performance
v. the appliance has been dropped or the cabinet damaged
14. Servicing – the user should not attempt to service the
appliance beyond those measures described in the operating
instructions.All other servicing should be referred to
qualified service personnel.
15. Grounding or polarisation – precautions should be taken so
that grounding or polarisation means for the appliance are
not defeated.
16. The SCM19A and SCM40A active loudspeakers feature a
push-in power switch which, when depressed, powers the
unit on. The C1 Sub features a rocker switch which, when
positioned downwards, turns the unit on.
Unpacking & Handling
1. Open the carton and remove all loose items.
2. Fold back both the inner and outer carton flaps and carefully
roll over the carton so that the loudspeaker and all stratocell
caps remain in the carton.
3. Lift away the cardboard carton leaving the loudspeaker
cradled in the stratocell caps.
4. Remove the upper half of the end caps and lift the
loudspeaker away from the packaging.
5. Remove the felt bag and position the loudspeaker in the
listening room.
ENTRY MANUAL 040919_ENTRY BROCHURE 13.3 10/09/2019 15:19 Page 5

1:Monitor Placement
The subjective performance of any monitor loudspeaker will be
fundamentally influenced by the acoustic character of the room
in which it is used, and its position within the room. Most often
monitors are installed in rooms which are comfortable to sit and
talk in. A mixture of carpets, curtains and soft furnishings will
help ensure that middle and high frequencies are reasonably well
controlled.There may however, be low frequency problems;
either too much or too little bass.To minimize low frequency
problems the monitors should be kept away from corners or
walls. Start with them positioned around 1 metre from the side
walls and 2 metres from the back. If the balance is bass-light,
the monitors can be moved towards the back walls.
For stereo listening, loudspeakers should be positioned so
they form an equilateral triangle with the listening position
(See Fig. 1). Loudspeaker stand height should be chosen to
position the loudspeaker acoustic axis at, or close to ear level.
(See Fig. 2).
All rooms vary and it is a good idea to experiment with both
the listening and speaker position until a good compromise is
reached. For professional installations the requirements are often
very specific. Please consult with an experienced professional
acoustician if necessary.
Stereo/Satellite
Loudspeakers
1
Monitor Placement
2
Amplification (Passive Models)
3
Connection (Passive Models)
4
Connection (Active Models)
5
Operation (Active Models)
ENTRY MANUAL 040919_ENTRY BROCHURE 13.3 10/09/2019 15:19 Page 6

30°
30°
distance x
distance y
distance z
distance x = distance y = distance z
Loudspeaker Positioning - Stereo
Acoustic Axis
acoustic axis:
mid-point between bass/mid and tweeter
2-way systems
acoustic axis:
mid-range driver
3-way systems
Fig. 1
Fig. 2
ENTRY MANUAL 040919_ENTRY BROCHURE 13.3 10/09/2019 15:19 Page 7

2:Amplification (Passive Models)
The choice of partnering amplifiers for Passive Entry Series
loudspeakers will have significant influences on the performance
of the system. Consider the following when selecting the
amplifier:
■ With any passive loudspeaker there is a trade-off between
low frequency extension and sensitivity. Extended low frequency
response means that sensitivity is relatively low. It is advisable
therefore to select an amplifier of relatively high power
capabilities. Use of an under-specified amplifier will result in the
system sounding distorted at high level and may risk damage to
the loudspeakers.Valve or solid state amplifiers with high output
impedance should be auditioned carefully to establish that their
characteristic reduced damping at low frequencies is acceptable.
Typically, amplifiers with power outputs of 75W+ (continuous
output) will give the best results.
■ The ATC bass/mid driver voice coils are unusually large and
operate in an overhung gap.The result is that the monitors not
only demonstrate extremely low distortion at all levels but also
a greatly enhanced effective dynamic range. This exceptional
distortion performance, also combined with very wide
dispersion, will ruthlessly reveal deficiencies in ancillary
equipment. It is advisable therefore to audition your speakers
with your proposed amplifier and ancillary system. The range of
ATC amplifiers and pre-amplifiers should be your first choice.
3:Connection (Passive Models)
ATC Entry Series monitors are equipped with a “bi-” or
“tri-wire” connection panel that enables separate amplification
of the bass/mid driver and tweeter. Remove the linking bars
between the pairs of terminals if you wish to take advantage of
this facility.
The pairs of binding posts are laid out to match the drive unit
positions with the bass driver pair towards the lower edge of
the input panel. Ensure the multiple amplifiers used for
bi or tri-amping have equal gain and use the most powerful
amplifier for the LF driver. The terminals can accommodate
either stripped cable ends or 4mm plugs.
Always use good quality speaker cable with a 2.5mm2minimum
cross sectional area per conductor (79 strand). Cable of a
smaller cross sectional area or fewer strands is unsuitable.
For cable runs longer than 5m use a significantly heavier gauge
cable. Consult our dealer or consultant for specific cable
recommendations. Ensure that the positive and negative
terminals on each connection panel are connected back to the
corresponding positive and negative terminals on the amplifier.
ENTRY MANUAL 040919_ENTRY BROCHURE 13.3 10/09/2019 15:19 Page 8

4:Connection (Active Models)
Signal Cable Options: Balanced cable configuration is the
preferred option, however unbalanced connection is possible.
Figs 3 and 4 illustrate the signal cable connections required for
each option. Balanced (XLR to XLR) connection offers lower
noise and better immunity to “hum” pick-up. Unbalanced (XLR
to Phono or Two pole Jack) connection carries risk of hum
caused by multiple signal earths. Hum problems resulting from
unbalanced connection may be reduced by making ONE of the
following modifications to the signal cable connections: If the
driving preamplifier (or desk) is double insulated (i.e. has no
mains earth), disconnect the signal cable screen at the RCA
Phono plug end. Alternatively, disconnect the signal cable screen
at the XLR end.This second option will make the source the
reference signal earth.
Connection: Two connections are required for each monitor:
one for mains power and one for the audio signal.The mains
supply is supplied specifically to comply with local statutory
safety approvals and alternatives should not be substituted. If you
intend to use your monitors in an alternative territory, please
contact ATC for advice.The mains connection must always be
earthed. The signal cable and plug (not necessarily supplied)
should be of a good quality and XLR terminated. Poor cable and
plug quality will compromise the performance of your monitors.
The signal input pin configuration is illustrated in Fig 5.
Due to the nature of the electronics in ATC active loudspeakers,
it is quite normal for a sound to be heard from the speaker
when the power is applied or disconnected.The noise heard will
not damage the speaker.Although ATC use the highest grade
components, a different noise may be heard from each speaker
due to slight variations in the amplifier components.
Two Core Screened Cable
3 Pin Male XLR
Connector
3 Pin Female XLR
Connector
To Monitor Input
Hot
Return
Screen
To Source Output
1
2
3
1
2
3
Phono (RCA)
Connector
To Source Output
Two Core Screened Cable
3 Pin Male XLR
Connector
To Monitor Input
1
2
3
Hot
Screen
Return
Pin 1, Screen
Pin 2, Signal (hot)
Pin 3, Signal (return)
21
3
PUSH
Fig. 3 Balanced Cable
Fig. 4 Unbalanced Cable
Fig. 5 Input Connection Pins
ENTRY MANUAL 040919_ENTRY BROCHURE 13.3 10/09/2019 15:19 Page 9

5:Operation (Active Models)
Figs 6 and 7 illustrate the connection and control panel for the
amplifiers used in the active SCM40A and 19A monitors.
Each feature is described below:
Mains Inlet: The supplied mains power lead (appropriate to
the local territory) should be connected here. Ensure that the
mains voltage specified on the panel corresponds with the local
supply voltage.
Power Switch: Switches on the monitor.
Fuseholder: Should a monitor fail to switch on when the
power switch is operated, the fuse should be inspected. Lift out
the fuseholder cover using a flat-blade screwdriver, remove the
fuse and inspect it for damage. If required, a replacement should
be fitted. It should be stressed however, that fuses often fail
because of a serious electrical fault. If this is the case, then simply
replacing the fuse will only result in another fuse failure.The
monitor should be returned to ATC if a second fuse fails.
Input Socket: The audio signal cable should be connected
here. Balanced or unbalanced cables may be used (see Section 4.)
Fault LED (SCM19A and SCM40A only): The fault LED
will illuminate if there is a fault in the Amplifier or the heat sink
temperature is too high for safety or reliability.There will be no
output from the Loudspeaker if the LED is on.Turn the Amplifier
off at the mains, remove the Input connector, wait approximately
10 seconds and then turn the Amplifier back on again. if the LED
is still on, leave the Amplifier to cool for 30 minutes and repeat
the above procedure. If after this time the LED still comes on
then contact ATC for advice.
ENTRY MANUAL 040919_ENTRY BROCHURE 13.3 10/09/2019 15:19 Page 10

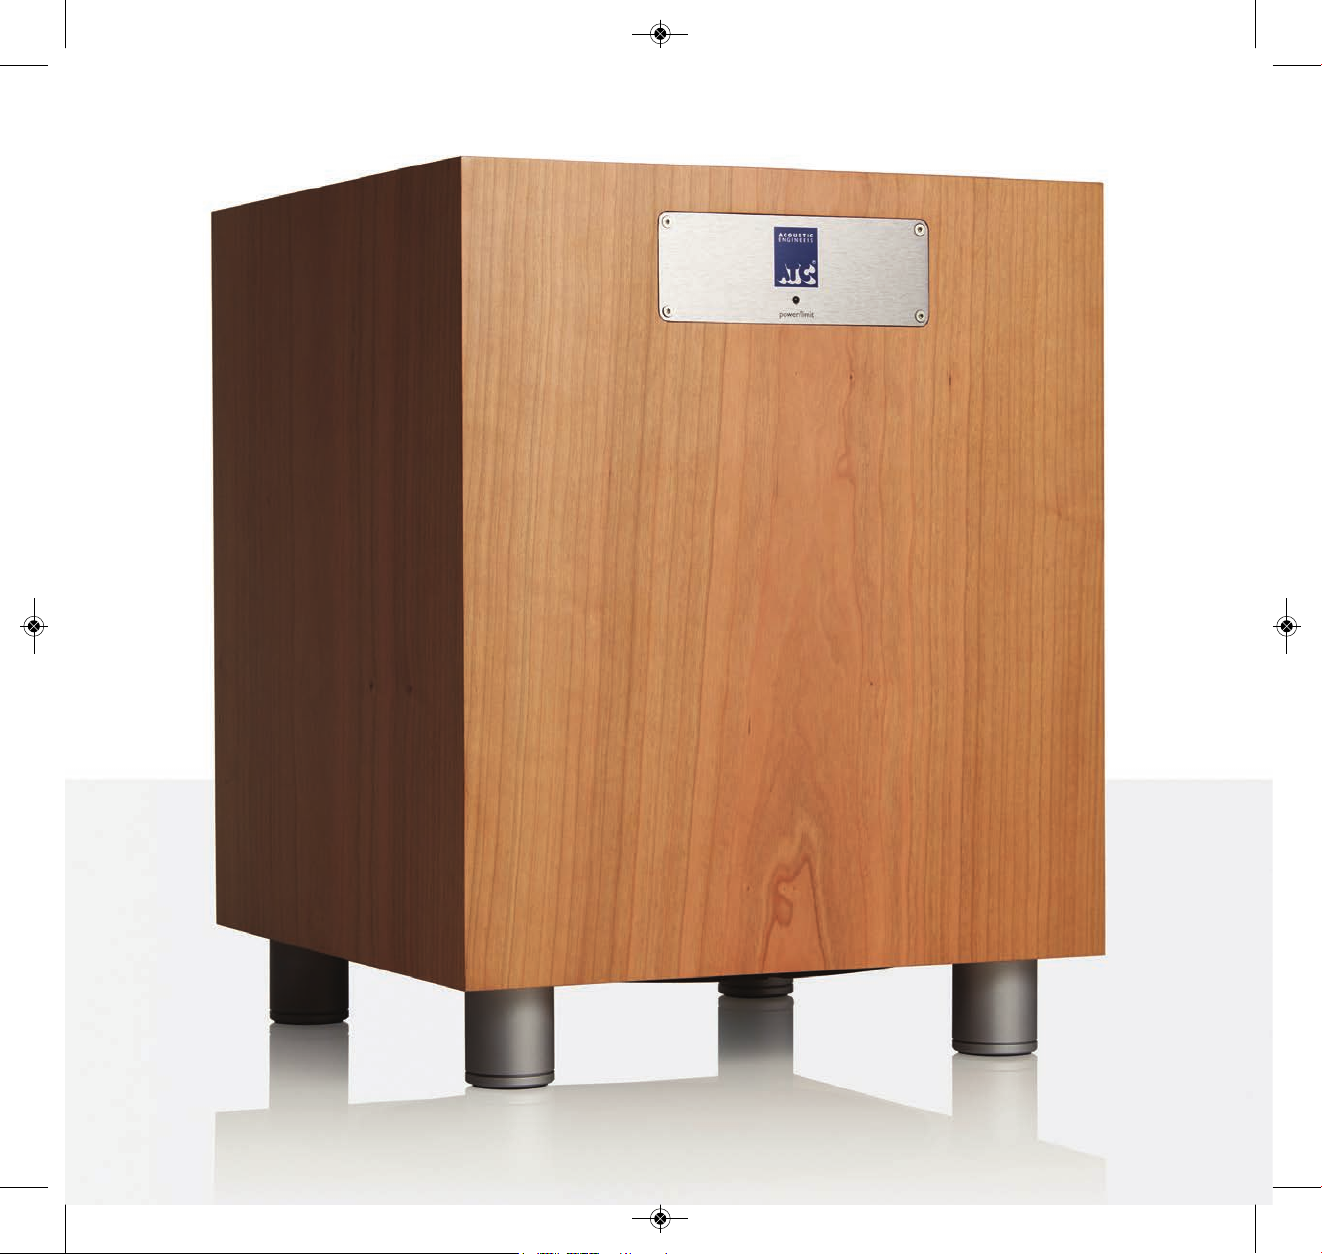
SCM40 High Performance Active Loudspeaker
1:
2:
3:
power
CAUTION
RISK OF ELECTRIC SHOCK
DO NOT OPEN
WARNING
THIS EQUIPMENT
MUST BE EARTHED
!
model serial no.
voltage
RETURN TO
MANUFACTURER
FOR DISPOSAL
CONSUMPTION
MAINS INPUT
50/60 Hz
POWER
420 WATTS MAX.
fuse
115V :T5A H/250V
220 - 230V :T3.15A H/250V
100V :T6.3A H/250V
2000m
can only be safely used in non-tropical weather
can only be safely used lower than 2,000 metres altitude
Acoustic Transducer Co. Is a trading name and Is the registered Trade Mark of Loudspeaker Technology Ltd.
Laite on liitettävä suojakoskettimilla varustettuun pistorasiaan
Apparatet må tilkoples jordet stikkontakt
Apparaten skall anslutas till jordat uttag
fault
THERE ARE NO USER SERVICEABLE PARTS INSIDE
CHECK VOLTAGE BEFORE USE
R
Designed and manufactured by
Acoustic Transducer Company
GL6 8HR
England
Gloucestershire
21
3
PUSH
!
"#
$%
!&#
'!"
(
!"
#$%
&'#(
)*
''+, &!-+
--.-&+,&'!-+
/01)0*./2
/01)0*2-3*
)*+)*,)-.*,+/-, *0--/+*--,,- ,*1---)0/2 ,.
+-++-343*5*-++4*-1+**+
11-6+1-*5,-*+
11-***+5,/
!$%$%$$%$%+$45$%6$
!$7+58$4$9%$$
6*)/*10
/*/*/0
85 :!%
$
8*/2
/
';!2)//5*<
8
:8
%$%
9%$%
9%65
Fig. 6 SCM40A Connection and Control Panel
Fig. 7 SCM19A Connection and Control Panel
ENTRY MANUAL 040919_ENTRY BROCHURE 13.3 10/09/2019 15:19 Page 11

1 : Monitor Placement
Centre Speaker Placement
The positioning constraints on a centre channel loudspeaker are
always influenced by the type and location of the associated
screen. However, the basic parameters that influence the
subjective performance of any loudspeaker in a listening room –
alignment to the listening position and proximity of room
boundaries – also apply to a centre channel and should be taken
into account. The C1C and C3C are intended to be positioned
relatively clear of room boundaries and centrally either just
below or just above the screen. If the screen is either a plasma
or projector type located close to the wall it may not be
possible to position the C1C or C3C very far forward. In these
cases, some adjustment of low frequency equalisation via the AV
processor may be necessary to reduce excess bass. It is always
preferable however to experiment with loudspeaker positioning
before resorting to electronic equalisation. If the centre speaker
is to be positioned away from the screen, either low down or
high up, it should be angled up/down towards the listener.
While every ATC centre channel speaker is effectively magnetically
shielded, the extreme sensitivity of some CRT tubes to residual
levels of magnetic flux may mean that, in rare cases, ATC centre
channel speakers are not appropriate. Adjusting the relative
front/back position of the centre speaker and the CRT can
reduce magnetic interference but should your screen suffer
intractable picture distortion caused by the proximity of a
centre speaker contact your dealer or installer for advice.
Centre/Sub
Multichannel Units
1
Monitor Placement
2
Bass Management
3
Amplification
4
Connection
5
Functions/Settings – C1 Sub
ENTRY MANUAL 040919_ENTRY BROCHURE 13.3 10/09/2019 15:19 Page 12
Subwoofer Placement
The subjective performance of any subwoofer will be
fundamentally influenced by the acoustic character of the room
in which it is used, and its position within the room. Speaker and
subwoofer systems are most often installed in rooms which are
comfortable to sit and talk in, and the typical mixture of carpets,
curtains and soft furnishings help ensure that middle and high
frequencies are reasonably well controlled.There may however
be low frequency problems; either too much or too little bass.
To minimise these problems start with the subwoofer positioned
away from walls and corners, avoiding the midpoint between any
two parallel boundaries. If the balance is bass-light, the sub-
woofer can be moved towards the corner. Use the subwoofer
controls (see Section 5) to optimise satellite integration and for
fine tuning rather than to compensate for inappropriate
positioning. All rooms vary and it is a good idea to experiment
with both listening and speaker positions until a good
compromise is reached.
The subwoofer should be placed in a position which allows
adequate ventilation around the heat sink fins.
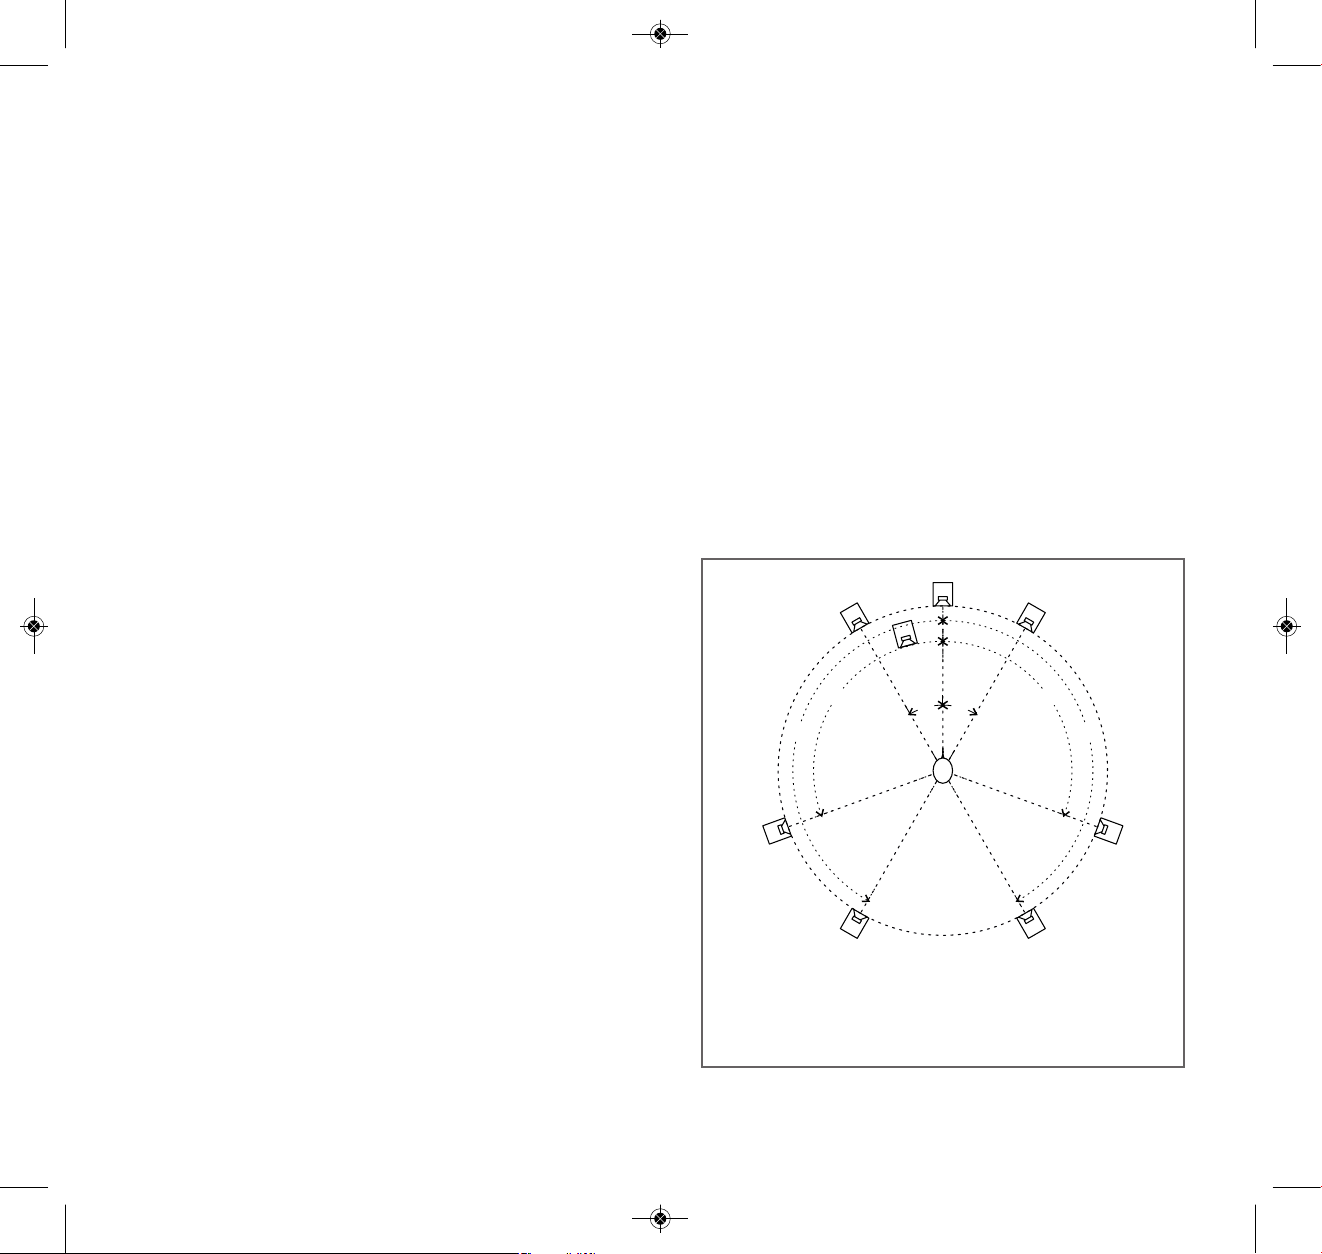
Full Bandwidth Speaker Positioning
While each loudspeaker in an AV system should be located
appropriately in its immediate acoustic environment, if an AV
system is to reach its full potential the relative position of each
loudspeaker element must be considered. In professional
environments the relative position is important because it will
fundamentally influence multichannel mix decisions, while in
domestic systems correct positioning will offer the best chance
of programme material being heard as intended.
The basic guidelines for positioning the full bandwidth loud-
speakers of a 5.1 and 7.1 system are illustrated in Fig 1. The
elements of an AV system should follow this positioning guide as
closely as possible.There is some latitude for compromise in the
speaker to listener distance of a domestic installation as AV
coders/processors provide facilities to adjust the delay time of all
or some speaker channels. Professional installations however
should adhere strictly to the recommendations of Fig. 1 and not
use delay adjustment to compensate for alternative speaker to
listener distances.
left
centre
right
left
side
right
side
left
rear
right
rear
distance L
distance C
distance R
distance LS
distance RS
distance LR
distance RR
150°
110°
150°
30°
30°
110°
sub
•All loudspeakers should be equi-distant from the listening position:
distance L = distance C = distance R = distance LS = distance LR = distance RR
•For 5.1 systems, position the ‘surround’ speakers between 110 and 150 degrees
•If ideal positioning is not possible, position loudspeakers as close as possible
Fig. 1
Ideal Full Bandwidth Speaker Positioning of 5.1 and 7.1 systems
All loudspeakers should be equidistant
from the listening position: distance L=C=R=LS=LR=RR=RS.
For 5.1 systems, position the surround speakers between 110° and 150° (ITU spec. is 110°).
The LR and RR speakers shown are applicable to 7.1 systems only.
If ideal positioning isn’t possible, position loudspeakers as close as possible to ideal.
ENTRY MANUAL 040919_ENTRY BROCHURE 13.3 10/09/2019 15:19 Page 13

2 : Bass Management
Bass Management in Domestic Systems
This section aims to clarify some of the issues surrounding the
use of Bass Management (or bass redirection as it is sometimes
known) in ATC multichannel systems.Topics discussed apply to
the whole range of ATC systems and can be used for guidance
when making installation decisions. Differences in professional
and domestic requirements dictate slightly different approaches
to Bass Management. In the recording studio, the primary aim is
to achieve a result which will transport well to a range of
domestic equipment and listening environments, whilst retaining
the artistic intentions.These notes however focus on the needs
of the domestic user which are rather more particular.The
primary function of Bass Management in domestic applications
(home theatre or multichannel audio only reproduction) is to
increase the dynamic range, or the total sound pressure that can
be delivered by the speaker system. However, depending on the
performance of the loudspeakers in use, this priority may not be
appropriate in some situations – this is commonly the case when
using ATC loudspeakers. Switching off Bass Management in the
majority of AV processors is simply a case of ensuring that the
Subwoofer output is turned “ON” and that all satellite speaker
size options are set to “LARGE”.
The advent of multichannel reproduction technology in the
home has led to the desire for inexpensive and robust speaker
systems which can reproduce high sound pressure levels.
Unfortunately the latter two requirements are in direct conflict
with the former. Obviously, the simplest way of reducing the
retail price of a product such as a loudspeaker is to cut back on
the quality of the components used.
However, when designed properly, there is a direct relationship
between the cost of a moving coil loudspeaker and its potential
dynamic range.This can be attributed to a number of factors.
For example, a drive-unit’s metal parts act as a sink for the heat
generated by its voice coil, so as the mass of steel used is
reduced for cost purposes, so the speaker’s ability to handle
power is degraded. Magnet size and diaphragm area also tend to
be reduced in an attempt to cut costs. Again, the trade-off is
efficiency and dynamic range, both of which suffer as the
compromises are made.
A convenient way of helping a low power system to deliver
more sound pressure is to divert the potentially more damaging
low frequencies away from the vulnerable speakers and into a
Subwoofer. Bass Management was devised to perform this task
in the digital domain. It is a system of software filters and gain
controls commonly fitted to AV processors/decoders that can
redirect low frequencies away from the satellite speakers
(left, centre, right, surround left and surround right in a 5.1
configuration) and route it to the dedicated low frequency
channel. Because the processing is done in software it is virtually
free of cost and thus attractive to those who wish to maximise
the dynamic range of a modest speaker system.
Compromises
As described earlier, Bass Management was devised for domestic
use as a means of extracting more performance from cost-
sensitive systems. However in high quality audio systems it
should be avoided. The improvement in dynamic range that may
be achieved with Bass Management is not without side effects
and in high quality systems these side effects are significant.
ENTRY MANUAL 040919_ENTRY BROCHURE 13.3 10/09/2019 15:19 Page 14

The reasons for avoiding its use in high quality systems, such as
ATC systems, are these:
■High quality systems have enough dynamic range and bass
extension without the use of Bass Management. Less software
processing of the source material implies less potential for
undesirable artefacts.
■Without accurate knowledge of the acoustic character of
satellite and Subwoofer it is impossible for Bass Management to
achieve a flat overall frequency response. Similarly the phase
response will be unpredictable.
■Bass Management encourages the crossover frequency
between Subwoofer and satellites to be above the onset of
directionality in the Subwoofer output.The resulting ability to
hear the location of the Subwoofer is clearly to be avoided.
■When a significant proportion of the frequency range is
separated from the satellites and passed to the Subwoofer, any
difference in the dynamic behaviour between the two types of
loudspeaker will cause the system frequency response to change
with output level.
■The addition of filter slopes to the existing roll-off shapes of
the loudspeakers may incur time-domain ringing and audible
colouration.
Conclusion
There is a good argument for the use of Bass Management in
modest, cost sensitive systems with restricted dynamic range.
However, when applied to high quality systems the side effects
are likely to be intrusive.We strongly recommend that Bass
Management should not be used with ATC loudspeakers in
domestic applications.
3 : Amplification
The choice of partnering amplifier for the C1C and C3C will
have significant influence on the performance of the system.
Consider the following when selecting the amplifier:
■With any passive loudspeaker there is a trade-off between
low frequency extension and sensitivity. The C1C and C3C’s
extended low frequency response means that their sensitivity is
relatively low. It is advisable therefore to select an amplifier of
relatively high power capabilities. Use of an under specified
amplifier will result in distortion at high levels and may risk
damage.Valve or solid state amplifiers with high output
impedance should be auditioned carefully to establish that their
characteristic reduced damping at low frequencies is acceptable.
■The exceptional distortion performance of the C1C and
C3C combined with very wide dispersion will ruthlessly reveal
deficiencies in ancillary equipment. It is advisable therefore to
audition the C1C or C3C with your proposed amplifier and
ancillary system.
ENTRY MANUAL 040919_ENTRY BROCHURE 13.3 10/09/2019 15:19 Page 15

4 : Connection
C1C and C3C Centre Channels
The C1C and C3C are equipped with a “bi-wire” connection
panel that enables separate amplification of the bass drivers and
tweeter. Remove the linking bars between the two pairs of
terminals if you wish to take advantage of the bi-wire facility.
The terminals can accommodate either stripped cable ends or
4mm plugs. Always use good quality speaker cable with a 2.5mm2
minimum cross sectional area per conductor (79 strand). Cable
of a smaller cross sectional area or fewer strands is unsuitable.
For cable runs longer than 5m use a significantly heavier gauge
cable. Consult your dealer or consultant for specific cable
recommendations.
Ensure that the positive and negative terminals on each
connection panel are connected back to the corresponding
positive and negative terminals on the amplifier.
C1 Sub
The Subwoofer is provided with both line level inputs via a pair
of phono connectors and hi-level (speaker level) inputs on a
pair of binding posts. Only one type of input should be used
at any one time.The rear panel also features the mains power
input, power switch, fuse, filter controls and L+R Output for
connection to a second C1 sub.The amplifier standby/limiter
indicator is mounted on the smaller front panel.
Audio Input Options – C1 Sub
Line Level Inputs:These should be used to connect your
subwoofer to preamp outputs or integrated amplifier preamp
outputs. For stereo use, use both connections. In a 5.1 system,
only connect to one input. Either left or right is fine and will
give the same results.
Hi-Level Inputs:These should be used to connect your
subwoofer directly to a stereo pair of speakers, either via the
amplifier outputs or the loudspeaker input terminals themselves.
Take care to maintain correct polarity throughout.
ENTRY MANUAL 040919_ENTRY BROCHURE 13.3 10/09/2019 15:19 Page 16

VHULDOQR
P
FDQRQO\EHVDIHO\XVHGLQQRQWURSLFDOZHDWKHU
FDQRQO\EHVDIHO\XVHGORZHUWKDQPHWUHVDOWLWXGH
YROWDJH
&$87,21
5,6.2)(/(&75,&6+2&.
'212723(1
:$51,1*
7+,6(48,30(17
0867%(($57+('
$FRXVWLF7UDQVGXFHU&R, VDWUDGLQJQDPHDQG,VWKHUHJLVWHUHG7UDGH0DUNRI/RXGVSHDNHU7HFKQRORJ\/WG
PRGHO
5(785172
0$18)$&785(5
)25',6326$/
IXVH
97$+9
97$+9
7+(5($5(1286(56(59,&($%/(3$576,16,'(
/DLWHRQOLLWHWWl Yl VXRMDNRVNHWWLPLOODYDUXVWHWWXXQSLVWRUDVLDDQ
$SSDUDWHWPnWLONRSOHVMRUGHWVWLNNRQWDNW
$SSDUDWHQVNDOODQVOXWDVWLOOMRUGDWXWWDJ
SRZHU
&2168037,21
0$,16,1387
+]
32:(5
:$7760$;
&+(&.92/7$*(%()25(86(
OHYHO IUHTXHQF\ SKDVH
KLLQSXWV
OLQHLQSXWV
OHIW
ULJKW
OHIW
ULJKW
OURXWSXW
LQ
RXW
PLQPD[RR
+]
+]
+]
+]
+]
$FRXVWLF7UDQVGXFHU&RPSDQ\
'HVLJQHGDQGPDQXIDFWXUHGE\
*ORXFHVWHUVKLUH
*/+5(QJODQG
5
Fig. 2
C1 Sub Amplifier Rear Panel
ENTRY MANUAL 040919_ENTRY BROCHURE 13.3 10/09/2019 15:19 Page 17

5 : Functions/Settings – C1 Sub
The C1 Sub amplifier control panel is shown in Figure 2.
Mounted on the panel are three rotary knobs enabling
adjustment of Level, Low Pass Crossover Frequency and Phase.
Located next to the phase knob is a in/out phase switch.
Overall input sensitivity of the Subwoofer can be set via the
Level rotary knob and should initially be set towards the centre
of its range (12 o’clock) and only adjusted once the upper filter
cut-off frequency has been set.
Filter Frequency is controlled via the Frequency rotary knob.
The filter frequency is the fundamental parameter that defines
how the subwoofer integrates with the satellite/main loud-
speakers.The filter frequency should be set at, or just above the
cut-off frequency of the satellite/main loudspeakers. The
recommended initial filter settings for the C1 Sub when used
with ATC satellite/main loudspeakers are shown below:
SCM7 – 60Hz; SCM11 – 55Hz; SCM19 – 55Hz; SCM40 – 50Hz
HTS7/HTS7C – 55Hz; HTS11/HTS11C – 50Hz; HTS40 -50Hz.
Phase is adjusted using a combination of the Phase rotary knob
and the in/out switch. These controls change the phase of the
acoustic output signal with reference to the input signal.This can
be used to improve the integration of the sub – satellite/main
loudspeakers by correcting for phase problems due to different
distances from listener to sub and satellite/main loudspeakers.
This control can be set by listening to well-known material and
choosing the preferred setting or, by using a test tone. If using
the test tone method, select a tone at, or very close to the sub-
satellite crossover frequency and play it back through the sub
and satellite loudspeakers. Flip the in/out phase setting and
rotate the knob to listen to which gives the highest total output
at the listening position.Alternatively, a sound level meter could
be used to measure the level
L+R Output provides a line level summed output of the left
and right input signals.This can be used to “Daisy Chain” C1
subwoofers together.There are no limits to the number of C1
Subwoofers that can be connected in this manner. The control
panel settings have no bearing on the output, i.e the output is
unfiltered and as such each Subwoofer in the chain will require
independent setting of Level and Phase.
Standby/Limit. A single Bi-Colour LED is mounted on the
front panel of the C1 Sub.When the loudspeaker is powered on,
the LED will illuminate Green.The amplifier in the C1 Sub
employs ATC's Active FET momentary gain reduction protection
circuitry which when activated will cause the LED to blink red.
This circuit ensures that when driven to overload the amplifier
will clip in a soft manner, minimising typical limiter related
distortions. If the Power/Limit LED is regularly blinking Red, the
Level is too high and should be reduced, either on the Control
Panel or at source.
ENTRY MANUAL 040919_ENTRY BROCHURE 13.3 10/09/2019 15:19 Page 18
ENTRY MANUAL 040919_ENTRY BROCHURE 13.3 10/09/2019 15:19 Page 19

Entry Series
All models
1
Listening
2
Care & Maintainance
3
Specifications : Stereo/Satellite Models
4
Specifications : Multichannel Models
5
Warranty & Contact
1:Listening
The ear and brain tend to interpret distorted sound as loudness
and thus underestimate the actual level of undistorted sound.
The Entry Series, like all ATC monitors, demonstrates very much
lower levels of distortion than conventional systems of a similar
size and it is therefore advisable to begin listening at an
artificially low level and carefully increase the volume. It is
also possible for your speakers to produce sufficient sound
pressure levels for your ears themselves to become a source
of distortion and make the sound appear harsh. Any audible
distortion indicates that either the system or your ears are
being over-loaded and the volume level should be reduced.
2:Care & Maintenance
High technology material finishes are used in this product.
The surfaces are durable and with a little care can be kept as
good as new even under conditions of heavy use. Normally, a
dry duster will be all that is required to keep the finishes clean.
Heavy soiling can be cleaned using a cloth slightly moistened with
a non-abrasive household cleaner.
There are no components within the speakers that can be
considered expendable, or that would benefit from regular
maintenance.There is no requirement for any kind of routine
service work and there is no schedule for preventative
maintenance.There are no user-replaceable parts within the
speaker and, in the unfortunate event of any malfunction, repair
should be referred to either the supplying dealer or consultant,
the relevant importer, or ATC.
ATC has every confidence in the quality of each product that it
manufactures.
ENTRY MANUAL 040919_ENTRY BROCHURE 13.3 10/09/2019 15:19 Page 20
This manual suits for next models
9
Table of contents
Other ATC Speakers manuals


