ATC P202S Instruction manual

P202S WLAN Phone
Quick User Guide
Version 1.01

TABLE OF CONTENTS
1.0 INTRODUCTION............................................................................................................. 1
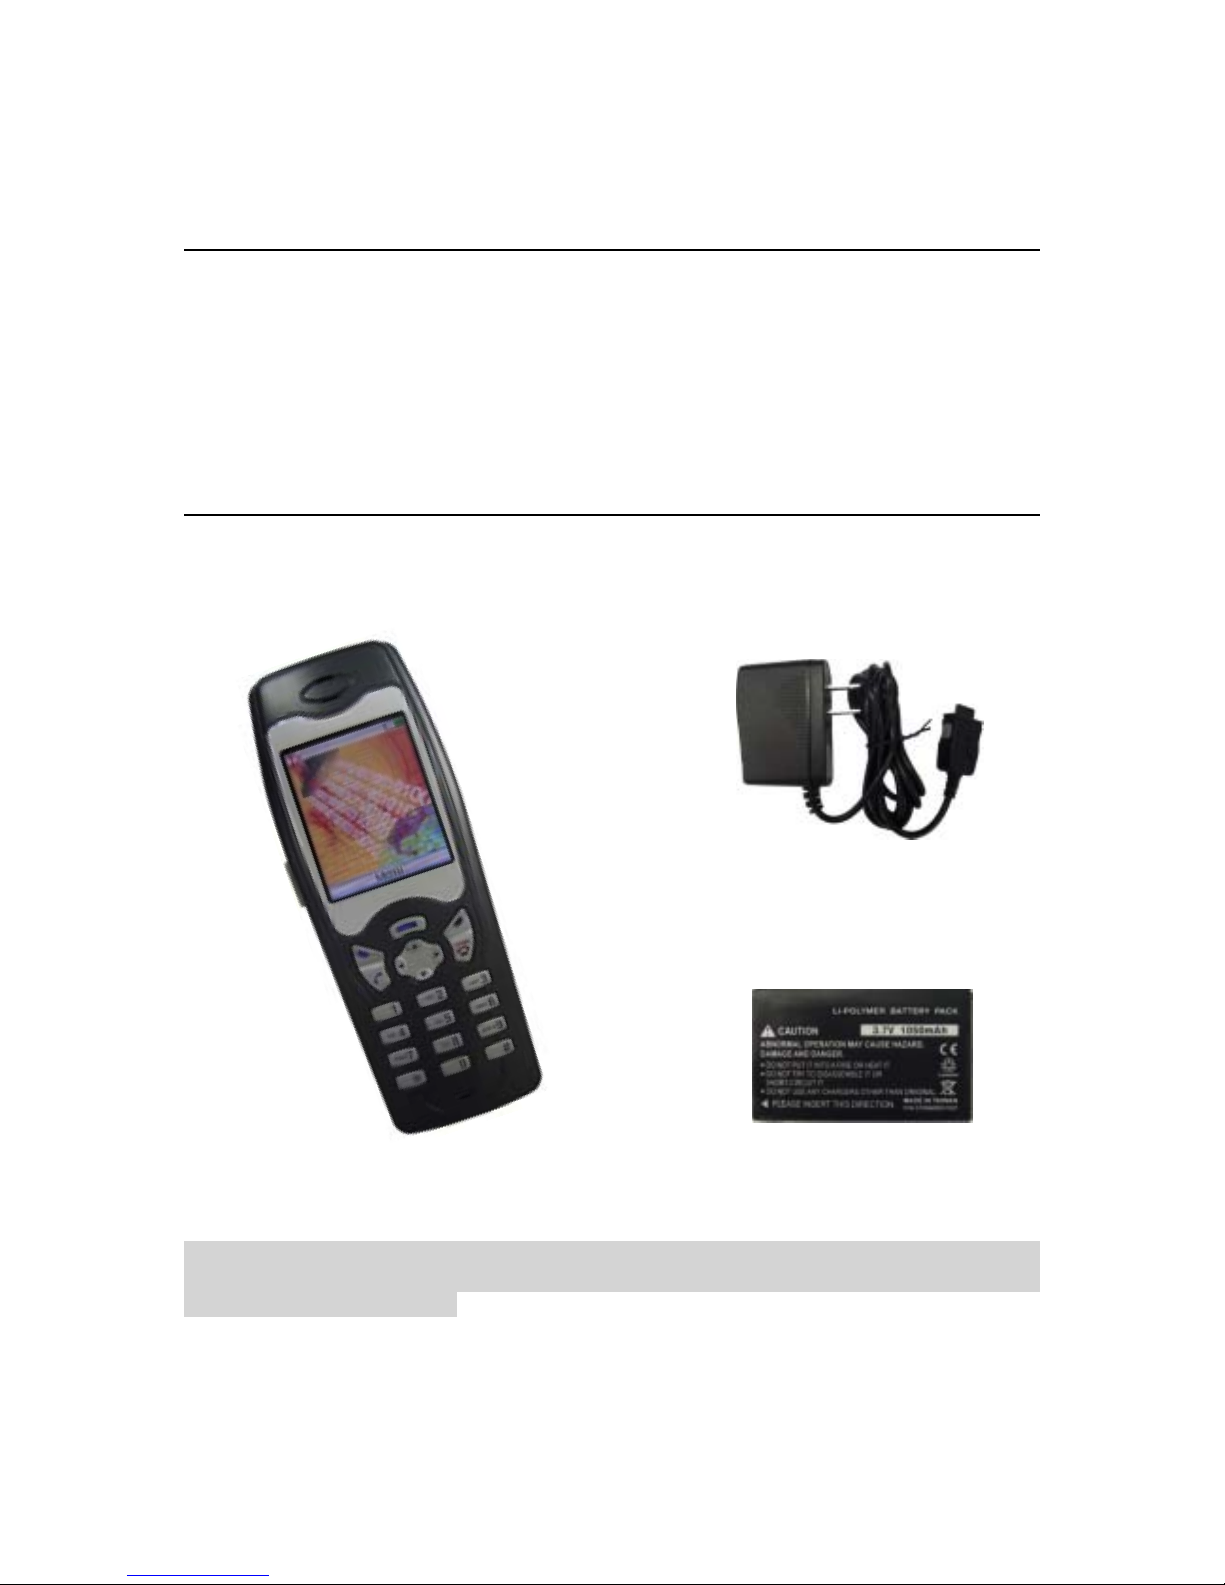
2.0 PACKAGE CONTENT.................................................................................................... 1
3.0 LIST OF FIGURES.......................................................................................................... 2
4.0 QUICK START................................................................................................................ 3
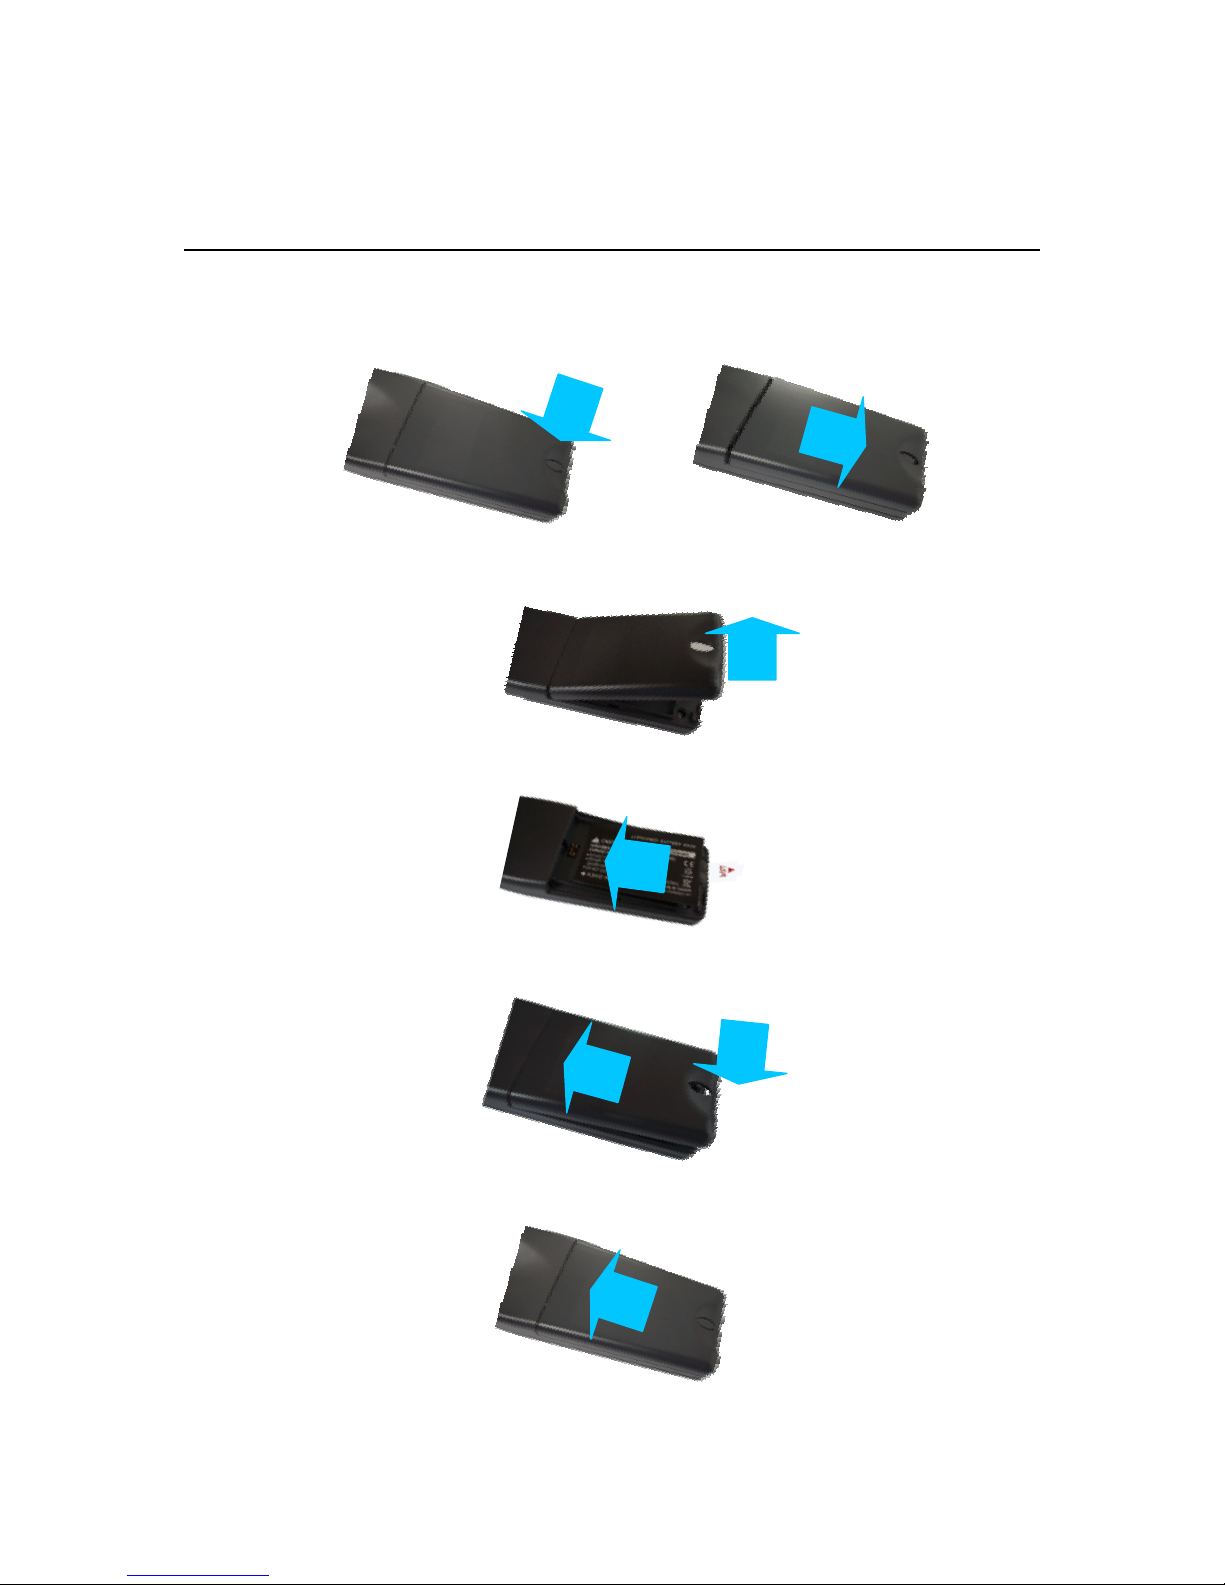
4.1 FIT THE BATTERY ............................................................................................................. 3
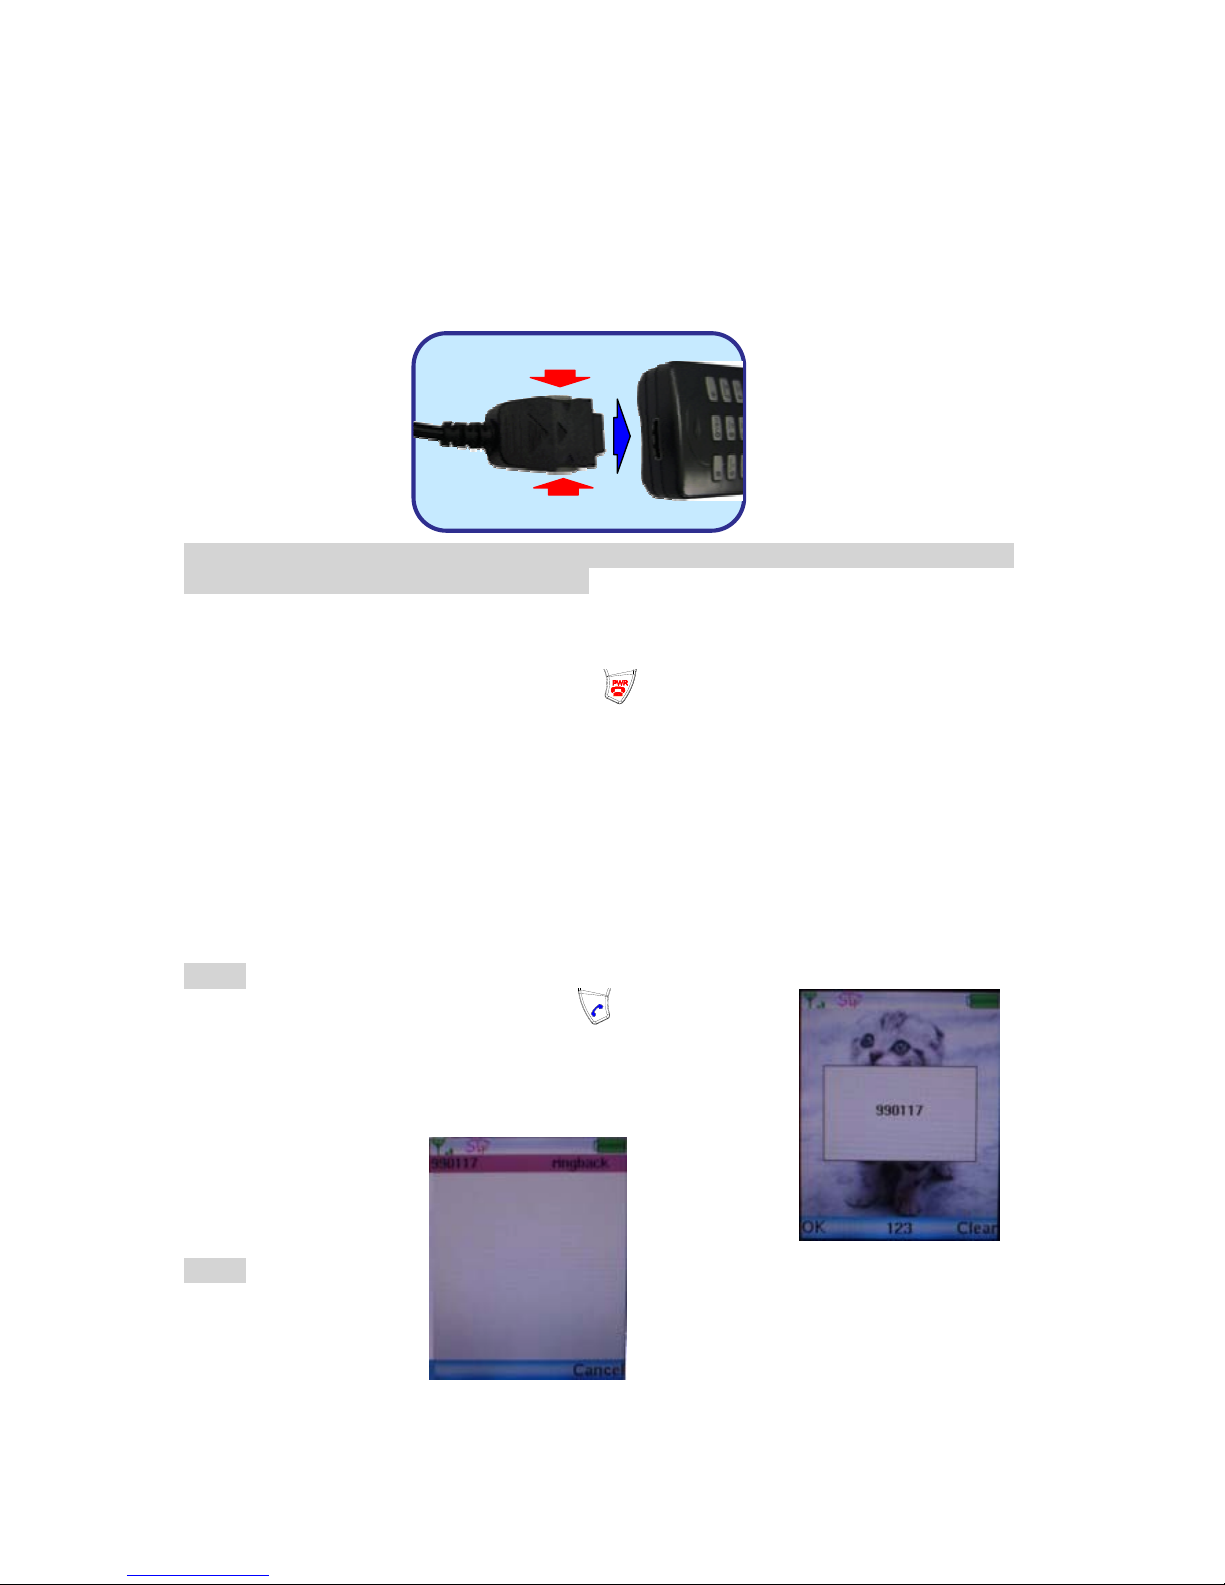
4.2 CHARGE THE BATTERY..................................................................................................... 4
4.3 POWER ON THE PHONE ..................................................................................................... 4
4.3 MAKE/RECEIVE A CALL................................................................................................... 4
5.0 MENU................................................................................................................................ 6
5.1 STATUS ICONS.................................................................................................................. 6
5.2 MENU STRUCTURE ........................................................................................................... 7
5.3 TEXT ENTRY..................................................................................................................... 7
5.4 TEXT ENTRY IN JAVA VIRTUAL MACHINE........................................................................ 8
6.0 SETTINGS......................................................................................................................... 9
6.1 NETWORK ........................................................................................................................ 9
6.2 WIRELESS SETTINGS ...................................................................................................... 10
6.3 HOT SPOT ...................................................................................................................... 11
6.4 SIP................................................................................................................................. 12
6.5 STUN AND UPNP .......................................................................................................... 12
7.0 PHONE BOOK ............................................................................................................... 14
7.1 CREATE A NEW CONTACT.............................................................................................. 14
7.2 BROWSE......................................................................................................................... 14
8.0 MESSAGING.................................................................................................................. 16
8.1 VIEW MESSAGE ............................................................................................................. 16
8.2 VIEW MESSAGE ............................................................................................................. 16
9.0 CALL LOG ..................................................................................................................... 17
10.0 ENTERTAINMENT....................................................................................................... 18
11.0 CALENDAR.................................................................................................................... 18
12.0 PHONE SETTING ......................................................................................................... 19
12.1 TIME &DATE................................................................................................................. 19
12.2 BACKLIGHT LEVEL ........................................................................................................ 19
12.3 MELODY VOLUME ......................................................................................................... 20
12.4 ALERT TYPE .................................................................................................................. 20
12.5 IMAGE MANAGEMENT ................................................................................................... 20
12.6 MELODY MANAGEMENT ................................................................................................ 21

13.0 INFORMATION............................................................................................................. 22
14.0 CALL FORWARD ......................................................................................................... 22
15.0 USING THE CONFIGURATION WEB...................................................................... 23
15.1 ACCESSING CONFIGURATION MENU .............................................................................. 23
15.2 WEB LOGIN SETTING ..................................................................................................... 23
15.3 MANAGEMENT SETTING –RESTORE FACTORY SETTING................................................ 24
15.4 NETWORK SETTING –DHCP ......................................................................................... 24
15.5 NETWORK SETTING –STATIC IP .................................................................................... 25
15.6 SIP SETTING –SIP PHONE SETTING,REGISTRAR AND OUTBOUND PROXY SERVER....... 26
15.7 SIP SETTING –OTHERS.................................................................................................. 27
15.8 SIP ACCOUNT SETTINGS................................................................................................ 28
15.9 STUN SETTING –STUN SERVER SETTING,UPNPSETTING .......................................... 29
15.10 VOICE SETTING AND QOS .......................................................................................... 29
15.11 PHONE SETTINGS –PHONE SETTING,TIMER .............................................................. 30
15.12 PHONE BOOK ............................................................................................................. 32
15.13 RESTART SYSTEM ...................................................................................................... 32
16.0 OPERATING THE PHONE.......................................................................................... 33
16.1 DIALING......................................................................................................................... 33
16.1.1 IP Address............................................................................................................. 33
16.1.2 SIP Number........................................................................................................... 33
16.2 ANSWERING A PHONE CALL .......................................................................................... 33
16.3 SWITCHING TO ANOTHER LINE ...................................................................................... 34
16.4 CALL TRANSFER ............................................................................................................ 34
16.5 REDIAL .......................................................................................................................... 35
16.6 ON HOLD ....................................................................................................................... 35
16.7 CALL WAITING .............................................................................................................. 35
FCC Warning
This device complies with Part 15 of the FCC Rules. Operation is
subject to the following two conditions: (1) This device may not cause
harmful interference, and (2) this device must accept any interference
received, including interference that may cause undesired operation.

Federal Communication Commission Interference Statement
This equipment has been tested and found to comply with the limits for a Class B digital
device, pursuant to Part 15 of the FCC Rules. These limits are designed to provide
reasonable protection against harmful interference in a residential installation. This
equipment generates, uses and can radiate radio frequency energy and, if not installed
and used in accordance with the instructions, may cause harmful interference to radio
communications. However, there is no guarantee that interference will not occur in a
particular installation. If this equipment does cause harmful interference to radio or
television reception, which can be determined by turning the equipment off and on, the
user is encouraged to try to correct the interference by one of the following measures:
- Reorient or relocate the receiving antenna.
- Increase the separation between the equipment and receiver.
- Connect the equipment into an outlet on a circuit different from that
to which the receiver is connected.
- Consult the dealer or an experienced radio/TV technician for help.
FCC Caution: Any changes or modifications not expressly approved by the party
responsible for compliance could void the user's authority to operate this equipment.
This device complies with Part 15 of the FCC Rules. Operation is subject to the
following two conditions: (1) This device may not cause harmful interference, and (2)
this device must accept any interference received, including interference that may
cause undesired operation.
The antenna(s) used for this transmitter must not be co-located or operating in
conjunction with any other antenna or transmitter.
FCC Caution: Any changes or modifications not expressly approved by the party
responsible for compliance could void the user's authority to operate this equipment.
IMPORTANT NOTE:
FCC Radiation Exposure Statement:
This equipment complies with FCC radiation exposure limits set forth for an uncontrolled
environment.
.

1
1.0 INTRODUCTION
Voice over IP (also known as Internet Phone) over wireless LAN is a technology that allows
anyone to make a telephone call over the Internet in wireless LAN environment. This is a quick
user guide for the P202S WLAN Phone. It is intended to help you configure the telephone and
have it ready to run within a few minutes. Please follow the user guide carefully as
troubleshooting the telephone can be very difficult and time consuming.
2.0 PACKAGE CONTENT
The following materials are included in the package. Please check the package to ensure that all
the materials are listed below. Contact your supplier immediately if any item is missing.
Note: The radio frequency (RF) for this phone is configured for a specific regulatory domain. If
you use this phone outside of its regulatory domain, the phone will not function properly and you
might violate local regulations.
WLAN Phone (Model: P202S) Li-Polymer Battery (3.7V 1050mAh)
5V DC Power Adaptor

2
3.0 LIST OF FIGURES
Diagram for WLAN Phone (Model: P202S)
(1) Main display
(2) Menu key
Enter the main menu
(3) Right softkey
Activate the item in the label above the
softkey
(4) Power/End (red) key
Turn the phone on or off, or ends a connected
call
(5) Number keys
Use these to enter numbers and characters
(6) Charger connector
Connect to battery charger
(7) Receiver
Ear piece
(8)
Side key
Adjust receiver volume
(9) Ear set jack
(10) Left softkey
Activates the item in the label above the
softkey
(11) Answer/Send (blue) key
Answer a call or dial a number
(12) Navigation key
Move from one function to another. This
guide uses these directional arrows ▲,▼,◄
or ►
(13) Microphone
(13)
(5)
(4)
(9)
(1)
(11)
(10) (3)
(8)
(12)
(2)
(7)
(6)

3
4.0 QUICK START
4.1 Fit the battery
!Push the battery cap lock and then pull down the battery cap.
!Move battery cap upward to open.
!Put in the battery.
!Put back the battery cap while the top of the cap is 3mm gap.
!Push the cap toward to the top until you hear the click from the lock.
12
2
1
1

4
4.2 Charge the battery
The battery must be fitted in the phone before you connect the charger. Press the button on the
both sides of the connector and insert it into the base of the phone.
Note: Do not force the connector as this may damage the phone and/or the charger. The power
adaptor will stop charging after it is complete.
4.3 Power on the phone
To turn the phone on, press and hold the key for two to three seconds. The phone
authenticates, then associates with a wireless access point and connects to the IP telephony
network.
After connecting to the network, the phone displays the main menu, as shown in Section 5.1. The
phone is in standby mode and is ready to place or receive calls. For the icon status, please refer
to Section 5.1 for detail information.
4.3 Make/Receive a Call
Make a call by number
Step 1:
Dial number and press Answer/Send (blue) key or softkey
<OK>, if you have already registered to the SIP server.
Step 2:
When the call is valid, it will show the ringback. You can hear the
ring back tone and wait for the callee to answer the call.

5
Step 3:
Once the callee answers the call, it will show the talking status.
Make a call by IP address
You can dial IP address to make a call as well. Please press “*” to stand for “.” in IP
address format.
Received a call
When hear ring Melody, press Answer/Send (blue) key to answer the call.

6
5.0Menu
5.1 Status icons
Signal Status
Menu
Battery Status
SIP Status
Enter the main menu/Primary softkey
Indicate the battery level
Indicate the WLAN signal strength
SIP service available
Wallpaper of
standby mode
Title of Sub-menu
Main Display
Right Softkey
Left Softkey
Page Status
Number of current page/Number of total pages
!Use ▲/▼to scroll up/down each record
!Use ◄or ►to page up/down

7
5.2 Menu structure
5.3 Text entry
You use alphanumeric characters to enter details into the Phone Book, to create text and e-mail
messages. The table below shows the characters that you can enter in the different text modes.
Text Mode Text Mode
Key Normal
(ABC) Numeric (0-9) Key Normal
(ABC) Numeric (0-9)
@ 1
pqrsPQRS 7
abcABC 2
tuvTUV 8
defDEF 3
wxyzWXYZ 9
ghiGHI 4
+-*
∕:;?!
( )
0
Phone Book
1. New
2. Browse
Calendar Phone Setting
1. Time & Date
2. Backlight Level
3. Melody Volume
4. Alert Type
5. Image Management
6. Melody Management
Call Log
Information
Settings
1. Network
2. Wireless
3. Hot Spot
4. SIP
5. STUN &
UPnP
Messaging
1. View
Message
2. Retrieve
Voice Mail
Call Forward
Entertainment

8
jklJKL 5
*
mnoMNO 6
#
In Normal and Numeric modes, each time you press in quick succession the next character
available on that key in displayed. For example, to enter “c” you need to press four times
in quick succession. To enter the displayed character, release the key or press another key.
5.4 Text entry in Java Virtual Machine
This WLAN phone supports Java Virtual Machine platform that provide user to download
application in JAVA mechanism. Therefore, you may download wallpaper, melody and games
into this phone. The text entry in Java Virtual Machine may different from the text entry that list
in Section 5.3. Press to change between upper and lower case letters and numeric. Please
check text modes that are shown in table as below.
Key Text Mode/Function Key Text Mode/Function
Upper case
letters (ABC) Numeric (0-9) Move up
Press once Lower case
letters (abc) Numeric (0-9) Move down
Press twice Numeric (0-9)
Backward
Forward
Enter
Backspace
Press and
hold a second
Space

9
6.0 Settings
Enter the main menu and use navigation keys to locate Settings icon. Press the left softkey
<Select> to enter this sub-menu.
6.1 Network
This WLAN phone supports DHCP that can assign IP address automatically and static IP that
can assign IP address manually. Please ensure the network of this phone is set in order to use this
phone properly.
!Move the highlight bar to Network and press the left softkey
<Select> to enter this Network Setting menu.
!The default network setting is DHCP. You can setup manually by
using navigation keys to enter the column you want and then
insert the necessary data.
!Press the left softkey <Save> to store the settings.

10
6.2 Wireless Settings
Please setup the correct AP into preferred AP list before using this phone properly.
!Move the highlight bar to Wireless and press the left softkey
<Select> to enter this Wireless Setting menu.
Scan APs
!Move the highlight bar to Scan APs and press the left softkey
<Select> to scan available APs. It will list all the names of
available APs or show “No AP found” message after scanning.
!Move the highlight bar to the AP you want to link and press the left softkey <Select>. It will
pop-up a small window that lists Info and Set as Preferred AP items.
Info: List AP information of “SSID”, “Status” and “Signal”
Set as Preferred AP: Save the profile of this AP into Preferred APs
You may have several preferred APs. Please repeat the steps of Scan APs to add more preferred
APs.
Preferred APs
!Move the highlight bar to Preferred APs and press the left softkey <Select> to scan

11
available APs. It will list all the names of available Preferred APs or show “No AP found”
message after scanning.
!Move the highlight bar to the AP you prefer to link and press the left softkey <Select>. It
will pop-up a small window that lists Setting and Remove items.
!Move the highlight bar to Setting and press the left softkey <Select> to setup “SSID”,
“WEP” and “Key” of this preferred AP.
SSID: Shows the name of linking AP.
WEP: Use navigation keys to turn on/off this function.
Key: Please enter the “Key” of linking AP if you enable this function
Note: This key supports Hexadecimal format and please use <0~9> and <A~F> for this. (64 bit:
10 digits; 128 bit: 26 digits)
!Move the highlight bar to Remove and press the left softkey
<Select> to delete this AP from Preferred APs list.
!Please press the left soft key <Save> to store the settings.
This phone will automatically search for the available AP when it
boots up at the first time.
6.3 Hot Spot
Allow users to connect securely to Wi-Fi hotspots without fear of
identity theft and allows operators/service providers to offer a
broader range of wireless LAN services to trusted users.
!Move the highlight bar to Hot Spot and press the left softkey
<Select> to enter this Hot Spot menu.

12
!Move the highlight bar to Setting and press the left softkey
<Select> to enter this Hot Spot Setting menu.
!Currently, this WLAN only support “Default”, “Taipei Free
WLAN”, “WiFly” and “EASY-UP” ISP profiles. Please check
with your dealer/ISP for more detail.
Sending Method: Support “Never”, Prompt” and Automatic”
sending methods.
Login ID: User ID to login to the wireless network.
Password: Password to assess the wireless network.
6.4 SIP
Session Initiation Protocol (SIP) is the most popular Voice over IP standard. It enables two or
more people to make phone calls, share multimedia and make multimedia conference over the
internet. Please have an administrator setup these settings for you or obtain this information from
your SIP service provider.
!Move the highlight bar to SIP and press the left soft key
<Select> to enter this SIP Setting menu.
!Use navigation keys to input
“Display name”, “User Name”,
“Authentication ID”,
“Authentication Pwd”, “SIP Port”,
“SIP Server”, “Outbound Proxy
Port” and “Outbound Proxy
Server”.
!Press the left softkey <Save> to store the settings.
6.5 STUN and UPnP
Enable STUN or UPnP to activate the NAT traversal function if this device is behind NAT
mechanism. Please ensure your NAT router can support UPnP as well. Please refer to the
operation manual of your router for further information.
!Move the highlight bar to STUN & UPnP and press the left softkey <Select> to enter this
STUN & UPnP Setting menu.

13
!Use navigation keys to turn STUN or UPnP on or off. Enter
STUN server IP address when enable STUN server.

14
7.0 Phone Book
Use the Phone Book menu to store, browse, edit and delete a person’s name, Phone number and
e-mail address. Enter the main menu and use navigation keys to locate Phone Book icon. Press
the left softkey <Select> to enter this sub-menu.
7.1 Create a New Contact
!Move the highlight bar to New and press the left softkey
<Select> to enter this Phone Book menu.
!Enter the data using the keypad and select an item from the list
available.
For each contact you can enter:
Item Number of digits
Name 31
Phone Number 63
Email 63
7.2 Browse
!Move the highlight bar to Browse and press the left softkey
<Select> to enter this Browse menu.
!Press the 1st digit of letter to browse the record of phone book.
The highlight bar will locate the record that you would like to
find.
!Move the highlight bar to name and press the left softkey
<Select> to view or delete this contact.

15
!Press the left softkey <Select> to view this contact and then
press <Edit> to edit the item you would like to do.
!You may save this new data after editing or exit to pervious menu
to select <Delete> this contact.

16
8.0 Messaging
From the Messaging menu you can view and retrieve the message and voice mail you have.
Enter the main menu and use navigation keys to locate Messaging icon. Press the left soft key
<Select> to enter this sub-menu.
8.1 View Message
!Move the highlight bar to View Message and press the left soft
key <Select> to enter this menu.
!It will show the number of new voice message you have.
8.2 View Message
!Move the highlight bar to Retrieve Voice Message and press
the left soft key <Select> to listen to the message you have.
Table of contents