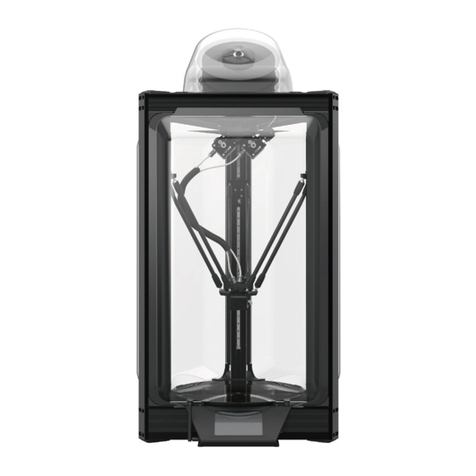
Atom ATOM 3 Series User manual

ATOM 3.5 USER'S MANUAL

Hello! Welcome to join Atom 3D printer family! Atom 3.5 is a
world-class desktop machine designed for speed, precision and
reliability. We know you’ll love printing your designs on Atom 3
but before you do, please read the manual thoroughly.

SAFETY WARNINGS AND GUIDELINES
P. 4
ATOM 3 SERIES: USER'S MANUAL
P.14
PREPARING TO PRINT
UPLOAD FILES/START PRITING
PRINTER SETTING
PACKAGE CONTENT
Auto-Leveling
Cleaning the Build Plate
Loading Filament
Unloading Filament
Swapping Hotends
Wi-Fi Setting
P. 8
P. 9
P.10
P. 11
P.12
P.12/13
P. 5
P. 6 / 7
CUSTOMER SERVICE
P. 5
CUSTOM SETTING
P.15
SAFETY CERTIFICATIONS
P.18
CARE AND MAINTENANCE
MIC
FCC
CE
P.16
P.17
P.17
FILAMENT RUNOUT SENSOR
P.16
LANGUAGE SETTINGS
P.16
PRINTING ENVIROMENT
P.16
P.19
WARRANTY
P.20
REGULATORY

4
SAFETY WARNINGS AND GUIDELINES
Safety Warnings and Guidelines
1. Be careful not to damage the glass build plate.
2. Take care to avoid touching hot parts, including heat
blocks, nozzle, extruded filament, and the heated build
plate.
3. Keep the printer and all accessories out of reach of small
children.
4. Do not remove or disconnect the USB cable when printing
from a computer.
5. Do not pull or twist the black cable harness at any time.
6. Do not force or tear anything during unpacking and
setup. This may cause damage to the printer and/or its
accessories.
7. Do not reach inside the printer during operation. Always
allow the printer and extruded filament to cool before
reaching inside.
8. Ensure that the printer is turned o and unplugged from
its power source before making repairs or performing
service.
9. Do not install this device on an unstable surface where it
could fall and cause either personal injury or damage to
the device and/or other equipment.
10. Do not subject the product to extreme force, shock, or
uctuations in temperature or humidity.
11. This device is intended for indoor use only.
12. Do not expose this device to water or moisture of any
kind. Do not place drinks or other containers with moisture
on or near the device. If moisture does get in or on the
device, immediately unplug it from the power outlet and
allow it to fully dry before reapplying power.
13. Do not touch the device, the power cord, or any other
connected cables with wet hands.
14. Use only in a well-ventilated area. Do not use in conned
spaces.
15. Prior to operation, check the unit and power cord for
physical damage. Do not use if physical damage has
occurred.
16. Before plugging the unit into a power outlet, ensure that
the outlet provides the same type and level of power
required by the device.

5
Customer Service
ATOM is dedicated to ensuring that your ordering, purchasing,
and delivery experience is second to none. If you have any
problem with your order, please give us an opportunity to
make it right. You can contact an ATOM Customer Service
representative through the phone or email, also you can link on
our website www.atom3dp.com during normal business hours
(Mon-Fri: 9am-12pm, 1pm-6pm)
or via email at [email protected]
Software Installation and Setup
We recommend using Cura for use with both Atom 3.5 and
Atom 3.5 DX. Please visit Atom website to download Cura and
for instruction of installation. The installation package comes
with everything you need to get started.
https://www.atom3dp.com/en/
CCAH21LP1650T7
For low-power radio frequency equipment that has been certied, companies, rms,
or users are not allowed to change the frequency, increase the power, or change the
characteristics and functions of the original design without approval. The use of low-
power radio frequency equipment must not aect ight safety and interfere with legal
communications; if interference is found, it should be stopped immediately, and it can
only be used when there is no interference. The aforementioned legal communications
refer to radio communications operated in accordance with the provisions of the
Telecommunications Administration Law. Low-power radio frequency equipment must
endure the interference of legal communications or industrial, scientic and medical
radio wave radiation electrical equipment.
Package Contents
Please take an inventory of the package contents to ensure
you have all the items listed below. If anything is missing
or damaged, please contact Atom Customer Service for a
replacement.
Atom 3.5
• 1 x Atom 3.5 3D Printer
• 1 x Atom PLA Filament Roll (700g)
• 1 x Power Supply
• 1 x Power Supply AC cable
• 1 x Antenna
• 1 x Spare PTFE-lined Nozzle
• 1 x Auto-level Sensor
• 2 x Spool Axle
• 1 x Teon lubricants
• 1 x Shovel
• 1 x Diagonal pliers
• 1 x Screwdriver( H1.5 )
• 1 x Roll support rod
• 1 x Black hexagon socket screw M5-12mm
• 1 x Washer
• 1 x Retainer clip
CUSTOMER SERVICE/SOFTWARE INSTALLATION AND SETUP/PACKAGE CONTENTS

6
PRINTER SETTING
Follow below instruction before to print :
1. Take the 3D printer out of the package and place it on a stable surface
which near by the AC outlet.
2. Take out the magnetic rod and the mobile platform. In order to ensure
the magnetism of the magnetic rod, please avoid separating the two.
Note: The magnet of each magnetic rod is marked with N-level; those
not marked are S-level.
※ If the mobile platform and the magnetic rod are connected together, please
reconnect the two corresponding to the magnet (as shown in the picture)
3. Install the rod
4. Install Washer > Spool Axie > Filament Roll > Spool Axie
> Retainer Clip
A
T
O
M
3
D
P
R
I
N
T
E
R
S
w
w
w
.
a
t
o
m
3
d
p
.
c
o
m
1
2
3
4
5
N
S
N
S
NS
The fan faces the front

7
6. Plug in the power and turn on the switch5. Install antenna
A. First lock the antenna horizontally into the screw
and tighten it
B. Fold up the antenna at the bend
PRINTER SETTING

8
Auto-Leveling
Before your rst print, and anytime you remove the build plate,
you’ll want to run an auto-level to ensure that your parts adhere
well to the glass. Follow the procedure below to run an auto-
level
1. Make sure the nozzle temperature is in room temperature
2. After connecting the automatic calibration sensor to the
green line of the mobile platform cable set, properly cover
the nozzle with the white sponge ring.
Please gently put the sensor
on the nozzle. If the nozzle
touches the plastic lm, it
will cause calibration errors.
Do not touch
the running fan
to avoid injury!
Connect the platform
calibration module cable
and the green connector
which above the nozzle
※Regardless of positive
and negative polarity
Automatic sensor
correction
PREPARING TO PRINT
011 Idle
Position
X 0 0
Y 0 0
Z 337 3
Bed Calibration Extrusion
Macro
Fan 0%
HOMEConsoleMove
STOPControlPrint Setup
Nozzle 1 Hot Bed
200 70
23.3 24.2
1
Note: Please gently put the sensor on the nozzle. If the
nozzle touches the plastic lm, it will cause calibration
errors.

9
011 Idle
Position
X 0 0
Y 0 0
Z 337 3
Bed Calibration Extrusion
Macro
Fan 0%
HOMEConsoleMove
STOPControlPrint Setup
Nozzle 1 Hot Bed
200 70
23.3 24.2
1
Clean the Build Plate
To prepare the build plate for printing, use rubbing alcohol and
a soft, lint-free cloth or white paper towel to remove any dust
and oil from the surface of the glass. DO NOT use colored paper
towels or white board cleaners.
3. Click [ Control ] > [ HOME ] > [ Bed Calibration ] on the
LCD screen to auto-leveling.
4. After the automatic calibration is completed, the automatic
calibration sensor will be removed
1
2
3
PREPARING TO PRINT

10
6. Touch the LCD screen to preheat the nozzle to the
working temperature of the material, for example,
PLA is 200° C.
1. Place the filament spool
on the holder so that
the working end of the
filament hangs down to
the right.
2. Cut the end of the
filament at an angle as
illustrated.
3. Gently straighten a
segment about 5 cm
(2”) from the end with
your ngertips to make it
easier to feed the lament
through the sensor and
the extruder.
4. Remove the filament
sensor from its holder
and feed the end of the
filament through the
sensor in the direction as
indicated by the arrow,
then into the tube on the
right side of the extruder.
5. Pinch the extruder idler
lever and push the
filament past the gear
and into the bowden tube
just past the pneumatic
connector.
Pass the coil to the beginning of the
circle shown in the gure
Place the Sensor Module
back when it is not in use.
Do not touch the heated nozzle
and the heated build plate to
avoid burn scald !
LOADING FILAMENT
011 Idle
Position
X 0 0
Y 0 0
Z 337 3
Bed Calibration Extrusion
Macro
Fan 0%
HOMEConsoleMove
STOPControlPrint Setup
Nozzle 1 Hot Bed
200 70
23.3 24.2
1
Loading Filament

011 Idle
Position
X 0 0
Y 0 0
Z 337 3
Bed Calibration Extrusion
Macro
Fan 0%
HOMEConsoleMove
STOPControlPrint Setup
Nozzle 1 Hot Bed
200 70
23.3 24.2
1
011 Idle
Macros
Extrude 5mm
Retract 5mm
Tool0
Tool1
X
011 Idle
Position
X 0 0
Y 0 0
Z 337 3
Bed Calibration Extrusion
Macro
Fan 0%
HOMEConsoleMove
STOPControlPrint Setup
Nozzle 1 Hot Bed
200 70
23.3 24.2
1
011 Idle
Macros
Extrude 5mm
Retract 5mm
Tool0
Tool1
X
11
7. When the nozzle reaches the specified temperature,
click [ Macros ] > [ Load Filament ]
UNLOADING FILAMENT
1. Touch the LCD screen to preheat the nozzle to the working
temperature of the material, for example, PLA is 200° C.
2. When the nozzle reaches the specified temperature,
click [ Macros ] > [ Unload Filament ]
3. Hold the lament sensor and carefully rotate the spool while
the lament is unloading to avoid tangles.
4. IMPORTANT: When removing the end of the lament from the
sensor, carefully string the end through the hole in the spool
to avoid overlapping and tangles. These WILL cause lament
jams and failed prints.
Unloading Filament

011 Idle
Position
X 0 0
Y 0 0
Z 337 3
Bed Calibration Extrusion
Macro
Fan 0%
HOMEConsoleMove
STOPControlPrint Setup
Nozzle 1 Hot Bed
200 70
23.3 24.2
1
Messages
STOPControlPrint Setup
12
Swapping Hotends
Atom 3’s hotend is easily swappable so you can print with
dierent materials at dierent temperatures. While we always
recommend using the default, PTFE-lined hotend for use with
PLA and many other low-temperature materials, the included
all- metal hotend allows you to print with materials which
require temperatures hotter than what PTFE can handle. As
always, please remember to use your printer in a well ventilated
area.
1. Preheat the hotend and unload the lament.
2. Cool down the hotend, then turn o the machine.
3. Remove the Bowden tube from the eector by removing the
plastic pneumatic connector clips and depressing the top of
the connector while pulling the tube.
4. Disconnect the heater and thermistor connectors from the
cable harness.
5. While holding the hotend, use a 1.5 mm hex wrench (included)
to loosen the two headless hex screws on the side of the
heat sink below the eector, and the hotend should be easily
removable.
6. Replace the hotend in the same orientation and tighten the
screws.
7. Reconnect the heater, thermistor, and Bowden tube, ensuring
that the tube is pushed all the way in.
Wi-Fi Setting
A. Click [ Console ] > Upper Right Keyboard > Input 3 steps
SWAPPING HOTENDS/WI-FI SETTING When printing over 250 degrees,
please use the all-metal hose to
avoid melting and deformation
of the original Teflon hose.
Removing and Replacing a Hotend

Y
X
X
VCH
SDF
STOPControlPrint Setup
Y
X
X
VCH
SDF
STOPControlPrint Setup
13
C. Open the browser of your computer or mobile device and
enter the IP location to connect to the printer
Do not touch the moving parts during
printing to avoid injury or burns!
3 Steps
1. M552SpaceS0 (Close Wi-Fi)
2. M587SpaceS"Wi-Fi name"SpaceP"Wi-Fi password"
3. M552SpaceS1 (Turn on Wi-Fi)
4.
B. Wait a few seconds, the screen will display the IP
location of the printer, enter the IP location into the web
address area of the browser, press Enter to connect
to the printer, the connection screen appears and the
connection is successful.
For Exsample:10.0.0.55
DO NOT type Space
WI-FI SETTING

14
[ + 0.02mm] Raise the nozzle position
[-0.02mm] Lower the nozzle position
F. If the rst layer
of printing does
not stick to the
platform (the print
head is too high)
or the plastic is
not discharged
normally (the
print head is
too low), press
the right [arrow
button] to make
advanced settings
for the Z-axis
compensation
value.
UPLOAD FILES/START PRINTING
D. Click left menu [ Jobs ] > [ UPLOAD G-CODE FILE(S) ]
E. After uploading les, click the le you'd like to print and
press [ YES ], it will start printing.
If the broswer is not working
Click the upper right EMERGENCY STOP to totally stop
the printer, then re-click the file you'd like to print.
011 Printing
Position
X 0 0
Y 0 0
Z 337 3
Percent: 30% Time Left« 1h 10m
STOPControlPrint Setup
Nozzle 1 Hot Bed
200 70
200 69.9
1
011 Printing
Baby Stepping
V
Position
X 31.9
Y 81.7
Z 0.3
0 000mm
+0.02mm-0.02mm
1
2

15
CUSTOM SETTING
Custom Printer Name
Atom 3.5 support customized name, please follow the
steps below to set.
2. Enter the page and scroll down to Line 9 and custom
your printer name. Please put your custom name inside
the P''printer name'' (Only support alphabets and numbers
no longer than 15 charactors, DO NOT enter SPACE and
PUNCTUATION )
1. Open the browser and connect to the working
screen of the printer, and go to the left menu
Click [ System ] > [ cong.g ]
3. After the modification is completed, click [SAVE]
to the upper right corner to save the modification.
4. LCD will show your modification of the printer name.
5. When open the browser, enter
http://printer name.local will connect your pritner page
(no space between charactors))
ATOM Idle
Position
X 0 0
Y 0 0
Z 337 3
Bed Calibration Extrusion
Macro
Fan 0%
HOMEConsoleMove
STOPControlPrint Setup
Nozzle 1 Hot Bed
200 70
23.3 24.2
1
1
2

011 Idle
Position
X 0 0
Y 0 0
Z 337 3
Bed Calibration Extrusion
Macro
Fan 0%
HOMEConsoleMove
STOPControlPrint Setup
Nozzle 1 Hot Bed
200 70
23.3 24.2
1
16
Printing Environment
FDM needs to be printed in a constant temperature
environment, the printing quality will be more
stable. Try not to print in the direct air-conditioning
environment and the indoor temperature is too low.
PRINTING ENVIRONMENT
Filament Runout Sensor
If the sensor fails to detect the wire, the screen will
prompt you.vPlease re-import the filament.
Language Setting
Click [ Setup ] > [ en ] to switch language into English
pannel.
Pause
∑㞘
STOPControlPrint Setup
Always dim Info timeout 0 Clear settings
Calibrate touch Brightness - Brightness +
Volume 3 en

17
MIC CERTIFICATION

18
FCC/CE CERTIFICATION

19
CARE AND MAINTENANCE
Care and Maintenance
• Regular care and maintenance will keep your Atom 3
looking and working like new for years. Please follow these
care and maintenance guidelines for each component of
your machine.
• Clean the machine’s frame with a damp, lint-free cloth.
• Clean the glass build plate with rubbing alcohol or another
ammonia-free solvent and a soft, lint-free cloth such as
microber.
• Lubricate the magnetic control arms with PTFE or lithium
grease on at least a monthly basis. This can be done by
applying a small amount of grease onto the magnets of
the control arms which function as a lubricant reservoir.
After a few prints, wipe away any excess grease from the
ball joints with a lint-free cloth.
• The carriages have been factory calibrated to ensure many
thousands of hours of consistent, precision movement. If
after an extended period of time they seem loose or noisy,
they may require adjustment or lubrication.
• To adjust the wheel spacing,
• USE ONLY silicone lubricant on the wheels when
they seem noisy
• Use a dry brush to clean the extruder gear’s teeth when
they become clogged or when the gear starts to slip.
• Clean the LCD touchscreen display while the machine is
powered o using a soft cloth. DO NOT use any solvents
or cleaning uids on the display.

20
ATOM Warranty
ATOM product warranty terms
1. Since the acceptance date, products that meet the terms of
this warranty have a one-year warranty period, not including
vandalism or any man-made damage, and are not applicable
to consumable products and consumable parts (*Note)
3、Due to the manufacturing process, the LCD panel cannot
guarantee 100% no bright or dark spots, and no guarantee is
provided for no bright or dark spots on the panel.
4、The LCD panel will be worn out due to usage time (such
as brightness changes), and this wear and tear is not covered
by the warranty.
5、If the parts are damaged after the warranty expires, the
consumer must bear the parts and repair with ATOM service
fees. If the consumer cannot accept the repair price, the
original purchase channel may not accept the repair.
6、If the part is damaged after the warranty period, or the
damage is not within the warranty, the consumer decides not
to repair after inspection, each product shall be charged a test
fee, and the channel has the right to decide whether to repair
the obsolete or discontinued product.
7、This warranty clause only applies to the hardware parts
contained in the "product". It does not include technical
assistance for the use of hardware or software, nor does it
include any software products contained in the "product".
8、The scope of protection of this warranty does not cover
failures caused by any factors other than the defects of
the product itself, including but not limited to the following
conditions:
8-1、Natural disasters, earthquakes, lightning strikes and
other accidents
8-2、Misuse / abuse / negligence (such as cracked LCD
panel, liquid penetration, moisture, or failure to follow
the instructions for use, etc.)
8-3、Appearance damage
8-4、Repairs, modications, disassembly and assembly
performed by personnel not authorized by the
original factory
9、After inspection by the original factory, the "product"
itself does not have any faults or defects. If the abnormal
phenomenon is caused by other accessories, products, related
or peripheral devices connected to the "product", this warranty
clause will not apply.
10、The company has the final decision and the right to
modify the terms of service.
*Note: "Consumable products and consumable parts"
include but are not limited to nozzles, Teflon tubes, normal
consumption of glass platform, belt, outer packaging material,
printing wire, paper manual damaged or missing.
ATOM WARRANTY
This manual suits for next models
1
Table of contents
Other Atom 3D Printer manuals
Popular 3D Printer manuals by other brands

German RepRap
German RepRap X400CE manual

3D Platform
3D Platform WorkSeries 200 Series Quick reference guide

ATOMSTACK
ATOMSTACK E285 Replacement instructions

Felix Storch
Felix Storch FELIXFOOD 3D quick start guide

DMP Electronics
DMP Electronics 86Duino ENJOY Quick start manual

Flashforge
Flashforge Inventor II user guide