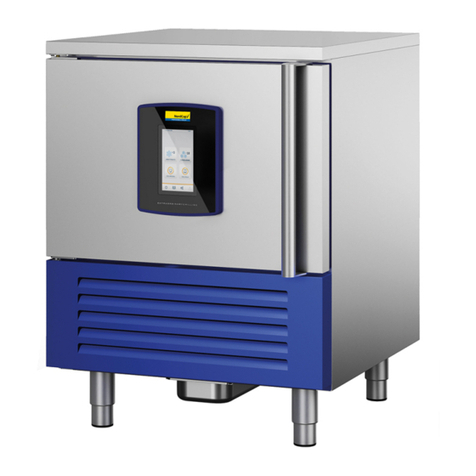
Atosa EBF-03 User manual

Original instruction
INSTRUCTION MANUAL
Blast Chiller Cabinets
Please read the user’s manual before you use this product


1
Blast Chiller Cabinets
Installation, use and maintenance instructions
1. INTRODUCTION................................................................................................................................................................2
2. The manufacturer cannot be held liable in the following cases:................................................................................3
3. TRANSPORTATION AND STORAGE............................................................................................................................3
4. COMMISSIONING.............................................................................................................................................................4
4.1 POSITIONING........................................................................................................................................................4
4.2 INITIAL CLEANING............................................................................................................................................... 5
4.3 Electrical connection............................................................................................................................................. 5
4.4 CONNECTION TO DRAINS................................................................................................................................ 6
5. TECHNICAL CHARACTERISTICS................................................................................................................................ 6
5.1 NOISE AND VIBRATION......................................................................................................................................6
5.2 POSSIBLE USAGES............................................................................................................................................ 6
6. USAGE................................................................................................................................................................................ 7
6.1 ACTION................................................................................................................................................................... 7
6.2 Meaning of the button........................................................................................................................................... 7
6.3 Selecting the BLAST CHILLING cycle............................................................................................................... 8
6.4 How to access and set parameters.................................................................................................................... 9
6.5 Accessing the parameters divided by functional blocks............................................................................... 10
6.6 Directly accessing the parameters by selecting the category......................................................................10
6.7 Alarms with manual reset...................................................................................................................................10
6.8 HACCP function................................................................................................................................................... 10
6.9 Procedure for setting the default parameter values.......................................................................................11
7. MANITENANCE............................................................................................................................................................... 11
7.1 PERIODIC CLEANING....................................................................................................................................... 11
7.2 CLEANING OF CONDENSER.......................................................................................................................... 11
7.3 PERIOD OF INACTIVITY OF CABINET......................................................................................................... 11
8. TROUBLE SHOOTING AND REMEDIES................................................................................................................... 12
8.1 If the cabinet does not operate, make sure that:............................................................................................12
8.2 If the required temperature is not achieved, make sure that;...................................................................... 12
8.3 If the cabinet leaks water, make that:...............................................................................................................12
8.4 If the cabinet is unacceptably noisy, make sure that:....................................................................................12
8.5 IMPROBABLE RISKS.........................................................................................................................................12
9. SUBSTITUTION OF SPARES.......................................................................................................................................12
10. DISMANTLING.............................................................................................................................................................12
Circuit diagram......................................................................................................................................................................... 14
Technical Parameters..............................................................................................................................................................15
OFFICIAL APPROVAL AND RULES.................................................................................................................................... 15
Summary of operating parameters....................................................................................................................................... 17
Signals on the display..................................................................................................................................................... 17
CORRECT DISPOSAL OF THIS PRODUCT..................................................................................................................... 18
2
1. INTRODUCTION
Please read instructions before using this appliance.
IMPORTANT SAFETY INSTRUCTION
▲ To reduce the risk of fire, electric shock, or injury to persons when using your product, basic safety
precautions should be followed, including the following.
▲ This appliance must be properly installed and located in accordance with the Installation Instruction
before it is used.
▲ Before the appliance is plugged in, ensure that the rated voltage corresponds to the voltage of the
electrical system in your home. The power plug should have its own independent socket. Using adapters
may cause overheating or burning.
▲ This appliance can be used by children aged from 8 years and above and persons with reduced
physical, sensory or mental capabilities or lack of experience and knowledge if they have been given
supervision or instruction concerning use of the appliance in a safe way and understand the hazards
involved.
▲ Children shall not play with the appliance.
▲ Cleaning and user maintenance shall not be made by children without supervision.
▲ If the supply cord is damaged, it must be replaced by the manufacturer or its service agent or a
similarly qualified person in order to avoid a hazard.
▲ Connect to properly grounded outlets only. Avoid the use of extension cords. Do not run cord under
carpeting, runners or the like. Arrange cord away from traffic area and where it will not create a tripping
hazard.
▲ Always unplug appliance when not in use and before cleaning, adjusting or maintaining this machine.
To disconnect appliance, turn switch off and remove plug from power source.
▲ Do not disconnect by pulling on the cord. Always disconnect by grasping and pulling on the plug top.
▲ Do not pull out the cord or touch the power plug with wet hands. Clean water or dust from the power
plug and insert it with the ends of the pins securely connected.
▲ Do not use outdoors.
▲ Do not splash water on the appliance. It may cause a malfunction or electric shock.
▲ Do not disassemble, repair or alter the appliance. It may cause fire or abnormal operations, which
may lead to injury.
▲ After your fridge-freezer is in operation, do not touch the cold surfaces in the freezer compartment,
particularly when hands are damp or wet. Skin may adhere to these extremely cold surfaces.
▲ Never place glass products in the freezer because they may be broken when their inner contents are
frozen.
▲ The refrigerant and insulation blowing gas used in the appliance require special disposal procedures.
When disposal, please consult with service agent or a similarly qualified person.
▲ Do not store explosive substances such as aerosol cans with a flammable propellant in this
appliance.
▲ If you need the electronic version instruction manual, please ask the manufacturer or its service
agent .
▲ Max. Load of shelf is 88 lbs.

3
This instruction manual provides all the necessary information regarding:
▲ use of the refrigerator
▲ technical specifications
▲ installation and handling
▲ operator procedures and instructions
▲ maintenance operation
The manual is to be considered an integral part of the refrigerator and should be stored in a safe place
for father consult to permit a good working life of the refrigerator.
The appliance is intended for commercial use only.
2. The manufacturer cannot be held liable in the
following cases:
■ improper installation (not in accordance with the guidelines indicated
herein)
■ misuse of the refrigerator
■ power supply defects
■ improper or inadequate maintenance
■ unauthorised modification or tampering
■ use of non-original spare parts
■ partial or total failure to comply with the instructions
All electrical equipment can be hazardous to health. Current standards and legal requirements must be
complied with during the installation and use of any equipment.
3. TRANSPORTATION AND STORAGE
The equipment is wrapped in absorbent material and contained and fixed within a wooden platform and
paper box.
Whist awaiting by definitive collection, these should be stored within a protected and covered
environment at a temperature between -25℃/ +55℃,with ambient humidity between 30℃/95%. Do not
stack more than three items.

4
4. COMMISSIONING
Carefully read the label on the equipment, do not cover for any reason whatsoever. and replace them
immediately if damaged. Do not remove protection or panelling that require the usage of tools.
4.1 POSITIONING
Ensure that in respect of the dimensions, the space reserved for the equipment permits its correct
utilisation and ease of maintenance. After carefully unpacking the display case, remove the white PVC
protective film and all of the manufacturer's material which safeguards the item in transit. Place the
cabinet on a flat surface and level it by screwing and adjusting the leveling legs to ensure its efficient
operation. The cabinet must be lifted only from the exterior of the base to avoid the possibility of damage.
Do not move the cabinet by application of pressure to the surface.if the device has been positioned
horizontally (integral condensing unit).wait two hours before activating it. Packing and protective film
should be disposed off as indicated by the local authorities. The equipment must not be installed within
explosive amblence,In the open air or exposed to
Ensure that in respect of the dimensions, the space reserved for the equipment permits its correct
utilisation and ease of maintenance. After carefully unpacking the display case, remove the white PVC
protective film and all of the manufacturer's material which safeguards the item in transit. Place the
cabinet on a flat surface and level it by screwing and adjusting the leveling legs to ensure its efficient
operation. The cabinet must be lifted only from the exterior of the base to avoid the possibility of damage.
Do not move the cabinet by application of pressure to the surface.if the device has been positioned
horizontally (integral condensing unit).wait two hours before activating it. Packing and protective film
should be disposed off as indicated by the local authorities. The equipment must not be installed within
explosive amblence, In the open air or exposed to rain the correct siting is; distant from direct sources
( radiators, direct lighting, etc...) and protected from direct sunlight and draughts. Air circulation must be
freely maintained around the condensing unit, be it integral or remote. In observance of these specific
conditions will detrimentally affect the cabinet. nsure that in respect of the dimensions, the space
reserved for the equipment permits its correct utilisation and ease of maintenance. After carefully
unpacking the display case, remove the white PVC protective film and all of the manufacturer's material
which safeguards the item in transit. Place the cabinet on a flat surface and level it by screwing and
adjusting the leveling legs to ensure its efficient operation. The cabinet must be lifted only from the
exterior of the base to avoid the possibility of damage. Do not move the cabinet by application
of pressure to the surface. if the device has been positioned horizontally ( integral condensing unit ).wait
two hours before activating it. Packing and protective film
should be disposed off as indicated by the local authorities.
The equipment must not be installed within explosive
amblence, In the open air or exposed to rain the correct
siting is; distant from direct sources ( radiators, direct
lighting, etc...) and protected from direct sunlight and
draughts. Air circulation must be freely maintained
around the condensing unit, be it integral or remote.
In observance of these specific conditions will
detrimentally affect the cabinet.
≥50cm

5
4.2 INITIAL CLEANING
Before use all parts of the cabinet should be cleaned,
For the walls and all the internal parts use an
antibacterial detergent. For the plastic parts use a
moistened cloth.Dry with a soft clean cloth.use
little or no water.
Do not use harsh or abrasive solvents or detergents
During cleaning do not approach bare-handed those
parts which could cut (evaporator, condenser, etc.) and always use protective gloves.
4.3 Electrical connection
Check that the supply conforms to the requirements
listed on the factory label and that it is provided
with a fall-safe protection or automatic circuit
breaker with an efficient earth connection.
Should there not be an electrical safety
feature have this introduced by a qualified person.
by means of a omnipolar switch as indicated
in the safety regulations with a means of a
omnipolar switch as indicated in the safety
regulations with a minimum clearance of the
contacts of 3 mm. where the cabinet
has to be installed at some distance from
the electrical source.ensure that the conforms
to the local regulations. Cabinet supplled
with integral condensing units are provided
with an appropriate plug fitted with a neutral
and earth; the supply cable must be well
stretched (avoid coilling and superimposition).
it must not be exposed to the possibility of damage
by third parties. it should not be in contact with
liquids, water or heat sources. in the event
of damage it must be replaced by qualified
personnel. Always avoid the use of reducers or
adapters.
AC220-240V
Outlet Only
Grounding Terminal

6
4.4 CONNECTION TO DRAINS
The dispersal of defrost water is automatic in all models with integral condensing unit.
5. TECHNICAL CHARACTERISTICS
5.1 NOISE AND VIBRATION
The sound level of the equipment fitted with integral hermetic condensing unit does not exceed 70 dB,it
is therefore not necessary to provide sound insulation. Under normal conditions the equipment does not
generate vibrations which affect surroundings.
5.2 POSSIBLE USAGES
Do not utilise the equipment to store medical supplies. the optimum operational ambient temperatures
are between +10℃/ +32℃

7
6. USAGE
6.1 ACTION
These devices are activated by one switches and an electronic control panel.
6.2 Meaning of the button

8
6.3 Selecting the BLAST CHILLING cycle

9
6.4 How to access and set parameters
type “F” (FREQUENT, not protected by password), type “C” (CONFIGURATION, password protected)
Step
Action
Effect
Meaning
1
Press PRG for 3 seconds
After 3 seconds the display will show the 1st
parameter, “0”(Password)
Access to type ”F” parameters is
direct without password
2
Press UP or DOWN
The value on the display will increase or decrease.
Enter the password ”22” to access the
type “C” parameters or whatever
different value for the type “F”
parameters.
3
Press START
The display will show “St” (Setpoint)
This is the current value of the
Setpoint
4
Press UP or DOWN
If the password set is 22 the display will scroll the
list of type “C” parameters(CONFIGURATION)
otherwise the list of type ”F”
parameters(FREQUENT)
Set the desired value
5
Press START
The display will show the parameter name
This is the current value of the
parameter
6
Press UP or DOWN
The value on the display will increase or decrease
Set the desire value
7
Press START
The display will show the parameter name again
IMPORTANT: parameters not yet
saved
8
Repeat steps 2,3,4&5 for
all parameters required
9
Press PRG for 5 seconds
The controller will display the temperature read by
the probes again
IMPORTANT: only now have all the
parameters been updated
For both types of access (type “F” and type “C”) there is a timeout (no button on the keypad pressed for
1 min), the procedure is ended without saving the parameter.

10
6.5 Accessing the parameters divided by functional blocks
Once having accessed the type “F” or “C” parameters (see tables above)
Step
Action
Effect
Meaning
1
Press PRG
The display will show the name of the functional
block that the parameter belongs to
Example ‘CMP’ for the compressor
parameters, ‘dEF’ for the defrost
parameters
2
Press UP or DOWN
The display will show the name of the other
functional blocks
Example ‘Fan’ for the fan parameters
3
Press START
The display will show the name of the first
parameter in the functional block selected
Example “F0” for ‘Fan’
6.6 Directly accessing the parameters by selecting the category
The configuration parameters can also be accessed, in addition to the mode described above, via the
category (see the icons and abbreviations inthe table below), according to the list on the display with the
corresponding name and icon. To directly access the list of parameters grouped bycategory, press the
PRG button for at least 1 second and to modify the parameter press DOWN+ START + UP.
Category
Paraneters
Message
Icon
Probe parameters
/
‘pro’
Control parameters
r
‘Ctl’
Compressor parameters
c
‘CMP’
Defrost parameters
d
‘dEF’
Alarm parameters
A
‘ALM’
Fan parameters
F
‘FAn’
Configure parameters
H configuration
‘CnF’
HACCP parameters
H HACCP
‘HcP’
RTC parameters
rtc
‘rtc’
6.7 Alarms with manual reset
The alarms with manual reset can be reset by pressing the PRG and UP for more than 3 s.
6.8 HACCP function
ir33+ is compliant with the HACCP standards in force since it allows the monitoring of the temperature of
the stored food.
“HA” alarm = exceeded maximum threshold: up to three HA events are saved (HA, HA1, HA2)
respectively from the more recent (HA) to the oldest (HA2) and a HAn signal that displays the number of
occurred HA events.

11
“HF” alarm = power failure lasting over a minute and exceeded AH maximum threshold: up to three HF
events are saved (HF, HF1, HF2) respectively from the more recent (HF) to the oldest (HF2) and a HFn
signal that displays the number of occurred HF events. HA/HF alarm setting: AH parameter (high temp.
threshold); Ad and Htd (Ad+Htd = HACCP alarm activation delay).
Display of the details: access to HA or HF parameters pressing the START button and use UPor DOWN
buttons to glance over. HACCP alarm erasing: press the DOWN and SET buttons for more than 5
seconds, the message ‘res’ indicates that the alarm have been deleted. To cancel the saved alarms
press the DOWN+ START + UP buttons for more than 5 seconds.
6.9 Procedure for setting the default parameter values
To set the default parameter values on the controller, proceed as follows:
• If “Hdn” = 0:
1: switch the instrument off;
2: switch the instrument back on, holding the PRG button until the message “Std” is shown on the
display.
Note: the default values are only set for the visible parameters (C and F). For further details see table
“Summary of operating parameters”.
• If “Hdn” < > 0:
1: switch the instrument off;
2: switch the instrument back on, holding the PRG button until the value bn0 is shown on the display;
3: select the set of default parameters, between 0 and “Hdn”, using the DOWN and UP buttons;
4: press the START button until the message “Std” is shown on the display.
7. MANITENANCE
7.1 PERIODIC CLEANING
For hygienic reasons and improved performance clean at least once a month the internal basin.
Especially the hole for water out going, need keep clean always, First perform a manual defrosting cycle
( par. 6.3 ),
When complete, switch off the power supply and clean the inside following the instructions given in par.
4.2 ( initial cleaning ).
7.2 CLEANING OF CONDENSER
For improved performance clean the condenser at least once a week.
Before beginning turn off the equipment, and disconnect the plug.
Close and protect the unit.
- Unscrew, rotate and remove protective grill
- Remove the dust deposited on the front surface of the condenser
using a brush and a vacuum cleaner and restore previous conditions.
7.3 PERIOD OF INACTIVITY OF CABINET
During periods of inactivity, remove the products from thecabinet and then follow these directions:
- Remove the plug out from the outlet and carefully clean the unit
as per periodic cleaning
- Cover the cabinet whit a cloth that allows air circulation in the interior.

12
8. TROUBLE SHOOTING AND REMEDIES
Often, the malfunction of a unit is due to simple causes which can easily be eliminated without
contacting a technician.Therefore execute the following controls
8.1 If the cabinet does not operate, make sure that:
- The plug has been correctly inserted into the socket.
- The supply cord is not damaged.
8.2 If the required temperature is not achieved, make sure that;
- The command switch is turned on.
- The electronic control panel is correctly regulated (see 6.1.3, 6.1.4).
- The cabinet is neither in the defrosting phase nor in the
post-defrosting pase.
- The evaporator is not covered with frost (see 6.3).
- The condenser is not blocked with dust.
- The cabinet is not located near heat sources or its condensing unit
has uninterrupted air flow.
- The stored foods or other objects do not inhibit proper closing of the unit.
- The cabinet is not working in anomalous conditions (overloaded, loaded with hot food, or loaded in
a way that prevents proper air circulation).
8.3 If the cabinet leaks water, make that:
- The collecting container or the device for condensing water elimination are not damaged.
- The discharge outlets are not blocked or obstructed.
- The cabinet has been properly leveled.
8.4 If the cabinet is unacceptably noisy, make sure that:
- The frame does not have loose screws or bolts.
- The cabinet has been laid in a stable position and correctly leveled.
If, after all these controls, the malfunctioning continues, it is advisable to contact technical
assistance. Be prepared to supply the following information:
- The model trade name and the serial number (both can be found on the technical data plate ).
- The alarm codes appearing on the display of the control panel.
8.5 IMPROBABLE RISKS
In case of fire unplug the cabinet, if possible, and use a powder fire extinguisher.
9. SUBSTITUTION OF SPARES
Before commencing any service or maintenance work, isolate the cabinet from the electrical supply.
Always fit original spares which may be obtained from an authorized concessionaire or stockist.
10. DISMANTLING
The scrapping of the cabinet requires to be undertaken by specialized company, licensed by the local

13
authorities, and observing local statutes.Polyurethane foaming material, not fire-resistant, when deal
with the material, should be according with local law and statue.
- The cabinet consists of:
- Structure in steel plate,
- Electrical components and cables,
- Electrical compressor.
- Plastic materials,
- Refrigerant fluid which must not be discharged into the atmosphere.
ALL THE RESPONSIBILITY FOR THE FAILURE TO RESPECT THE EXISTING LOCAL STATUTES
ARE THE RESPONSIBILITY OF THE OWER.
Meaning of crossed –out wheeled dustbin:
Do not dispose of electrical appliances as unsorted municipal waste, use separate collection facilities.
Contact you local government for information regarding the collection systems available. If electrical
appliances are disposed of in landfills or dumps, hazardous substances can leak into the groundwater
and get into the food chain, damaging your health and well
-being. When replacing old appliances with new ones, the retailer is legally obligated to take back your
old appliance for disposals at least free of charge

14
Circuit diagram

15
Technical Parameters
Energy efficiency parameters
Model(s):
EBF-03
Type of product
Blast chiller / Blast freezer
Refrigerant fluid(s):
R290 (Propane), GWP: 3
Indication of the program used for blast chilling
Indication of the program used for blast freezing
Item
Symbol
Value
Unit
Energy consumption for chilling function
E
0,1218
kWh /kg
Chilled full load capacity
10,00
kg
Energy consumption for freezing function
E
0,7842
kWh /kg
Frozen full load capacity
5,00
kg
Refrigerant charge
0,15
kg
Blast chilling cycle from + 65°C to + 10°C
t
90
min
Blast freezing cycle from + 65°C to - 18°C
t
270
min
Contact
details
Yindu Kitchen Equipment Co., Ltd.
No. 1 Xingxing Road, Xingqiao District, Yuhang, Hangzhou, Zhejiang 311100, China
Model
EBF-03
EBF-05
Fast cooling performance per cycle/kg
10Kg(+90℃/+3℃) in 90 Min
25Kg(+90℃/+3℃) in 90 Min
Fast freezing performance per cycle/kg
5Kg(+90℃/-18℃) in 240 Min
15Kg(+90℃/-18℃) in 240 Min
Rated voltage
220-240V,50Hz
220-240V,50Hz
Rated power(W)
1100
1300
Current(A)
6
6.5
Auxiliary heater
13
13
Safety climate class
4
4
Volume(L)
-
-
Refrigerant
R290
R290
Amount(g)
150
150
Dimension D×W×H(mm)
755×832×581
750×815×870
Inner fitting
3 trays GN1/1 - 3 trays EN 600×400
5 trays GN1/1 - 5 trays EN 600×400
Condensation
air
air

16
Model(s):
EBF-05
Type of product
Blast chiller / Blast freezer
Refrigerant fluid(s):
R290 (Propane), GWP: 3
Indication of the program used for blast chilling
Indication of the program used for blast freezing
Item
Symbol
Value
Unit
Energy consumption for chilling function
E
0,0576
kWh /kg
Chilled full load capacity
25,00
kg
Energy consumption for freezing function
E
0,2804
kWh /kg
Frozen full load capacity
15,00
kg
Refrigerant charge
0,15
kg
Blast chilling cycle from + 65°C to + 10°C
t
72
min
Blast freezing cycle from + 65°C to - 18°C
t
240
min
Contact
details
Yindu Kitchen Equipment Co., Ltd.
No. 1 Xingxing Road, Xingqiao District, Yuhang, Hangzhou, Zhejiang 311100, China
OFFICIAL APPROVAL AND RULES
Our products full fill the present E.U. rules, including the CE mark of the European official approval
Machinery Directive (MD) 2006/42/EC
Electromagnetic Compatibility (EMC) Directive 2014/30/EU
EN 60335-1 EN 55014-1
EN 60335-2-89 EN 55014-2
EN 62233 EN 61000-3-2
EN 61000-3-3
Serial № C003-106-076

17
Summary of operating parameters
Signals on the display

18
CORRECT DISPOSAL OF THIS PRODUCT
This marking indicates that this product should not be disposed with other
household wastes throughout the EU. To prevent possible harm to the
environment or human health from uncontrolled waste disposal, recycle it
responsibly to promote the sustainable reuse of material resources. To
return your used device, please use the return and collection systems or
contact the retailer where the product was purchased. They can take this
product for environmental safe recycling
This manual suits for next models
1
Table of contents