manuals.online logo
Brands
  1. Home
  2. •
  3. Brands
  4. •
  5. Atten
  6. •
  7. Power Supply
  8. •
  9. Atten ST-1509 User manual

Atten ST-1509 User manual

Other Atten Power Supply manuals

Atten APS15-3A User manual

Atten

Atten APS15-3A User manual

Atten APS3005S-3D User manual

Atten

Atten APS3005S-3D User manual

Atten APS22-5A User manual

Atten

Atten APS22-5A User manual

Atten TPR3003T User manual

Atten

Atten TPR3003T User manual

Popular Power Supply manuals by other brands

Videx 520MR Installation instruction

Videx

Videx 520MR Installation instruction

Poppstar 1008821 Instructions for use

Poppstar

Poppstar 1008821 Instructions for use

TDK-Lambda LZS-A1000-3 Installation, operation and maintenance manual

TDK-Lambda

TDK-Lambda LZS-A1000-3 Installation, operation and maintenance manual

TDK-Lambda 500A instruction manual

TDK-Lambda

TDK-Lambda 500A instruction manual

Calira EVS 17/07-DS/IU operating instructions

Calira

Calira EVS 17/07-DS/IU operating instructions

Monacor PS-12CCD instruction manual

Monacor

Monacor PS-12CCD instruction manual

VOLTIMA MagicBox 15 Installation and operating instructions

VOLTIMA

VOLTIMA MagicBox 15 Installation and operating instructions

Miller Auto Deltaweld 452 owner's manual

Miller

Miller Auto Deltaweld 452 owner's manual

BCP PUOUBK How to install

BCP

BCP PUOUBK How to install

HC 2210 manual

HC

HC 2210 manual

Agilent Technologies 6032A Service manual

Agilent Technologies

Agilent Technologies 6032A Service manual

Radial Engineering SB-48UB user guide

Radial Engineering

Radial Engineering SB-48UB user guide

Puls CT5.241 installation manual

Puls

Puls CT5.241 installation manual

OCZ ZX1250W Technical specifications

OCZ

OCZ ZX1250W Technical specifications

iseg ECH 238 manual

iseg

iseg ECH 238 manual

Agilent Technologies 6631B Service manual

Agilent Technologies

Agilent Technologies 6631B Service manual

Power XXL A Series instruction manual

Power

Power XXL A Series instruction manual

HP 6200B Operating and service manual

HP

HP 6200B Operating and service manual

manuals.online logo
manuals.online logoBrands
  • About & Mission
  • Contact us
  • Privacy Policy
  • Terms and Conditions

Copyright 2025 Manuals.Online. All Rights Reserved.

ST-1509 User Manual
Packing list: Main host + Soldering handle
+ Iron stand + Power cord + Manual
Main host Soldering handle
Power cord
Iron stand
ST-1509
150W
T1.6A(230VAC) T3A(110VAC)
80℃~480℃/176℉~896℉
3
30
(means:ST-1509 V0.1 version)
2.Enter standby mode
standby
3.Enter sleep mode (only after turning on the standby function)
S 8
REAL
SLP
SET
REAL
150
(Default standby mode after 1 minute.)
(Only when the standby function is on can it be used. By default, it will enter
the sleep mode after 30 minutes.)
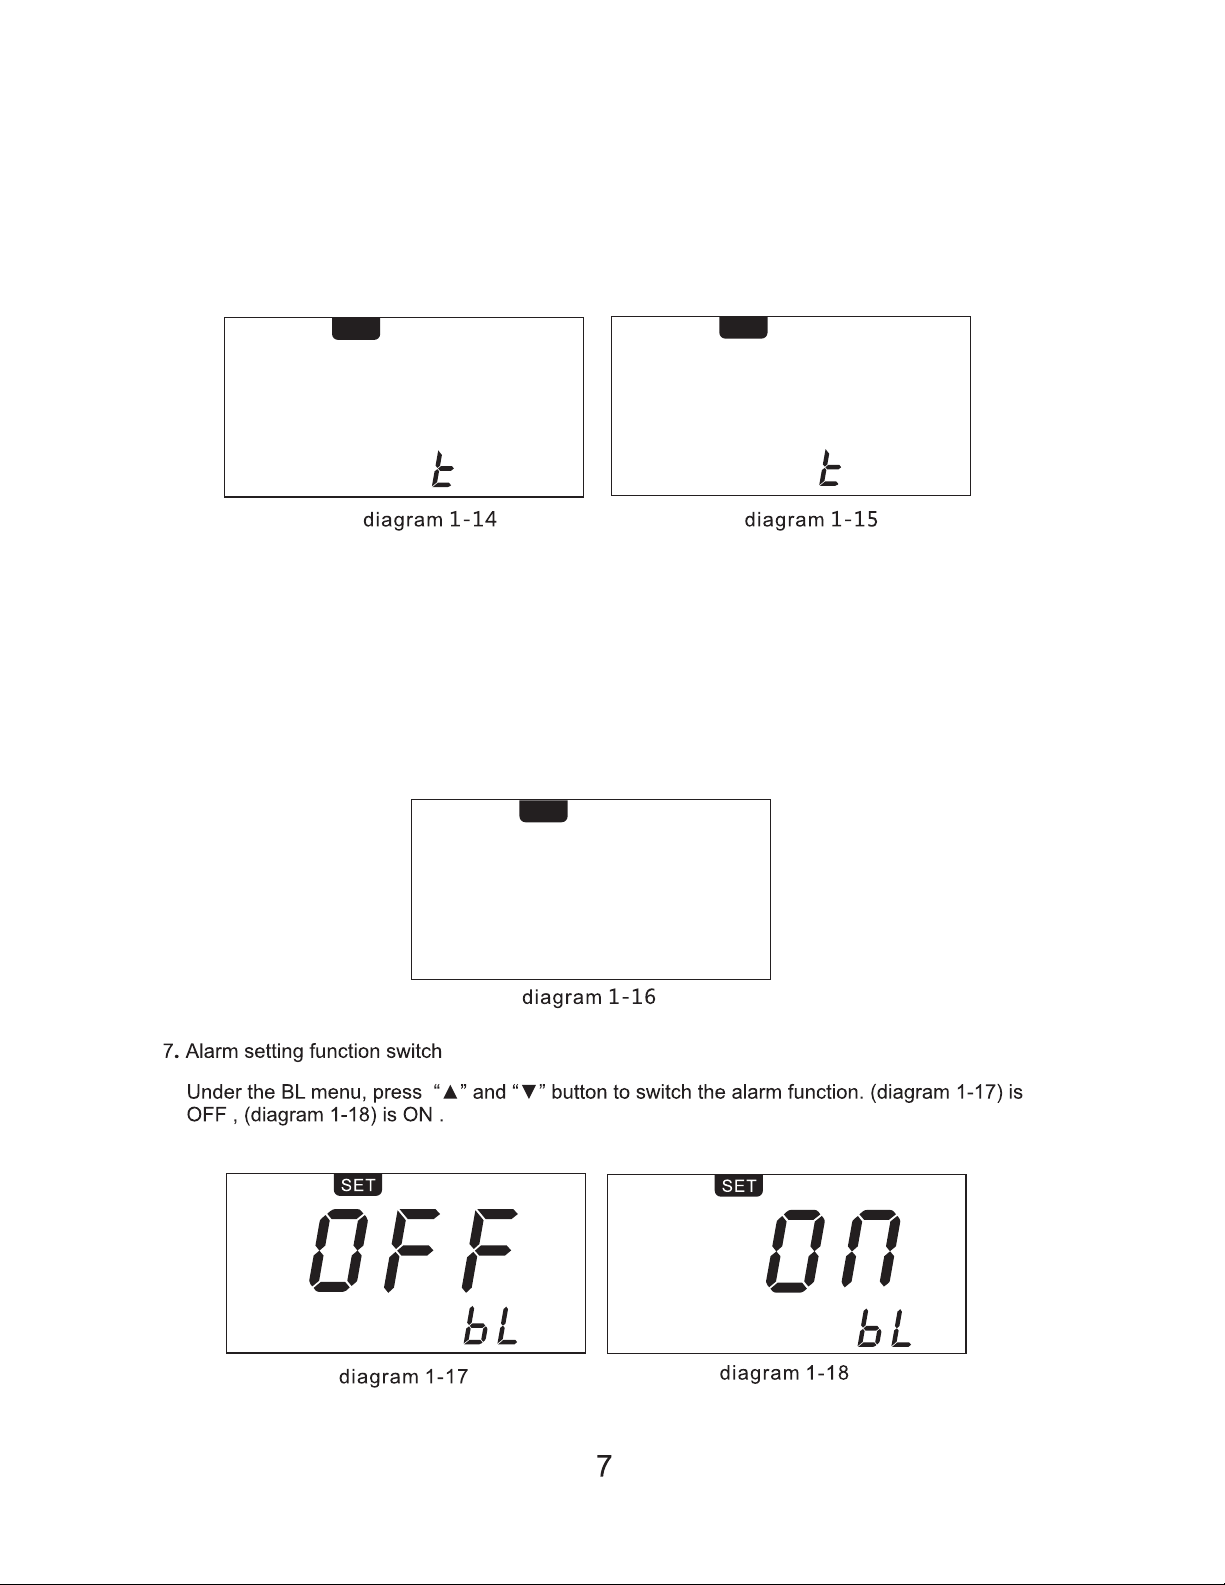
5.Auto-standby function
Under the STB menu, press "▲" and "▼" to set the standby parameters:Off/On Time:10~60
(default 1) minutes. the heater temperature is 150 ℃ under standby status. (diagram 1-14)
open the auto standby function, and the standby time is 20 minutes. (diagram 1-15) turn off the
auto standby function . In standby mode, pick up the soldering tool or press any key to
automaticallyresume normal operation. (Note: If the device is not in a static state, it will affect the
device to enter auto sleep)
6.Auto-sleep function
Note: The auto sleep function needs to be used when the auto standby function is turned on.
When the auto standby function is turned off, the auto sleep function is turned off at the same
time. The auto sleep function cannot be turned off when the auto standby function is turned on.
Under the OFF menu, press "▲" and "▼" button can be set the heating time:10~60(default 30)
minutes. When the heating state is turned off, pressing any button will automatically resume the
normal working mode.
Example:The standby time is 10, and the sleep time is 20. The total time is 30 minutes. After
heating is turned off, the heating core is not heated.
2
SET
Y8
S
0f
SET
Y8
S
of
2 0
S
L
P
SET
0
SET
lPS9
0
SET
l9
e
Under the PSD menu, press “▲” and “▼” button to adjust the password setting value.The
password value can be set from “01" to “999". (diagram 1-21) Display 01 means the password
function is turn on, (diagram 1-22) to enter the menu interface. The first time you enter the
password in not set, press 2 button to enter the menu mode, then set the password and press
2 button to confirm the menu.
(Note: Directly enter password 906 to enter the menu interface in case of forgetting the password)
Under the H-L menu, press “▲”and “▼” button to set the upper lower temperature values and
OFF. (diagram 1-19) It will alarm if upper temperature more than 20℃(68℉) and the lower
temperature less than -20℃(68℉). (diagram 1-20) alarm function is OFF. The upper and lower
temperature rang is 20℃to 80℃(68℉to 176℉).
E02:Sensor alarm(diagram 1-25)
E03:Zero-cross detection abnormal alarm(diagram 1-26)
E04:Abnormal temperature alarm
E05:over-current protection
E07:Short circuit of sensor
E08:Abnormal soldering tip temperature
E09:The soldering pen has been removed
e 20 e 30
30