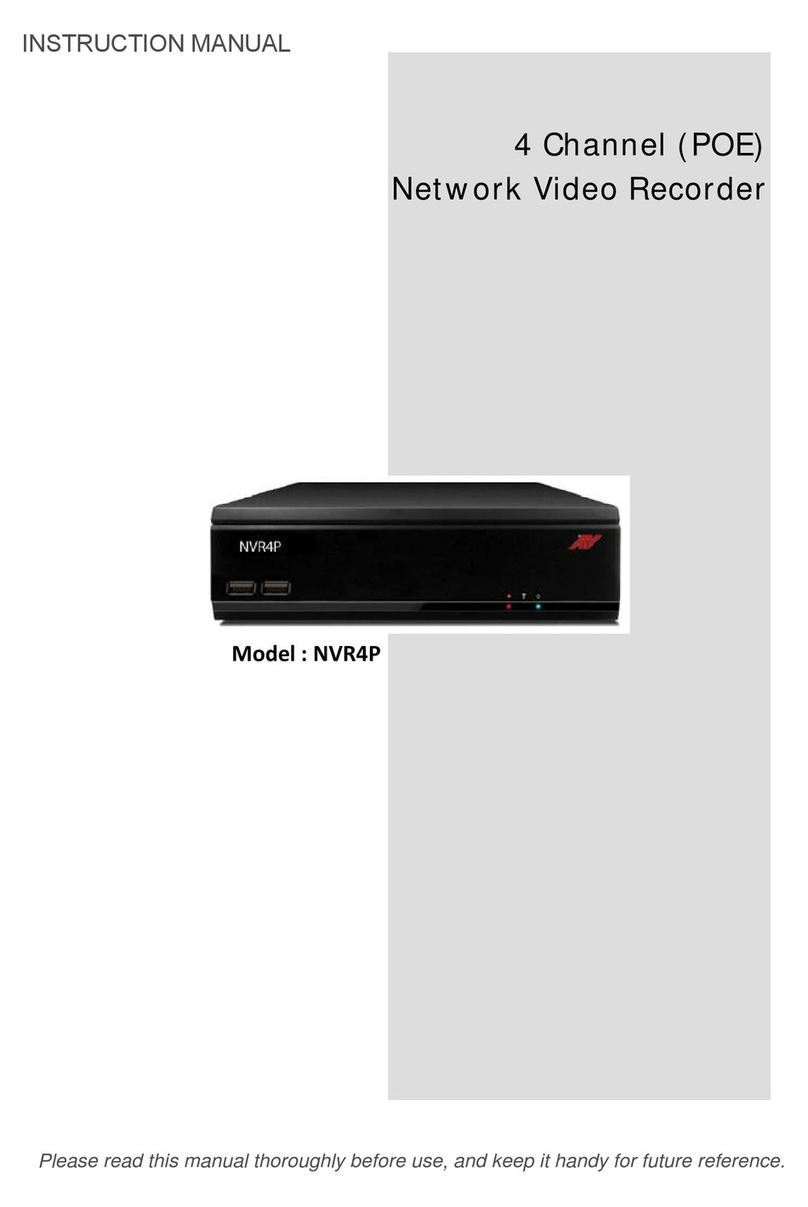
ATV N16P4 User manual

Please read this manual thoroughly before use, and keep it handy for future reference.
Real Time Full HD, PoE
Network Video Recorders
INSTRUCTION MANUAL

2
WARNING
TO REDUCE THE RISK OF FIRE OR ELECTRIC SHOCK, DO NOT EXPOSE THIS PROCUCT TO
RAIN OR MOISTURE. DO NOT INSERT ANY METALLIC OBJECT THROUGH THE VENTILATION
GRILLS OR OTHER OPENNINGS ON THE EQUIPMENT.
CAUTION
EXPLANATION OF GRAPHICAL SYMBOLS
The lightning flash with arrowhead symbol, within an equilateral triangle, is intended to alert
the user to the presence of uninsulated "dangerous voltage" within the product’s enclosure
that may be of sufficient magnitude to constitute a risk of electric shock.
The exclamation point within an equilateral triangle is intended to alert the user to the
presence of important operating and maintenance (servicing) instructions in the literature
accompanying the appliance.
PRECAUTIONS
Safety -------------------------------------- Installation -------------------------------
Should any liquid or solid object fall into the
cabinet, unplug the unit and have it checked by
the qualified personnel before operating it any
further.
Unplug the unit from the wall outlet if it is not
going to be used for several days or more. To
disconnect the cord, pull it out by the plug. Never
pull the cord itself.
Allow adequate air circulation to prevent internal
heat build-up. Do not place the unit on surfaces
(rugs, blankets, etc.) or near materials (curtains,
draperies) that may block the ventilation holes.
Height and vertical linearity controls located at the
rear panel are for special adjustments by qualified
personnel only.
Do not install the unit in an extremely hot or
humid place or in a place subject to excessive
dust, mechanical vibration.
The unit is not designed to be waterproof.
Exposure to rain or water may damage the unit.
Cleaning ---------------------------------
Clean the unit with a slightly damp soft cloth.
Use a mild household detergent. Never use
strong solvents such as thinner or benzene as
they might damage the finish of the unit.
Retain the original carton and packing materials
for safe transport of this unit in the future.

3
FCC COMPLIANCE STATEMENT
INFORMATION TO THE USER:THIS EQUIPMENT HAS BEEN TESTED AND FOUND TO
COMPLY WITH THE LIMITS FOR A CLASS A DIGITAL DEVICE, PURSUANT TO PART 15 OF
THE FCC RULES. THESE LIMITS ARE DESIGNED TO PROVIDE REASONABLE PROTECTION
AGAINST HARMFUL INTERFERENCE WHEN THE EQUIPMENT IS OPERATED IN A
COMMERCIAL ENVIRONMENT. THIS EQUIPMENT GENERATES, USES, AND CAN RADIATE
RADIO FREQUENCY ENERGY AND IF NOT INSTALLED AND USED IN ACCORDANCE WITH
THE INSTRUCTION MANUAL, MAY CAUSE HARMFUL INTERFERENCE TO RADIO
COMMUNICATIONS.
CAUTION:CHANGES OR MODIFICATIONS NOT EXPRESSLY APPROVED BY THE PARTY
RESPONSIBLE FOR COMPLIANCE COULD VOID THE USER'S AUTHORITY TO OPERATE THE
EQUIPMENT.
THIS CLASS A DIGITAL APPARATUS COMPLIES WITH CANADIAN ICES-003.
CET APPAREIL NUMÉRIQUE DE LA CLASSE A EST CONFORME À LA NORME NMB-003 DU
CANADA.
CE COMPLIANCE STATEMENT
WARNING: This is a Class A product. In a domestic environment this product may cause radio
interference in which case the user may be required to take adequate measures.

4
IMPORTANT SAFETY INSTRUCTIONS
1. Read these instructions.
2. Keep these instructions.
3. Heed all warnings.
4. Follow all instructions.
5. Do not use this apparatus near water.
6. Clean only with dry cloth.
7. Do not block any ventilation openings. Install in accordance with the manufacturer’s
instructions.
8. Do not install near any heat sources such as radiators, heat registers, stoves, or other
apparatus (including amplifiers) that produce heat.
9. Do not defeat the safety purpose of the polarized or grounding-type plug. A polarized plug has
two blades with one wider than the other. A grounding type plug has two blades and a third
grounding prong. The wide blade or the third prong is provided for your safety. If the provided
plug does not fit into your outlet, consult an electrician for replacement of the obsolete outlet.
10. Protect the power cord from being walked on or pinched particularly at plugs, convenience
receptacles, and the point where they exit from the apparatus.
11. Only use attachments/accessories specified by the manufacturer.
12. Use only with the cart, stand, tripod, bracket, or table specified by the
manufacturer, or sold with the apparatus. When a cart is used, use
caution when moving the cart/apparatus combination to avoid injury
from tip-over.
13. Unplug this apparatus during lightning storms or when unused for long
periods of time.
14. Refer all servicing to qualified service personnel. Servicing is required
when the apparatus has been damaged in any way, such as power-
supply cord or plug is damaged, liquid has been moisture, does not
operate normally, or has been dropped.
15. CAUTION – THESE SERVICING INSTRUCTIONS ARE FOR USE BY QUALIFIED
SERVICE PERSONNEL ONLY. TO REDUCE THE RISK OF ELECTRIC SHOCK DO
NOT PERFORM ANY SERVICING OTHER THAN THAT CONTAINED IN THE
OPERATING INSTRUCTIONS UNLESS YOU ARE QUALIFIED TO DO SO.
16. Use power source that satisfies clause 2.5 of IEC60950-1/UL60950-1 or
Certified/Listed Class 2.
17. ITE is to be connected only to PoE networks without routing to the outside plant.

5
Contents
Chapter 1. Introduction............................................................................................................................ 9
1.1. Description........................................................................................................................................ 9
1.2. Components ..................................................................................................................................... 9
1.3. Key Features .................................................................................................................................... 9
1.4. Basic Security System Configuration ............................................................................................. 10
1.5. Front Panel View .............................................................................................................................11
1.6. Rear Panel View..............................................................................................................................11
1.7. IR Remote Control.......................................................................................................................... 12
Chapter 2. Installation............................................................................................................................ 13
2.1. HDD Installation.............................................................................................................................. 13
2.2. Network Connection Setup............................................................................................................. 13
2.2.1. Using a Static IP Address ............................................................................................................ 13
2.2.2. Using a Dynamic IP Address....................................................................................................... 14
2.2.3. Router Configuration ................................................................................................................... 14
2.2.3.1. WAN Setting ............................................................................................................................. 14
2.2.3.2. DHCP & IP Address Setting ..................................................................................................... 15
2.2.3.3. Virtual Server Setting................................................................................................................ 15
STARTING THE SYSTEM..................................................................................................................... 16
EASY SETUP ........................................................................................................................................ 16
Live Menu Description........................................................................................................................... 19
System Information................................................................................................................................ 20
Live Menu navigating using the mouse................................................................................................. 20
Navigating to the different channels by using the mouse...................................................................... 20
Navigating to different channels by using the remote control. .............................................................. 21
Chapter 3. Main Menu Setup................................................................................................................. 22
3.1. Video/Audio Setup.......................................................................................................................... 23
3.1.1. Camera........................................................................................................................................ 23
3.1.2. IP Camera Registration ............................................................................................................... 24
3.1.3. IP Camera Setup......................................................................................................................... 26
3.1.4. Image Setup ................................................................................................................................ 29
3.1.5. Monitor......................................................................................................................................... 29
3.1.6. Sequence / Event Display ........................................................................................................... 29
3.1.7. OSD / Display Position ................................................................................................................ 30
3.1.8. Screen Mode ............................................................................................................................... 31
3.2. Record Setup.................................................................................................................................. 31
3.2.1. Policy ........................................................................................................................................... 31
3.2.2. Record Quality............................................................................................................................. 32
3.2.3. Record Method............................................................................................................................ 32
3.2.4. Record Option ............................................................................................................................. 33
3.2.5. Schedule Setup ........................................................................................................................... 33
3.2.6. Holiday......................................................................................................................................... 34
3.2.7. Motion Setup ............................................................................................................................... 35
3.2.8. Event Recording Duration ........................................................................................................... 35
3.3. Device Setup .................................................................................................................................. 35
3.3.1. Storage ........................................................................................................................................ 36
3.3.2. Sensor / Video Loss Detection Setup.......................................................................................... 37
3.3.3. Alarm Schedule ........................................................................................................................... 38
3.3.4. PTZ.............................................................................................................................................. 38
3.3.5. System Controller / Printer Device .............................................................................................. 39
3.3.6. POS/ATM Device......................................................................................................................... 39
3.3.7. Video Analysis ............................................................................................................................. 41
3.4. System Setup ................................................................................................................................. 41
3.4.1. Date/Time Setup.......................................................................................................................... 41
3.4.2. Signal / Language / Device name ............................................................................................... 42

6
3.4.3. Config .......................................................................................................................................... 42
3.4.4. Log Information............................................................................................................................ 43
3.4.5. Authorization Management.......................................................................................................... 43
3.4.5.1. Admin........................................................................................................................................ 43
3.4.5.2. Group........................................................................................................................................ 43
3.4.5.3. User .......................................................................................................................................... 44
3.4.5.4. Setup ........................................................................................................................................ 45
3.5. Network Setup ................................................................................................................................ 45
3.5.1. Connection .................................................................................................................................. 46
3.5.2. Port / Connection Test ................................................................................................................. 47
3.5.3. ID, Password ............................................................................................................................... 48
3.5.3.1. DVRNS Registration................................................................................................................. 48
3.5.4. Dashboard Setup......................................................................................................................... 49
3.5.4.1. Setup/Registration.................................................................................................................... 49
3.5.4.2. Dashboard Starting................................................................................................................... 50
3.5.4.3. Dashboard Login ...................................................................................................................... 50
3.5.4.4. DVR/NVR Search..................................................................................................................... 51
3.5.4.5. Remote Login ........................................................................................................................... 51
3.5.5. DDNS .......................................................................................................................................... 52
3.5.6. FTP File Transfer......................................................................................................................... 53
3.5.7. Email/SNS (Social Network Service)........................................................................................... 54
3.5.7.1. Email/SNS: SMTP .................................................................................................................... 54
3.5.7.2. Email/SNS: Event..................................................................................................................... 54
3.5.7.3. Email/SNS: Schedule ............................................................................................................... 55
3.5.7.4 Email/SNS: Recipient ................................................................................................................ 55
3.5.8. iSCSI ........................................................................................................................................... 56
3.5.8.1. NVR iSCSI Setting.................................................................................................................... 56
3.5.8.2. iSCSI device block size............................................................................................................ 57
3.6. Backup Setup ................................................................................................................................. 58
CHAPTER 4: Search Menu................................................................................................................... 59
4.1. Time Search ................................................................................................................................... 59
4.2. Event Search .................................................................................................................................. 60
4.3. Protect ............................................................................................................................................ 61
4.4. Capture........................................................................................................................................... 61
4.5. POS/ATM........................................................................................................................................ 61
4.6. Video Analysis ................................................................................................................................ 62
CHAPTER 5. General Operation........................................................................................................... 63
5.1. General Menu................................................................................................................................. 63
5.1 .1 .General Menu: Screen Mode ..................................................................................................... 64
Auto Sequence...................................................................................................................................... 64
PIP (Picture in Picture) .......................................................................................................................... 64
5.1.2. General Menu: Audio OFF .......................................................................................................... 65
5.1.3. General Menu: Zoom In .............................................................................................................. 65
5.1.4. General Menu: Freeze ................................................................................................................ 66
5.1.5. General Menu: Stop Alarm .......................................................................................................... 66
5.1.6. General Menu: Record Start/Stop ............................................................................................... 67
5.1.7. General Menu: Play..................................................................................................................... 67
5.1.8. General Menu: Search ................................................................................................................ 67
5.1.9. General Menu: Backup................................................................................................................ 68
5.1.10. General Menu: Main Menu........................................................................................................ 69
5.1.11. General Menu: Information........................................................................................................ 69
5.1.12. General Menu: IP Cam INFO .................................................................................................... 70
5.1.13. General Menu: Easy Setup ....................................................................................................... 70
5.1.14. General Menu: IP Camera Registration .................................................................................... 71
5.1.15. General Menu: Shut Down ........................................................................................................ 71
5.1.16. General Menu: Hide Launcher .................................................................................................. 72
5.1.17. General Menu: Logout............................................................................................................... 72
5.2. Live Launcher ................................................................................................................................. 73

7
5.2.1. Live Launcher Control Button Description................................................................................... 73
5.3. Playback Launcher......................................................................................................................... 74
5.3.1. Play Launcher Control Button Description .................................................................................. 74
5.3.2. Playback (P) and Trap Mode (Pause / FF/ REW / Frame Advance)........................................... 75
5.4. PTZ CONTROL .............................................................................................................................. 75
Chapter 6. Protect Video/Audio File ...................................................................................................... 78
6.1. Protect Registration........................................................................................................................ 78
6.2. Playback and Remove Protected File ............................................................................................ 78
6.3. Protected File Backup .................................................................................................................... 79
Chapter 7. Capture Video Still Image .................................................................................................... 80
7.1. Still Image Capture ......................................................................................................................... 80
7.2. View Captured Image..................................................................................................................... 80
7.3. Remove Captured Image ............................................................................................................... 81
7.4. Backup Captured Image................................................................................................................. 81
Chapter 8. Web Viewer – Connection via Internet Explorer.................................................................. 82
8.1. System Requirement...................................................................................................................... 82
8.1.1. Network Environment .................................................................................................................. 82
8.2. Web Viewer – Getting Started ........................................................................................................ 82
8.2.1. Connect NVR via Web Browser using Direct IP. ......................................................................... 82
8.2.2. General Web Viewer Operation................................................................................................... 83
8.2.3. Calendar and Time Search Button: ............................................................................................. 84
8.2.4. PTZ Control ................................................................................................................................. 85
8.2.5. Connect to NVR via Web Browser using URL ............................................................................ 85
Chapter 9. Web Viewer – Setup/Web Configuration ............................................................................. 86
9.1. Web Configuration.......................................................................................................................... 86
9.1.1. Video/Audio ................................................................................................................................. 86
9.1.1.1. Camera..................................................................................................................................... 86
9.1.1.2. IP Camera Registration ............................................................................................................ 86
9.1.1.3. IP Camera Setup...................................................................................................................... 87
9.1.1.4. Monitor...................................................................................................................................... 87
9.1.1.5. Sequence/Event Display .......................................................................................................... 87
9.1.1.6. OSD/Display Position ............................................................................................................... 88
9.1.2. RECORD ..................................................................................................................................... 88
9.1.2.1. Policy ........................................................................................................................................ 88
9.1.2.2. Recording Quality..................................................................................................................... 88
9.1.2.3. Schedule................................................................................................................................... 89
9.1.2.4. Holiday...................................................................................................................................... 89
9.1.2.5. Event Record Duration ............................................................................................................. 89
9.1.2.6. Record Option .......................................................................................................................... 90
9.1.3. Device.......................................................................................................................................... 90
9.1.3.1. Sensor Detection...................................................................................................................... 90
9.1.3.2. Video Loss Detection................................................................................................................ 90
9.1.3.3. Alarm Schedule ........................................................................................................................ 91
9.1.3.4. PTZ........................................................................................................................................... 91
9.1.3.5. System Controller / Printer Device ........................................................................................... 91
9.1.3.6. Storage ..................................................................................................................................... 91
9.1.4. System......................................................................................................................................... 92
9.1.4.1. Date/Time ................................................................................................................................. 92
9.1.4.2. Time Synchronization Setup..................................................................................................... 92
9.1.4.3. Signal/Language/Device name ................................................................................................ 92
9.1.4.4. Config ....................................................................................................................................... 93
9.1.4.5. System Information................................................................................................................... 93
9.1.4.6. Authorization Management....................................................................................................... 93
9.1.4.6.1. Authorization Management: Admin........................................................................................ 94
9.1.4.6.2. Authorization Management: Group........................................................................................ 94
9.1.4.6.3. Authorization Management: User.......................................................................................... 94

8
9.1.4.6.4. Authorization Management: Setup ........................................................................................ 95
9.1.5. Network ....................................................................................................................................... 95
9.1.5.1. Connection ............................................................................................................................... 95
9.1.5.2. Port ........................................................................................................................................... 95
9.1.5.3. ID, Password ............................................................................................................................ 96
9.1.5.4. DDNS ....................................................................................................................................... 96
9.1.5.5. FTP File Transfer...................................................................................................................... 96
9.1.5.6. Email/SNS ................................................................................................................................ 96
9.1.5.6.1 Email/SNS: SMTP .................................................................................................................. 97
9.1.5.6.2. Email/SNS: Event.................................................................................................................. 97
9.1.5.6.3. Email/SNS: Schedule ............................................................................................................ 97
9.1.5.6.4. Email/SNS: Recipient ............................................................................................................ 97
PRODUCT SPECIFICATIONS .............................................................................................................. 98
INSTALLING SYSTEM KEYBOARD WITH STANDALONE NVR SERIES ........................................ 100
POS Configuration............................................................................................................................... 103
ATM Configuration............................................................................................................................... 105
NETWORK TROUBLESHOOTING..................................................................................................... 106
TERMS / ICONS GLOSSARY............................................................................................................. 108
NVR Icon Reference............................................................................................................................ 109

9
Chapter 1. Introduction
1.1. Description
This manual applies to the 4/8/16 channel PoE network video recorder.
The network video recorder supports up to 4/8/16 network cameras. The NVR can record high quality
Full HD images onto the maximum capacity of hard disk drives.
The network recorder is extremely straightforward to install and setup, as it detects network cameras
and defines the parameters of each through a dedicated configuration wizard. You can start
monitoring instantly, as the images are automatically assigned to a layout menu.
Based on embedded Linux and high performance, the network NVRs are fully featured for security
surveillance and remote monitoring needs.
1.2. Components
The system comes with the following components:
Network Video Recorder unit
IR Remote Control
DC Power Adapter or Power supply built-in (AC110~220V) for 16 PoE NVR
Power Cable
AAA Battery x 2
Screw Packet
Installation CD including ATVisionIP Software, Installation Guide and User Manual
Note: Check your package to make sure that you received the complete system, including all
components shown above.
1.3. Key Features
The NVR is the most competitive device developed for all industrial applications. In addition to its
sleek professional design, it is very reliable and cost effective. Most of all, its real time and crystal
clear picture quality with small recording file size and powerful remote control function will become the
standard to which other security systems are judged.
Major features include:
►Real time live, real time recording
►4/8/16 channels IP camera support (4/8/16port PoE camera input)
►Simultaneous Live, Recording, Playback, Backup, Network
►Extremely small recording file size using H.264 compression technology
►Adjustable recording frame rate, resolution and picture quality
►Video / Audio data backup via USB 3.0 or CMS
►Support Authentic Video Image Player
►High speed network transmission
►Dynamic / Static IP address support, Own Client (ATVision IP or CMS Software) support
►Remote recording, still image capturing and printing
►PTZ camera control via network
►Independent color adjustment for each camera input and VGA output
►USB Mouse and IR remote control unit for user interface
►Self-diagnosis system and Hardware Watchdog: error checking and restoring functions
►Powerful event search function (Search by manual, schedule, sensor, network or all)
►Pre-Alarm Recording for motions and sensors

10
►Protect Video/Audio files from HDD Overwrite
►Still image capturing and printing during live or playback
►System & Event Log files management
►Configuration data copy to other channels for easy setup
►Configuration file Export / Import for easy installation of multiple NVRs
►Control of minimum recording dates by channel
►Mobile (I-Phone, Android) phone support
►E-Map support
►Video Analysis support
Notice:
The information in this manual was current when published. The manufacturer reserves the
right to revise and improve its products. All specifications are therefore subject to change
without notice.
1.4. Basic Security System Configuration
The configuration above is based on 4ch NVR.
Power Switch
Client Software Web browser,
Web viewer
External HDD
VGA Monitor HDMI Monitor
Amplified
Speaker Sensor input
Alarm out
DC Power
Adapte
r
USB data backup

11
1.5. Front Panel View
1) Power LED: NVR power indicator
2) REC LED: Recording indicator
3) Playback LED: Playback indicator
4) Network LED: Network connection indicator
5) IR REMOTE CONTROL SENSOR: Receives all incoming signals from the remote control
6) USB 2.0 Port: Connect USB mouse or USB memory device for firmware upgrade.
1.6. Rear Panel View
(4ch NVR)
(8ch NVR)
(16ch NVR)

12
1.7. IR Remote Control
Installing batteries
1. Remove the battery cover by sliding in the direction of the arrow.
2. Insert two AAA batteries according to directions provided.
3. Replace the battery cover by sliding in the direction of the arrow.

13
Chapter 2. Installation
2.1. HDD Installation
Before Installation
We recommend setting the current time on your NVR before HDD Installation.
Please make sure that the power of NVR is switched off before starting installation.
Step 1. Make sure the NVR power is switched OFF
Step 2. Open the top cover of NVR using a cross screw driver.
Step 3. Place HDD(s) on the mounting plate and mount it with screws.
Step 4. Replace the mounting plate into the NVR and fix it with screws.
Step 5. Attach the data and power cable to HDD(s) correctly.
Step 6. Replace the top cover of NVR and fix it with screws.
AfterHDDinstallation
Step7.TurntheNVRpowerON.
Step 8. NVR will detect HDD(s) during the booting and will format HDD(s).
Step 9. After HDD formatting, NVR will be automatically rebooted and will be ready to work
with HDD(s).
2.2. Network Connection Setup
2.2.1. Using a Static IP Address
You can use the Static IP address, Subnet Mask and Gateway address provided by your ISP
(Internet Service Provider) for your NVR. The Gateway address is the IP address of your
broadband modem.
Internet

14
2.2.2. Using a Dynamic IP Address
You can use a router with your Dynamic IP broadband modem. In this case, you should set the
configuration of a router properly for network connection between NVR and Net/Web Viewer.
Please follow the instructions in next section to configure your router correctly.
If your Broadband Modem does not support internal loop back (port forwarding) function and you
want to monitor NVR using a PC located in same Intranet, you should use Direct IP instead of
DVRNS in the connection menu of NetViewer. If your PC is located outside of Intranet, you can
use both DVRNS and Direct IP to connect to NVR even though your Broadband Modem has
limited features.
2.2.3. Router Configuration
If your NVR is connected to the network through a router, you should configure router properly.
There are 3 steps as follows.
1. WAN Setting 2. DHCP Setting 3. Virtual Server Setting
2.2.3.1. WAN Setting
When you connect to your Router, you
can find menu for WAN setting. Please
confirm the WAN setting. If you are using
DSL service, you should select PPPoE,
and you will be directed to a sub-menu to
type in DSL user name and password.
Home/Office Network Internet

15
2.2.3.2. DHCP & IP Address Setting
To assign a unique private IP address to
NVR in your intranet environment
automatically, you can enable DHCP option
in the Network Setup menu of your NVR and
your Router. In this case, you can skip the
procedures described on this page.
We recommend assigning IP address to
NVR manually to prevent unexpected
change of IP address.
*A router from D-Link is quoted as an
example in this manual. The images of
setup menu above may not always match
another router’s setup menu.
2.2.3.3. Virtual Server Setting
You should register your NVR as a virtual server. Please enter the information into IP address
field of the router (e.g. 192.168.0.110).
Protocol Type should be TCP. Private/Public Port numbers should be the same with the Port
numbers assigned in NVR. You can change port numbers in Network Setup menu to avoid conflict
with other network servers.
Your NVR uses 3 port numbers and the default Port numbers are 9350~1 and 80. 9350~1 are
for controlling the video, audio and commands of Net Viewer, and 80 is for Web Viewer. You need to
register 3 port numbers into the router as network servers. Please make sure that your router does
not block those port numbers to/from the NVR with filter and firewall features.
The image is only for your reference. Depending on the Router manufacturer, the setting can vary.
If you have any problem with DHCP function or want to assign the private IP address, please
disable DHCP option in the Network Setup menu of your NVR and check the starting and ending
IP used by DHCP server of the Router. You can assign any private IP address to your NVR
even if it is out of the DHCP range, but the IP address should match with the one entered in
the Network Setup menu of your NVR.

16
STARTING THE SYSTEM
When power is turned on, you will see the
initializing screen and it may take up to one
minute to complete. After initializing is complete,
an Easy Setup screen will appear.
EASY SETUP
An Easy Setup screen of 10 steps will appear. If you don’t like to setup all at this point and like to skip
the steps, please click the Exit button. Then the system will exit to main live screen. However, you can
setup the system at anytime you want by click the Easy Setup Menu in the right-click mouse menu.
[1/5] Signal / Language / Device Name
The user can set the OSD language, signal and device name.
[2/5] Date/Time Setup
In this step, the user can set the date and time of the system, and Time zone as well.

17
[3/5] Connection Mode setup
The user can set the Network and IP camera connection mode properly according to the network
connection.
** For detailed information, please refer to the 3.5. Network Setup page of this manual
[4/5] IP Camera Registration
The user can check the IP camera listing and register the desired IP cameras automatically or
manually by click the Auto/Manual button.
.
Quick search: the user can search the IP cameras connected to the network and system quickly. In
this case, the user must enter the camera ID and Password one by one.
Detail search: if the user selects the Detail search, it will take more time to search all the cameras
comparing to quick search. The system checks all IP camera IDs and Passwords automatically. The
user needs not to enter the IP camera ID and password separately. The registered camera can be
detected automatically from the NVR, so the user needs not to enter the ID and PW of IP camera
separately.
Manual add: if the user wants to add the remote cameras manually, firstly the user check the IP
camera address to register to the system. The IP camera must support Onvif and enter the full Onvif
IP camera address. Ex. http://192.168.10.110/onvif/device_service.
* For detailed information, please refer to the IP camera registration page of this manual

18
[5/5] Schedule recording
The user can set the schedule recording as continuous, event and both (continuous and event) by
drag the desired date and time.
After Easy Setup is completed or exited from Easy Setup menu, a live screen will appear.
When the user does not log-in the system and click to any menu, it will prompt you to the login dialog.
Enter ID and Password by using the virtual keyboard and click OK. By default, the ID is set at “admin”
and the Password is set at “admin”

19
Live Menu Description
Mouse Menu
To navigate by using your mouse, right click your mouse anywhere on the screen and you will be
given options to choose from.
1 Screen Mode Can select how you would like to view screen
2 PTZ control Can activate PTZ window to control the PTZ function.
3 Zoom In Can zoom in for the desired area.
4 Audio On/Off Option to have the audio on or off
5 Freeze Can freeze Playback or Live scene
6 Stop Alarm Stops the alarm output and the event monitoring.
7 Record Start/Stop Starts/stops the manual recording
8 Play Plays the search result (for 30sec. 1min, 5min, 10min and all)
9 Search Can search for recorded data (by time, event, capture, etc)
10 Backup Can backup data via USB drive
11 Main Menu Access the main menu.
12 Information This menu will display system information
13 IP Cam INFO It will display you IP camera information
14 Easy Setup You’ll be able to setup your system with simple.
15 IP Camera Registration You can search the registered cameras and add the cameras.
16 Shutdown Will allow you to completely shut down the unit
17 Hide Launcher Hides the launcher.
18 Logout You can log out.

20
System Information
When the user clicks the right click menu on the live screen and select Information menu, the system
information will appear with overall system info.
When there’s an exclamation , this indicates
that the NVR has not been registered in our
DVRNS server
Password will only show half of the registered
password. You can enter up to 8 characters max.
If four characters are used in the password, it
will show as 12**, six characters will show as
123*** and eight character, 1234****
Live Menu navigating using the mouse
Navigating to the different channels by using the mouse.
By using the mouse, move the mouse to the far right in the middle of the screen and an arrow button
will appear on the screen to navigate to different channels. You can only navigate from one channel to
another when viewing in a single screen/channel. If you are viewing from a 4-split screen, you will
NOT be able to navigate using the arrow. This feature will only work when viewing from a single
screen
Table of contents
Other ATV Network Hardware manuals
Popular Network Hardware manuals by other brands

ADF Web
ADF Web HD67879-A1-XX user manual

Omron
Omron DRT2 SERIES DEVICENET SLAVES - OPERATION ... Operation manual

Moxa Technologies
Moxa Technologies EOM-G103-PHR-PTP Series Quick installation guide

Teledyne
Teledyne Field Wizard 2101 Installation and operation guide

Kentrox
Kentrox DataSmart 486 Specification sheet

TRENDnet
TRENDnet TEG-S3M2MG Specifications