AUDAC M2DIS User manual

M2DIS
User Manual
www.audac.eu

2

3
Index
Introduction 4
Caution servicing 4
User interface 5
Login screen 5
Main screen 6
Output settings 8
Test signals 10
Sound settings 11
Settings screen 12
Input Configuration 13
Output Configuration 14
Global scene 14
Timer settings 16
Paging Volume 17
Priority settings 18
System configuration 19
Address settings 24
Password settings 25
Factory settings 26
Fiber settings 27
Amplifier Bridging 28
Notes 29

4
Introduction
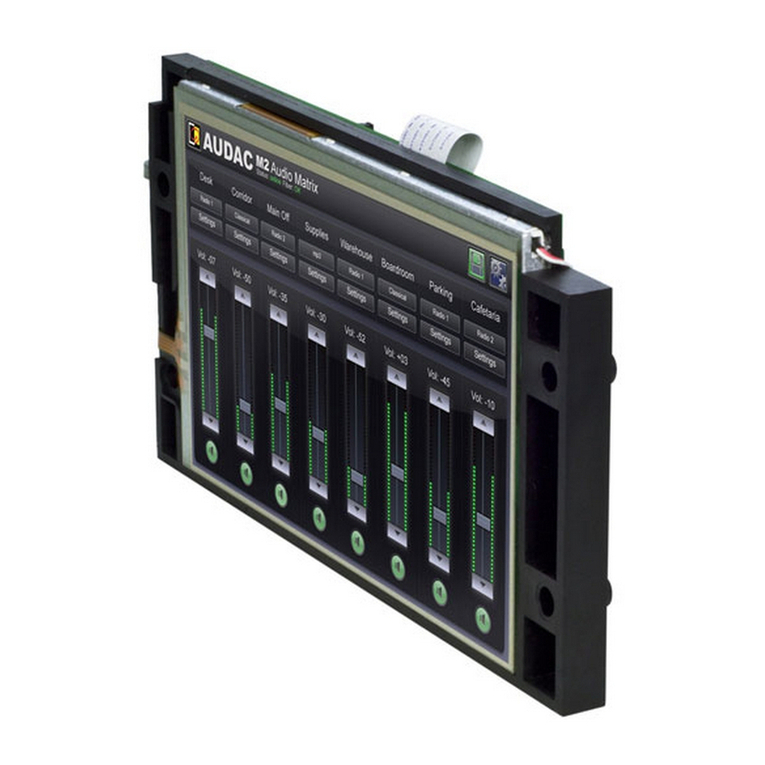
7” Touchscreen display kit M2
The M2DIS is an optional display unit with touchscreen which can be installed internally
in the front panel of the M2 Multi-Media Digital audio mixer. This unit consists of a
7” TFT display panel with a resolution of 800 x 480 px that is fitted with a resistive
touchscreen panel. It is controlled by a powerful 32 bit processor which communicates
directly with the DSP processor.
This unit allows the user to operate the control and configuration functions of the matrix
system without any external equipment. This can be useful for direct access, when the
system is installed in a technical room where no external control devices are within
reach or in case the system is not connected to a LAN network due to security reasons.
Touchscreen precautions
• Tap the touchscreen gently. Never use force.
• Don’t use any sharp object to tap the touchscreen. Don’t use a pen, but only
use your fingertips or stylus especially meant for use with touchscreens.
• Keep the touchscreen dry and clean. Don’t use any abrasives or cleaning
solutions to clean it. Only clean it with a soft damp cloth.

5
User interface
Login screen
A password should be entered to get access to the M2 amplifier.
There are two different access levels, administrator level and user level.
If you login with the administrator password, you get access to all functions and
configuration options. (The factory default password for administrator access is
“M2”).
When logging in with the user password, you only get access to the basic functions of
the main screen, such as changing the volume and changing the mixing / presets for a
particular output. (The factory default password for user access is “user”).
After pressing the text field, a keyboard screen will come up and the password can
be entered. After the password is entered, press the “OK” button, and you will be
redirected to the main screen of the M2 interface.
NOTE
The passwords can be changed in the Settings >> Password settings menu
(Only administrator)

6
Main screen
The main screen displays all 8 outputs of the M2 with fader volume controls
Volume control:
The volume of each output can be changed by moving the fader.
At the bottom a “Mute” button is provided to mute the volume of the corresponding
output. If the output is muted, the mute button is Red. If the output is unmuted, the
mute button is Green. The mute can be toggled from muted to unmuted by pressing it.
Assign names to output:
This option is only available if logged in as “ADMINISTRATOR”.
For a better overview of all outputs, a name can be assigned to every output. The
names displayed are identical to the names entered in the web interface.
The name for the output can be changed by pressing and holding the name for 2
seconds. After 2 seconds a keyboard screen will come up whereby the name can be
changed. Simply press the delete (DEL) key to remove the existing name and enter the
new name.
After the name has been changed, press “OK”.

7
Press the “Save” button and confirm to save the zone settings to make sure that all
settings will be restored after system reboot.
Input channel selection:
This option is available if logged in as “ADMINISTRATOR” or “USER”.
The desired input signal for an output can be selected by pressing the button below
the output name. A dropdown list shows 8 audio input signals or presets, together
with the options “Off” and “Other”. If logged in as administrator, the list can be
changed in the “Quick menu settings” screen. This screen can be reached through
Settings screen followed by output configuration screen.
Output settings:
This option is only available if logged in as “ADMINISTRATOR”.
By pressing the “Settings” button, above a slider, the “Output Settings” screen
is displayed. In this window you can select all input channels to be mixed for the
selected output. You can also select filters.
Save:
This option is only available if logged in as “ADMINISTRATOR”.
By pressing this button you can save the settings.
To make sure the changed zone settings are still effective after shutdown and restart
of the M2, the “Save” button on the main screen of the M2 needs to be pressed. At
the same time, the volume and routing settings will be saved.

8
Settings:
This option is only available if logged in as “ADMINISTRATOR”.
In the top right corner is a “Setup” button displayed. After pressing this button, you
will be redirected to the configuration menu of the M2.
Info:
Pressing the AUDAC logo will show the info screen.
Output Settings
This option is only available if logged in as “ADMINISTRATOR”.
By pressing the “Settings” button, above a slider, the “Output Settings” screen is
displayed. In this window you can select an input channel for the selected zone.
Input channel selection:
The screen gives an overview of all input channels that can be patched to the output
zone. You can select “M2 inputs”, “Wall panel inputs” , “Fiber inputs” and “Line
inputs” .

9
• If no input is needed click the “All off” button
• The M2 inputs are shown as default. Here you can select the inputs you want to
mix.
• Click the “Wall panel inputs” button to select wall panel inputs
• Click the “Fiber inputs” button to select Fiber inputs
• Click the “Line inputs” button to select Line inputs
• To save click the “apply scene” or “save as scene” button

10
Output settings >> Test signals
The M2 has an internal digital signal generator which can generate white noise, pink
noise and sinusoidal signals with a selectable frequency.
Each of those signals can be patched to any output zone.
When one of the test signals is selected, “Other” will appear in the ‘Input Selection”
box on the main screen.
• Select “white noise” to route white noise to the output zone.
• Select “pink noise” to route pink noise to the output zone.
• Select “Sine Generator” to route a sine wave to the output zone.
The frequency of the sine wave can be changed by the up and down arrows.

11
Output settings >> Sound setting
In this screen you can control the value of bass and treble for this output.
This screen shows two faders. One to control the bass (low tones) which can be
adjusted from -9 to 9 dB. The other controls the treble (high tones) and can also be
adjusted from -9 to 9 dB.

12
Settings screen
The settings screen is displayed by pressing the “Setup” button. This button is always
shown in the upper right corner of every window. (Only on Administrator level).
In this window, the next settings can be changed:
• Input configuration
• Output configuration
• Global scenes
• Timer settings
• Paging volume
• Priority settings
• System configuration
• Fiber settings
• Amplifier Bridging
If you want to change some settings, just click on the corresponding icon.When you
are done with configurating the M2 you need to press the save configuration button. If
you don’t the settings will be lost at restarting.

13
Settings >> Input Configuration
First select the input of which the settings should be changed
Now a new screen appears which allows you to change the line and mic settings for
this input. For both Line and Mic you can: set the gain, apply ALC (automatic Level
Control) , apply several different filters or apply a 3 or 7 band equalizer by clicking the
corresponding button. Also the input can be muted, toggled between mono and stereo
and phantom power can be enabled.

14
Settings >> Output Configuration
First select the Output of which the settings should be changed
Now a new screen appears which allows you to change the settings of this output.
Following options can be adjusted or applied: set volume, apply several different
filters, apply a 3 or 7 band equalizer, set quick menu settings, set output linking
settings and set talkover settings by clicking the corresponding button. Also the
output can be toggled between mono and stereo or toggle between Single-ended and
Balanced. Even antiphase and a delay time can be set for a certain output.
For more info on these settings please refer to the M2 User Manual
Settings >> Global scene
In this window global scenes can be made or adjusted

15
A global scene are preset settings which are enforced when a trigger occurs or when
the user activates the scene.
As you can see you can set an input and volume for every output, a trigger can also be
set. When the trigger occurs then this global scene will be enforced, allowing you to
set global scenes for all kinds of things. (from commercial messages to the fire alarm)
To keep things clear you can give each of the eight scenes a name.

16
Settings >> Timer settings
In this window you can add and adjust timers
To create or adjust timers first pick the action that needs to happen when the
timerevent takes place. Adjust the variables of this action to your desires and specify
a day or date when the action needs to be executed. Now click the “+ Add” button
and everything will be saved.
For more information about this screen please refer to the M2 user manual

17
Settings >> Paging Volume
In this window the volume for all outputs can be set to a value you see fit for paging.
For every output you can set the paging volume and choose if the relay for this ouput
should be switched or not.

18
Settings >> Priority settings
In this window you can preset 4 priority settings
To do a priority setting first choose a channel on which the M2 will trigger your
setting. Now an input should be chosen. You can select every output to which the
input should be routed. For every output it is possible to set volume and toggle relay
position.
For more info about priority settings please refer to the M2 user manual.

19
System configuration >> Time
settings
In this window the time and date of the M2 can be set.
This can be done by selecting the values from a dropdown list.
Press “Set Clock” to set time and date.

20
System configuration >> LCD
configuration
This window configures the display unit screen, not the M2.
The settings must be saved by pressing the “SAVE” button.
The next items can be set:
• Panel brightness:
Sets the brightness of the backlight.
• Auto Logoff:
When enabled, the system logs off after some time of no activity.
The administrator has to log on again.
Push “Logoff time” to change the time.
• Limited control:
When enabled, there is no logon screen.
At start up the main screen is shown.
The user can only change volume and mute.
For other functions, the password will be asked.
Other manuals for M2DIS
1
Table of contents
Other AUDAC Touchscreen manuals
Popular Touchscreen manuals by other brands

InTouch
InTouch INDT156 user manual

Johnson Controls
Johnson Controls Advanced Graphic Touchscreen Display Installation and operation manual

Elo TouchSystems
Elo TouchSystems 1939L user guide

Speechi
Speechi ST-XX-UHD-AND-HP-007-S-QSG quick start guide

HCP
HCP TPR15 user manual

Carel
Carel pGDx Touch 4.3" manual