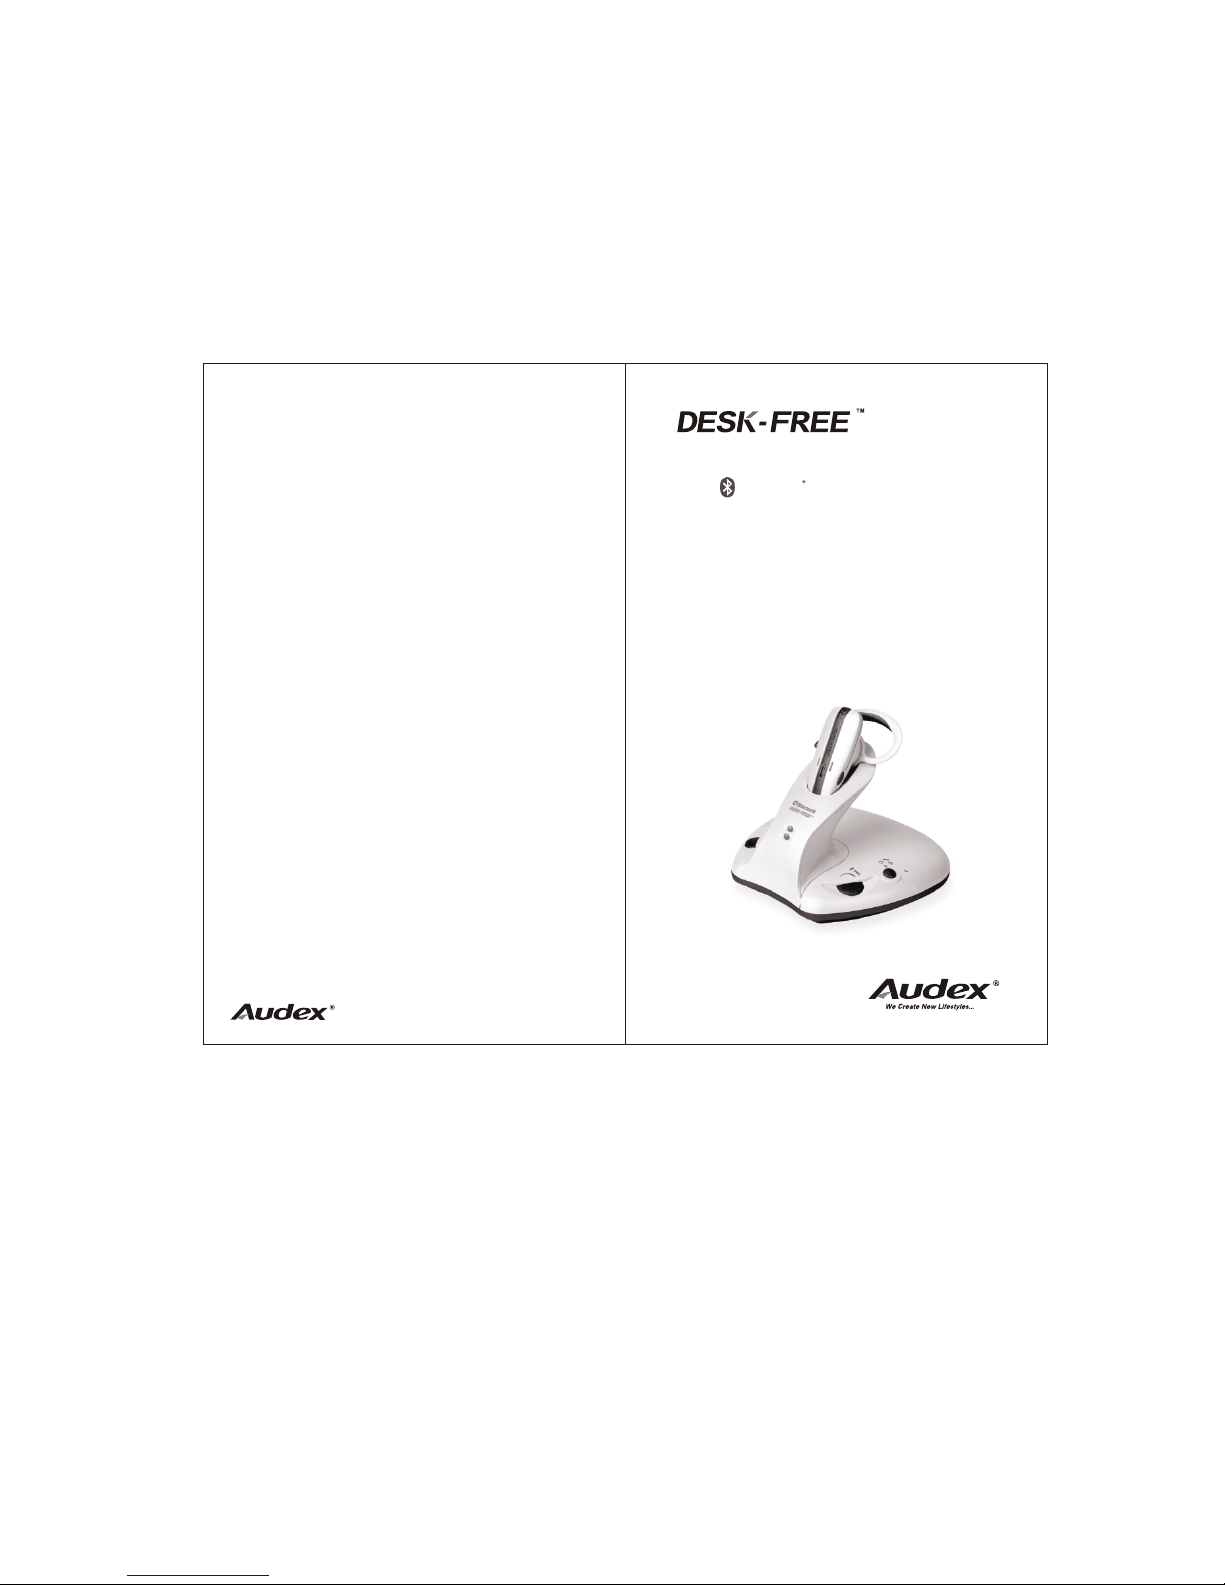
Audex DESK-FREE DSF-2481 User manual
Bluetooth
http://www.audex.cn Made in China
DSF-2481
a new concept in making phone calls
At work or home
Headset for telephone
User’s Guide

Introduction
2
®TM
The Audex Bluetooth DESK-FREE
(hereafter called the DSF-2481) is a
new concept in wireless handsfree devices
for your existing desk phone. It isdesigned
and manufactured in accordance with
®
the Bluetooth Core Specification v1.2.
It can also work as a wirelessheadset
®
for your Bluetooth mobile phone or
®
other Bluetooth devices.
You can connectthe DSF-2481 to the
handset so as to free yourhands for
other valuable tasks at work or home.
It works in full-duplex mode digitally,
adopts advanced frequency hopping
and spread spectrum technologies so
the speech quality and security
are ensured.
3
Introduction
®
What is Bluetooth ?
®
Bluetooth wireless technology is a
worldwide specification for a small-form
factor, low-cost andshort-range radio
solution that provides links
between mobile computers, mobile phones,
other portable handheld devices, and
connectivity to the Internet. The
specification is developed, published and
®
promoted by the Bluetooth Special
Interest Group (SIG).
Welcome 1
Thank you for your purchase of
®
our DSF-2481 Bluetooth
TM
DESK-FREE .
This User's Guide will help youto
learn the basic features. Please
read it carefully before using.
Contents
This package contains the following:
1. Main unit
2. Headset
3. Ear Hook
4. AC power adapter
5. Connection cord
6. User's Guide
7. Quick Guide
The accessories may be subject tochange
for the sake of product improvement.
Changes may be made without prior notice.
4
1
User's
guide
2
3
4
5
6
7

5
(1) Main Unit
(2) Headset/Handset Switch
(3) Headset Working Indicator
(4) MIC Volume Control
(5) Headset Master Volume Control
(6) Power Indicator
(7) Headset Charging Station
(8) Headset
(9) Ear Hook
(10) Connection Indicator
(11) Headset Charging Indicator
(12) Microphone (MIC)
(13) Speaker
(14) Headset Secondary Volume Control (+)
(15) Headset Secondary Volume Control (-)
(16) ON/OFF
(17) AC Adapter Jack
(18)
(19)
(20) Configuration Switch
(21) Pairing Key
(22) Connection Cord
(with big and small connectors)
(23) AC Power Adapter
Telephone port
Headset port
Functional Parts
Operating Instructions
8
Connect the Main Unit (1) to the handset according
to the figure attached.
1. (18)
2. (19)
3. Connect the AC Power Adaptor (23) to the AC
Adaptor Jack (17) and apower outlet. The Power
Indicator (6) will light up.
4. When the Headset (8) is seated in the Headset
Charging Station (7), the Headset Charging Indicator
(11) is on. When the Headset (8) is picked up, the
light goes out.
5. Press the Headset/Handset Switch (2). Then the
Headset Working Indicator (3) is lit.
6. Pick up the handset and put it aside. Slide the
Configuration Switch (20) between the positions
“1” and “6” until you hear a clear dial tone through
the Headset (8). Then put back the handset.
7. Pair the Headset (8) with the Main Unit(1), then
turn on the Headset (8) according to the instructions
The DSF-2481 is now ready to use.
Telephone port Insert supplied connection cord
to the telephone’s handset port and to the bottom
of base.
Headset port Unplug coiled handset cord from
the telephone’s handset port and insert it to the
bottom of the base.
Operating Instructions 7
Installation & How to Use:
6
13
22
23
1
6
4
2
3
7
14
16
10
8
9
11
15
5
20
Small connector
Big connector
Functional Parts
12
17
19
18
21

Operating Instructions 9
How to use:
1. When you have an incoming call, pick up the
handset and put it aside. Now you can pick up the
Headset (8) to make a conversation.
2. The volume of the incoming call can be adjusted
with the Headset Master Volume Control (5)
on the Main Unit (1) or pressing the Headset
Secondary Volume Control +/- (14, 15) on the
Headset (8).
3. Adjust how loud you sound to the other party by
tuning the MIC Volume Control (4).
4. When the conversation is over, put the handset on the
hook and the Headset (8) on the Headset Charging
Station (7). Now the call has been canceled.
5. If you want to make a conversation with the handset,
press the Headset/Handset Switch (2). Then the
Headset Working Indicator (3) is off. The call is
now transferred to the handset.
Switching On the Headset:
Press and hold the ON/OFF button (16) for about
3 seconds until the Connection Indicator (10)
flashes blue. A beep (2 shorts tones) can be
heard at the same time. Release the ON/OFF
button (16). The Headset is now in
standby mode.
Note: If the battery is low, the Headset Charging
Indicator (11) will flash red.
Operating Instructions 11
2. When the Headset (8) is attempting to pair, press
and hold (do not release) the Pairing Key (21) for about
6 seconds until the Power Indicator (6) flashes.
Release the button. If the Main Unit (1) fails to pair
during this period, it will return to the standby
mode automatically.
3. When the pairing is completed, the Connection
Indicator (10) on the headset will flash blue
slowly and the Charging Indicator (11) will be
OFF; the Power Indicator (6) on the main unit
will stay lit but stop flashing.
3 seconds
Operating Instructions
12
Switching Off the Headset:
Press and hold the ON/OFF button (16) for about
3 seconds until the Connection Indicator (10)
goes off. A beep (2 shorts tones) can beheard
at the same time. Release the ON/OFF button (16).
The Headset is now switched off.
Resetting:
To reset the DSF-2481, press
the ON/OFF button (16) and
Headset Secondary Volume
Control (-) (15) simultaneously.
Then release.
3 seconds
Pairing:
Before the first use, you must pair the Headset (8)
with the Main Unit (1). Pairing is the process of
®
linking two Bluetooth devices so that they can
communicate.
The pairing only needs to be done once. Afterwards,
every time you switch on the Headset (8), it will
automatically connect to the Main Unit (1).
To initiate the pairing, put both the Headset (8)
and the Main Unit (1) within 30 cm of
each other. Make surethere is no Wi-Fi equipment
in the vicinity.
1.When the Headset (8) is OFF, press and hold (do
not release) the Volume Control (+) button (14)
for about 6 seconds until the Connection
Indicator (10) and the Charging Indicator (11)
flashes blue and red alternately. Then release
the button. The Headset (8) will attempt to pair
for 2 minutes. If it fails to pair during this period,
it will be switched off automatically.
Operating Instructions
10
<30 cm>
6 seconds

Operating Instructions 13
Pairing
®
Before connecting to a Bluetooth device
successfully, the Headset must be paired with
the device. There is a pairing mode for doing
the pairing procedure.
To initiate the pairing, put the Headset (8)
and your mobile phone within 30 cm
of each other, but you must be
at least 15 meters (50 feet) away from the
Main Unit (1). Make sure there is no Wi-Fi
equipment in the vicinity.
Remarks: If the Headset has been paired with
the mobile phone but now you want to use
the Main Unit again, please DISABLE the
Bluetooth function of the mobile phone, and
make sure the Headset is within 15 meters
(50 feet) from the Main Unit now. The Headset
can connect with the Main Unit automatically.
When the DSF-2481 is expected to work
with your Bluetooth mobile phone or
other Bluetooth devices:
The paired devices list in the Headset can be reset.
After resetting, all information for the paired devices will
be erased. To reset the list, press the ON/OFF
button (16) and Headset Secondary Volume
Control (-) (15) simultaneously, then release.
Auto-connection:
When the Headset has just been switched on, or
when the user presses the keys to make a connection to a
paired device, it will try to connect to the last
paired or last used device for about 3 seconds.
Due to the multiple-pairing feature, if the
connection fails, it will try to connect to the
next frequently used device from the paired list
and so on.
If connection succeeds, the indicators will light,
and the Headset is ready for use with
the device. If no device is available, it will wait for
connection.
Profiles auto-select:
The Headset supports both Handsfree and Headset
profiles. By default, the Headset will automatically
select a profile to use when connecting to your
paired device. It will first select Headset profile if
it is peer supported.
On the other hand, a mobile phone will
automatically select a profile to use when connecting
to the Headset. Usually, both profiles supporting
mobile phones will select Headset profile.
Operating Instructions
16
Operating Instructions 15
Enter pairing mode:
When the Headset is OFF, press and hold the Volume
Control (+) button (14) for about 6 seconds until the
Connection Indicator (10) and the Charging Indicator
(11) flash blue and red alternately. Then release the
button. The Headset (8) will now attempt to pair for 2
minutes. If it fails to pair during this period, it will be
switched off automatically.
When the Headset is attempting to pair, you can then use
a mobile phone to search for it. Select the name
“Audex-2481”and enter the default password “0000”to
complete a pairing procedure. When pairing
succeeds, the Headset exits pairing mode and is
ready to use. The Connection Indicator (10) on the
headset will flash blue slowly and the Charging
Indicator (11) will be OFF.
To cancel and exit pairing mode, press and hold
Volume Control (+) (14) or Volume Control (-)
(15) for 2 seconds until the indicator stops flashing.
Then the Headset becomes non-discoverable.
Multiple pairing:
The Headset (8) supports multiple-pairing. It stores
the pairing information for up to 4 devices . That means
previously paired devices do not need to enter their
password again when making connection with
the Headset.
A list of information for the paired devices is stored in the
Headset. When the list is full and a new device is
being added onto the list due to successful pairing,
the least recently used device will be removed
from the list.
Operating Instructions
14
Bluetooth
<15Meter>
112233
445566
778899
00
**##
<30 cm>
Keys Usage:
When the Headset is idle:
Voice dial: Press ON/OFF button (16) once
(depending on the support of mobile phone)
Call transfer (from phone): Press ON/OFF button (16) once
Last number redial: Double-click ON/OFF button (16)
Volume up: Press Volume Control (+) (14)
Volume down: Press Volume Control (-) (15)
When the mobile phone is dialing
Cancel a call: Press ON/OFF button (16) once
When the Headset is ringing
Accept a call: Press ON/OFF button (16) once
Reject a call: Press and hold ON/OFF button (16)
When you are talking with the Headset
End a call: Press ON/OFF button (16) once
Call transfer (to phone): Press and hold ON/OFF button (16)
Call waiting: Double-click ON/OFF button (16)
Call hold: Double-click ON/OFF button (16)
Volume up: Press Volume Control (+) (14)
Volume down: Press Volume Control (-) (15)
Operating Instructions
18
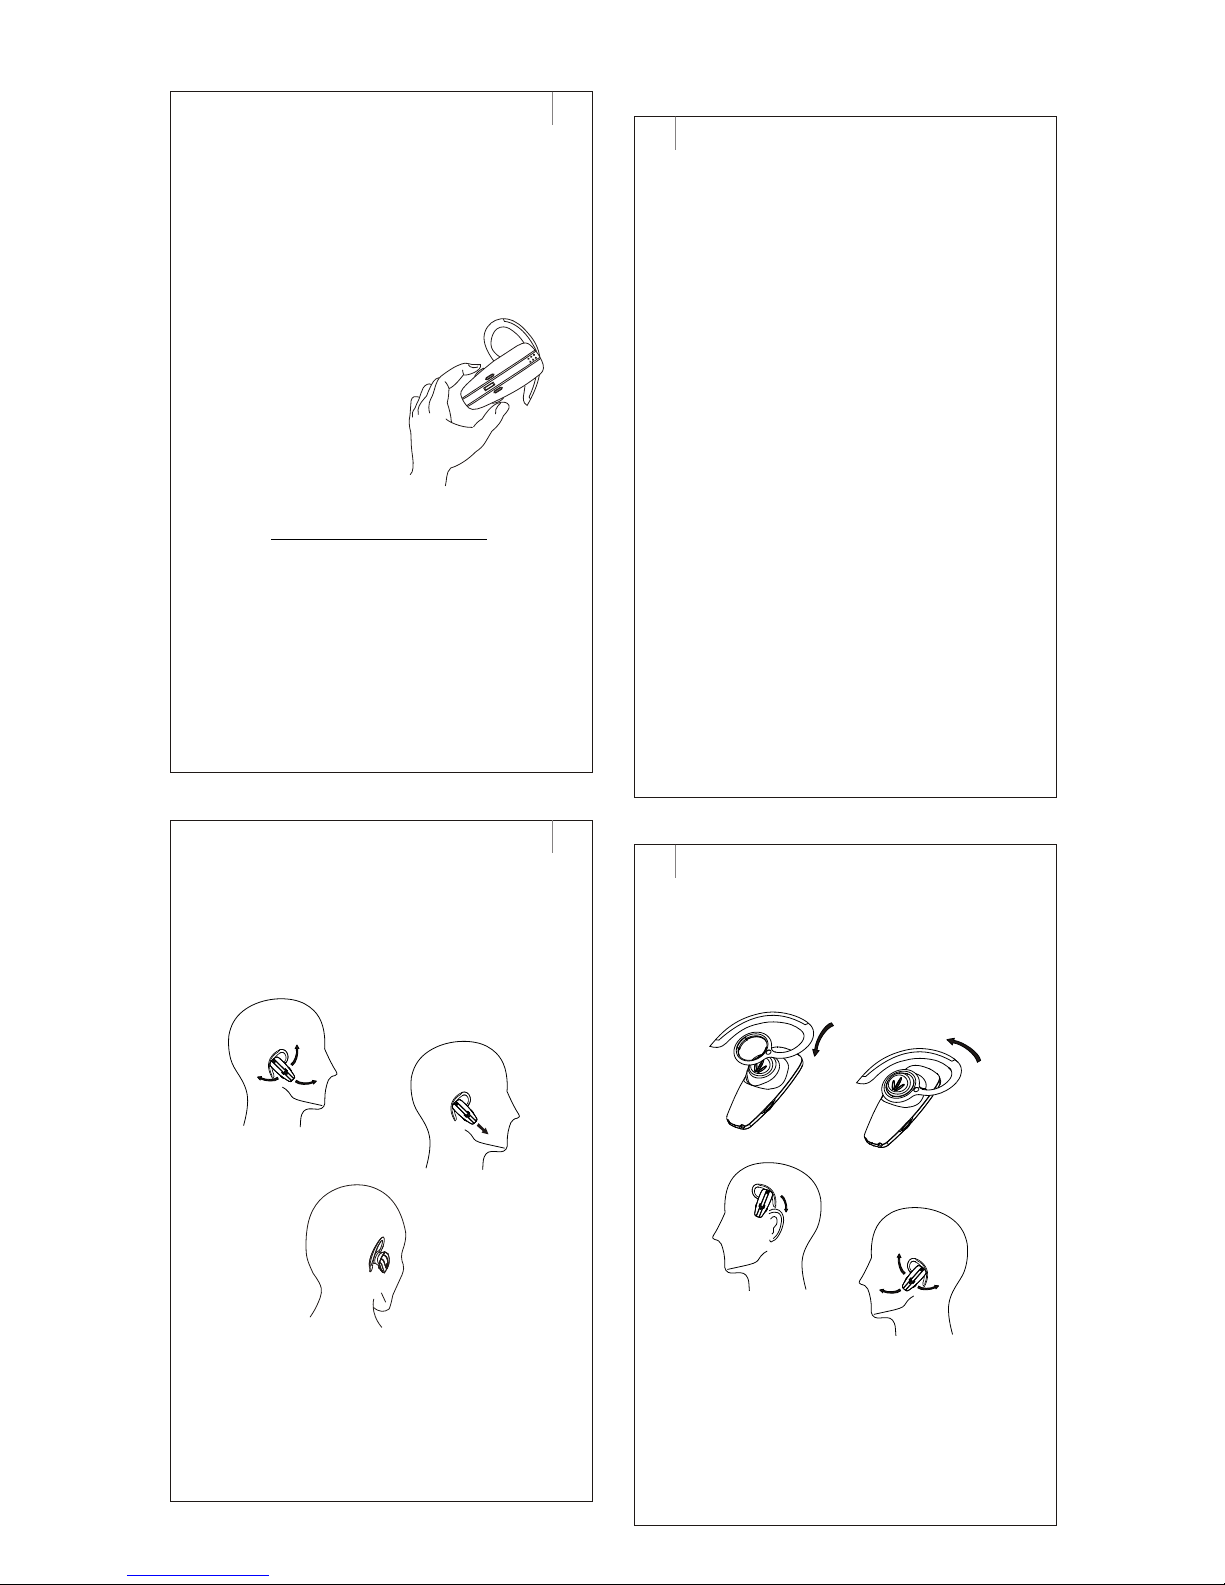
Adjusting the Ear Hook for left-ear Use
Using the headset
Operating Instructions
20
To wear the headset on your left ear:
1. Rotate the hook until the curved section is on the top as shown above.
2. Slide the headset behind the left ear and adjust until it is securely placed.
3. Rotate the headset so that the microphone is pointing
towards your mouth for better reception.
How to use the headset
Adjusting the Ear Hook for Right-ear Use
Operating Instructions 19
The headset is designed to fit both left and right ears.
To put the headset on your right ear:
1. Put on the headset by placing the hook behind your ear.
2. Rotate the headset so that the microphone is pointing
towards your mouth for better reception.
Operating Instructions 17
Battery Level Indication
When the battery is low, the Connection
Indicator (10) will stop flashing and the
Charging Indicator (11) will flash red to
indicate low battery.
The user can explicitly check the
battery level in standby or
connection state, by pressing the
Volume Control (+) (14)
and Volume Control (-)
(15) buttons
simultaneously once.
The Charging Indicator
(11) will flash
red as follows.
Battery level Red Indicator Flashing times
High 3
Mid 2
Low 1

Audex provides a limited warranty for the
DSF-2481 and its original accessories (hereafter
called “the Product”).
If the Product needs warranty service, please send
this letter of warranty back to the distributor. You
can consult your local distributor
Warranty Liability:
During the warranty period, if this Product doesn’t
work properly under normal use and maintenance
conditions and if this is caused by a design, material
or workmanship defect, an Audex-authorized
distributor in the country or area where the Product
was bought will decide to repair or replace the
product, at their discretion, according to the clauses
prescribed in this book.
According to the following Conditions, if the
returned Product is found not within the range of
warranty, Audex and its distributors retain the right
to charge a handling fee.
Conditions:
1. The warranty is effective only when the original
proof of purchase is provided to the Audex
authorized distributor. This must show the
purchase date and product serial number
If the above document has been smeared or
modified after the Product is bought, Audex
retains the right to refuse to provide the
warranty service.
24 Limited Warranty
Charging the Headset
Charging the headset correctly:
1. This headset must be seated on the main unit and
charged for at least 2.5hours before the first use.
2. The charging indicator is on during charging. It
goes off when the headset is fully charged.
3. Charging time: around 2.5 hours
CAUTIONS:
1. Always use the Audex-specified AC power adapter.
2. The voltage used should comply with the voltage
range marked on the adapter. Using the incorrect
adapter or incorrect current may cause damage
to the device or injury to the user such as
catching fire or getting an electric shock.
3. The adapter should be used in a well-ventilated
place. Keep away from inflammable or explosive
articles.
4. When using the adapter, please plug it into the
socket safely.
5. During use, don't cover the adapter or the
device with anything.
6. Don't pull the wire sharply when removing the
adapter from the socket. Please hold the
housing of the adapter instead and remove it
carefully.
7. In case of a peculiar smell or smoke, please
remove the adapter immediately and carefully.
Operating Instructions 21
Guide for Safe Use
Please read the following information before
using the DSF-2481.
Safety instructions:
*Make sure the volume is suitable before
using the headset. If the volume is too
high, it may damage your hearing.
*Always put the device in a clean place.
Don't store it in a dusty area.
*Don't put the device into water when
cleaning.
*Don't expose it to chemicals such as
benzene and thinners, or any other liquids.
*Don't expose it to extreme temperatures
(above 35°C or below 5°C). Don't expose
it to moisture.
*Don't apply excessive pressure to the device.
*Don't let any foreign matter spill into the device.
*Don't place any heavy objects on top of the device.
*Don't expose it to direct sunlight or heat sources.
*Don't throw, cast or try to flex this device.
*Don't use the device near medical
equipment without permission.
*Don't use the device in places where
radio equipment or wireless devices are
prohibited, e.g. in an airplane.
*Don't use the device in such a place where
the danger of explosion exists.
*Don't try to disassemble or repair this
device by yourself. Only Audex-authorized
personnel can disassemble it.
22 Guide for Safe & Effective Use
Children:
In order to avoid injury to themselves or others,
and to avoid damaging the device, do not
allow children to play with this equipment
or its accessories. The device or its
accessories may include detachable
small parts which could cause suffocation.
Disposal:
Don't dispose of this device as municipal
waste. Please consult the local regulations
regarding worn-out electronic products.
Power source:
The AC power adapter can only be connected
to the specified power source. Make sure the
lead is fixed in the right place to avoid damage
or pressure. Before cleaning, please remember
to switch off the power of all parts to avoid
electric shock. Don't use the AC power
adapter outside or in a damp place.
Never change the lead or plug. If the plug
doesn't match the socket, please ask a
qualified electrician to fix the suitable socket.
23
Guide for Safe & Effective Use

25
Limited Warranty
2. If Audex repairs or replaces the Product, the
repaired or replaced Product continues to enjoy
the warranty service for the balance of
the original warranty period or within thirty
(30) days after the service date (whichever
is longer). Repair or replacement can
include the use of the original parts for
repairing the same function. The parts or
components being replaced belong to Audex.
3. According to the Operating Instructions and
Guide for Safe & Effective Use in this book,
this warranty doesn't apply to product
failure caused by normal wear or misuse
(including but not limited to abnormal and
irregular use). Also, function failure
caused by accident, software or hardware
modification or regulation, or immersion is
not within the range of
warranty.
®
4. The Bluetooth system incorporated in this
Product was provided by other companies.
Audex will bear no responsibility for the
operation, usability, coverage, service or
range of this system.
5. The malfunction of the Product is not within
the range of warranty if the Product has been
altered, repaired or opened by non-Audex-authorized
personnel.
26 Limited Warranty
6. A malfunction caused by the use of accessories
of brands other than Audex or the use of other
peripherals is not within the range of warranty.
7. The warranty will become invalid if the seal of
the Product is damaged.
8. No special warranty is available, written or oral,
except the limited warranty printed here. All
implicit warranties, including but not limited to
the commercial or applicable implicit warranties
for special purposes, should be subject to the
period/duration stipulated by this warranty. In
the greatest degree that the law permits, Audex
or its distributor will bear no responsibility for
occasional or consecutive losses of any nature,
including but not limited to the profit loss or
commercial loss.
Some countries/regions/provinces don't permit the
exclusion or limitation of occasional or consecutive
damages, or the limitation of the implicit warranty
period. Therefore, the above restrictive or exemptive
clause may not apply to you.
The warranty provided doesn't affect the consumer's
lawful rights according to the current applicable laws.
Nor does it affect the rights prescribed in the purchase
and sales contract signed between the consumer and
the distributor.
* Extra information will be needed for some
countries/regions. This will be clearly stated on the
relevant purchase evidence when necessary.
27
Specifications
Main Unit & Headset
Working frequency
Working mode
Effective distance
Battery
Charging time
Continuous talking time
Standby time
Dimensions L×W×H
Weight of Main unit
Weight of Headset
2.4 GHz~2.4835 GHz
full-duplex
10 M (may vary in different environment)
Li-Ion, 80 mAh
About 2.5 hours
About 1.5 hours
3 days
123X113X109mm
197.1g
14.1g
Input voltage
Output voltage
AC power adapter
* Specifications and features are subject to change
without prior notice
220VAC 50Hz
12VDC 200mA
120VAC 60Hz
12VDC 200mA
Changes or modifications to this unit not expressly
approved by the party responsible for compliance
will void the user's authority to operate the equipment.
Any change to the equipment will void FCC grant.
This equipment has been tested and found to comply
with the limits for a Class C digital device, pursuant to
part 15 of the FCC Rules. These limits are designed to
provide reasonable protection against harmful interference
in a residential installation. This equipment generates,
uses and can radiate radio frequency energy and, if not
installed and used in accordance with the instructions,
may cause harmful interference to radio communications.
However, there is no guarantee that interference will not
occur in a particular installation. If this equipment does
cause harmful interference to radio or television reception,
which can be determined by turning the equipment off
and on, the user is encouraged to try to correct the
interference by one or more of the following measures:
-- Reorient or relocate the receiving antenna.
-- Increase the separation between the equipment and receiver.
-- Connect the equipment into an outlet on a circuit
different from that to which the receiver is connected.
-- Consult the dealer or an experienced radio/TV technician for help.
The user's manual or instruction manual for an intentional
or unintentional radiator shall caution the user that changes
or modifications not expressly approved by the party responsible
for compliance could void the user's authority to operate the
equipment. In cases where the manual is provided only in a
form other than paper, such as on a computer disk or over
the Internet, the information required by this section may be
included in the manual in that alternative form, provided the
user can reasonably be expected to have the capability to
access information in that form.
This equipment complies with FCC radiation exposure limits
set forth for an uncontrolled environment.
28 Warning

This equipment complies with FCC REGULATIONS 15
and 68 of the Federal Communications commission (FCC)
rules for the United States. A label is located on the
underside of the base unit containing the FCC registration
number and Ringer Equivalence Number (REN). You must,
upon request, provide this information to your local
telephone company. This equipment is compatible with
inductively coupled hearing aids.
FCC Part 15
Changes or modifications to this unit not expressly
approved by the party responsible for compliance will
void the user's authority to operate the equipment. Any
change to the equipment will void FCC grant.
This equipment has been tested and found to comply
with the limits for a Class C digital device, pursuant to
part 15 of the FCC Rules. These limits are designed to
provide reasonable protection against harmful interference
in a residential installation. This equipment generates,
uses and can radiate radio frequency energy and, if not
installed and used in accordance with the instructions,
may cause harmful interference to radio communications.
However, there is no guarantee that interference will not
occur in a particular installation. If this equipment does
cause harmful interference to radio or television reception,
which can be determined by turning the equipment off
and on, the user is encouraged to try to correct the
interference by one or more of the following measures:
-- Reorient or relocate the receiving antenna.
-- Increase the separation between the equipment and receiver.
-- Connect the equipment into an outlet on a circuit
different from that to which the receiver is connected.
-- Consult the dealer or an experienced radio/TV
technician for help.
Warning
The user's manual or instruction manual for an intentional
or unintentional radiator shall caution the user that
changes or modifications not expressly approved by the
party responsible for compliance could void the user's
authority to operate the equipment. In cases where the
manual is provided only in a form other than paper, such
as on a computer disk or over the Internet, the information
required by this section may be included in the manual
in that alternative form, provided the user can reasonably
be expected to have the capability to access information
in that form. This equipment complies with FCC radiation
exposure limits set forth for an uncontrolled environment.
FCC Part 68
The FCC requires that you connect you cordless telephone
to the nationwide telephone network through a modular
telephone jack (USOCRJ11C or RJ11W).
You telephone company may discontinue you service if
your equipment causes harm to the telephone network.
They will notify you in advance of disconnection, if
possible. During notification, you will be informed of your
right to file a complaint with the FCC.
If it is determined that your telephone equipment is
malfunctioning, the FCC requires that it not be used and
that it be unplugged from the modular jack until the
problem has been corrected. Repairs to this telephone
equipment can only be made by the manufacturer or its
authorized agents or by others who may be authorized
by the FCC. For repair procedures, follow the instructions
outlined under
Warranty.
(Audex Telecom Industrial Co., Ltd.)
Warning
29 30
Table of contents
Other Audex Headset manuals


