Audio Physic AVANTI User manual

Owner´s Manual
AVANTI
AUDIO PHYSIC AVANTI
Contents
Included in the Delivery page 10
Welcome page 11
General Tips page 12
Unpacking and Assembly page 13
Connecting the Loudspeakers page 14
Setting Up page 15
Positioning page 16
Technical Specications page 17
Included in the Delivery
Your new loudspeakers are delivered in two separate boxes. One box contains one loudspeaker and one front grille,
as well as your „Welcome to the Audio Physic Family“ package containing this Owner‘s Manual, the Final Inspection
Certicate and accessories. In the second box you will nd the other loudspeaker and one front grille.
Box “A“ • “Welcome to the AUDIO PHYSIC Family“ package and a spirit level to optimise setup
• 8x spikes
• 8x screw cap
• 1x front panel without fabric (mounted)
• 1x front panel covered in fabric
Box “B“ • 1x front panel without fabric (mounted)
• 1x front panel covered in fabric
10
english AUDIO PHYSIC AVANTI
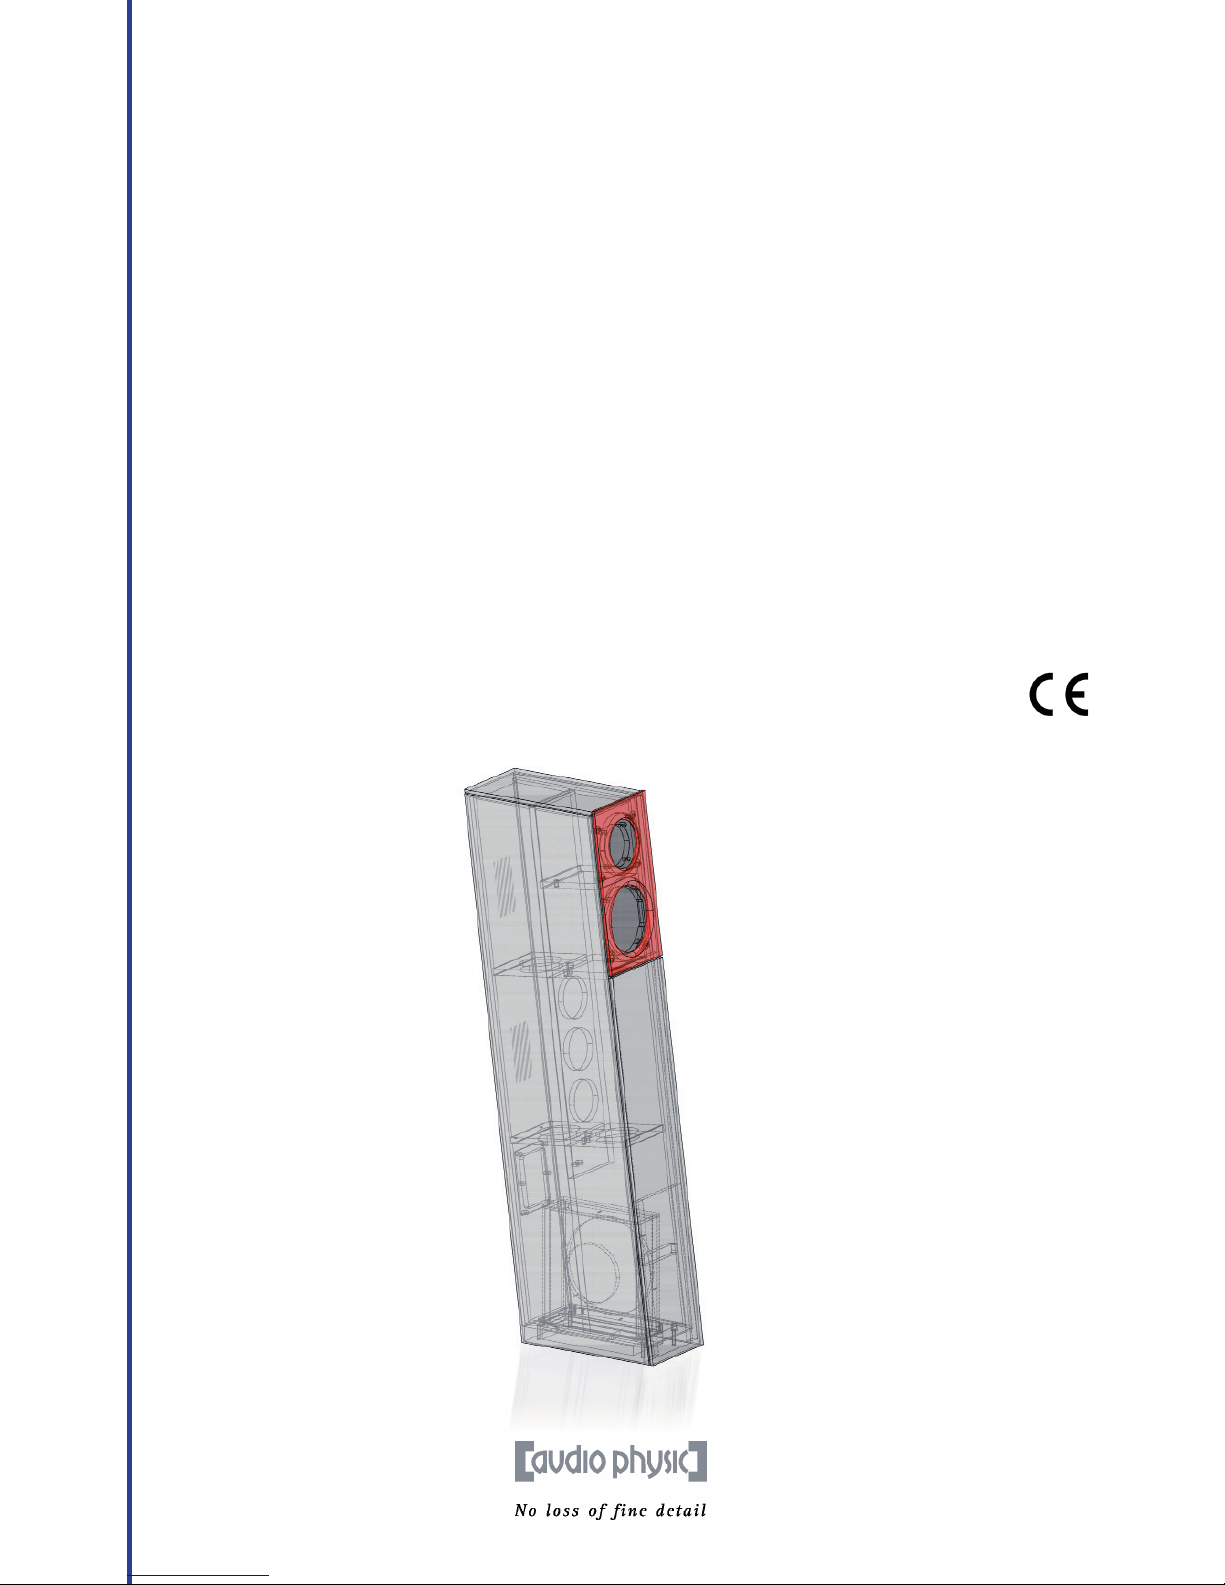
Insight:
The transparent illustration
of the AVANTI demonstrates
the elaborate structural
conguration of the cabinet
with the integrated woofer.

Welcome
Dear music lover,
We would like to thank you for putting your trust in our products and welcome you to the family of audiophile
friends of AUDIO PHYSIC.
You have chosen a top-class product that has been developed in Germany. We would like to congratulate you on
this choice and wish you a lot of fun and enjoyment with your product.
In order to earn your trust, we only use the latest technical expertise and top-quality components when manufacturing
our loudspeakers and we produce them in accordance with strict quality criteria. These criteria enable us to provide
original owners with a 10 year warranty for our loudspeakers (2 years for the subwoofer electronics and 10 years for
the drivers), starting on the date of purchase of the product by the original owner, which is far longer than the legally
prescribed warranty periods. In order to secure this additional service, please ll out the warranty card enclosed with
your loudspeakers and send this and a copy of your proof of purchase to your national AUDIO PHYSIC distributor. He
will send you written conrmation of your 10 year warranty shortly after receiving these documents.
Only after several electronic and acoustic test runs, which our quality assurance staff conrm by signing the enclosed
certicate, are our loudspeakers allowed to leave the factory in secure packaging. These measures help to ensure that
you can enjoy the full experience of the high-quality materials, production and sound of AUDIO PHYSIC loudspeakers
in the comfort of your own home.
As a rule, your competent AUDIO PHYSIC dealer will deliver and install your loudspeakers. If you would rather install
your product yourself, the following pages provide you with detailed tips and steps to follow in order to safely set up
your loudspeakers. Have fun with your new AVANTI loudspeakers!
11
AUDIO PHYSIC AVANTI english
You have our word:
We put our name on every model in
order to guarantee the tested quality
of our loudspeakers.

General Tips
Depending on the size and weight of your loudspeakers, it is a good idea for two people to unpack them.The ideal way
to do so in the case of oor-standing loudspeakers is to stand the boxes upright so that the top of the loudspeaker is resting
on the oor (the boxes are marked accordingly) and you can easily attach the spikes. The spikes for both loudspeakers
can be found in your “Welcome to the Audio Physic Family“ package.
Please follow the instructions in the chapter “Unpacking and Assembly“ to ensure the safe and correct installation of your
loudspeakers.
The loudspeakers should reach a temperature that is approximately equivalent to room temperature before you connect
them to the HiFi system and/or operate them. This instruction predominately refers to the winter months in case the
loudspeakers were previously stored in a cold room.
Maintenance
Our loudspeakers are coated in high-quality veneers or high-gloss lacquers. Some parts of the cabinet may have a glass
surface depending on the loudspeaker design in question. You should avoid using chemical cleaning agents because
these may attack the loudspeaker surfaces and make them go matt.As a rule, a ne, soft and damp cloth is all that you
need to clean the surfaces. If a cleaning agent is required, use this to dampen the cloth and do not directly apply it to
the surface. It is best if you test the suitability of the cleaning agent on a less visible part of the cabinet.The drivers do
not normally need to be cleaned. Dust particles fall off quickly when the loudspeakers are operated.You can, however,
use a soft brush to lightly brush over the surfaces of the drivers.When doing so, make sure you do not put any pressure
on it. Please never use any cleaning agents on the drivers. Do not expose the loudspeakers to direct sunlight. Anodised
surfaces are sensitive to acids and alkalis and to ultraviolet light and may fade.
The midrange and tweeter drivers of the AVANTI loudspeakers use a unique mounting technique. Rather than directly
mounting the drivers onto the cabinet of the loudspeaker, the drill holes of the loudspeakers contain special neoprene
plugs. These neoprene plugs tighten in the mounting hole when the screws are tted, creating a permanently elastic
connection between the driver and the cabinet that reduces resonance. You do not need to tighten these screws.
Re-tightening the screws may damage the plugs and have a negative effect on the sound.
Burning In
The loudspeakers rst reach their full sound potential after a specic burn-in period.We burn in the drivers at our factory
prior to assembly, meaning that they normally only need a burn-in period of a few hours at a normal room volume
and with music that has a range of frequencies that is as wide as possible, for example orchestral pieces. Recordings
containing ’white or pink noise’ such as those available on many so-called Test CDs are also ideal - however, for safety
reasons, these pieces should never be played at high volumes.
Stray Magnetic Fields
The magnetic eld created by the individual driver magnets may to some extent have an effect outside of the loudspeaker.
This stray magnetic eld may interfere with other devices, particularly televisions and monitors with cathode ray tubes
(not LCD or plasma televisions), for example by causing changes in colour in the picture.We recommend that you place
your loudspeakers approximately half a metre away from such devices (and also from magnet tapes, video cassettes,
credit cards with magnetic stripes, etc.).
Transportation
Where possible, please retain the loudspeaker packaging. You can then securely transport your loudspeakers if you
move house. If you have AVANTI loudspeakers in our “Glass High Gloss“ design, please pack them securely and only
transport them in an upright position on a pallet in order to avoid damages.
12
english AUDIO PHYSIC AVANTI

13
Unpacking and Assembly
1. Place the boxes on the oor, making sure that the product labels are facing up, and carefully open the
packaging on the long side where it has been taped up, preferably using a pocket knife or kitchen knife
(similar to illustrations).
2. Remove the “Welcome to the Audio Physic“ package and the accessories.
3. Keep the box on the oor and carefully remove the loudspeaker together with its protective foam pads. It is
ideal if two people carry out this step. Make sure that you do not touch the drivers when removing and handling
the loudspeaker as this may cause irreparable damage to the drivers.
4. Now remove the top foam cover and carefully slide down the protective foil so that you can easily attach the
spikes that come with the loudspeaker.
5. Screw the caps with the integrated counter nuts onto the spikes.
6. Now turn over the loudspeakers so that the loudspeakers are in stable contact with the oor. Two people
should also carry out this step where possible.
Make sure that you do not hurt yourself on the tips of the spikes.
7. Place the loudspeakers in their intended positions and nely adjust the spikes so that the loudspeakers do
not wobble. If you do not place the loudspeakers in a secure and stable position and they therefore wobble,
this will have a major effect on the sound.When the boxes are standing level and upright, you have set them up
perfectly.The enclosed spirit level will help you to nely adjust the loudspeakers (they are level when the bubble
remains in the inner circle). Now use the lock nuts to again tighten the spikes. Roughly hand-tightening the nuts
is sufcient.
8. Our AVANTI models are tted with a solid front panel without fabric when delivered from our factory. If you
wish, you can exchange this panel for the panel covered in fabric that is also enclosed with your loudspeaker
to suit your tastes. To do so, simply use your ngers to carefully lift off the tted panel. Please ensure that
you do not touch the drivers when doing so. Once you have removed the panel, place the fabric-covered
panel in its position and softly push it in into place until it is ush with the loudspeaker cabinet. You do not
need to worry about any limitations or loss of sound details when using either of the panels.
AUDIO PHYSIC AVANTI english
Right
The loudspeaker upper side
should be on the bottom during
unpacking. If you now carefully
pull the loudspeaker out of the
packaging, you can grip the
loudspeaker on its underside
with the traverses and can easily
attach the spikes.
Wrong
If the loudspeaker upper side
is on top, it is necessary for
you to rst turn the loudspeaker
around after removing it from
the packaging, in order to attach
the spikes to the traverses.
Connecting the Loudspeakers
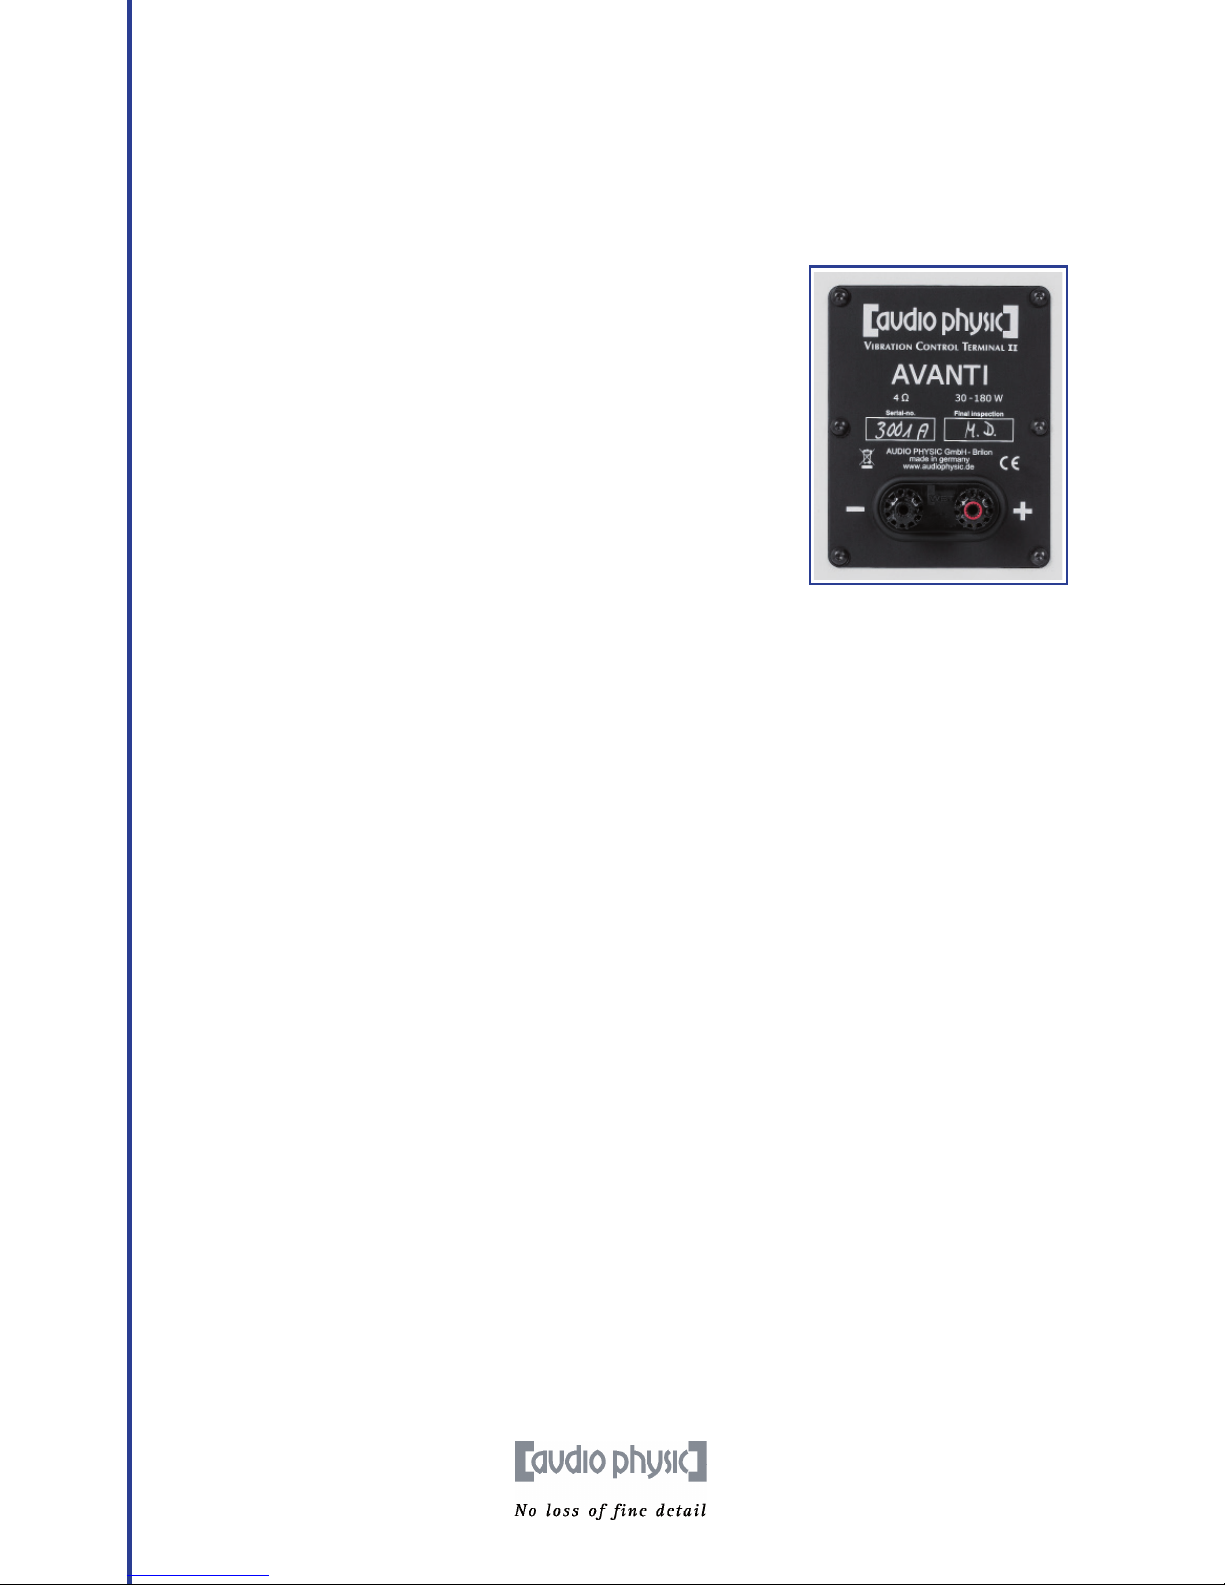
Your new loudspeakers are tted with particularly high-quality connectors from the “nextgen” range made by the
specialist manufacturer WBT (see the image on the right). These connectors feature a unique mechanism (the torque
indicator) that helps you to connect cables with spades as explained under point 2. The connectors of the AVANTI
accept both spades and banana plugs. Loose cable strands oxidise easily and are not suitable for a permanently
high-quality listening experience.
1. Please switch off all equipment in your Hi system before you begin
to connect your loudspeakers.
2. If you are using a loudspeaker cable with spade connectors, turn the
screw clamps to the left until you can easily slide the spades into
the openings at the side. Push the spades into these openings and
turn the screw clamps to the right until you hear a clicking noise
- this is the torque indicator. Now turn the clamps until they are
hand-tight, which will normally be the case after a few more ‘clicks‘.
After this point, you can indeed tighten the clamps even more, but
this will not improve the results. In the worst case scenario, further
tightening the clamps may lead to damage to the surface structure
of the spade connectors.
3. Make sure you have the right polarity. As a rule, loudspeaker cables are accordingly labelled, either by a
permanent marking on one of the two conductors of the cable or by plus “+“ and minus “-“ markings on the
cable ends.
4. Now connect the cable to your amplier and make sure that you have the right polarity here.
You can now start to optimally align your new AVANTI to the listening position.
You can nd tips regarding this process in the following chapter on “Setup” and can access
particularly detailed information on the AUDIO PHYSIC website.
14
english AUDIO PHYSIC AVANTI

15
AUDIO PHYSIC AVANTI english
Setting Up Your AVANTI
1. The ideal placement of your loudspeakers in your
room involves positioning them in an isosceles
triangle arrangement including your listening seat,
creating equal spacing between each loudspeaker
and the listening position.
2. The distance between the loudspeakers should be
around 0.8 - 1.2 times as much as the distance
between the loudspeakers and the listening position.
The closer you sit to the loudspeakers, the more
direct and dry your sound experience will be.As you
move further away from the loudspeakers, the bass
response will normally increase and the spatial
imaging will seem more generous.
3. Your loudspeakers should ideally be placed around
40 centimetres or further away from the surrounding
walls, The larger the space between the loudspeakers
and the back wall, the more precise the sound
reproduction, particularly where bass performance
is concerned.
4. The closer the loudspeakers come to the back wall
(and/or side wall), the more powerful the broadband
reproduction of the low frequencies will be – resulting
in stronger bass tones and full-bodied voice tones.
5. This effect can be made even more intense when the
loudspeakers are placed in a corner. Low tones
become around 6 decibels (or more) louder. Use
software with which you are familiar to try out
different placements and you will soon nd the
position that best suits your own personal tastes.
6. Alongside the strength of the bass response, the
distance from the side walls also particularly affects
the localisation of sound events and therefore the
precision of the spatial imaging. As the distance
from the walls increases, the localisation will become
more precise and the sound will be more balanced.
When the loudspeakers are extremely close to the side
walls, this will result in early reections, leading to
reduced spatial perception and tending towards
nervous sound reproduction. Curtains or shelves
or similar at the sides reduce this effect.
7. Ifyouwanttopositionyourloudspeakersontheleftand
right-handsidesofacupboardoratallsideboard,please
ensure that the fronts of the loudspeakers are level
with the front of the cupboard or sideboard. If the
loudspeakers are positioned further back than the
furniture, this will have an effect on the sound, not
only in the form of early reections from the side walls
of the cupboard as explained under point 6 but
also, in some cases, by disrupting the unobstructed
radiation of sound.
Setup close to
the wall:
Low frequencies
are broadly
reinforced by
around +3 and
+6 decibels
when the
loudspeakers
are positioned
close to the
wall.
Setup in the
corners of the
room:
Low tones
become
signicantly
louder and
overlap into
the midrange
frequencies.
Setup away
from the wall:
The loudspeakers
are positioned at
least
40 centimetres
away from the
surrounding
walls. This
provides a clearly
dened bass
response and a
clean, crisp
reproduction
of midrange
frequencies.

Positioning Your AVANTI Loudspeakers
1. Once the loudspeakers are positioned parallel to the
side walls, turn them inwards until an imaginary line
is pointing from the tweeter of each loudspeaker
towards your preferred listening position. If you prefer
to listen to music alone, the two imaginary lines
coming from the loudspeakers should ‘intersect‘ at
your listening position. This will result in excellent
localisation and spatial image. If you would rather
listen to music in a group, turn the loudspeakers
further inwards so that the imaginary lines cross in
front of the listening position.
2. If you prefer a wider soundstage and more generous
spatial imaging, position the loudspeakers at less of
an angle so that the imaginary lines (in blue) cross
just behind the listening position. Once a specic
angle has been reached, the spatial image in the
centre between the loudspeakers will begin to lose
structure and precision. You can easily identify the
ideal angle by using a mono recording. When the
voiceofthe artist soundsclear again andcomes directly
from the middle between the loudspeakers,you have
found the ideal position.
Second step:
Experiment with the angle.
When it comes to positioning
your loudspeakers, your
listening taste plays an
important role. To nd the ideal
position, mono recordings are
extremely useful, particularly
those with a singing voice and
few instruments.
16
First step:
Angle the loudspeakers so that
an imaginary line is in place
between the tweeters and your
listening position.
english AUDIO PHYSIC AVANTI
17
AUDIO PHYSIC AVANTI english
Technical Specications
Height 41.5“
Width 6.7“
Depth 9.5“
Required Space: Width x Depth 8.3“ x 11.8“
Weight 24 kg
29 kg (glass design)
Recomm. amplier power 30 - 180 watts
Impedance 4 Ohm
Frequency range 31 Hz - 40 kHz
Sensitivity 88 dB
Loudspeaker systems
Woofer 1 x 7“
Midrange 1 x 5.9“ HHCM III
Tweeter 1 x 1.75“ HHCT III
Some sound advice for even more aenon to detail
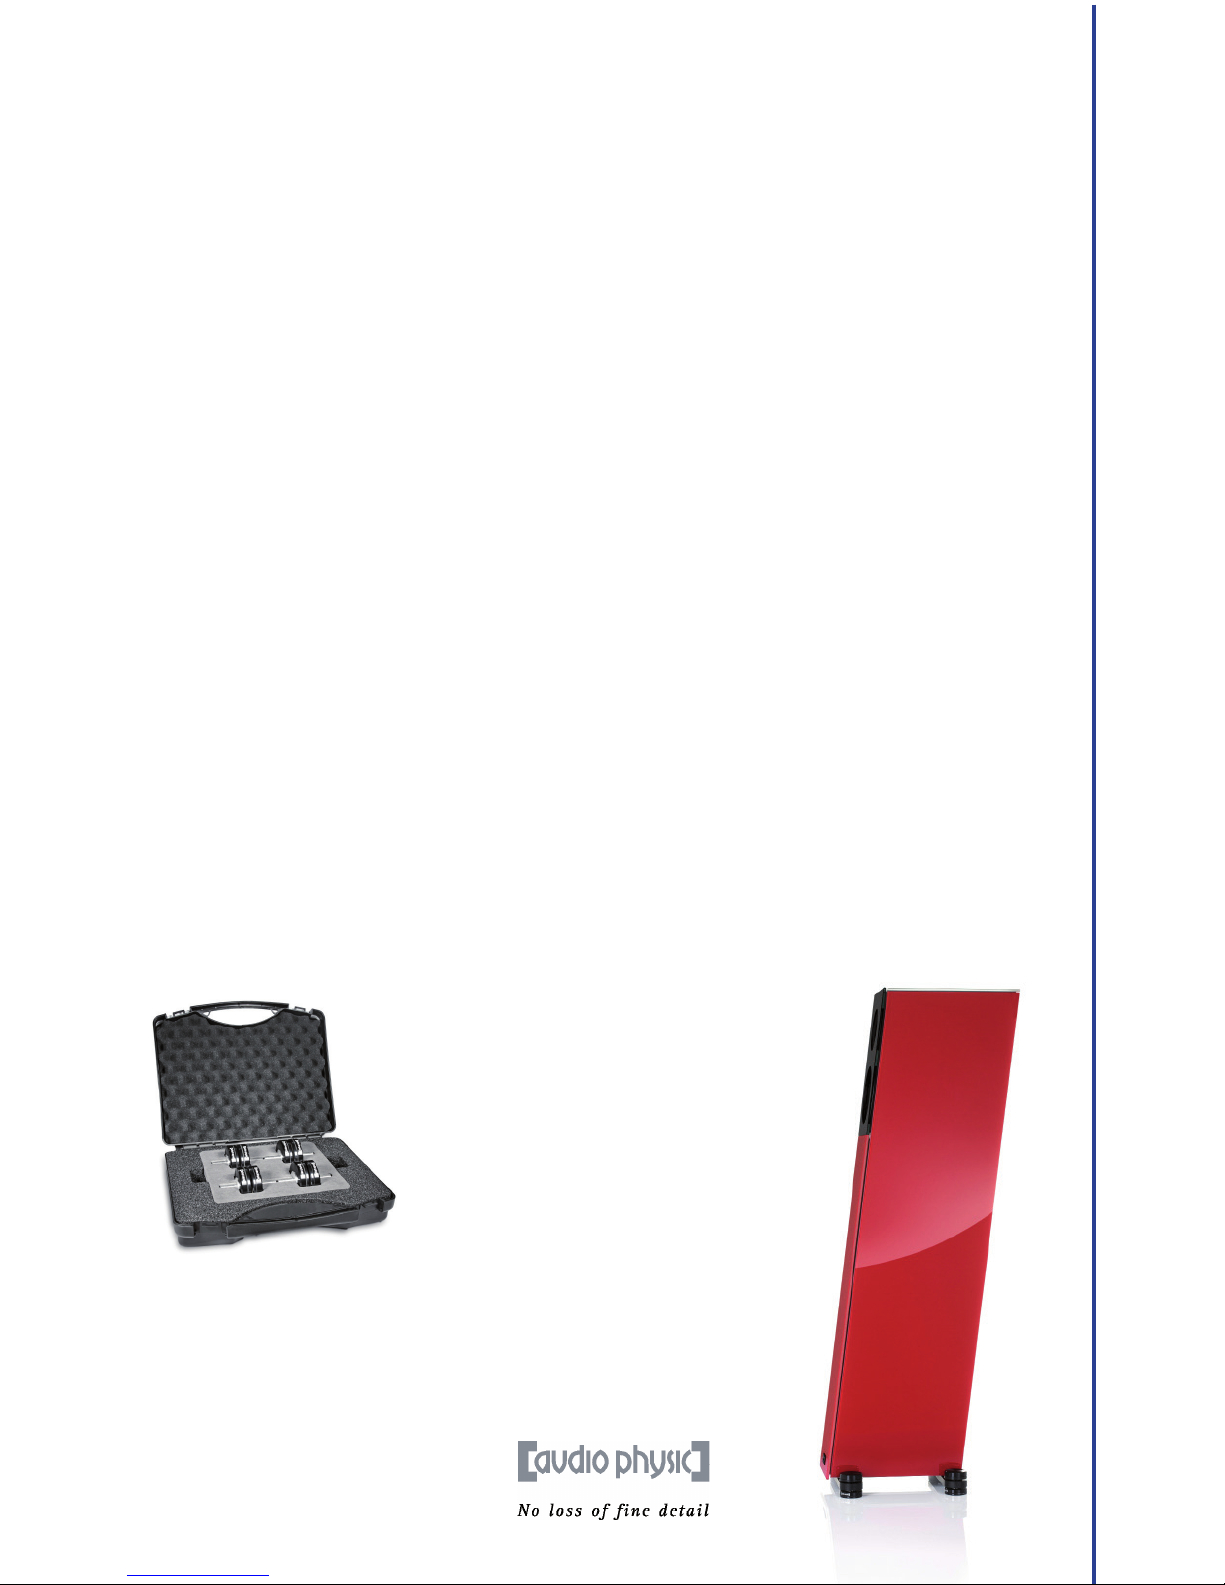
If you want to boost the sound of the AVANTI even more, you should denitely try our „VCF II M8 Magnec“
vibraon control feet (see right illustraon). The vibraon control feet dramacally reduce the transfer
of vibraon between the loudspeaker and the set-up space. When excited by sound energy, oors tend to
develop their own vibraons. These micro-vibraons can have a detrimental eect on the acousc paern.
The VCF II M8 Magnec feet interrupt this radius of vibraon. The result is an audible bonus of ne denion
and precision delity. Your AUDIO PHYSIC specialised dealer is pleased to advise you, or simply visit our
accessories web shop at www.audiophysic.de.
More sound through innovation
The cutting-edge AUDIO PHYSIC VCF II M8
Magnetic feet are highly effective in
decoupling the loudspeakers from the oor.
The acoustic pattern gains an even higher
level of depth, precision and natural
quality. What‘s more, the feet reliably
protect sensitive oors from scratches.
Thanks to the M8 threads, the VCF II M8
Magnetic can be conveniently attached to
the loudspeaker traverses.

AUDIO PHYSIC GmbH
Almerfeldweg 38
59929 Brilon / Deutschland
Germany
Tel. +49(0)2961/9617-0; Fax +49(0)2961/51640
AUDIO PHYSIC AVANTI
Distributed in North America by:
VANA, Ltd.
2845 Middle Country Road
Lake Grove, NY 11755
(631) 246-4412.
www.vanaltd.com
Other manuals for AVANTI
1
Table of contents
Other Audio Physic Speakers manuals

Audio Physic
Audio Physic CLASSIC Compact User manual

Audio Physic
Audio Physic CARDEAS 30 User manual

Audio Physic
Audio Physic Virgo 25 plus User manual

Audio Physic
Audio Physic AVANTI User manual

Audio Physic
Audio Physic VIRGO III User manual

Audio Physic
Audio Physic OREA User manual

Audio Physic
Audio Physic TEMPO plus User manual

Audio Physic
Audio Physic CLASSIC On-Wall User manual

Audio Physic
Audio Physic STEP plus User manual


