Audio Physic VIRGO III User manual

AUDIO PHYSIC VIRGO III
Bedienungsanleitung | Manual
VIRGO III

Inhaltsverzeichnis
Lieferumfang Seite 3
Begrüßung Seite 4
Allgemeine Tipps Seite 5
Auspacken und Zusammenbau Seite 6-7
Anschließen der Lautsprecher / Bi-Wiring Seite 8
Aufstellen der Lautsprecher Seite 9-10
Technische Spezikationen Seite 11
Contents
Included in the Delivery page 3
Welcome page 12
General Tips page 13
Unpacking and Assembly page 14-15
Connecting the Loudspeakers / Bi-Wiring Operation page 16
Setting Up the Loudspeakers page 17-18
Technical Specications page 19
2
deutsch AUDIO PHYSIC VIRGO III

Lieferumfang
Ihre neuen Lautsprecher werden in zwei getrennten Kartons geliefert. Ein Karton enthält neben einem Lautsprecher
die Zubehörpackung „1“ und Ihr „Willkommen in der Familie“-Paket mit dieser Anleitung und unserer Endkontroll-
Urkunde. Im zweiten Karton bendet sich neben dem Lautsprecher ein weiteres Zubehörpaket („2“).
Verpackung „A“ • „Welcome to the Family-Pack“ mit Dosenlibelle zur Aufstellungsoptimierung
• Zubehör („1“): 1x Frontbespannung
2x Metalltraversen
1x Befestigungsset mit 4x Spikes
4x Kontermuttern
4x Flanschschrauben
4x Unterlegscheiben
1x Inbusschlüssel
Verpackung „B“ • Zubehör („2“): 1x Frontbespannung
2x Metalltraversen
1x Befestigungsset mit 4x Spikes
4x Kontermuttern
4x Flanschschrauben
4x Unterlegscheiben
1x Inbusschlüssel
Included in the Delivery
Your new loudspeakers are delivered in two separate boxes. One box contains one loudspeaker and the accessory
pack “1“, as well as your “Welcome to the Audio Physic Family“ package containing this Owner‘s Manual and
the Final Inspection Certicate. In the second box you will nd the other loudspeaker and a further accessory pack
(number “2“).
Box “A“ • “Welcome to the Family“ with spirit level to optimise setup
• Accessory Pack (“1“): 1x front grille
2x metal stands
1x mounting set with 4x spikes
4x nuts
4x ange bolts
4x plastic washer
1x Allen key
Box “B“ • Accessory Pack (“2“): 1x front grille
2x metal stands
1x mounting set with 4x spikes
4x nuts
4x ange bolts
4x plastic washer
1x Allen key
3
AUDIO PHYSIC VIRGO III deutsch

Willkommen
Sehr geehrter Musikfreund,
wir bedanken uns herzlich für Ihr Vertrauen in unsere Produkte und heißen Sie im Kreise der audiophilen Freunde von
AUDIO PHYSIC herzlich willkommen.
Sie haben sich für ein erstklassiges Produkt aus deutscher Entwicklung entschieden, dazu beglückwünschen wir Sie
und wünschen Ihnen viel Freude damit.
Damit wir Ihr Vertrauen verdienen, entstehen unsere Lautsprecher nach neuesten technischen Erkenntnissen, unter Ver-
wendung erstklassiger Bauteile und werden nach strengen Qualitätskriterien gefertigt. Kriterien, die es uns erlauben dem
Erstbesitzer ab dem Kaufdatum 10 Jahre Garantie auf unsere Lautsprecher zu gewähren (Subwooferelektronik 2 Jahre,
Chassis 10 Jahre), ein Vielfaches der gesetzlich vorgeschriebenen Gewährleistungsfristen. Um diese Zusatzleistung zu
erhalten, füllen Sie bitte die den Lautsprechern beiliegende Garantiekarte aus und senden uns diese zusammen mit einer
Kopie Ihres Kaufbeleges zu. Wir bestätigen Ihnen kurz darauf die 10-Jahres-Garantie schriftlich.
Erst nach mehreren elektrischen und akustischen Prüfdurchgängen, die unsere Mitarbeiter der Qualitätssicherung
mit ihrer Unterschrift auf der beiliegenden Urkunde bestätigen, verlassen die Schallwandler sicher verpackt das Werk.
Diese Maßnahmen tragen dazu bei, dass Sie zuhause in den vollen Genuss der hohen Material-, Fertigungs- und
Klangqualität von AUDIO PHYSIC-Lautsprechern kommen.
Im Regelfall wird Ihnen der kompetente AUDIO PHYSIC-Fachhändler die Lautsprecher liefern und installieren. Sollten
Sie dies selbst tun wollen, helfen Ihnen die auf den folgenden Seiten beschriebenen Tipps und Schritte bei der sicheren
Inbetriebnahme. Viel Spaß mit Ihren VIRGO III.
No loss of ne detail:
Wenn Sie hautnah erfahren möchten, was
Ihre neuen AUDIO PHYSIC-Boxen
leisten, wird Sie unser Anniversary-
Sampler „25 Jahre AUDIO PHYSIC“mit
16 Klassikeinspielungen in lupenreiner
Qualität begeistern.
Wort drauf:
Für die geprüfte Qualität
unserer Lautsprecher bürgen
wir an jedem Modell mit
unserem Namen.
4
deutsch AUDIO PHYSIC VIRGO III

Allgemeine Tipps
Je nach Größe und Gewicht der Lautsprecher bietet es sich an, diese zu zweit auszupacken. Ideal ist es, die Kartons zu
stellen, und zwar so, dass sich die Boxenoberseite unten am Boden bendet (die Kartons sind entsprechend gekenn-
zeichnet) und Sie die Fußkonstruktion einfach anbringen können. Entnehmen Sie den Kartons das Zubehör, das sich in
kleineren Kartons bendet. In diesen benden sich die zum Anbringen der Boxenfüße notwendigen Bauteile. In der Re-
gel sind die Spikes für beide Lautsprecher im Zubehör-Package einer der beiden Boxen (Zubehör-Package „1“). Folgen
Sie für die sichere und korrekte Installation den Hinweisen im Kapitel „Auspacken und Zusammenbau“.
Die Lautsprecher sollten etwa Zimmertemperatur erreichen, bevor Sie sie mit der HiFi-Anlage verbinden, bzw. in Betrieb
nehmen. Dieser Hinweis bezieht sich in erster Linie auf die Wintermonate, falls die Boxen zuvor in einem kalten Raum
gelagert wurden.
Pege
Unsere Lautsprecher sind mit hochwertigen Furnieren oder Hochglanzlacken beschichtet. Chemische Reinigungsmittel
sollten Sie meiden, diese können die Oberächen angreifen und matt werden lassen. In aller Regel genügt ein feines,
weiches, angefeuchtetes Tuch, um die Oberächen zu reinigen. Sollte ein Reinigungsmittel nötig sein, feuchten Sie da-
mit das Tuch an; tragen Sie das Mittel nicht direkt auf die Oberäche auf. Am besten prüfen Sie die Verträglichkeit des
Mittels an einer weniger sichtbaren Stelle des Gehäuses. Die Chassis benötigen normalerweise keine Reinigung. Staub-
partikel fallen im Betrieb schnell ab. Sie können jedoch mit einem weichen Pinsel vorsichtig über die Chassis-Oberäche
streichen, Sie sollten dabei keinesfalls drücken! Bitte säubern Sie die Töner nie mit Reinigungsmitteln. Setzen Sie die
Boxen nicht direktem Sonnenlicht aus. Eloxalächen reagieren empndlich auf Laugen wie auf UV-Licht und bleichen
unter Umständen aus.
Die Chassis dieser AUDIO PHYISC-Boxen-Serie verfügen über eine einzigartige Befestigungstechnik. Statt direkt
mit dem Korpus verschraubt zu werden, benden sich in den Montagebohrungen der VIRGO III spezielle Neopren-
dübel. Beim Anziehen der Schrauben verankern sich diese sicher in der Bohrung und sorgen für eine dauerelastische,
resonanzmindernde Verbindung zwischen Chassis und Gehäuse. Es ist nicht nötig, diese Schrauben nachzuziehen. Ein
nachträgliches Festziehen kann die Dübel zerstören und führt zu einem schlechteren Klang.
Einspielen
Ihr volles Klangpotenzial erreichen die Lautsprecher erst nach einer gewissen Einspielzeit. Die modernen Chassis der
VIRGO III werden von uns vor der Montage im Werk eingespielt, daher genügen meist einige Stunden Spielzeit bei
Zimmerlautstärke mit Musik, die einen möglichst breiten Frequenzumfang besitzt wie beispielsweise Orchesterwerke.
Ideal sind auch Aufnahmen mit „Weißem oder Rosa Rauschen“, wie sie auf vielen so genannter Test-CDs vorhanden
sind. Die Lautstärke sollte hierbei zum Schutz der Lautsprecher keinesfalls hoch eingestellt werden.
Streufelder
Die Magneten der einzelnen Chassis erzeugen ein magnetisches Feld, das teilweise auch außerhalb der Lautsprecher
wirkt. Dieses Streufeld kann Geräte, insbesondere Fernseher und Monitore mit Bildröhren (nicht LCD- oder Plasma-TVs),
beeinussen. Es kommt möglicherweise zu Farbveränderungen im Bild. Wir empfehlen, etwa einen halben Meter Ab-
stand zu solchen Geräten (auch zu Magnetbändern,Videocassetten, Kreditkarten mit Magnetstreifen, etc.) zu halten.
Wenn möglich, bewahren Sie dieVerpackungen der Lautsprecher auf. So können Sie Ihre Boxen bei einem Umzug sicher
transportieren.
5
AUDIO PHYSIC VIRGO III deutsch

Auspacken und Zusammenbau
1. Stellen Sie die Kartons mit den Produktaufklebern nach oben auf den Fußboden. Öffnen Sie die Verpackungen
vorsichtig an den Klebestellen der Längsseiten entsprechend den Abbildungen unten (Abbildung ähnlich), am
besten mit einem Taschen- oder Küchenmesser.
2. Entnehmen Sie die Zubehör-Packages aus den Kartons.
3. Ziehen Sie die Lautsprecher, idealerweise zu zweit, mit den Schaumstoffpolstern aus dem stehenden Karton.
Achten Sie unbedingt darauf, dass Sie beim An- oder Umgreifen der Boxen nicht die Chassis berühren, diese
könnten irreparabel beschädigt werden.
4. Entfernen Sie nun das obere Schaumstoffpolster und streifen behutsam die Schutzfolie nach unten, sodass
Sie bequem die Fußkonstruktion befestigen können.
5. Nehmen Sie die Metalltraversen aus der Zubehörpackung und schrauben die Spikes in die dafür vorgesehenen
Öffnungen.
6. Schrauben Sie die Kontermuttern von oben auf die Spikes.
7. Legen Sie nun die Metalltraversen mit den angebrachten Spikes auf den Lautsprecher und richten Sie die
Traversen so aus, dass deren Verschraubungsöffnungen mit denen der dafür vorgesehenen Öffnungen im
Lautsprecherboden übereinstimmen.
Korrekt: Die Lautsprecherober-
seite sollte beim Auspacken nach
unten zeigen. Wenn Sie die Boxen
nun vorsichtig aus der Verpa-
ckung ziehen, haben Sie einfach
Zugriff auf die Boxenunterseite
und können leicht die Fußkonst-
ruktion befestigen.
Falsch: Zeigt die Laut-
sprecheroberseite nach
oben, müssen Sie den
Lautsprecher nach dem
Entfernen der Verpa-
ckung erst wenden, um
die Fußkonstruktion
anzubringen.
6
deutsch AUDIO PHYSIC VIRGO III

8. Legen Sie die beiliegenden Unterlegscheiben von oben auf die Bohrungsöffnungen in den Traversen und
führen die mitgelieferten Flanschschrauben in die Öffnungen ein. Ziehen Sie die Schrauben fest an. Ein
optimaler Halt ist nach etwa 7 Umdrehungen erreicht.
9. Drehen Sie die Lautsprecher nun um, am besten wieder zu zweit, sodass die Metallfüße sicheren Kontakt
zum Fußboden bekommen. Achten Sie darauf, sich nicht an den Spitzen der Spikes zu verletzen.
10. Stellen Sie die Lautsprecher an den vorgesehen Platz und justieren die Spikes fein, damit die
Boxen nicht wackeln. Stehen die Lautsprecher nicht sicher und wippen, dann beeinusst das
den Klang nachhaltig. Wenn die Boxen im „Lot“ stehen, haben Sie die optimale Einstellung
erreicht. Die beiliegende Dosenlibelle hilft Ihnen bei der Feinjustage (die Luftblase muss
inmitten des inneren Kreises zur Ruhe kommen). Sichern Sie die Spikes erneut mit den
Kontermuttern. Ein etwa handfesten Anziehen der Muttern genügt.
Jetzt können Sie beginnen, Ihre VIRGO III optimal auf den Hörplatz auszurichten. Tipps hierzu nden Sie im
folgenden Kapitel „Aufstellung“ und besonders ausführlich auf der AUDIO PHYSIC-Website.
7
AUDIO PHYSIC VIRGO III deutsch

Anschließen der Lautsprecher
1. Bitte schalten Sie alle Geräte Ihrer HiFi-Anlage aus, bevor Sie mit dem Anschließen der Lautsprecher beginnen.
2. Befestigen Sie die Lautsprecherkabel an den Polklemmen der Boxen.Achten Sie dabei auf die korrekte Polarität.
In aller Regel sind Lautsprecherkabel entsprechend gekennzeichnet, entweder mittels einer durchgehenden
Markierung auf dem Kabel an einem der beiden Leiter oder über eine Kennzeichnung an den Kabelenden
nach Plus „+“ und Minus „-“.
3. Schließen Sie nun die Kabel an Ihren Verstärker an und beachten bitte dabei ebenfalls die richtige Polarität.
4. Die Polklemmen der VIRGO III (Abbildung rechts) nehmen Kabelschuhe
wie auch Bananenstecker sicher auf. Lose Kabellitzen oxidieren leicht und
eignen sich nicht für einen dauerhaft hohen Hörgenuss.
„Bi-Wiring“-Betrieb
Wenn Ihre VIRGO III mit einem Bi-Wiring-Terminal ausgerüstet sind, und Sie diese Option nutzen möchten, schließen
Sie bitte das vom Verstärker kommende Boxenkabel für die linke Box an die oberen beiden Polklemmen des linken Laut-
sprechers, um dessen Mittel-Hochtonbereich anzusteuern; ein weiteres an die darunter bendlichen Klemmen, um den
Bass anzusteuern. Verfahren Sie entsprechend mit dem Lautsprecher, der sich rechts vom Hörplatz bendet. Entfernen
Sie bitte vor der Verkabelung die jeweiligen Bi-Wire-Brücken an den Boxenterminal und bewahren die Brücken auf.
Super Seven: Der Körper der VIRGO III ist um
sieben Grad nach hinten geneigt, das optimiert die
zeitlich korrekte Wiedergabe.
Der Blick ins Innere zeigt den intelligenten Aufbau
und die einzelnen Kammern für Mittel- und Hochtöner.
8
deutsch AUDIO PHYSIC VIRGO III

9
AUDIO PHYSIC VIRGO III deutsch
Aufstellen der Lautsprecher
1. Ideal ist es, wenn Sie Ihre neuen Lautsprecher
im Raum so positionieren, dass diese mit Ihrem
Hörplatz ein gedachtes, gleichschenkliges
Dreieck bilden.
2. DerAbstand zwischen den Boxen sollte etwa das
0,8- bis 1,2-fache des Abstandes zum Hörplatz
betragen. Je näher Sie vor den Lautsprechern
sitzen,umsodirekterundtrockenerwerdenSieden
Klang empnden. Mit zunehmender Entfernung
wächstinderRegeldieTiefenstaffelung,dieAbbil-
dung wirkt großzügiger.
3. IdealstehendieLautsprecheretwa40Zentimeter
von den umgebenden Wänden entfernt. Je
größer derAbstand zur Rückwand,desto präziser
wird die Wiedergabe, besonders im Bass.
4. Je näher die Lautsprecher an die Rückwand (und/
oderSeitenwand)kommen,umsokräftigerwerden
tiefe Frequenzen breitbandig verstärkt – Bässe
klingen voluminöser, Stimmen körperbetont.
5. In einer Ecke verstärkt sich dieser Effekt noch.Tiefe
Töne werden etwa 6 Dezibel (oder mehr) lauter.
ExperimentierenSiemitIhnenbekannterSoftware,
und Sie werden schnell die Position nden, die
Ihrem Hörgeschmack am nächsten kommt.
6. DieEntfernung zu den Seitenwändenbeeinusst,
neben der Stärke der Basswiedergabe, insbeson-
dere die Ortung von Schallereignissen und damit
die Abbildungspräzision. Mit größerem Abstand
wird die Ortung genauer, der Klang ausgegliche-
ner. Sehrnahean denSeitenwändenkommteszu
frühen Reexionen, die neben einer geringeren
Ortbarkeit auch zu einem tendenziell nervösen
Klang führen. Vorhänge oder Regale etc. an den
Seiten reduzieren diesen Effekt.
7. Falls Sie IhreVIRGO rechts und links neben einem
SchrankoderHigh-Boardaufstellen,sosolltendie
Fronten der Lautsprecher auf einer Ebene mit der
VorderseitedesSchranksoderBoardsstehen.Sind
die Lautsprecher gegenüber dem Möbel nach
hinten versetzt, beeinusst das den Klang. Es
kommt,wieunter6.genannt,zufrühenReexionen
an den Seitenwänden des Schranks aber unter
Umständen auch zu einer Störung der ungehin-
derten Schallabstrahlung.
Wandnahe
Aufstellung
Tiefe Frequen-
zen werden
durch die direk-
te Nähe zur
Wand verstärkt
– um etwa +3
bis +6 Dezibel.
Aufstellung
in den
Raumecken
Tiefe Töne wer-
den deutlich
lauter gegen-
über dem dar-
über liegenden
Frequenzspek-
trum.
Freie
Aufstellung
Die Lautspre-
cher stehen
gute 40 bis
50 Zentimeter
oder weiter von
den umgeben-
den Wänden
entfernt. In
dieser Position
klingen Bässe
straff und Mit-
ten besonders
detailreich.

10
deutsch AUDIO PHYSIC VIRGO III
Ausrichten der Lautsprecher
1. Stehen die Lautsprecher parallel zu den Seitenwänden,
drehen Sie die Boxen nun so nach innen, dass eine
gedachte Linie vom Hochtöner jeder Box auf Ihren
bevorzugten Hörplatz zeigt. Wenn Sie Musik gerne
alleine genießen, sollten sich die beiden gedachten
Linien ausgehend von den Lautsprechern an Ihrem
Hörplatz „schneiden“. So ergibt sich eine hervorra-
gende Ortung und Raumabbildung.
Hören Sie Musik bevorzugt zu mehreren, winkeln
Sie die Boxen stärker ein, sodass sich die gedachten
Linien vor dem Hörplatz kreuzen.
2. Mögen Sie eine besonders breite Bühne und eine
großzügige Abbildung, winkeln Sie die Lautsprecher
weniger ein, sodass sich die gedachten Linien knapp
hinter dem Hörplatz schneiden.Ab einem bestimmten
Winkel verliert die Abbildung in der Mitte zwischen
den Lautsprechern an Struktur und Präzision. Den
genauen Punkt können Sie einfach mit einer Mono-
Aufnahme herausnden. Klingt die Stimme der In-
terpretin oder des Interpreten wieder klar umrissen
und kommt genau aus der Mitte, haben Sie die opti-
male Position gefunden.
Zweiter Schritt
Experimentieren Sie mit dem
Winkel. Hier zählt auch Ihr
Hörgeschmack. Ideal eignen
sich dazu Mono-Aufnahmen, am
besten gering instrumentiert
mit Stimme.
Erster Schritt
Winkeln Sie die Boxen so an,
dass eine gedachte Linie von
den Hochtönern ausgehend auf
Ihren Hörplatz zielt.

Technische Spezikationen
Höhe 115,0 cm
Breite 23,0 cm
Tiefe 40,0 cm
Breite x Tiefe 36,0 x 47,0 cm
Gewicht ca. 29 kg
Empf. Verstärkerleistung 30 - 180 W
Impedanz 4 Ohm
Frequenzgang 30 Hz - 40 kHz
Wirkungsgrad 89 dB
Lautsprechersysteme
Tiefton 2 x 180 mm
Mittelton 1 x 150 mm HHCM III
Hochton 1 x 39 mm HHCT III
Der Klangtipp für noch mehr Detailtreue
Wenn Sie den Klang Ihrer neuen VIRGO III noch einmal steigern möchten, sollten Sie unbedingt unsere modernen
VCF-Unterstellfüße „VCF V Magnetic M8“ (Abbildung rechts) probieren. Die „Vibration Control“-Füße vermindern
die Schwingungsübertragung zwischen Lautsprecher und Aufstelläche drastisch. Fußböden neigen, durch Schallener-
gie angeregt, zu Eigenschwingungen. Solche Mikroschwingungen können das Klangbild negativ beeinträchtigen. Die
hochwertigenVCF V Magnetic-Füße unterbrechen diesenWirkkreis. Das Ergebnis ist ein hörbares Plus an Feinzeichnung
und Abbildungstreue. Zudem schützen sie empndliche Böden zuverlässig vor Kratzern. Ihr AUDIO PHYSIC-Fachhändler
berät Sie gerne oder besuchen Sie im Internet einfach unseren Webshop auf www.audiophysic.de.
11
AUDIO PHYSIC VIRGO III deutsch
Mehr Klang durch Innovation
Die AUDIO PHYSIC Boxenfüße
VCF V Magnetic M8 entkoppeln die
Lautsprecher wirksam vom Boden.
Das Klangbild gewinnt noch einmal
an Tiefe, Präzision und Natürlichkeit.

Welcome
Dear music lover,
We would like to thank you for putting your trust in our products and welcome you to the family of audiophile friends
of AUDIO PHYSIC.
You have chosen a top-class product that has been developed in Germany.We would like to congratulate you on this
choice and wish you a lot of fun and enjoyment with your product.
In order to earn your trust, we only use the latest technical expertise and top-quality components when manufacturing
our loudspeakers and we produce them in accordance with strict quality criteria. These criteria enable us to provide
original owners with a 10 year warranty for our loudspeakers (2 years for the subwoofer electronics and 10 years for
the drivers), starting on the date of purchase of the product by the original owner, which is far longer than the legally
prescribed warranty periods. In order to secure this additional service, please ll out the warranty card enclosed with your
loudspeakers and send this and a copy of your proof of purchase to your AUDIO PHYSIC distributor.
Only after several electronic and acoustic test runs, which our quality assurance staff conrm by signing the enclosed
certicate, are our loudspeakers allowed to leave the factory in secure packaging. These measures help to ensure that
you can enjoy the full experience of the high-quality materials, production and sound of AUDIO PHYSIC loudspeakers
in the comfort of your own home.
As a rule, your competent AUDIO PHYSIC dealer will deliver and install your loudspeakers. If you would rather install
your product yourself, the following pages provide you with detailed tips and steps to follow in order to safely set up
your loudspeakers. Have fun with your VIRGO III !
No loss of ne detail: If you want a close-up
rst-hand experience of exactly what your
new AUDIO PHYSIC loudspeakers can do,
we recommend that you try out our
Anniversary Sampler CD. These 16 pieces
of classical music with awless quality are
bound to put a smile on your face.
You have our word: We put
our name on every model in
order to guarantee
the tested quality of our
loudspeakers.
12
english AUDIO PHYSIC VIRGO III

General Tips
Depending on the size and weight of your loudspeakers, it is a good idea for two people to unpack them. The ideal
way to do so is to stand the boxes upright so that the top of the loudspeaker is resting on the oor (the boxes are
marked accordingly) and you can easily attach the foot construction. Take out the accessory packs, which are located
in smaller boxes inside the main box.These packs contain the parts that you will need in order to attach the loudspeaker
feet. The spikes for both loudspeakers can normally be found in the accessory pack of one of the two boxes
(“Accessory Pack 1”). Please follow the instructions in the chapter “Unpacking and Assembly“ to ensure the safe and
correct installation of your loudspeakers.
The loudspeakers should reach a temperature that is approximately equivalent to room temperature before you connect
them to the HiFi system and/or operate them. This instruction predominately refers to the winter months in case the
loudspeakers were previously stored in a cold room.
Maintenance
Our loudspeakers are coated in high-quality veneers or high-gloss lacquers. You should avoid using chemical
cleaning agents because these can attack the loudspeaker surfaces and make them go matt. As a rule, a ne, soft
and damp cloth is all that you need to clean the surfaces. If a cleaning agent is required, use this to dampen
the cloth and do not directly apply it to the surface. It is best if you test the suitability of the cleaning agent on
a less visible part of the cabinet. The drivers do not normally need to be cleaned. Dust particles fall off quickly
when the loudspeakers are operated. You can, however, use a soft brush to lightly brush over the surfaces of the
drivers . When doing so, make sure you do not put any pressure on it. Please never use any cleaning agents on
the drivers. Do not expose the loudspeakers to direct sunlight. Anodised surfaces are sensitive to acids and
alkalis and to ultraviolet light and may fade.
The drivers in this range ofAUDIO PHYSIC loudspeakers use a unique mounting technique. Rather than directly mounting
the drivers onto the cabinet of the loudspeaker, the drill holes of the VIRGO III contain special neoprene plugs. These
neoprene plugs tighten in the mounting hole when the screws are tted, creating a permanently elastic connection
between the driver and the cabinet that reduces resonance. You do not need to tighten these screws. Re-tightening
the screws may damage the plugs and have a negative effect on the sound.
Burning in the Loudspeakers
The loudspeakers rst reach their full sound potential after a specic burn-in period. We burn in the drivers of the
VIRGO III at our factory prior to assembly, meaning that they normally only need a burn-in period of a few hours at a
normal room volume and with music that has a range of frequencies that is as wide as possible, for example orchestral
pieces. Recordings containing ’white or pink noise’ such as those available on many so-called Test CDs are also ideal.
For safety reasons, these pieces should never be played at high volumes.
Stray Magnetic Fields
The magnetic eld created by the individual driver magnets may to some extent have an effect outside of the loudspeaker.This
straymagneticeldmayinterferewithotherdevices,particularlytelevisionsandmonitorswithcathoderaytubes(notLCD
orplasmatelevisions),forexamplebycausingchangesincolourinthepicture.Werecommendthatyouplacetheloudspeakers
approximately half a metre away from such devices (and also from magnet tapes, video cassettes, credit cards with
magnetic stripes, etc.).
Where possible, please retain the loudspeaker packaging. You can then securely transport your loudspeakers if you
move house.
13
AUDIO PHYSIC VIRGO III english

Unpacking and Assembly
1. Place the boxes on the oor, making sure that the product labels are facing up. Carefully open the packaging
on the long side where it has been taped up, as shown in the illustrations below (illustration similar), preferably
using a pocket knife or kitchen knife.
2. Remove the accessory packs from the boxes.
3. Carefully remove the loudspeakers, together with their protective foam pads, from the upright box. It is ideal
if two people carry out this step. Make sure that you do not touch the drivers when removing and handling
the loudspeakers as this may cause irreparable damage to the drivers.
4. Now remove the foam cover from the top and carefully pull down the foil, so that you can easily attach the
foot construction.
5. Remove the metal stands from the accessory pack and screw the spikes into the designated inserts.
6. Tighten the lock nuts onto the spikes from above.
7. Now lay the metal stands with the attached spikes on the loudspeaker and adjust the stands so that their
screw inserts are aligned with the inserts in the loudspeaker base.
Correct: In order to correctly
unpack the loudspeaker, the top
of the loudspeaker should be
facing down. This means that you
will easily be able to hold on to
the bottom of the loudspeakers
when carefully pulling them out
of the box and also enables you
to attach the foot construction
without difculty.
False: If the top of the
loudspeaker is facing up,
you will have to turn the
loudspeaker upside down
once you have removed
it from the box in order
to attach the foot
construction.
14
english AUDIO PHYSIC VIRGO III

8. Place the plastic washers included in the delivery onto the bore holes of the stands from above and insert
the provided ange bolts into the holes. Tighten the ange bolts rmly. The bolts need about seven turns
for optimum grip.
9. Now turn over the loudspeakers so that the metal feet are in stable contact with the oor. Two people should
also carry out this step where possible. Make sure that you do not hurt yourself on the tips of the spikes.
10. Place the loudspeakers in their intended positions and nely adjust the spikes so that the
loudspeakers do not wobble. If you do not place the loudspeakers in a secure and stable
position and they therefore wobble, this will have a major effect on the sound. When the
boxes are standing level and upright, you have set them up perfectly. The enclosed spirit
level will help you to nely adjust the loudspeakers (they are level when the bubble remains
in the inner circle). Use the lock nuts to again tighten the spikes. Roughly hand-tightening
the nuts is sufcient.
You can now start to optimally align your new VIRGO III to the listening position. You can nd tips
regarding this process in the following chapter on“Setup” and can access particularly detailed information on the
AUDIO PHYSIC website.
15
AUDIO PHYSIC VIRGO III english

Connecting the Loudspeakers
1. Please switch off all equipment in your Hi system before you begin to connect your AUDIO PHYSIC loudspeakers.
2. Attach the loudspeaker cable to the connectors on the loudspeakers. When doing so, please make sure that
you have the right polarity. As a rule, loudspeaker cables are accordingly labelled, either by a permanent
marking on one of the two conductors of the cable by “+“ and “-“ markings on the cable ends.
3. Now connect the cable to your amplier and make sure that you have the right polarity here.
4. The VIRGO`s connectors, which are shown in the image on the right,
accept both spades and banana plugs. Loose cable strands oxidise easily
and are not suitable for a permanently high-quality listening experience.
“Bi Wiring“ Operation
If your VIRGO III is tted with a bi-wiring terminal and you would like to use this option, please connect the
loudspeaker cable from the amplier for the left loudspeaker to the upper two connectors on the left loudspeaker in
order to control its midrange area and tweeter system and a further cable to the connectors underneath in order to
control the woofer system. Carry out the same steps on the loudspeaker to the right of the listening position. Please
remove and retain the respective bi-wire bridges on the loudspeaker terminals before connecting the cables.
16
english AUDIO PHYSIC VIRGO III
Super Seven: The body of the VIRGO III tilts
backwards at an angle of 7° in order to optimise
time-correction rendition.
The insight view shows the clever design and the
isolated chambers for midrange and tweeter.

17
AUDIO PHYSIC VIRGO III english
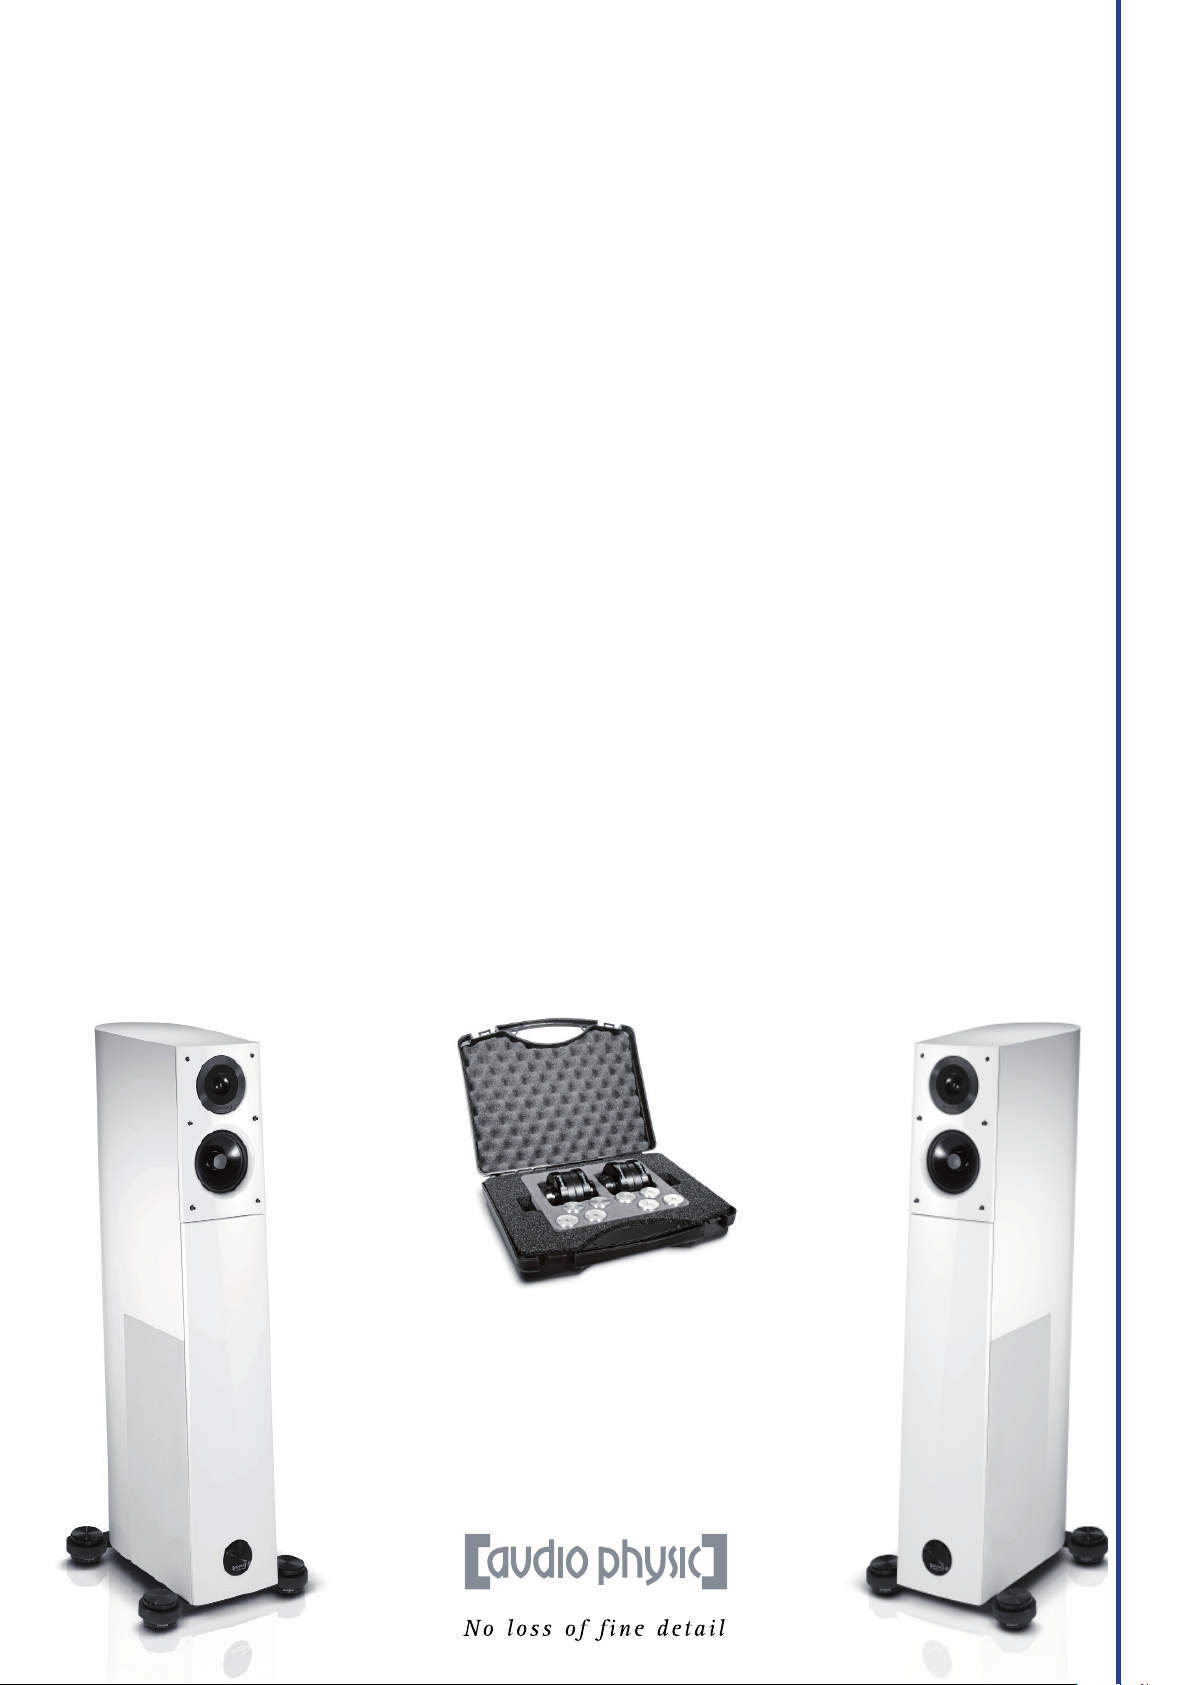
Setting Up Your VIRGO III
1. The ideal placement of your loudspeakers in your
room involves positioning them in an isosceles
triangle arrangement including your listening seat,
creating equal spacing between each loudspeaker
and the listening position.
2. The distance between the loudspeakers should be
around 0.8 - 1.2 times as much as the distance
between the loudspeakers and the listening position.
The closer you sit to the loudspeakers, the more
direct and dry your sound experience will be.As you
move further away from the loudspeakers, the bass
response will normally increase and the spatial
imaging will seem more generous.
3. Your loudspeakers should ideally be placed around
40 centimetres or further away from the surrounding
walls, The larger the space between the loudspeakers
and the back wall, the more precise the sound
reproduction, particularly where bass performance
is concerned.
4. The closer the loudspeakers come to the back wall
(and/or side wall), the more powerful the broadband
reproduction of the low frequencies will be – resulting
in stronger bass tones and full-bodied voice tones.
5. This effect can be made even more intense when the
loudspeakers are placed in a corner. Low tones
become around 6 decibels (or more) louder. Use
software with which you are familiar to try out
different placements and you will soon nd the
position that best suits your own personal tastes.
6. Alongside the strength of the bass response, the
distance from the side walls also particularly affects
the localisation of sound events and therefore the
precision of the spatial imaging. As the distance
from the walls increases, the localisation will become
more precise and the sound will be more balanced.
When the loudspeakers are extremely close to the side
walls, this will result in early reections, leading to
reduced spatial perception and tending towards
nervous sound reproduction. Curtains or shelves
or similar at the sides reduce this effect.
7. Ifyouwanttopositionyourloudspeakersontheleftand
right-handsidesofacupboardoratallsideboard,please
ensure that the fronts of the loudspeakers are level
with the front of the cupboard or sideboard. If the
loudspeakers are positioned further back than the
furniture, this will have an effect on the sound, not
only in the form of early reections from the side walls
of the cupboard as explained under point 6 but
also, in some cases, by disrupting the unobstructed
radiation of sound.
Setup close to
the wall:
Low frequencies
are broadly
reinforced by
around +3 and
+6 decibels
when the
loudspeakers
are positioned
close to the
wall.
Setup in the
corners of the
room:
Low tones
become
signicantly
louder and
overlap into
the midrange
frequencies.
Setup away
from the wall:
The loudspeakers
are positioned at
least
40 centimetres
away from the
surrounding
walls. This
provides a clearly
dened bass
response and a
clean, crisp
reproduction
of midrange
frequencies.

18
english AUDIO PHYSIC VIRGO III
Positioning Your VIRGO III Loudspeakers
1. Once the loudspeakers are positioned parallel to the
side walls, turn them inwards until an imaginary line
is pointing from the tweeter of each loudspeaker
towards your preferred listening position. If you prefer
to listen to music alone, the two imaginary lines
coming from the loudspeakers should ‘intersect‘ at
your listening position. This will result in excellent
localisation and spatial image. If you would rather
listen to music in a group, turn the loudspeakers
further inwards so that the imaginary lines cross in
front of the listening position.
2. If you prefer a wider soundstage and more generous
spatial imaging, position the loudspeakers at less
of an angle so that the imaginary lines cross just
behind the listening position. Once a specic
angle has been reached, the spatial image in the
centre between the loudspeakers will begin to lose
structure and precision. You can easily identify the
ideal angle by using a mono recording. When the
voiceof the artistsounds clearagain and comesdirectly
from the middle between the loudspeakers, you have
found the ideal position.
Second step:
Experiment with the angle.
When it comes to positioning
your loudspeakers, your
listening taste plays an
important role. To nd the ideal
position, mono recordings are
extremely useful, particularly
those with a singing voice and
few instruments.
First step:
Angle the loudspeakers so that
an imaginary line is in place
between the tweeters and your
listening position.

Technical Specications
Height 41.5“
Width 9.1“
Depth 15.7“
Required Space: Width x Depth 14.2“ x 18.5“
Weight 29 kg
Recomm. amplier power 30 - 180 watts
Impedance 4 Ohm
Frequency range 30 Hz - 40 kHz
Sensitivity 89 dB
Loudspeaker systems
Woofer 2 x 7“
Midrange 1 x 5.9“ HHCM III
Tweeter 1 x 1.75“ HHCT III
Some sound advice for even more attention to detail
If you want to boost the sound of theVIRGO III even more, you should denitely try our „VCF V M8 Magnetic“ vibration
control feet. The vibration control feet dramatically reduce the transfer of vibration between the loudspeaker and the
set-up space. When excited by sound energy, oors tend to develop their own vibrations. These micro-vibrations can
have a detrimental effect on the acoustic pattern. The VCF V M8 Magnetic feet interrupt this radius of vibration. The
result is an audible bonus of ne denition and precision delity.What´s more, the feet reliably protect sensitive oors
from scratches. Your AUDIO PHYSIC specialised dealer is pleased to advise you, or simply visit our accessories web
shop at www.audiophysic.de.
19
AUDIO PHYSIC VIRGO III english
More sound through innovation
The cutting-edge AUDIO PHYSIC
VCF V M8 Magnetic feet are highy
effective in decoupling the
loudspeakers from the oor. The
acoustic pattern gains an even
higher level of depth,
precision and natural quality.

AUDIO PHYSIC GmbH
Almerfeldweg 38
59929 Brilon / Deutschland
Germany
Tel. +49(0)2961/9617-0; Fax +49(0)2961/51640
AUDIO PHYSIC VIRGO III
Table of contents
Languages:
Other Audio Physic Speakers manuals

Audio Physic
Audio Physic STEP plus User manual

Audio Physic
Audio Physic TEMPO plus User manual

Audio Physic
Audio Physic Virgo 25 plus User manual

Audio Physic
Audio Physic CARDEAS 30 User manual

Audio Physic
Audio Physic CLASSIC Compact User manual

Audio Physic
Audio Physic AVANTI User manual

Audio Physic
Audio Physic AVANTI User manual

Audio Physic
Audio Physic OREA User manual

Audio Physic
Audio Physic CLASSIC On-Wall User manual