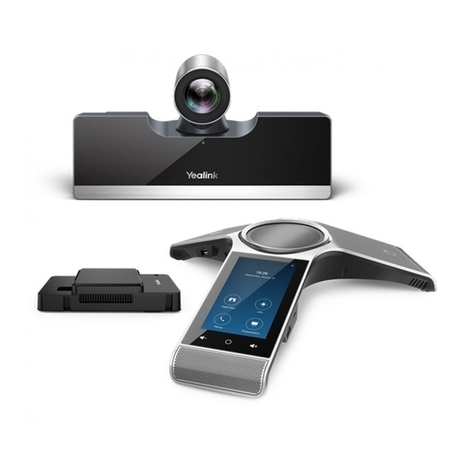
AudioCodes RXV100 Quick reference guide

Deployment Guide
AudioCodes RX Suite of Meeting Room Solutions
RXV100 Meeting Room Solution
for Microsoft Teams
Version 1.9


Deployment Guide Contents
Version 1.9 3 RXV100
Table of Contents
1Deploying the Hardware .............................................................................................7
1.1 Deploying the RXV100Hub Hardware ............................................................................. 8
1.1.1 Assembling the RXV100Hub ...........................................................................................8
1.1.1.1 Getting Familiar with the RXV100Hub Ports......................................................9
1.1.1.2 Connecting with One Cable the Red Side to the Hub Base ...............................9
1.1.1.3 Connecting Peripherals to the Block Side of One Cable..................................12
1.1.1.4 Connecting the Power Cable ..........................................................................12
1.1.1.5 Mounting One Cable inside the Security Box ..................................................12
1.1.2 Activating the RXV100Hub ............................................................................................13
1.1.2.1 Providing MTR Credentials.............................................................................13
1.1.2.2 Logging in to RXV100Hub as Administrator ....................................................13
1.1.2.3 Resetting the RXV100Hub..............................................................................14
1.1.2.4 Performing a Recovery Process......................................................................14
1.1.3 Connecting the TV Display to the RXV100Hub ..............................................................14
1.2 Deploying the RXVCam50 Hardware ............................................................................ 15
1.2.1 Positioning and Connecting the RXVCam50 ..................................................................15
1.3 Deploying the RX50 Hardware...................................................................................... 16
1.3.1 Pairing the RX50 with the RXV100Hub..........................................................................16
2Configuring the RXV100Hub.....................................................................................17
2.1 Configuring RXV100Hub Settings ................................................................................. 19
3Troubleshooting ........................................................................................................25
3.1 Sign-in fails ................................................................................................................... 25
3.2 No display on the integrated display.............................................................................. 25
3.3 No display on the external display................................................................................. 25
3.4 Dialpad is not visible ..................................................................................................... 26
3.5 No content shown on the second display ...................................................................... 26
3.6 No audio from the speakers .......................................................................................... 27
3.7 Microphone is not working............................................................................................. 28
3.8 Reset MTR credentials.................................................................................................. 28
3.9 Hub does not present automatically when connected to a laptop/client device .............. 28
3.10 Restoring the RXV100Hub to Factory State .................................................................. 29
3.11 Maintenance and Support ............................................................................................. 30
3.12 Customer Support......................................................................................................... 30
4Specifications ............................................................................................................31
4.1 RXV100Hub.................................................................................................................. 31
4.2 RX50............................................................................................................................. 32
4.3 RXVCam50................................................................................................................... 33

RXV100
Deployment Guide 4 Document #: LTRT-18190
List of Tables
Table 4-1: RXV100Hub Specifications.........................................................................................................31
Table 4-2: RX50 Specifications ...................................................................................................................32
Table 4-3: RXVCam50 Specifications..........................................................................................................33

Deployment Guide 1. Deploying the Hardware
Version 1.9 5 RXV100
Notice
Information contained in this document is believed to be accurate and reliable at the time of printing.
However, due to ongoing product improvements and revisions, AudioCodes cannot guarantee accuracy
of printed material after the Date Published nor can it accept responsibility for errors or omissions.
Updates to this document can be downloaded from https://www.audiocodes.com/library/technical-
documents.
This document is subject to change without notice.
Date Published: May-20-2021
Trademarks
AudioCodes Ltd. All rights reserved. AudioCodes, AC, HD VoIP, HD VoIP Sounds Better, IPmedia,
Mediant, MediaPack, What’s Inside Matters, OSN, SmartTAP, VMAS, VoIPerfect, VoIPerfectHD,
Your Gateway To VoIP, 3GX, VocaNom, AudioCodes One Voice and CloudBond are trademarks
or registered trademarks of AudioCodes Limited All other products or trademarks are property of
their respective owners. Product specifications are subject to change without notice.
WEEE EU Directive
Pursuant to the WEEE EU Directive, electronic and electrical waste must not be disposed of with
unsorted waste. Please contact your local recycling authority for disposal of this product.
Customer Support
Customer technical support and services are provided by AudioCodes or by an authorized
AudioCodes Service Partner. For more information on how to buy technical support for AudioCodes
products and for contact information, please visit our Web site at
https://www.audiocodes.com/services-support/maintenance-and-support.
Stay in the Loop with AudioCodes
Abbreviations and Terminology
Each abbreviation, unless widely used, is spelled out in full when first used.
Documentation Feedback
AudioCodes continually strives to produce high quality documentation. If you have any comments
(suggestions or errors) regarding this document, please fill out the Documentation Feedback form
on our Web site at http://online.audiocodes.com/documentation-feedback.
Related Documentation
Document Name
RXV100 User’s and Administrator’s Manual
RXV100 Release Notes
RXV100 Quick Deployment Guide

RXV100
Deployment Guide 6 Document #: LTRT-18190
This page is intentionally left blank.

Deployment Guide 1. Deploying the Hardware
Version 1.9 7 RXV100
1 Deploying the Hardware
AudioCodes’ RXV100 bundled product suite acts as Microsoft Teams Rooms (MTR) on Windows
devices to bring meetings to life and deliver an optimal collaboration experience for everyone.
RXV100 bundles are scalable and can be mixed and matched to various options per room
requirements.
The core of the suite includes RXV100Hub which offers smart control, share and collaboration
technology for conference rooms, RXVCam50 video camera which provides vivid image quality,
smart zoom and face detection technology, and optional RX50 Conference Phone that can be used
as a peripheral device.
Elements in the RXV100 topology are shown in the figure below.
Make sure you receive the following RXV100 components:
RXV100Hub
RXVCam50
RX50 (Optional; bundle-dependent)
Lenovo ThinkSmart One Cable 6ft
ThinkSmart Cable Management Security Box (black block)
Compatible power adapter
HDMI cable for HDMI Ingest / Direct connect
Before deploying, you’ll want to establish accounts and have licensing sorted in advance of the
installation date to ensure everything is synchronized (see https://docs.microsoft.com/en-
us/MicrosoftTeams/rooms/rooms-licensing for licensing-related information).
Make sure you have the following network requirements:
Access to a server that can provide an IP address using DHCP. Microsoft Teams Rooms
cannot be configured with a static IP on initial configuration.
Access to HTTP ports 80 and 443.

RXV100
Deployment Guide 8 Document #: LTRT-18190
Office 365 URLs and IP address ranges for Microsoft Teams or Skype for Business online
implementations.
Wired network connection (recommended) to assure you will have reliable connectivity.
Proxy bypass is strongly recommended for real-time traffic
1.1 Deploying the RXV100Hub Hardware
The core of the RXV100 is the RXV100Hub shown in the figure below.
AudioCodes’ RXV100Hub is based on the Lenovo ThinkSmart Hub certified for Microsoft Teams.
Built on the Microsoft Teams Rooms (MTR) platform that enterprise employees already know and
use, the RXV100Hub lets participants communicate and collaborate via video, voice or content
sharing in real time. The device’s rotatable 10.1-inch touchscreen display makes it easy for
members of the group to share and control the meeting.
1.1.1 Assembling the RXV100Hub
The RXV100Hub delivers a custom single cable management solution designed to cleanly run the
cables off the tabletop while keeping all connections secure. Once connected, the back of the
device will consist of the One Cable and the HDMI ingest cable.
One Cable

Deployment Guide 1. Deploying the Hardware
Version 1.9 9 RXV100
Connection Security Box
1.1.1.1 Getting Familiar with the RXV100Hub Ports
Use the figure below to familiarize yourself with the ports located on the RXV100Hub.
1.1.1.2 Connecting with One Cable the Red Side to the Hub Base
To connect the red side to the Hub base with One Cable:
1. Lay the device on its side with the ports facing upward.

RXV100
Deployment Guide 10 Document #: LTRT-18190
2. Insert an HDMI cable into HDMI Ingest port on inner right sidewall of base, lace it through the
security channel and set it into the rounded notch.
3. On the red side of One Cable, slide the plastic cover down to reveal the blocks of connectors.

Deployment Guide 1. Deploying the Hardware
Version 1.9 11 RXV100
4. Align the connectors labeled ‘Step 1’ and ‘Step 2’ to the ports on the base. Gently push the
connectors into the corresponding ports, moving from right to left.
5. Keeping the device on its side with the ports/cables facing up, slide the red cover along One
Cable, align HDMI ingest cable to the notch and snap cover into place. You may find it easier
to hold the cables in one hand while sliding the cover with the other hand.

RXV100
Deployment Guide 12 Document #: LTRT-18190
1.1.1.3 Connecting Peripherals to the Block Side of One Cable
To connect peripherals to the block side of One Cable:
Power, Internet Connections, in-room Displays and Peripherals are connected to the Hub by
using the ports on the Block Side of One Cable.
1.1.1.4 Connecting the Power Cable
To connect the power cable:
Take the yellow end of power cable and insert into bottom right port.
1.1.1.5 Mounting One Cable inside the Security Box
To mount One Cable inside the security box:
When all 4 blocks are connected, then drop into the security box. Then connect your
accessories and displays, securing with zip tie (not included). Add box top and security
screw. The box can then be mounted under a table, on a wall or behind a display

Deployment Guide 1. Deploying the Hardware
Version 1.9 13 RXV100
1.1.2 Activating the RXV100Hub
By default, there are two Windows accounts built into the RXV100Hub out of the factory.
‘Skype’ user account
‘Administrator; user account
Skype is the default account from which the MTR app runs from. This account is limited to running
the MTR app. This account is the default recommended account fromwhich to run MTR. No
administrator privileges are available from this account.
When the RXV100Hub boots, it will automatically login into the “Skype” account and will
automatically launchthe MTR app. No user intervention required.
Administrator is the standard Windows administrator account and provides system-wide
privileges. This account is password protected. The default password is “sfb” without quotes. For a
typical day-to-day usage, the administrator credentials are not needed. The admin account is only
used for device management. The default account to run the MTR app is “Skype” and this account
will be automatically logged in when the RXV100Hub boots.
1.1.2.1 Providing MTR Credentials
When the RXV100Hub is switched on for the first time, Microsoft Teams Rooms (MTR) credentials
must be provided to sign in.
To provide MTR credentials:
1. In the RXV100Hub Setup Wizard, select Keyboard (English - US) and Region.
2. Accept the license agreement and select Next.
3. Under 'Supported meeting mode', select Skype for Business and Microsoft Teams (default).
4. Enter the Teams Rooms credentials and select Next > Next > Next > Finish.
1.1.2.2 Logging in to RXV100Hub as Administrator
To log in to the RXV100Hub as an Administrator:
1. From the Main Menu, touch More, and then touch Settings.

RXV100
Deployment Guide 14 Document #: LTRT-18190
1. Enter the Administrator password, and then touch Yes.
2. Select Windows Settings, and then select the Administrator account displayed in the lower
left corner; a prompt appears requesting the Administrator credentials.
3. Enter the credentials; upon successful validation, you are logged in as an Administrator to
manage the RXV100Hub.
Note: The default Administrator password is sfb.
1.1.2.3 Resetting the RXV100Hub
Resetting the RXV100Hub is required to clear test account credentials and peripheral settings.
To reset the RXV100Hub
Click More and select Settings, select Reset Device and then confirm.
1.1.2.4 Performing a Recovery Process
To perform a recovery process, use the Microsoft Teams Recovery Tool available at
(https://docs.microsoft.com/en-us/MicrosoftTeams/rooms/recovery-tool)
The RXV100Hub supports Windows Push Button Reset (PBR) functionality. This feature restores
the device to its factory state.
To reset the RXV100Hub to its factory state using PBR:
1. Connect an external keyboard to the RXV100Hub via one of the USB ports.
2. Restart it, or alternatively, power it off and then on, and at the beginning of the boot process
keep tapping the F11 key on the keyboard; the Windows Recovery Environment opens.
3. Select Troubleshoot.
1.1.3 Connecting the TV Display to the RXV100Hub
The RXV100Hub has two HDMI ports located on the One Cable that can drive two external displays
up to 4k resolutions. You should plan to connect at least one external display.
Single External Display

Deployment Guide 1. Deploying the Hardware
Version 1.9 15 RXV100
When the RXV100Hub is connected to a single external display, remote participants and remote
content both share the display space. When there are two external displays connected to the Hub,
the MTR will automatically allocate one display for remote participants and the other for content
sharing.
Dual External Display
To connect the TV Display to the RXV100Hub:
Insert the cable(s) for HDMI display(s) into the HDMI ports. If connecting one external
display, either port will work.
1.2 Deploying the RXVCam50 Hardware
AudioCodes’ RXVCam50 Video Conference Camera is designed for medium-sized meeting rooms
and conference rooms (up to 8m). It boasts vivid image quality, smart zoom and face detection
technology for an exceptional video conferencing experience in HD 4K resolution. The
RXVCam50’s auto framing feature automatically adjusts the camera’s zoom so that remote
participants can clearly see everyone in the meeting room, with no user intervention required
whatsoever. Users can opt to disable the auto framing feature if they want. The camera is super-
quick to install via USB and very easy to operate.
1.2.1 Positioning and Connecting the RXVCam50
To position and connect the RXVCam50:
1. For the best viewing angle, position the device at a height of 178 cm | 70 inches (as shown
below left) within a radius of a 110-degree angle (as shown below right).
2. Position the device on the TV display. If you have two displays, i.e., content sharing and video,
position the device on the video display.
3. Connect the camera using a USB cable to the RXV100Hub.
4. Configure RXVCam50 settings using the Remote Control; see the RXVCam50 User’s Manual
for detailed information.

RXV100
Deployment Guide 16 Document #: LTRT-18190
1.3 Deploying the RX50 Hardware
If the RXV100-B40 bundle is purchased, the RX50 is included. Developed in partnership with
Dolby®, the device serves as a peripheral speaker producing clear, natural-sounding voice quality
regardless of acoustic room design (wall contour and surface material). Full-room pickup and
dynamic leveling automatically increase the volume of quiet or distant voices, while unwanted noise
is filtered, ensuring every participant's voice is heard regardless of room shape, size, or orientation
within the room. Optional satellite microphone kit extending pickup reach by 2 meters/6.5 feet.
To connect:
1. Connect the RX50 to the network.
2. After connecting to the network, the RX50 automatically powers up via Power
over Ethernet (PoE) and establishes itself on the network.
1.3.1 Pairing the RX50 with the RXV100Hub
Pairing is automatically performed.
To set up automatic pairing, make sure:
You have a version that is version 3.4.6.231 or later. If you don’t, upgrade it with firmware
version 3.4.6.231 or later (as shown below).
RXV100Hub and RX50 are in the same network.
You’re notified ‘Pairing activated’:
View also the pairing icon in the top right corner and MTR Audio (instead of Offline) in the top
left corner. After they’re paired, log in to the RXV100Hub as Administrator and set RX50 to be its
default audio device.
To upgrade the firmware if necessary:
1. Open the RX50’s Web interface and click Management > Firmware Upgrade.
2. Navigate to and select the IMG file
3. Click Submit and then OK.
Note:
•The firmware upgrade takes approximately 20 minutes.
•After the upgrade, restore the RX50 to defaults (MENU>ADMIN>Restore Defaults).
[Applies only to customers who want to connect to the RX50 after purchasing the RX50 not
as part of the MTR].
•Make sure the selected device is the RX50.
To set the RX50 as the default audio device:
1. After logging in to the RXV100Hub as Administrator (see Section 1.1.2.2 for details), select
More and then select Settings; enter the Administrator password (default is sfb) and
press Yes.
2. Under Peripherals, select AudioCodes RX50 as ‘Microphone for Conferencing’, Speaker for
‘Conferencing’ and ‘Default Speaker’, and then press Save and Exit.

Deployment Guide 2. Configuring the RXV100Hub
Version 1.9 17 RXV100
2 Configuring the RXV100Hub
When powered on, the Hub automatically logs in to the Skype account and launches the MTR app.
To configure the RXV100Hub:
1. After turning on the Hub for the first time, you’ll need to provide appropriate Teams rooms
credentials for signing in and using the device; the License Terms page opens.
Microsoft Software License Terms
2. Agree to the terms and click Next.

RXV100
Deployment Guide 18 Document #: LTRT-18190
3. Enter the Teams credentials and make sure Skype for Business and Microsoft Teams
(default) is selected for ‘Supported meeting mode’.
4. If you have an advanced sign-in or domain configuration, enter the details, select Next and
then Finish;the device restarts; the MTR app attempts to sign-in with the credentials; once
successfully authenticated, the app displays the signed-in state. The current time and Room
Name appear in the top-right corner of the screen and any future meetings for the day are also
displayed. The Hub is signed-in and is ready to use.
Note:
•Once logged in, the RXV100Hub can be restarted by selecting More and then clicking
Restart Device.
•Device settings can be reset:
√Click Settings.
√Enter the admin password.
√Click Windows Settings.
√Click Reset Device; a confirmation prompt is displayed; once confirmed, the MTR app
is reset.

Deployment Guide 2. Configuring the RXV100Hub
Version 1.9 19 RXV100
2.1 Configuring RXV100Hub Settings
This section shows how to configure RXV100Hub settings.
To configure RXV100Hub settings:
1. Log in as administrator as described before.
2. Click More.
3. Click the Settings icon and provide the Admin password (default is sfb)

RXV100
Deployment Guide 20 Document #: LTRT-18190
4. Under the About menu, view and verify the information about the device and then exit.
5. Click the Account menu, configure your Account and then exit
Other manuals for RXV100
1
This manual suits for next models
4
Table of contents
Other AudioCodes Conference System manuals
AudioCodes
AudioCodes RXV81 Quick reference guide

AudioCodes
AudioCodes AC-HRS User manual
AudioCodes
AudioCodes RXV80 User manual
AudioCodes
AudioCodes High Definition IP Phones Series Service manual

AudioCodes
AudioCodes RXV81 User manual
AudioCodes
AudioCodes RXV100 Quick reference guide
AudioCodes
AudioCodes RX-PANEL User manual

AudioCodes
AudioCodes RXV80 Quick reference guide

AudioCodes
AudioCodes RXV80 Quick reference guide

