audiophony MIXtouch8 User manual

USER GUIDE
H10991 - Version 1 / 10-2018
Page 2
MIXtouch8 - 8 Channel Digital Mixing Console
English
1 - Please read carefully :
We strongly recommend to read carefully and understand the safety instructions before
attempting to operate this unit.
2 - Please keep this manual :
We strongly recommend to keep this manual with the unit for future reference.
3 - Operate carefully this product :
We strongly recommend to take into consideration every safety instruction.
4 - Follow the instructions:
Please carefully follow each safety instruction to avoid any physical harm or property
damage.
5 - Avoid water and wet locations :
Do not use this product in rain, or near washbasins or other wet locations.
6 - Installation :
We strongly encourage you to only use a fixation system or support recommended
by the manufacturer or supplied with this product. Carefully follow the installation
instructions and use the adequate tools.
Always ensure this unit is firmly fixed to avoid vibration and slipping while operating
as it may result in physical injury.
7 - Ceiling or wall installation :
Please contact your local dealer before attempting any ceiling or wall installation.
8 - Ventilation :
The cooling vents ensure a safe use of this product, and avoid any overheating risk.
Do not obstruct or cover these vents as it may result in overheating and potential
physical injury or product damage. This product should never been operated in a
closed non-ventilated area such as a flight case or a rack, unless cooling vents are
provided for the purpose .
9 - Heat exposure :
Sustained contact or proximity with warm surfaces may cause overheating and product
damages. Please keep this product away from any heat source such as a heaters,
amplifiers, hot plates, etc...
1 - Safety information
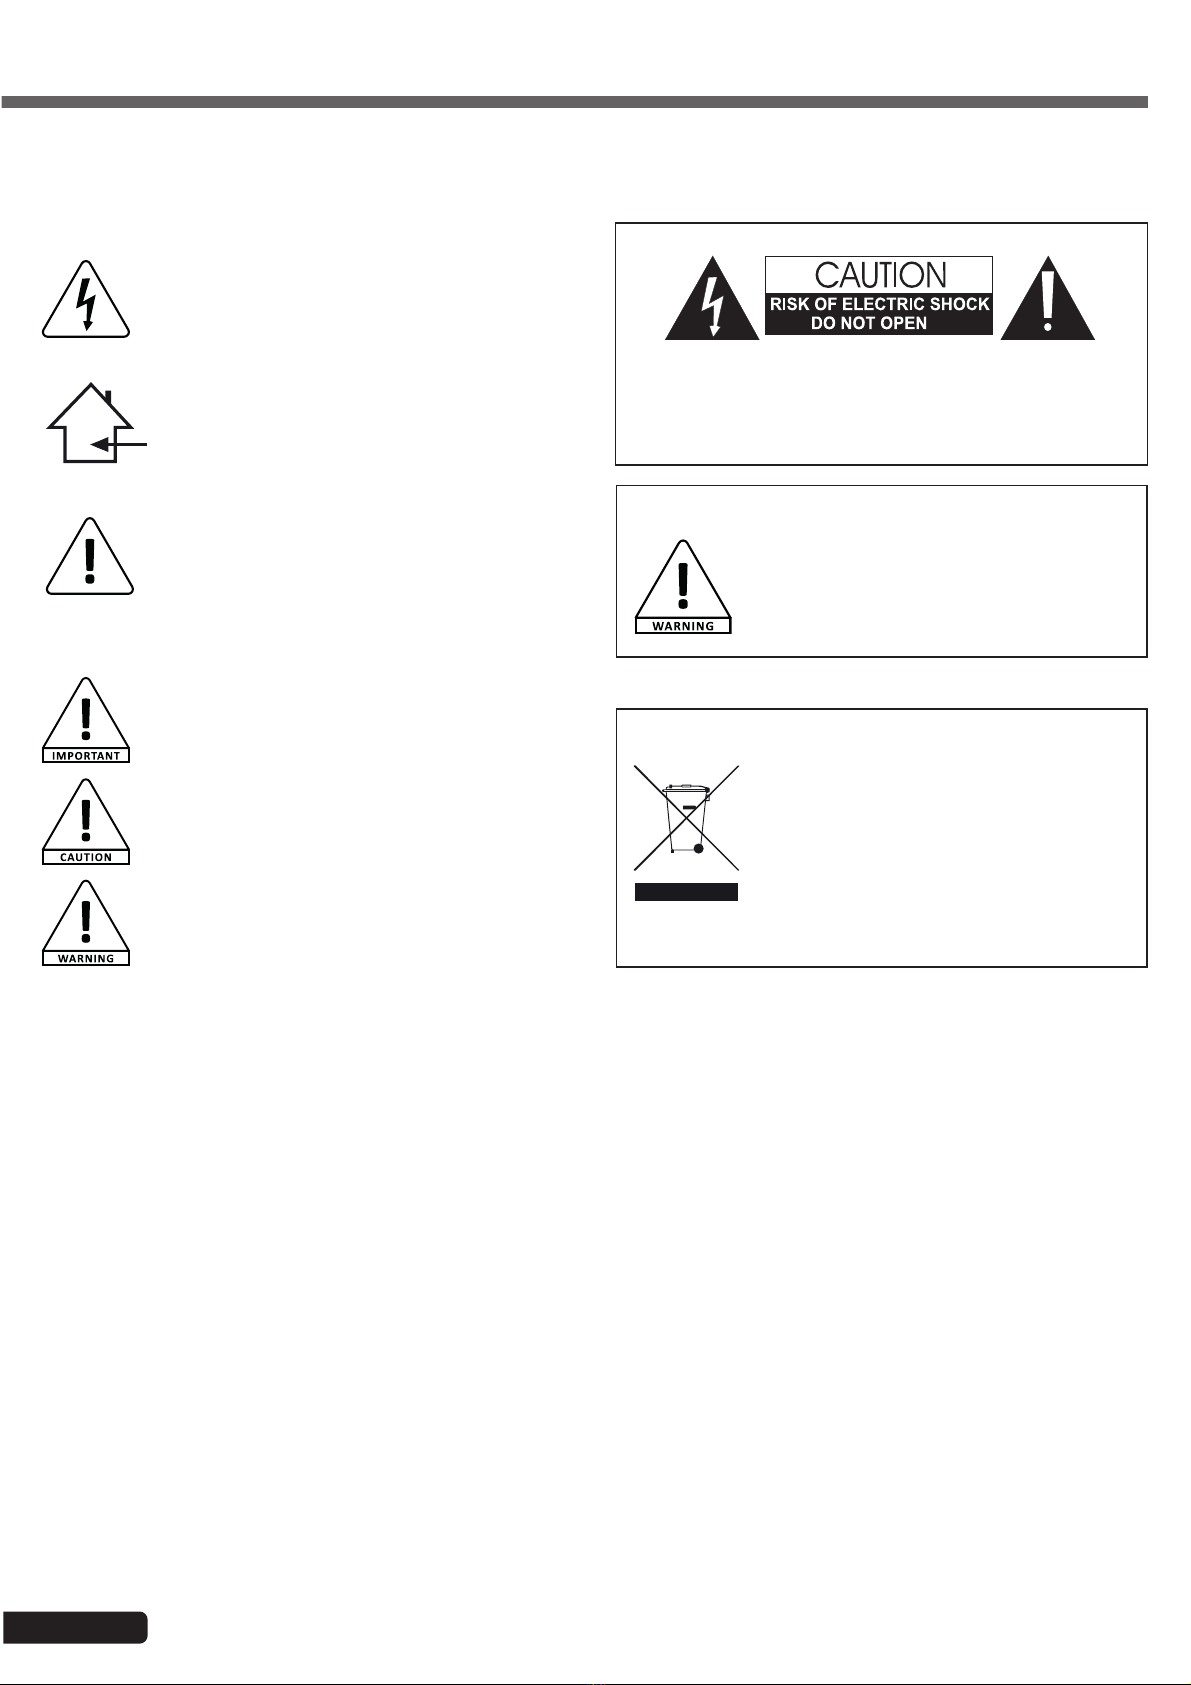
This symbol signals an important safety precaution.
The CAUTION symbol signals a risk of product deterioration.
The WARNING symbol signals a risk to the user’s physical integrity.
The product may also be damaged.
Important safety information
Symbols used
Any maintenance procedure must be performed by a CONTEST
authorised technical service. Basic cleaning operations must tho-
roughly follow our safety instructions.
This product contains non-isolated electrical components. Do not
undertake any maintenance operation when it is switched on as it
may result in electric shock.
This unit is intended for indoor use only. Do not use it in a wet, or
extremely cold/hot locations. Failure to follow these safety instruc-
tions could result in fire, electric shock, injury, or damage to this
product or other property.
WARNING
: This unit contains no user-serviceable parts. Do not open the
housing or attempt any maintenance by yourself. In the unlikely even your unit may
require service, please contact your nearest dealer.
In order to avoid any electrical malfunction, please do not use any multi-socket, power
cord extension or connecting system without making sure they are
perfectly isolated
and present no defect.
Recycling your device
• As HITMUSIC is really involved in the
environmental cause, we only commercialise
clean, ROHS compliant products.
• When this product reaches its end of life,
take it to a collection point designated by local
authorities. The separate collection and recycling
of your product at the time of disposal will help
conserve natural resources and ensure that it is
recycled in a manner that protects human health
and the environment.
Instructions and recommendations
10 - Electric power supply :
This product can only be operated according to a very specific voltage. These
information are specified on the label located at the rear of the product.
11 - Power cords protection:
Power-supply cords should be routed so that they are not likely to be walked on or
pinched by items placed upon or against them, paying particular attention to cords at
lugs, convenience receptacles and the point where they exit from the fixture.
12 - Cleaning precautions :
Unplug the product before attempting any cleaning operation. This product should be
cleaned only with accessories recommended by the manufacturer. Use a damp cloth
to clean the surface. Do not wash this product.
13 - Long periods of non use :
Disconnect the unit’s main power during long periods of non use.
14 - Liquids or objects penetration :
Do not let any object penetrate this product as it may result in electric shock or fire.
Never spill any liquid on this product as it may infiltrate the electronic components
and result in electric shock or fire.
15 - This product should be serviced when :
Please contact the qualified service personnel if :
- The power cord or the plug has been damaged.
- Objects have fallen or liquid has been spilled into the appliance.
- The appliance has been exposed to rain or water.
- The product does not appear to operate normally.
- The product has been damaged.
16 - Inspection/maintenance :
Please do not attempt any inspection or maintenance by yourself. Refer all servicing
to qualified personnel.
17 - Operating environment :
Ambient temperature and humidity: +5 - +35°C, relative humidity must be less than
85% (when cooling vents are not obstructed).
Do not operate this product in a non-ventilated, very humid or warm place.
Sound levels
Our audio solutions deliver important sound pressure levels
(SPL) that can be harmful to human health when exposed
during long periods. Please do not stay in close proximity
of operating speakers.
Page 3
MIXtouch8 - 8 Channel Digital Mixing Console English
2 - General and technical data
Connectivity
Mic inputs 4 on XLR chassis + 2 on combo chassis
Line input 1 sur 2 châssis Jack 6.35 et mini Jack 3.5
Master output 1 on 2 XLR chassis
AUX output 2 on 2 6.35 Jack chassis
Footswitch 2 on 2 6.35 Jack 6.35
Pre-listening 1 on Jack 6.35
Technical specifications
Line input impedance 3KΩ
Line input impedance 20KΩ
Output impedance 470Ω
Impedance of the headphone output 100Ω
Residual bus noise -90dBU
Maximum bus power +18dBU
Maximum voltage gain 80dB input to output
Dynamic range 106dBU (20Hz~20kHz)
AD / DA 24 bits max / 192kHz
Signal processing 40-bit floating-point processor
Signal latency <1.8msec input to output
Phantom power supply 48V, each channel can be switched individually
Crosstalk(@1KHz) -85 dB
USB interface 2 USB2.0 interface, maximum 32G supported, can be used for USB
disk playback and recording, support WAV, MP3 format
Network WIFI connecting to USB wireless module, 1 LAN interface
Effects 2 Reverb and 2 Delay
Power supply 12V via adaptateur secteur (AC 100-240V, 50/60Hz)
Contents of the package
The MIXtouch8 console
1 External power supply
1 IEC power cord
1 WiFi dongle
The user guide

Page 4
MIXtouch8 - 8 Channel Digital Mixing Console
English
3 - Overview of the unit
3-1 Front panel
1- 4 microphone inputs on XLR chassis
2- 2 microphone inputs on combo chassis
3- Stereo inputs on 6.35" Jack chassis
4- Stereo input on 3.5 jack
5- Auxiliary output on chassis Jack 6.35
6- Footswitch connector on chassis Jack 6.35
7- USB port for song playback, recording or connecting a WIFI dongle
8- Master output on XLR chassis
9- Pre-listening output on 6.35 Jack chassis with level adjustment
10-Power On Button: Press and hold this button, it flashes when the console is started and then stays on when the
console is ready.
11-MUTE button: Stops the playback of songs on USB storage equipment
12-PLAY button: Used to start the playback of songs
13-Multi-function knob
14-Vu-meter of the general output level
15-Vu-meter of the level of the inputs
16-Indicator of the active channel
17-Channel Selector: The channel selection is made each time this button is pressed
18-Microphone channels gain potentiometers
1 8
9
10
13
11
12
18
17 141516
2 3 4 5 6 7
Page 5
MIXtouch8 - 8 Channel Digital Mixing Console English
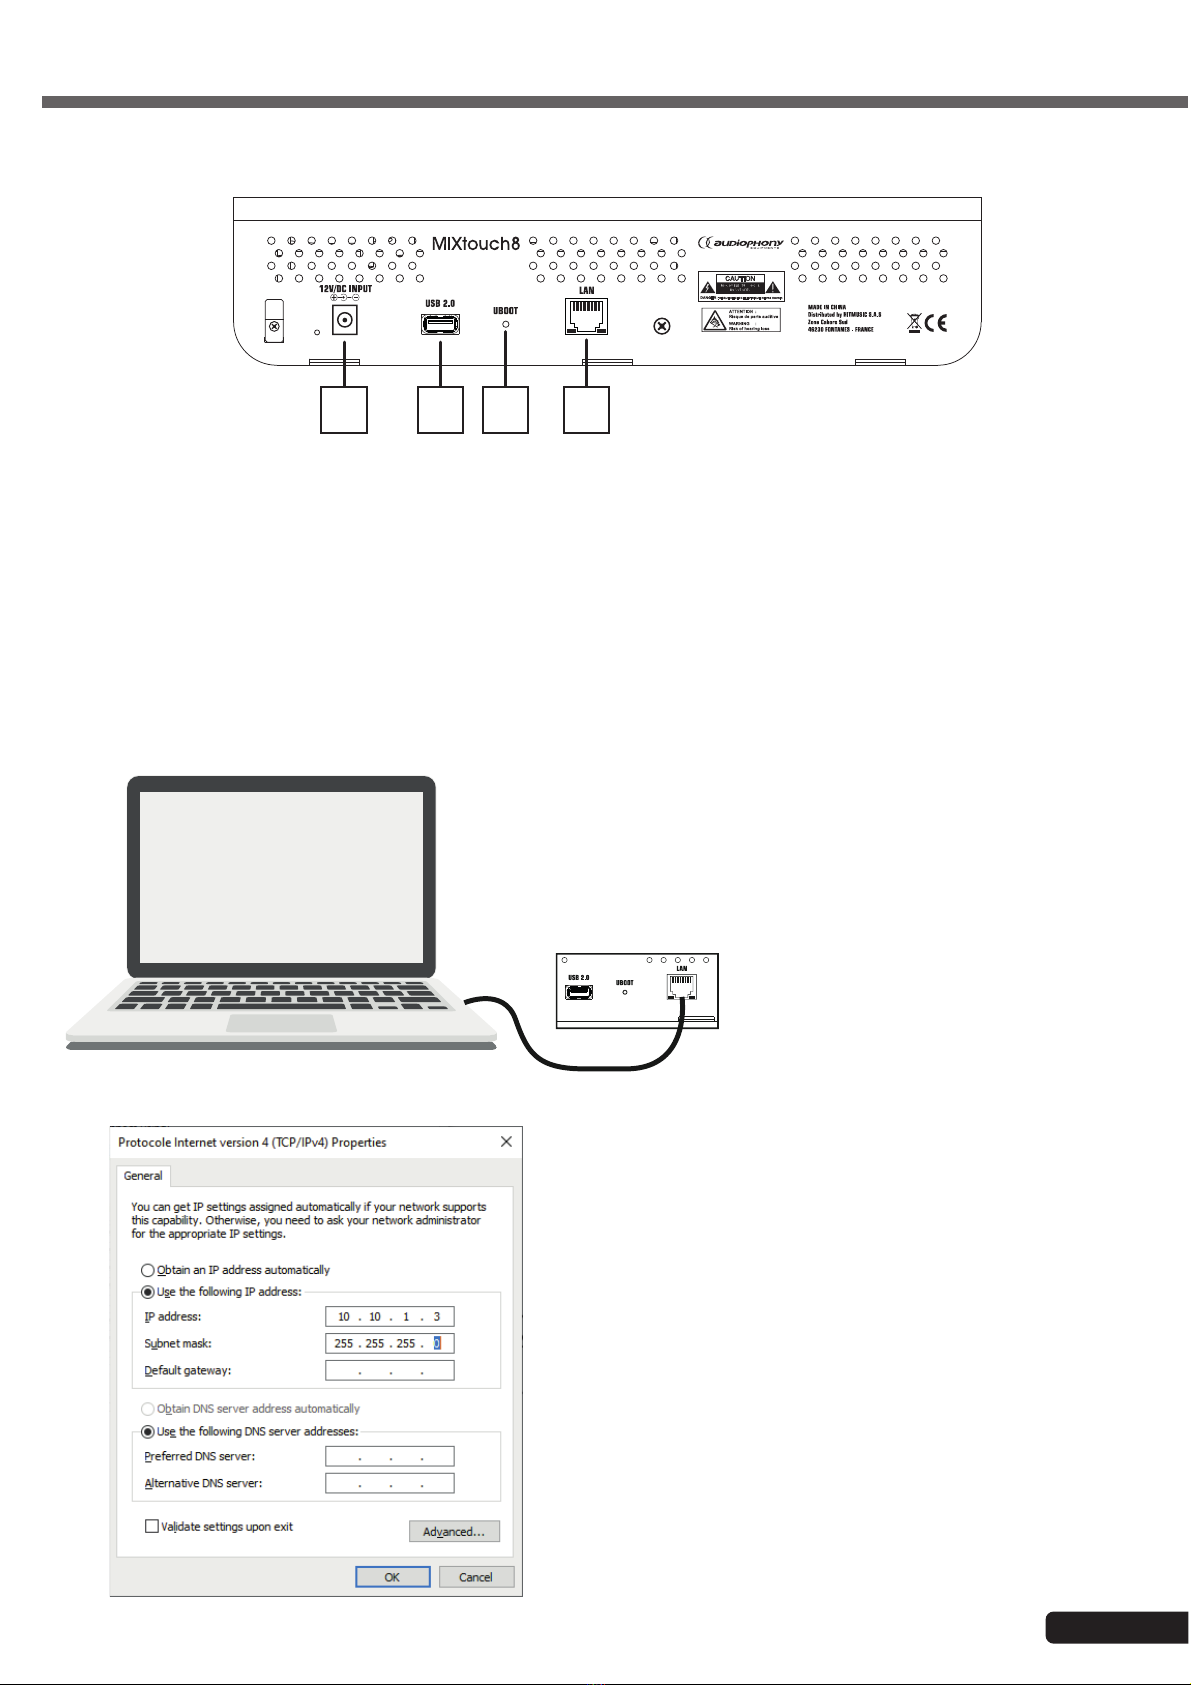
3-2 Rear Panel
19 20 21 22
4-1 Connection via the wired network
4 - Connection to the controller
19-Power supply input: 12V DC
20-USB connector for song playback, recording or connecting a WIFI dongle
21-Switch to return to factory settings
22-RJ45 port to connect the console to the network
1 - Connect the console to a wired
network or directly to a computer via an
RJ45 cable
2- Change the IP address of your computer and give it the
following: 10.10.1.X and the subnet mask: 255.255.255.255.0
Open an Internet browser and type in the address: 10.10.1.1
Note: If in a previous session you changed the console
address, type the address you changed.
Page 6
MIXtouch8 - 8 Channel Digital Mixing Console
English
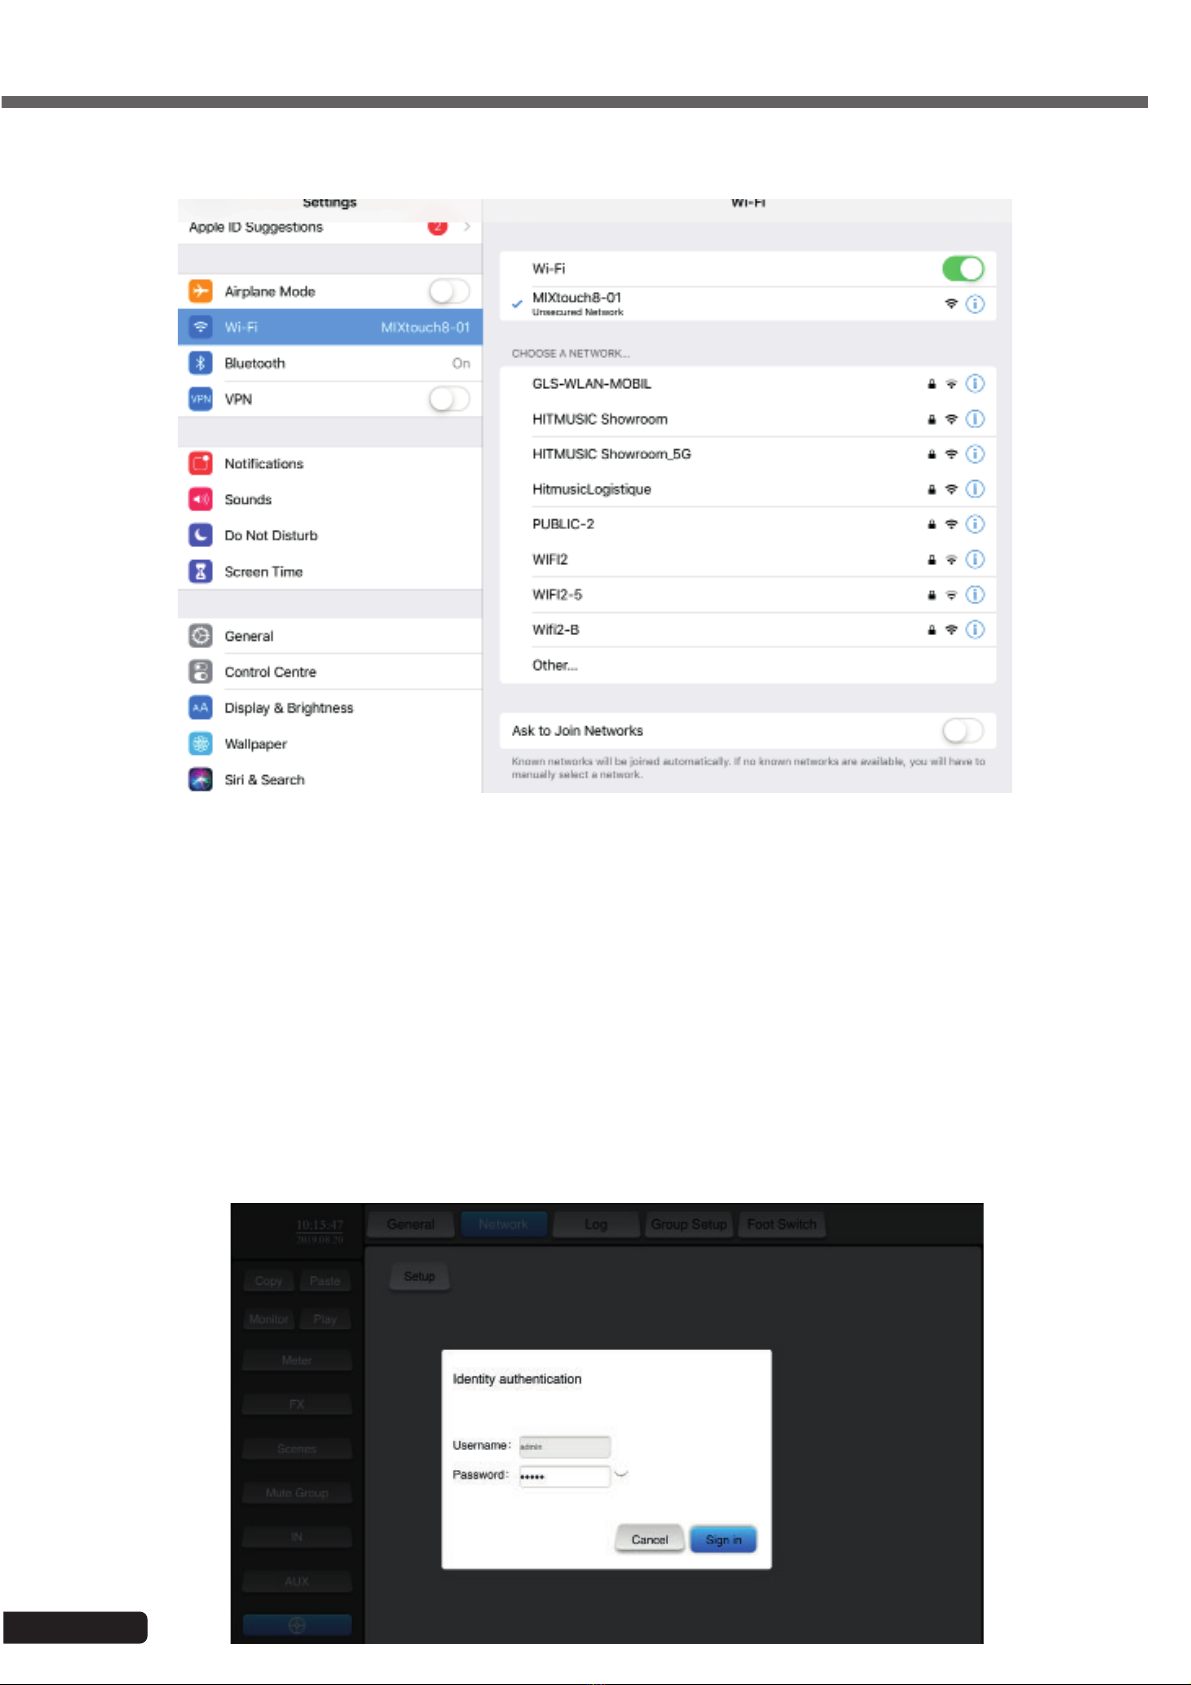
4-2 HotSpot connection
Activate the WiFi connection of your computer or other types of devices (tablet, mobile phone,...etc).
Select the MIXtouch8 console from the list and connect it.
Open an Internet browser and type in the address: 10.10.2.1
Note: If in a previous session you changed the console address, type the address you changed.
5-1 - To access the settings click on the settings tab (at the bottom of the left menu) then on the "Network" tab then finally
on the "Setup" button. You are then asked to authenticate yourself. The username and password are both "admin".
5-2 - Click on "Sign In" to access the settings page.
5 - Adjusting network settings

Page 7
MIXtouch8 - 8 Channel Digital Mixing Console English
5-3 - Select "Network" and go to the "LAN Configuration" page. You can display the IP address of the console or change
it manually. In the same network, type this IP address into the browser of the control device (PC) to connect and control the
console
5-4 - Select the "Administrator Password" tab to access the administrator password configuration page.
You can change the login password.
5-5 - Select the "Network Configuration" tab to access the wireless network settings page.
The wireless network settings are divided into two parts HOTSPOT and WIFI.
You can only choose to activate one of the two connection modes. Activating the WIFI automatically disables HotSpot.
If you connect via a HotSpot, you will disconnect the console. It is recommended to use either one or the other, and to
change only the IP address of one of the two connection modes, always keeping one connection mode as the default mode.

Page 8
MIXtouch8 - 8 Channel Digital Mixing Console
English
5-6 - Select the "Network State" tab to view all network configurations

Page 9
MIXtouch8 - 8 Channel Digital Mixing Console English
5-7 - Restore the factory settings.
When the console is on, press and hold the UBOOT switch under the rear panel for more than 3 seconds. A window appears
asking you to confirm the return to the factory settings.
If you confirm, the console will restart.
6-1 - Input channels main page
Accessible via the "IN" button in the left menu, this page allows you to select the channels to access their settings.
6 - Mixing functions

Page 10
MIXtouch8 - 8 Channel Digital Mixing Console
English
6-2 - Accessing auxiliary channels
Click on "AUX", the right window appears as shown in the image. The display of the right channels can also be done by
dragging the window.
6-3 - Customize the channel display
By clicking on the channel name (at the top of the channel), you can change its name and color.
Page 11
MIXtouch8 - 8 Channel Digital Mixing Console English
6-4 - Input stage
When a channel is selected, click on "Input Stage" to activate phantom power, phase inverter and set the delay for that
channel.
6-5 - The equalization section
When a channel is selected, click on "EQ" to access the equalizer settings. You then have four adjustment points that you
can drag on the screen. You can also use the potentiometers to make your settings.
Page 12
MIXtouch8 - 8 Channel Digital Mixing Console
English
Flat : Reset the equalization settings
Bypass : Disables equalization without changing settings
Library : Allows you to save and access the files in the parameter library.
Save : Save the settings in the library
HPF : Activates the high-pass filter
Freq : Allows you to select the frequency on which the setting acts
Gain : Allows you to adjust the level
Q: Sets the width of the band on which the setting acts
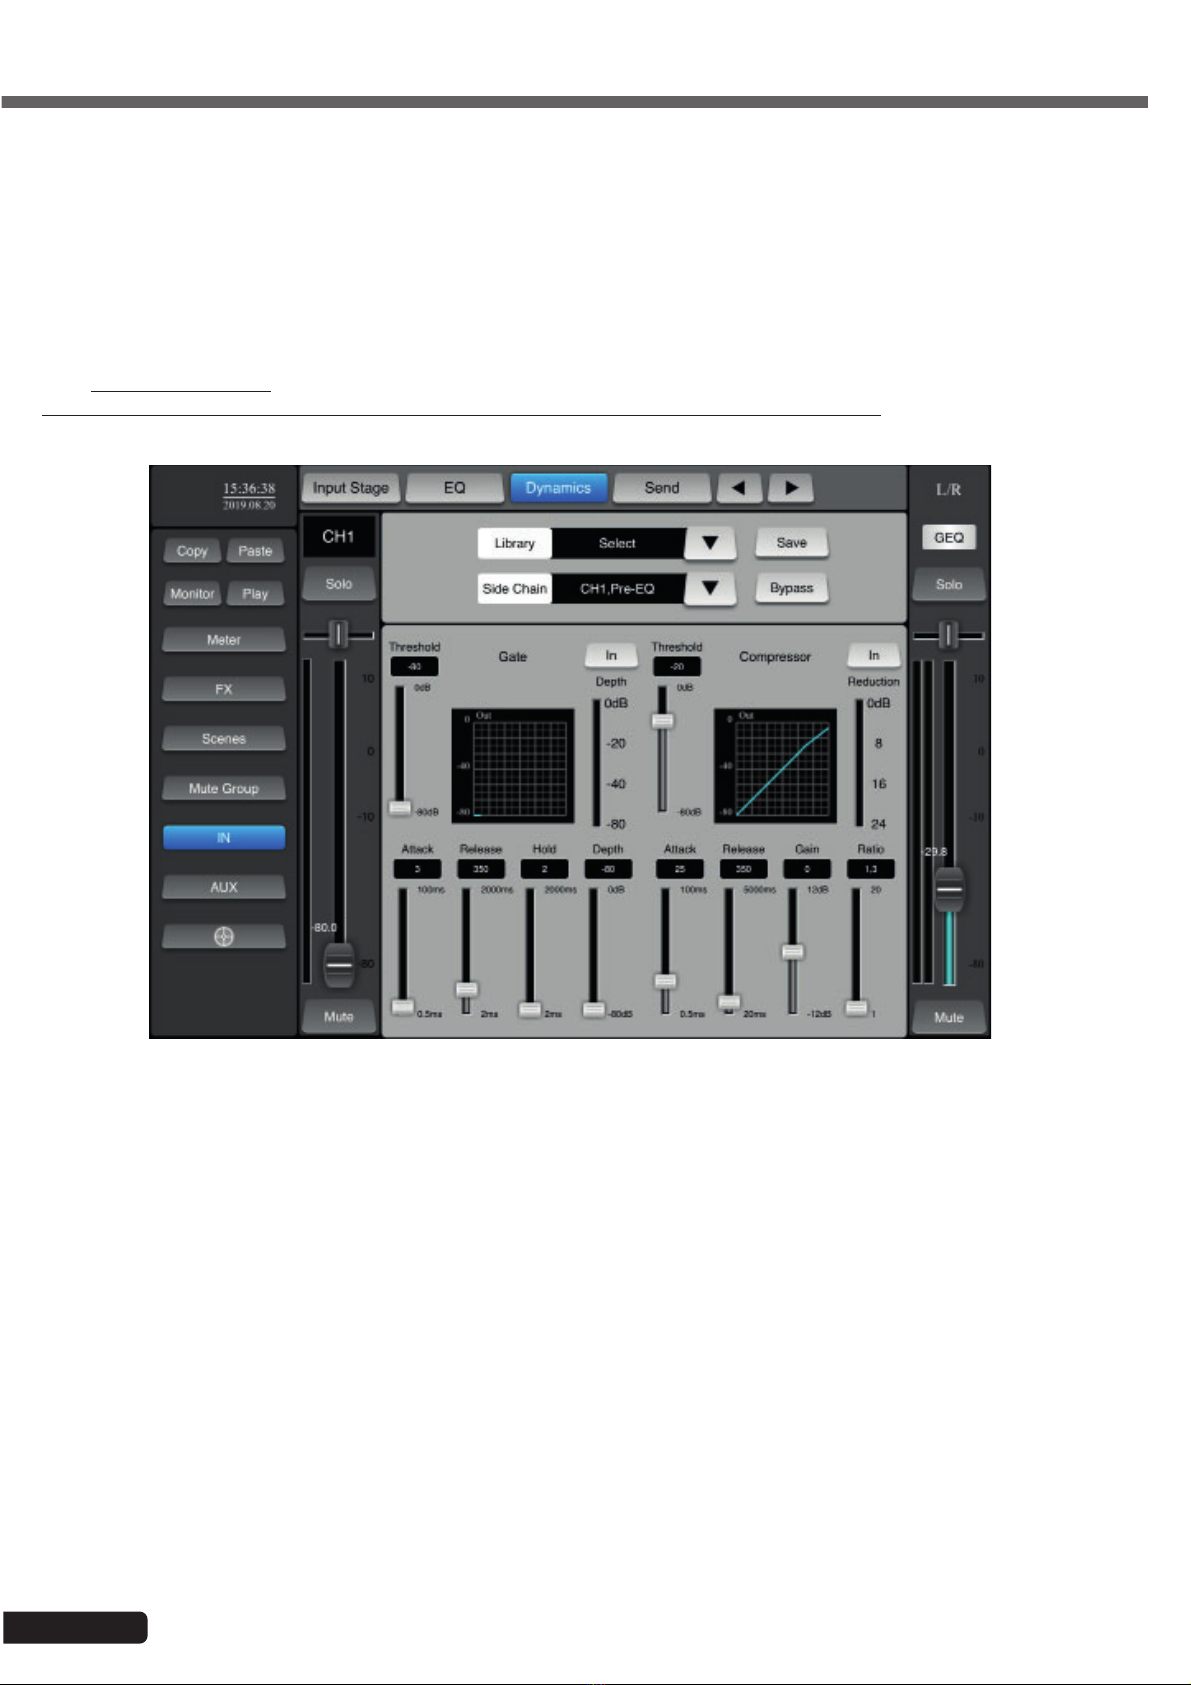
Bypass : Disables the compressor and gate without changing the settings
Library : Allows you to save and access the files in the parameter library
Save : Save the settings in the library
Side Chain : Allows you to link another channel to the current channel settings
6-6 - Dynamic processing
When a channel is selected, click on "Dynamics" to access the Gate and compressor settings.
Page 13
MIXtouch8 - 8 Channel Digital Mixing Console English
6-7 - When a channel is selected, click on "Send" to access the bus settings.
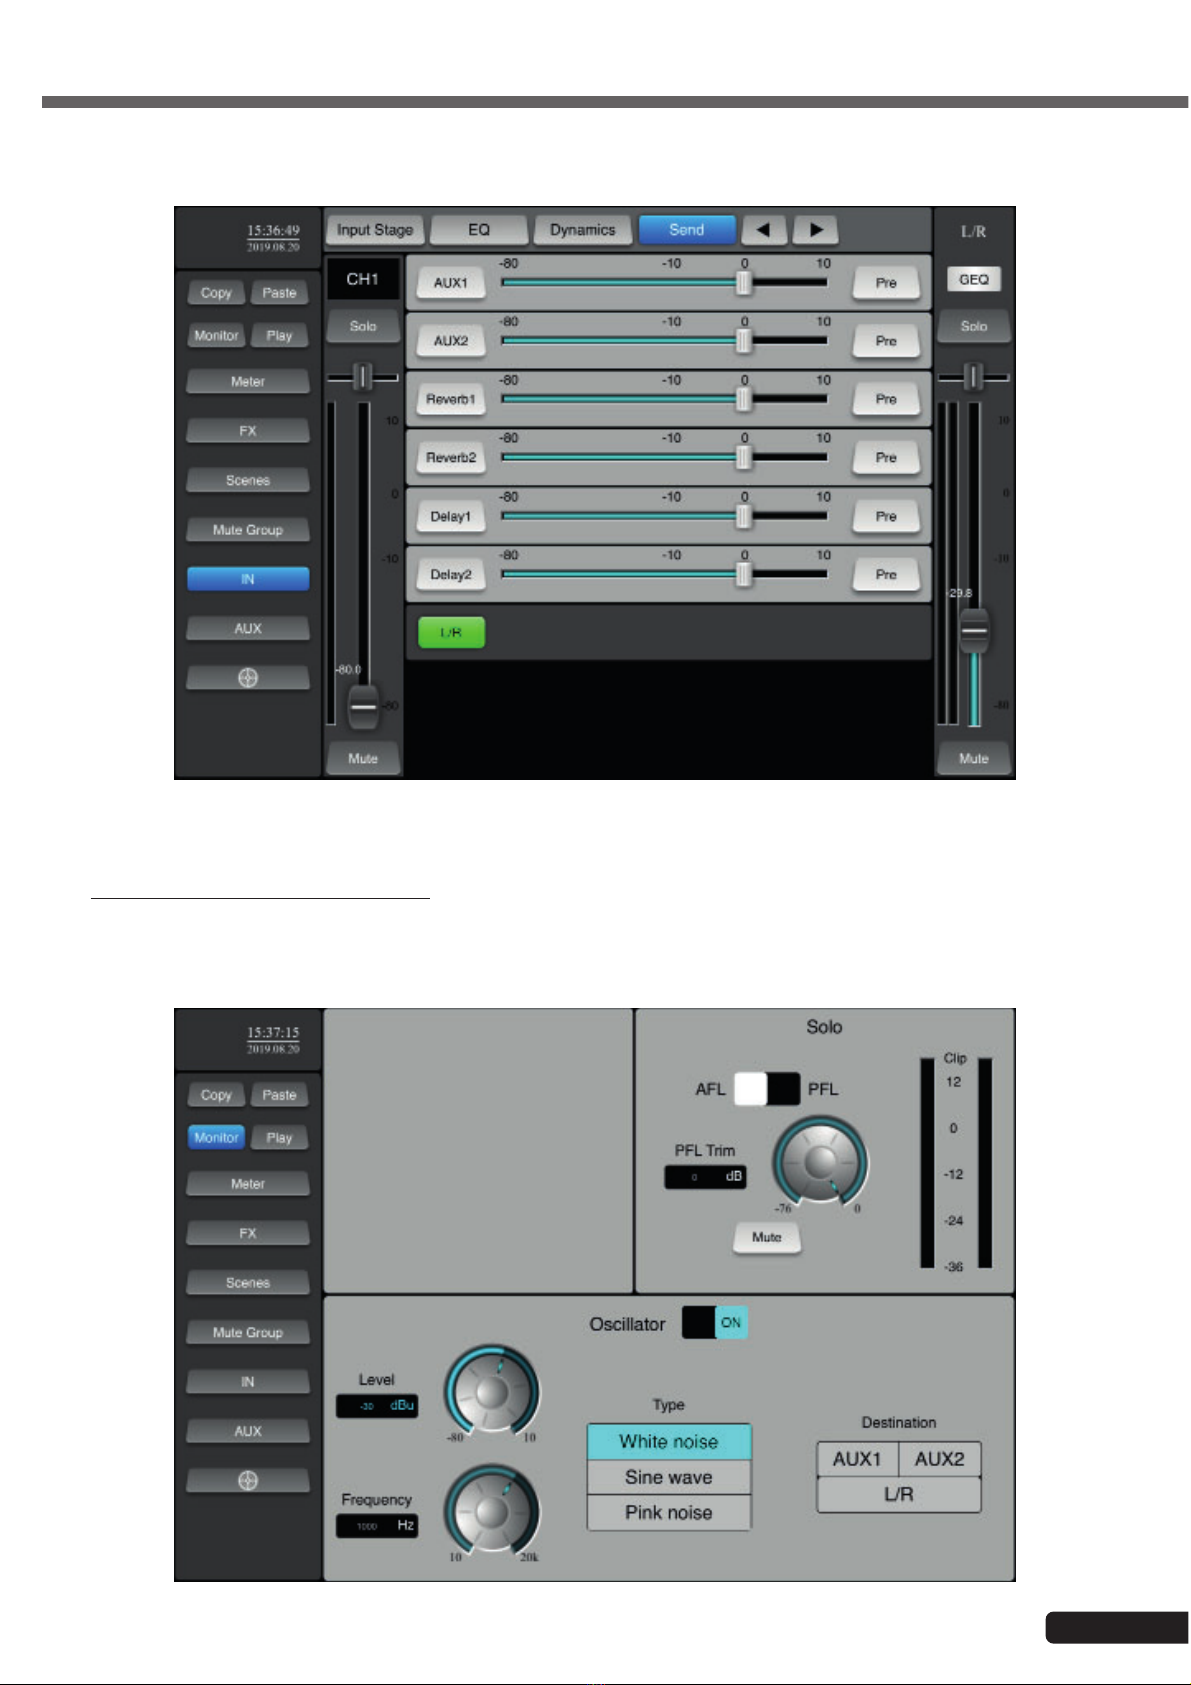
This section allows you to manage the buses to which the signal present on the current channel is sent.
6-8 - The Monitor/Signal Generator function
Click on the "Monitor" button in the left menu to access this section. In this section is the level adjustment of the monitor
output and the signal generator.
Only channels for which the "Solo" button is active (green) are sent to the Monitor output.

Page 14
MIXtouch8 - 8 Channel Digital Mixing Console
English
6-9 - The playback and recording function
Click on the "Play" button in the left menu to access this section. This section allows you to manage the playback of songs
on USB storage media.
It also allows you to record the current mix on a USB storage medium.
6-9 - The measurement function
Click on the "Meter" button in the left menu to access this section. This section allows you to view all incoming and outgoing
levels.

Page 15
MIXtouch8 - 8 Channel Digital Mixing Console English
6-10 - The effects
Click on the "FX" button in the left menu to access this section. This section allows you to adjust the 4 available effects.
These effects can be assigned to the outputs.
6-10-1 - Reverbs 1 and 2
Click on the "Reverb1" or "Reverb2" button to access the settings.
6-10-2 - Delay 1 and 2
Click on the "Delay1" or "Delay2" button to access the settings.

Page 16
MIXtouch8 - 8 Channel Digital Mixing Console
English
6-10 - The copy/paste function
This function allows you to copy the settings from one channel to another.
Select the channel whose settings you want to copy, click on "Copy" then select the destination channel and click on
"Paste".
Page 17
MIXtouch8 - 8 Channel Digital Mixing Console English
6-10 - Backup management
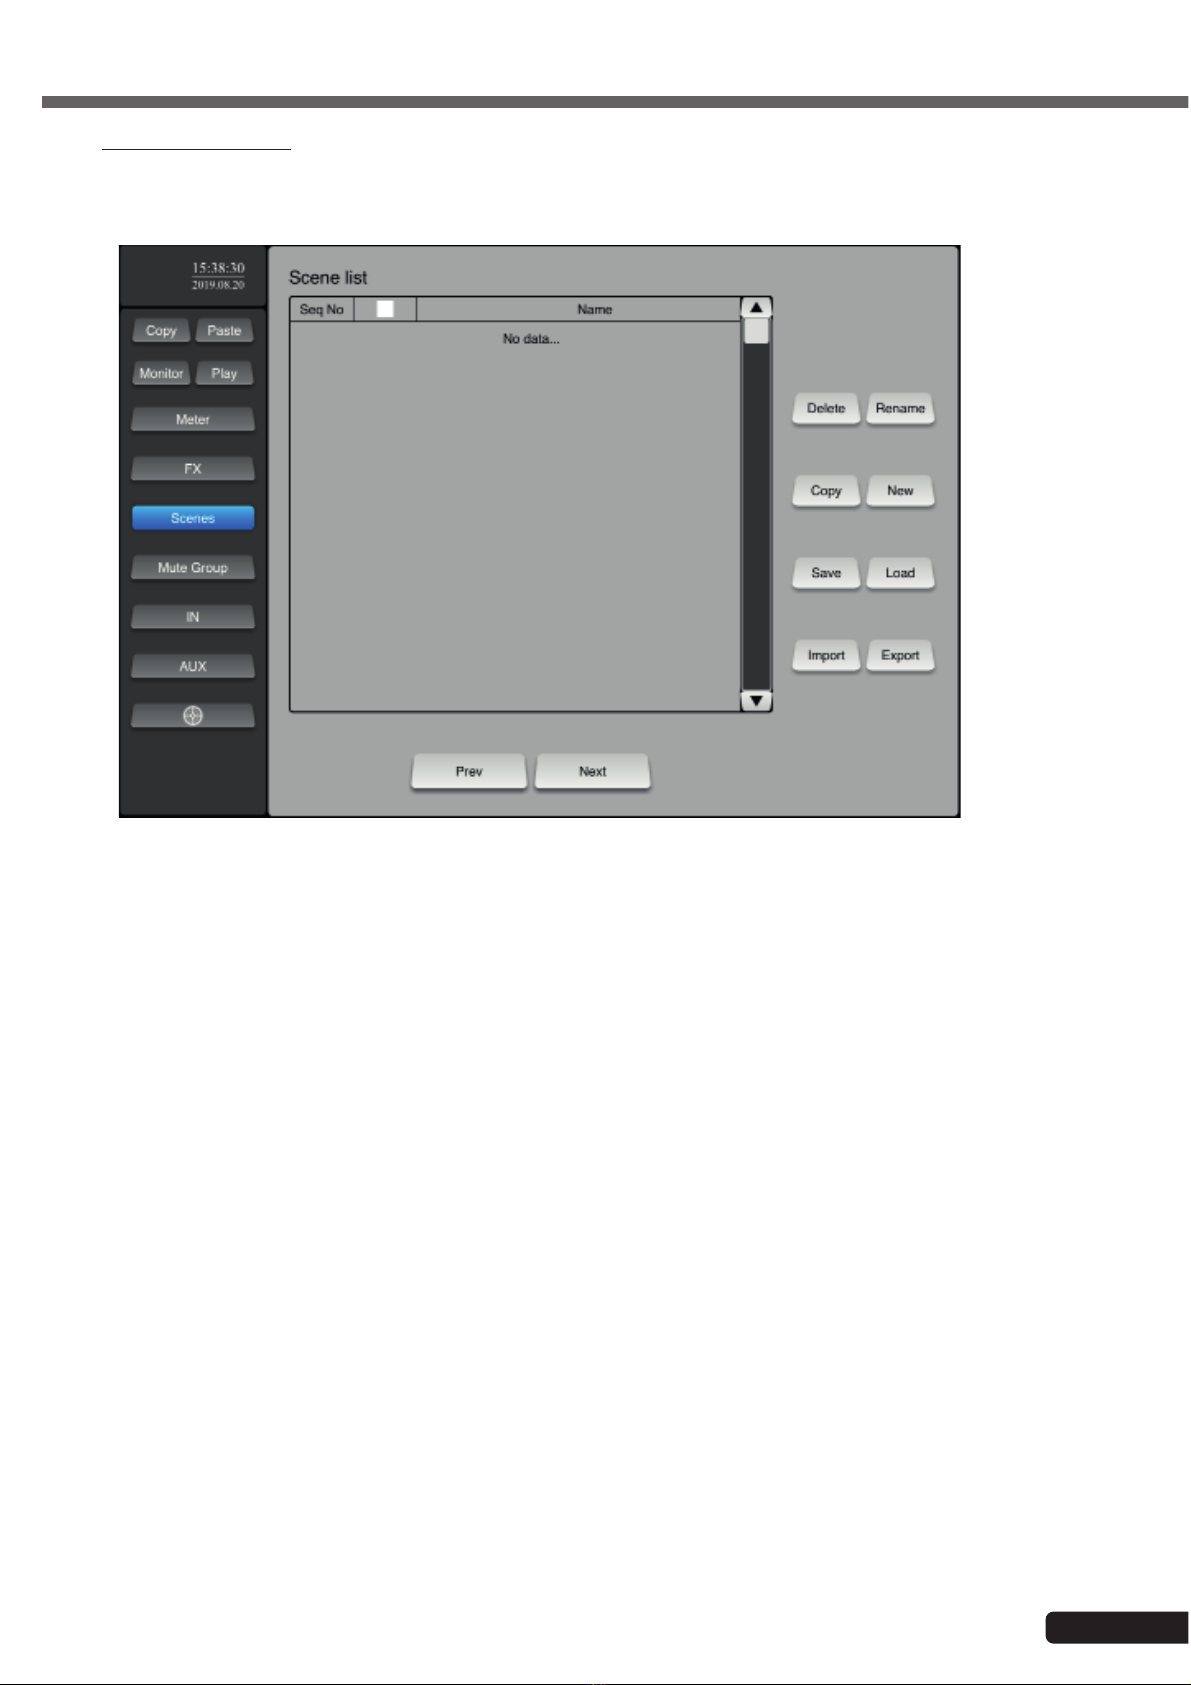
To access this function, click on "Scenes" in the left menu.
This function allows you to save, record, delete, rename, export and import scenes.
The scenes correspond to the current settings of the console.

Page 18
MIXtouch8 - 8 Channel Digital Mixing Console
English
To access this section, click on the button at the bottom of the left menu.
7-1 - General settings: "General"
This section allows you to choose the language of the system, update it and restore the factory settings.
7-2 - Network settings: "Network"
This section has been treated in paragraph 5.
7-3 - Session storage: "Log"
This function allows you to retrieve system information from USB media.
7 - Additional settings and functions

Page 19
MIXtouch8 - 8 Channel Digital Mixing Console English
7-3 - Group management: "Group Setup"
This function allows you to create a group of channels. These channels will be "mutated" when you click on the "Mute
Group" button
7-4 - Assignment of footswitch: "Foot Switch"
This function allows you to assign one or more effects to each foots witch so that they can be triggered remotely.
The pedals are in fact simple dry and permanent contact switches.

Because AUDIOPHONY®takes the utmost care in its products to make sure you only get the best possible quality, our products are
subjects to modifications without prior notice. That is why technical specifications and the products physical configuration might differ
from the illustrations.
Make sure you get the latest news and updates about the AUDIOPHONY®products on www.audiophony.com
AUDIOPHONY®is a trademark of HITMUSIC S.A.S - Parc d’Activités Cahors Sud – En Teste - 46230 FONTANES - FRANCE
Table of contents
Other audiophony Music Mixer manuals

audiophony
audiophony MYA5D User manual

audiophony
audiophony LIVEtouch20 User manual

audiophony
audiophony PMX34 User manual

audiophony
audiophony PA PREZONE88 User manual

audiophony
audiophony PREZONE444 User manual

audiophony
audiophony MX44 User manual

audiophony
audiophony MX822 User manual

audiophony
audiophony PA DZONE88 User manual

audiophony
audiophony DIGITAL-3 User manual

audiophony
audiophony GOA9C User manual


