Audiopole FREEPOLE 100 Mini User manual
PORTABLE SOUND SYSTEM
FREEPOLE 100
USER’S MANUAL

INDEX
SAFETY INSTRUCTIONS …………………………..……………………………………………… 3
DESCRIPTION …………………………………….…………………………………………………. 4
SYSTEM ELEMENTS ………………………..……….…………………………………………….. 4
CONTROL PANEL ………………………………………….……………………………………….. 5
POWER SUPPLY …………………………………………………………………………………….. 5
HF RECEIVER …………………………………..…………………………………………………….. 6
HF MICROPHONE …………………………….……………………………………………………... 7
AUDIO MODUME …………………………...……………………………………………………….. 9
TECHNICAL SPECIFICATIONS …………………………………………………………………… 11
WARRANTY ……………………………………………..……………………………………………. 11
POWER SUPPLY
Ensure that the insource voltage (AC outlet) matches the voltage rating of the product. Failure to do so could result in
damage to the product and possibly the user. Unplug the product before electrical storms occur and when unused for
long periods of time to reduce the ris of electric shoc or fire.
EXTERNAL CONNECTION
Always use proper ready-made insulated mains cabling (power cord). Failure to do so could result in shoc /death or fire.
If in doubt, see advice from a registered electrician.
FUSE
To prevent fire and damage to the product, use only the recommended fuse type as indicated in this manual. Do not
short-circuit the fuse holder. Before replacing the fuse, ma e sure that the product is OFF and disconnected from the AC
outlet.
PROTECTIVE GROUND
Before turning the unit on, ma e sure that it is connected to Ground. This is to prevent the ris of electric shoc .
Never cut internal or external Ground wires. Li e wise, never remove Ground wiring from the Protective Ground
Terminal.
OPERATING SAFETY INSTRUCTIONS
Read these instructions. Follow all instructions. Keep these instructions. Do not discard. Heed all warnings. Only use
attachments/accessories specified by the manufacturer.
This symbol in
dicates that the disposal of this product is submitted to local regulations. Pleas
e
contact
your local dealer.
DISPOSAL
SAFETY INSTRUCTIONS
This symbol, wherever used, alerts you to the presence of un
-
insulated and dangerous voltages within
the product enclosure. These are voltages that may be sufficient to constitute the ris of electric shoc or
death.
This symbol, wherever used, alerts you to important operating and maintenance instructions.
DO NOT REMOVE ANY COVERS
Within the product are areas where high voltages may present. To reduce the ris of electric shoc do not remove any
covers unless the AC mains power cord is removed. Covers should be removed by qualified service personnel only. No
user serviceable parts inside.
POWER CORD AND PL
UG
Do not tamper with the power cord or plug. These are designed for your safety. Do not remove Ground connections! If
the plug does not fit your AC outlet see advice from a qualified electrician. Protect the power cord and plug from any
physical stress to avoid ris of electric shoc . Do not place heavy objects on the power cord. This could cause electric
shoc or fire.
SERVICING
Refer all servicing to qualified service personnel only. Do not perform any servicing then those instructions contained
within this User’s Manual.
3

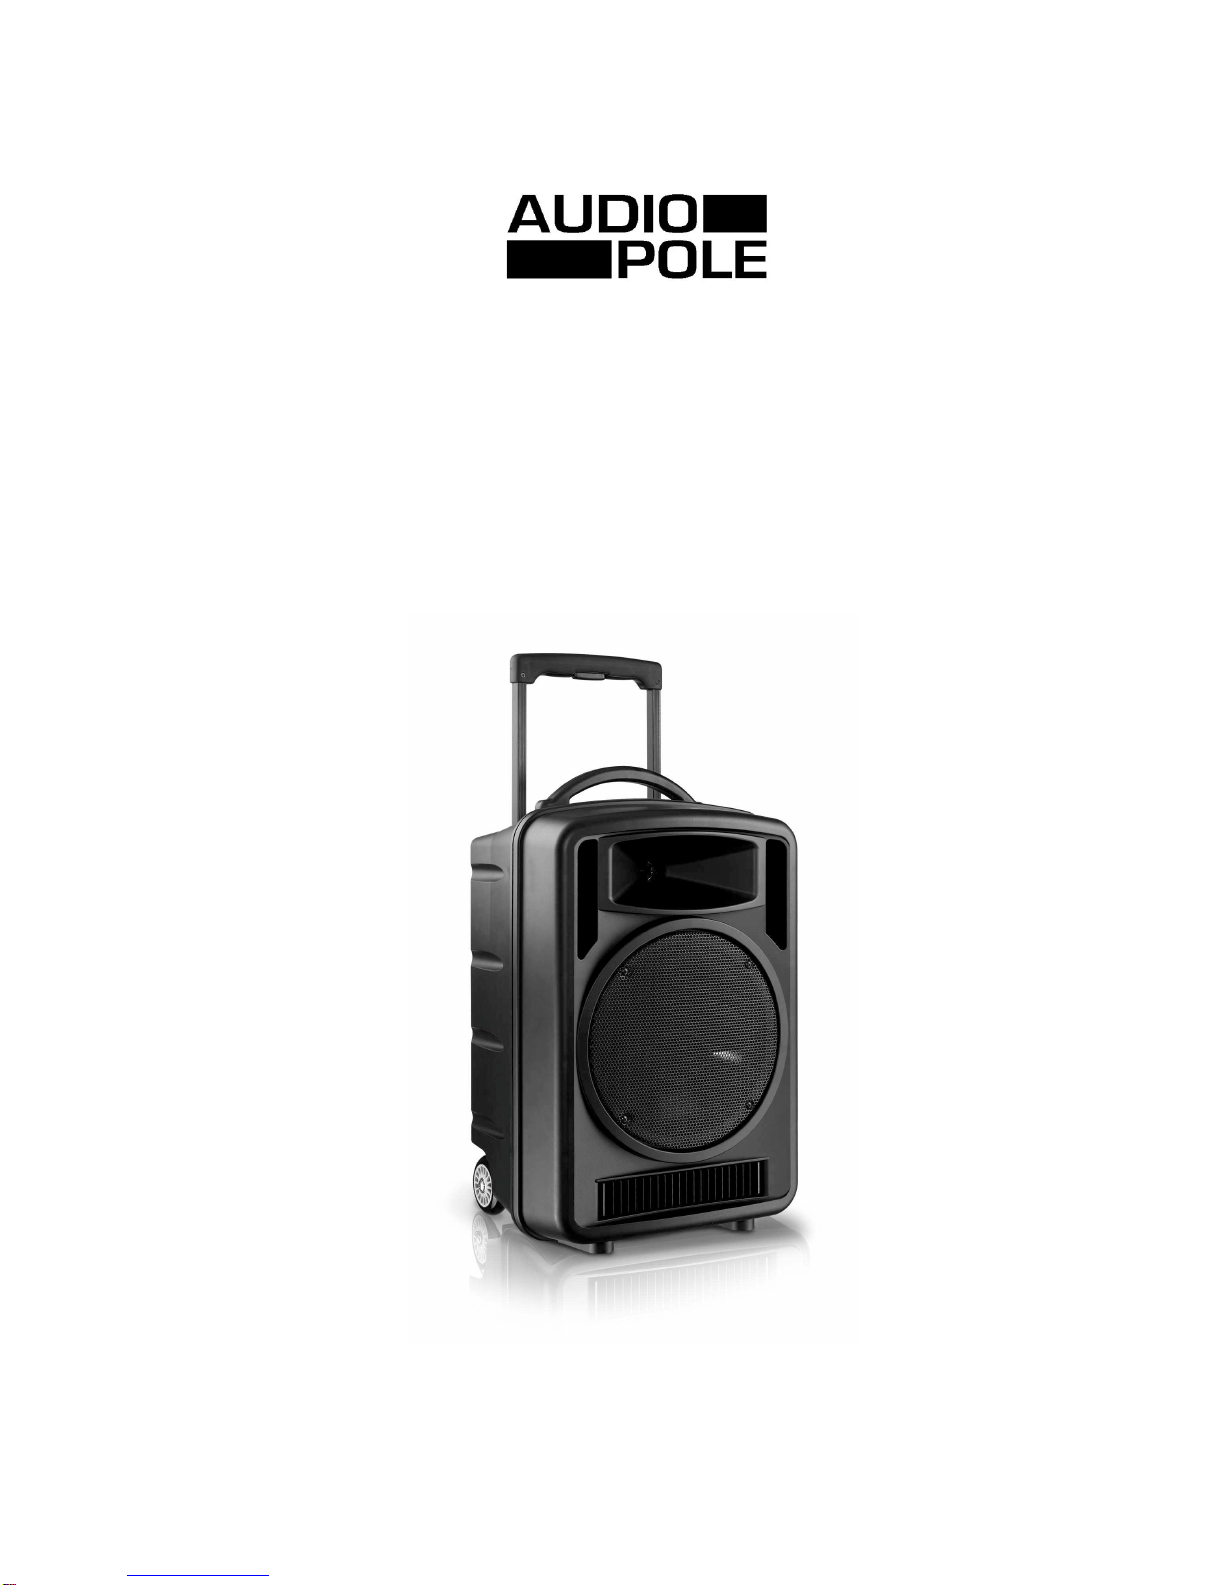
DESCRIPTION
Than you for purchasing the Audiopole FREEPOLE 100. This all in one system is an ideal tool for indoors and outdoors PA
applications without using wiring. The built-in lithium battery and the wireless microphone system offer freedom of use and an
optimal sound quality for the music and the voice.
It includes a two way 100 W RMS active spea er, a multichannel wireless receiver with a handled microphone, a five channel
mixer, a USB/SD audio module.
Mai features
•100 W (RMS) Class-D amplifier
•8” woofer and 1” driver
•Switching power supply 100 ~ 240 V AC
•Battery with built in charging control unit
• 4 ~ 6 hours battery life
•USB / SD player with bac lit LCD display
•16 channel UHF system (863 – 865 MHz)
•Microphone priority
•Mic / Line inputs and Line output
•AUX input and output
•Empty slot for additional 16 channel receiver or 16 channel transmitter
•Handles and wheels
SYSTEM ELEMENTS
Figure 1: Fro t pa el
1. Handle
2. Horn
3. Spea er grille
4. Woofer
5. Air vent
Figure 2: Rear pa el
1. Retractable handle
2. UHF Receiver
3. Audio module
4. ON/OFF switch and charge indicator
5. Main control panel
6. Mains inlet
7. Battery cover
8. Wheels
1
2
3
4
5
1
2
3
4
5
6
7
8
4

CONTROL PANEL
a. Treble control
b. Bass control
c. LINE IN Volume
d. AUX IN Volume
e. MIC 2 Volume
f. MIC 1 Volume
g. Master volume
h. Priority switch. When active, the Led lights up.
i. LINE IN: inputs for CD/MP3/DVD players, Smartphone etc. (RCA),
LINE OUT: outputs for recoding or amplifiers (RCA).
j. AUX IN : : inputs for CD/MP3/DVD players, Smartphone etc. (35 mm Jac ),
AUX : outputs for recoding or amplifiers . (35 mm Jac ),
k. Microphone input MIC 1 (Combo XLR-¼” Jac )
POWER SUPPLY
The FREEPOLE 100 can be powered by 100 to 240 V AC, or by two internal battery bloc s.
The batteries start the charging process as soon as the device is connected to the mains. The Led indicator lights up red during
the charging time and lights up green when the charge is over.
Warning
Before the first use or when the device is not used during a long period of time, it is important to charge the battery at
least 8 hours.
When the system wor s with the batteries, the charge indicator displays the following information:
•Available power exceeding 30 % of the total charge capacity: red Led lighting,
•Available power being less than 30 % of the total charge capacity: red Led blin ing,
•Available power being less than 5 % of the total charge capacity: power is automatically switched off
Batteries Replaceme t
Remove the cover Pull the battery bloc out Connect the new battery bloc respecting
the colour code : Red (+), Blac (-)
Both battery bloc s need to be replaced at the same time at ris of malfunction.
a
b
c
d
e
f
g
h
i
j
k
l
5

HF RECEIVER
Descriptio
a. LCD displaying frequency and channel number
b. Switching status of the diversity antennas A/B
c. HF signal presence
d. Audio signal presence
e. Set / confirm channel number
f. Select channel number
g. ON/OFF / Volume
Fu ctio s
1. Turn VOLUME / POWER (g) cloc wise. At the “clic ” the receiver switches on and the LCD lights up displaying the
channel number from 1 to 16.
To switch off, turn the button counter cloc wise up to the “clic ”.
2. Channel selection :
Press button (e) during 1 second, select the channel (CH1 ~ CH16) by pressing / (f), then press SET again once
the channel is selected.
In case of using two receivers, it is necessary to use two different channels.
3. To display the frequency value (MHz) corresponding to the selected channel, press / (f) continuously.
Channel number Frequency (MHz)
01 863,1
02 864,1
03 863,6
04 864,6
05 863,3
06 864,3
07 863,8
08 864,8
09 863,2
10 864,2
11 863,7
12 864,7
13 863,4
14 864,4
15 863,9
16
864,9
a
b
c
d
e
f
g
6
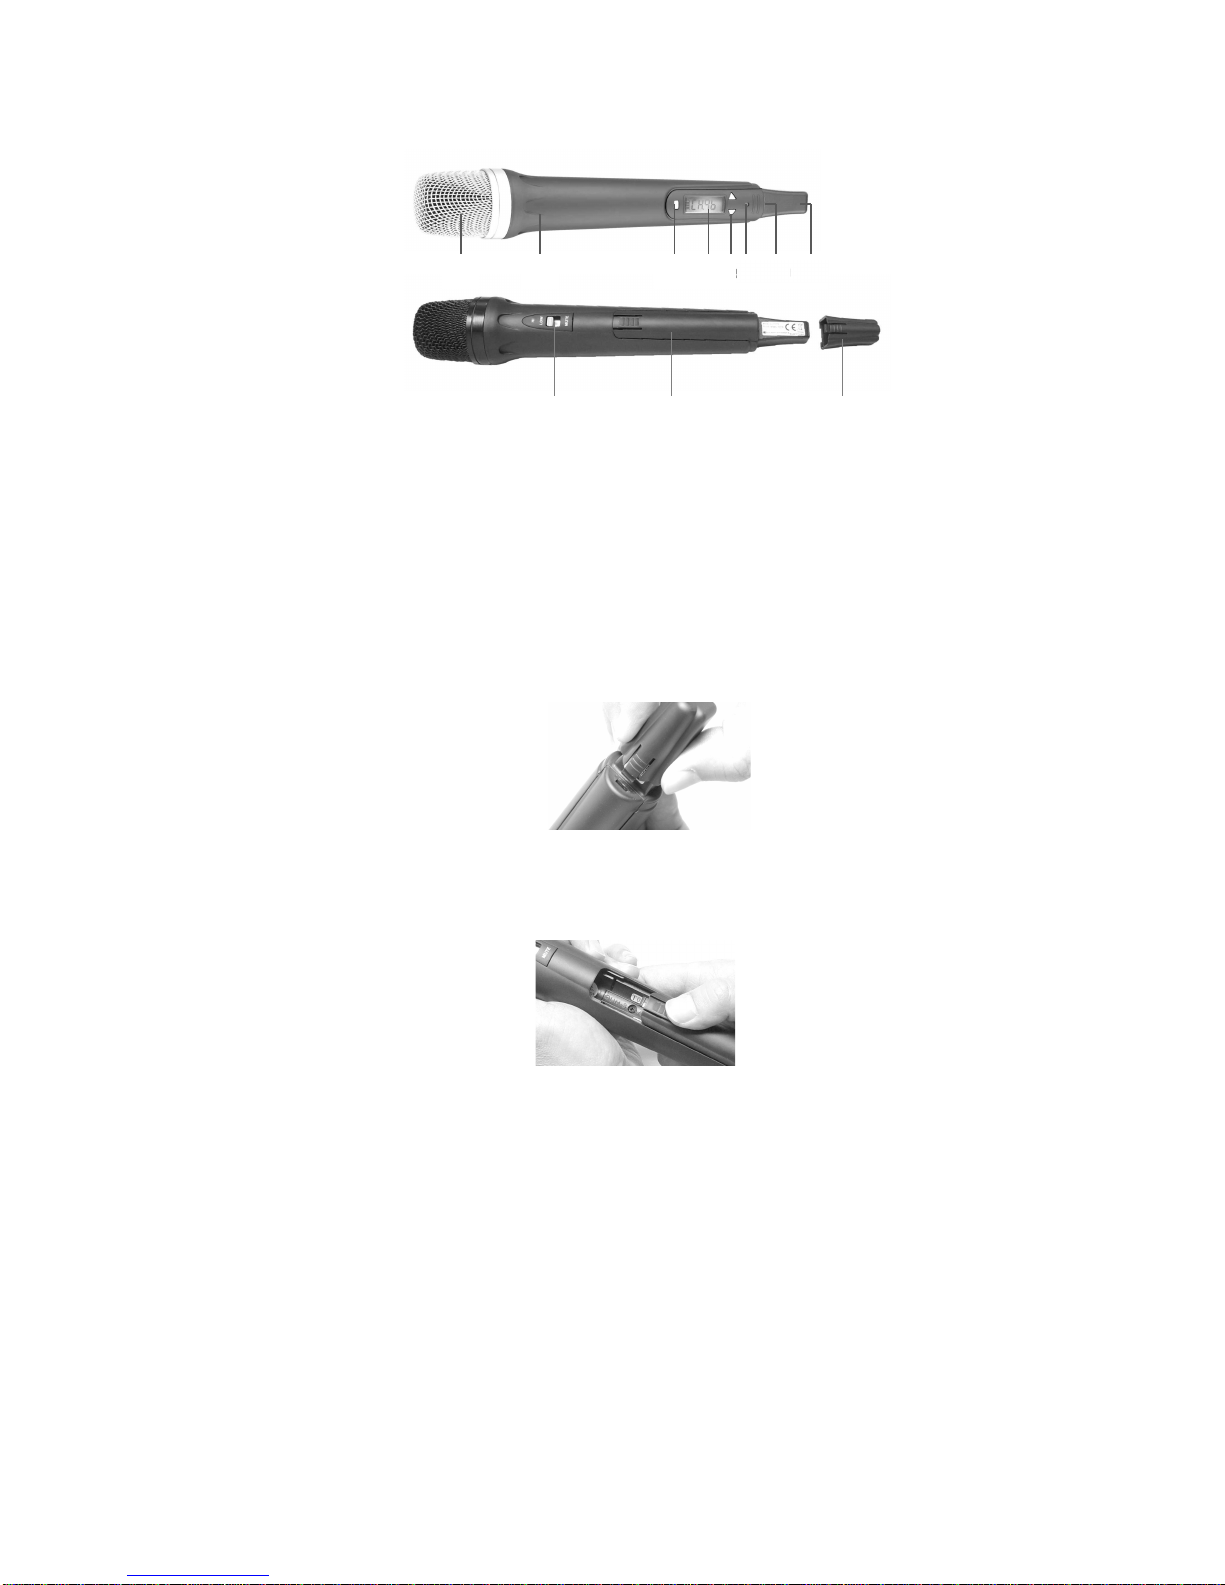
HF MICROPHONE
Descriptio
a. Anti-pop grille
b. Microphone « soft touch » body
c. Channel set button
d. LCD screen : displays channel number /
battery status / frequency
e. Up / Down selector
f. On / Off indicator
g. On / Off switch
h. Battery charge terminals
i. HI / LOW / MUTE : sensitivity selector
j. Batteries cover
k. Protect cap
Batteries i stallatio
Remove the protect cap ( ) and the cover (j) as indicated on the picture. Insert two al aline AA 1.5 V batteries or two
rechargeable 1.2 V Ni-MH batteries. Never use batteries with capacity exceeding 2300 mAh.
Put the cover and the cap bac . The cap maintains the cover loc ed.
Fu ctio
1. Press button (g) 2 to 3 seconds to switch the microphone on. The LCD displays “ON” then the channel number.
2. Channel selection: press button (c) 3 seconds, when the indication blin s press
/
(e) to select a new channel.
Press (c) again to confirm.
To display the frequency value (MHz) press
/
(e) continuously.
3. Chec that the microphone and the receiver are on the same channel.
e
i
j
k
d
c
g
h
a
b
e
f
7

HI: max. sensitivity
LOW : min. sensitivity
MUTE : sound mute
To mute the microphone without switching the transmission off, use the MUTE position.
HI / LOW positions correspond to two different sensitivities. It can be adjusted depending on the audio level.
The batteries status can be easily chec ed than s to the left side icon on the LCD. The transmission quality depends on the
energy of the batteries so it is recommended to chec it before every use.
Batteries charge
The microphone is equipped with a charging terminal, so there is no need to remove the rechargeable batteries from their
compartment.
Remove the cap ( ) and connect the charging wire as indicated on the picture. Chec that the charger is compatible with the
rechargeable battery elements.
Warning,
There is a risk of explosion in trying to recharge alkaline or other disposable batteries.
In case the device is not used during a long period of time, it is recommended to remove the batteries anyway.
8

AUDIO MODULE
Fo ctio s
a. USB : USB port
b. POWER On / Off switch
c. CD compartment: compatible with 12 cm CD / CD-R / CD-RW
d. LCD screen: display file / time / source / mode / status
e. NOR : bac to normal speed after a pitch modification
f. HI : speed increase (pitch), 10 variations
g. LO speed decrease (pitch), 10 variations
h. VOLUME : volume control
i. SD CARD : SD card port
j. SD / USB / CD : source selector
. FOLDER : folder selector (MP3 files)
l. FB : Fast bac ward
m. F.F. : Fast forward
n. REV : previous file
o. F.WD : next file
p. PLAY / PAUSE : play / pause
q. STOP / EJ : double press to stop, triple press to eject the CD.
Remote Co trol
1.
Eject / Insert CD : press .
2.
Sequence program :
• In CD mode press and use numeric eys 0 ~ 9.
•Press to confirm. Repeat for each memory, then press
to play the program.
•Double press to cancel.
3.
PROGPROG
PROGPROG
k
l
j
m
o
p
q
a
b
c
d
e
f
g
h
i
9

Ra dom play: press , the LCD displays « SHUFFLE » and the device starts to play.
Use and to go to next or previous trac .
4.
Repeat :
•In CD mode, press once to display « REPEAT ALL », all the CD trac s will be replayed.
•Press twice to display « REPEAT 1 », only the selected trac will be replayed.
To cancel the repeat function press again.
•In MP3 mode, press once to repeat all trac s (REPEAT ALL), twice for folder (REPEAT FOLDER) and
three times to repeat only one trac (REPEAT 1).
•To cancel the repeat function press again.
5.
0 ~ 9
Numeric eys
6.
Folder selection (MP3)
7.
Play / Pause
8.
Stop
9.
Next
10.
Previous
11.
Fast Bac ward; press again to play
12.
Fast Forward ; press again to play
13.
Source selection CD → USB → SD; press to confirm.
14.
A-B: Replay a selected section of trac . Press once to start the point of section, press a second time to end the
selected point and start to play this section repeatedly.
15.
Mute function. Press again bac to the normal mode
16.
Confirm.
17.
LOW, NOR, HIGH : Pitch adjustment.
18.
Always direct the remote control towards the sensor of the audio module. The effective wor ing distance is best at 3
meters, max. 5 meters.
Battery I stallatio
1.
Right push the latch to pull out the battery form the compartment
2.
Insert CR2025 3 Volts battery, the positive pole must face up.
RANRAN
FOLDERFOLDER
CD
USB/SD
CD
USB/SD
REPREP
REPREP
REPREP
REPREP
REPREP
1
0

TECHNICAL SPECIFICATIONS
WARRANTY
This device is warranted parts and labor against any manufacturing defects for a period of two years from the date of purchase
by the first user.
C
o d
i
t
i
o
s
1. The unit has been installed and implemented by observing the safety instructions in this operating manual.
2. The device was not diverted from its destination, either voluntary or accidental, and suffered no deterioration or
modification other than those described here or explicitly authorized by AUDIOPOLE.
3. All modifications or repairs have been carried out by an authorized service station.
4. The defective product must be returned with the dealer who made the sale or to an authorized service station with proof
of purchase.
5. The device was properly pac aged to avoid damage in transport.
1
1

22, rue Édouard Buffard, Z.A.C. de la Charbonnière, Montévrain - 77771 Marne-la-Vallée Cedex 4 - France
Tél : + 33 (0)1 60 54 32 00 - Fax : + 33 (0) 1 60 54 31 90 - www.audiopole-pa.com - www.audiopole.fr
Table of contents
Other Audiopole Speakers manuals


