manuals.online logo
Brands
  1. Home
  2. •
  3. Brands
  4. •
  5. Audiovox
  6. •
  7. Stereo System
  8. •
  9. Audiovox 128-4874A User manual

Audiovox 128-4874A User manual

DAY PACIFIC MOUNTAIN CENTRAL
TIME ZONE
5:30 AM - 4 PM
6 AM - 2 PM
MON.- FRI.
SATURDAY 7:30 AM - 6 PM
8 AM - 4 PM 8:30 AM - 7 PM
9 AM - 5 PM
6:30 AM - 5 PM
7 AM - 3 PM
InstallationInstructionsfor
Stereo Systems
®
CALL TOLL-FREE FOR ANSWERS TO INSTALLATION QUESTIONS: 1-800-645-7102
INDEINDE
INDEINDE
INDEXX
XX
X
HowToUseThisManual/KitInformation..............................................................................
UniversalandImportCarInstallations....................................................................................
Chevrolet-Oldsmobile-Pontiac-Buick-GMC-Cadillac-SaturnInstallations..............................
Ford-Lincoln-MercuryInstallations........................................................................................
Chrysler-Dodge-PlymouthInstallations.................................................................................
WiringDiagram....................................................................................................................
Page 1
Page 2
Pages 3, 4
Pages 5, 6
Page 7
Page 8
EASTERN
KK
KK
KII
II
ITINFORMATINFORMA
TINFORMATINFORMA
TINFORMATT
TT
TIONION
IONION
ION
1. The years shown in the Kit Listing below are approximate. Always check the application chart at your retail store
to find information on your specific make, model, and year of vehicle. If a kit is required, read the description on the
kit you intend to purchase to make sure it applies to your vehicle. If you have any doubts or questions, call our toll-free
"HELP" line.
2. The kitsshownbelow areAudiovoxkits. Your retailermaysellkitsmade byother manufacturerswhichmay alsobe usable
to install this radio. Always check the kit application before purchasing it to make sure it will work with your vehicle.
3. If you believe you need a kit but cannot find a retail store where it is available, call our toll-free "HELP" line.
KK
KK
KII
II
ITLISTTLIST
TLISTTLIST
TLISTINGING
INGING
ING
VEHICLE TYPE
Chevrolet-Oldsmobile-Buick-Pontiac-Cadillac-Saturn...
Chevrolet-GMC Full Size Vans ...................................
Chevrolet-GMC Full Size Pickups ...............................
Chrysler-Dodge-Plymouth ...........................................
Ford-Lincoln-Mercury ..................................................
AMC-Jeep-Eagle . .......................................................
KIT REQUIREMENT/NOTES
No Kit Required
AX-93-FCGM
No Kit Required
AX-88-CHV
No Kit Required
AX-88-CHT
AX-93-FCGM
Refer to In-Store Chart
No Kit Required
AX-93-FCGM
AX-88-SNP
No Kit Required
1981 and Older ..............................
1982 and Newer .............................
1987 and Older ..............................
1988 and Newer ..............................
1987 and Older ..............................
1988 and Newer ..............................
U.S. Built 1974 and Newer ..............
Imported .........................................
1984 and Older ...............................
1985 through 1990 ..........................
1991 and Newer ..............................
1971 and Newer ..............................
IMPORTS:
Acura-Audi-BMW-Daihatsu-Fiat-Honda-Hyundai-Mercedes-
Peugeot-Porsche-Saab-Subaru-Volkswagen-Volvo-Yugo......................
Nissan (Most Models) :1982 and Newer ............................................
Mazda(MostModels):1986andNewer...................................................
Toyota(MostModels):1982andNewer...................................................
For vehicles not listed or more specific information, refer to the in-store application chart or call our "HELP" line.
* Refer to In-Store Chart to determine if kit is required.
Will Fit Most Years; Some Require AX-88-SNP Kit *
Will Fit Most Years; Some Require AX-88-NAB Kit *
Will Fit Most Years; Some Require AX-87-MAZ Kit *
Will Fit Most Years; Some Require AX-88-TOY Kit *
HOHO
HOHO
HOWTWT
WTWT
WTOUSETHISMAOUSETHISMA
OUSETHISMAOUSETHISMA
OUSETHISMANUALNUAL
NUALNUAL
NUAL
1. Identify the make and year of the car in which you will be installing this sound system.
2. Refer to the Kit Information and Kit Listing sections to determine if a kit is required.
3. If a kit is required, follow the directions in Kit Information section.
4. Follow the specific installation instructions for your particular make of car as listed in the index.
NOTE:
Due to the wide variety of import cars and the different installations required, this manual does not show specific
installationsinthesevehicles. However,thissoundsystemcanbeinstalledinmanyimportcarsbyfollowingthe"Universal
Installation" section on page 2. Check the application chart at your retail store or call our toll-free "HELP" line for specific
information on your particular car.
-1-
HEXNUT
PERFORATED STRAP
SCREWSTUD
TRIMPLATE
EXISTING OPENING
METALPARTOF
DASHBOARD
DRILL HOLE IF NECESSARY
HEXNUT
SCREW
SHAFTNUT
DASHBOARD
RADIO
SHAFTNUTS
BACK-UPPLATE
-2-
UNIUNI
UNIUNI
UNIVERSAL INSTVERSAL INST
VERSAL INSTVERSAL INST
VERSAL INSTALLALL
ALLALL
ALLAA
AA
ATT
TT
TION FOR VEHICLESION FOR VEHICLES
ION FOR VEHICLESION FOR VEHICLES
ION FOR VEHICLES
WIWI
WIWI
WITH ATH A
TH ATH A
TH AN EN E
N EN E
N EXISTXIST
XISTXIST
XISTING RING R
ING RING R
ING RAA
AA
ADIO OPENINGDIO OPENING
DIO OPENINGDIO OPENING
DIO OPENING
This installation is designed for cars, trucks, vans, and boats that have an existing radio opening. It can also be
used as an option on some of the vehicles listed as requiring the AX-88-SNP kit. It will not work on all vehicles,
but can be used on most newer Fords and many imports.
1. Inspect the Existing Radio Opening:
A. Use the trimplate supplied with the radio to cover the existing opening. If it completely covers the opening,
you can install the radio as explained below. If it does not cover the opening, you will need an installation
kit.
B. Check that there will be sufficient space behind the dashboard for the radio chassis.
2. Wire the Radio to the Vehicle's Wiring:
A. In most cases it is easier to wire the radio before mounting it. Place the radio near the dashboard so the
wires can be led through the opening.
B. Carefully follow the diagram on page 8 to wire the radio, making certain all connections are secure and
insulated with wire nuts or electrical tape to insure proper operation of the unit.
C. After completing the wiring, turn the unit on to confirm operation (ignition switch must be "on"). If unit does
not operate, re-check all wiring until problem is corrected. Once proper operation is achieved, turn off unit
and ignition switch, and proceed with final mounting of the radio.
3. Mounting the Radio:
A. Thread a shaft nut half-way down each radio shaft.
B. Place a metal back-up plate on each radio shaft against the shaft nut.
C. Position the radio behind the dashboard opening so that the back-up plates are snug against the back of
the opening. Adjust the shaft nuts behind the back-up plates so that the desired amount of radio extends
throughtheopening. Ifpossible,thebestappearanceisusuallyachievedwhenthereisenoughoftheradio
extending to be flush with the front of the trimplate.
D. Place the trimplate over the front of the radio and secure it with a shaft nut on each radio shaft.
E. Attach one end of the perforated support strap (supplied) to the screw stud on the radio using the hex nut
provided. Fasten the other end of the perforated strap to a secure part of the dashboard either above or
below the radio using the screw and nut provided. Bend the strap to position it as necessary.
CAUTION: The rear of the radio must be supported with the strap to prevent damage to the dashboard from
the weight of the radio or improper operation of the radio due to vibration.
F. Install knobs on radio shafts.
8:30am-7:00pmEastern
9:00am-5:00pmEastern
Monday-Friday
Saturday
HELP!
1-800-645-49941-800-645-4994
1-800-645-49941-800-645-4994
1-800-645-4994
PERFORATED STRAP
SCREWSTUD
NOSE PIECE COLLAR
(INCLUDED WITH RADIO)
METAL PART OF
DASH BOARD
RADIO
DRILL HOLE IF NECESSARY
HEX
HEXNUT
SHAFTNUT
SCREW
TRIM FOR "GM"
DASHBOARD SHAFTNUTS
CHECHE
CHECHE
CHEVRVR
VRVR
VROLET-OLDSMOBILE-BUICK-PONTOLET-OLDSMOBILE-BUICK-PONT
OLET-OLDSMOBILE-BUICK-PONTOLET-OLDSMOBILE-BUICK-PONT
OLET-OLDSMOBILE-BUICK-PONTII
II
IAC-GMC-CAAC-GMC-CA
AC-GMC-CAAC-GMC-CA
AC-GMC-CADILLDILL
DILLDILL
DILLAC INSTAC INST
AC INSTAC INST
AC INSTALLALL
ALLALL
ALLAA
AA
ATT
TT
TIONION
IONION
ION
1981A1981A
1981A1981A
1981ANDOLDERNDOLDER
NDOLDERNDOLDER
NDOLDER
Important-This installation is designed for 1981 and older U.S. made GM cars, trucks, and vans. For 1981 and
newer vehicles, an installation kit may be required. See Kit Listing on Page 1 of this manual or refer to the in-store
application chart. If a kit is not required, use the following instructions.
1. Remove the Existing Radio:1. Remove the Existing Radio:
1. Remove the Existing Radio:
A. Remove radio knobs and shaft nuts behind the knobs.
B. Locate and remove support brace at back of radio.
C. Push radio back into dashboard to access the wiring and antenna cables plugged into the rear of the
chassis.
D. Un-plug the wiring harness(es) and antenna cable and remove the radio.
2. Wire the New Radio:2. Wire the New Radio:
2. Wire the New Radio:
A. In most cases it is easier to wire the radio before mounting it. Place the radio near the dashboard so the
wires can be led through the opening.
B. Carefully follow the diagram on page 8 to wire the radio, making certain all connections are secure and
insulated with wire nuts or electrical tape to insure proper operation of the unit.
C. After completing the wiring, turn the unit on to confirm operation (ignition switch must be "on"). If unit does
not operate, re-check all wiring until problem is corrected. Once proper operation is achieved, turn off unit
and ignition switch, and proceed with final mounting of the radio.
3. Install the New Radio:3. Install the New Radio:
3. Install the New Radio:
A. Thread a shaft nut half-way down each radio shaft.
B. Trim the top edge off of the nosepiece collar at the "CUT OFF FOR GM" mark and place the collar on radio
nosepiece.
C. Place the radio behind dashboard and through the radio opening. Adjust the position of the shaft nuts so
that the radio nosepiece and collar are flush against the back of the dashboard.
D. Secure the radio with a shaft nut on each radio shaft.
E. Attach one end of the perforated support strap (supplied) to the screw stud on the radio using the hex nut
provided. Fasten the other end of the perforated strap to a secure part of the dashboard either above or
below the radio using the screw and nut provided. Bend the strap to position it as necessary.
CAUTION: The rear of the radio must be supported with the strap to prevent damage to the dashboard from
the weight of the radio or improper operation of the radio due to vibration.
F. Install knobs on radio shafts.
-3-
1-800-645-49941-800-645-4994
1-800-645-49941-800-645-4994
1-800-645-4994
8:30am-7:00pmEastern
9:00am-5:00pmEastern
Monday-Friday
Saturday
HELP!
HEXNUT PERFORATED STRAP
SCREWSTUD
SCREW
RADIO
MOUNTING PLATE FROM KIT
(NOT INCLUDED WITH RADIO)
EXISTING DASH TRIMPANEL
HEXNUT
SHAFTNUT
CHECHE
CHECHE
CHEVRVR
VRVR
VROLET-OLDSMOBILE-BUICK-PONTOLET-OLDSMOBILE-BUICK-PONT
OLET-OLDSMOBILE-BUICK-PONTOLET-OLDSMOBILE-BUICK-PONT
OLET-OLDSMOBILE-BUICK-PONTII
II
IAC-GMC-CAAC-GMC-CA
AC-GMC-CAAC-GMC-CA
AC-GMC-CADILLDILL
DILLDILL
DILLAC-SAAC-SA
AC-SAAC-SA
AC-SATURNTURN
TURNTURN
TURN
INSTINST
INSTINST
INSTALLALL
ALLALL
ALLAA
AA
ATT
TT
TION -1982AION -1982A
ION -1982AION -1982A
ION -1982ANDNEWERNDNEWER
NDNEWERNDNEWER
NDNEWER
Important-This installation is designed for most 1982 and newer GM cars, trucks, and vans where an installation
kit is required. See Kit Listing on Page 1 of this manual or refer to the in-store application chart. If a kit is not
required, use the instructions on Page 3.
1. Remove the Existing Radio:1. Remove the Existing Radio:
1. Remove the Existing Radio:
A. Remove the existing dashboard trimpanel surrounding the radio opening. This panel is usually secured
by screws and/or snap-in clips.
B. Remove the screws used to secure the radio to the sub-dashboard.
C. Pull the radio forward to access the wiring and antenna cables plugged into the rear of the chassis.
D. Un-plug the wiring harness(es) and antenna cable and remove the radio.
2. Install the New Radio:2. Install the New Radio:
2. Install the New Radio:
A. Follow the instructions included with the installation kit to attach the radio to the mounting plate supplied
with the kit.
B. Place the radio near the dashboard so the wires can be led through the opening and following the
instructions of Step 2 on Page 2 and diagram on Page 8, carefully wire the radio making certain all
connections are secure and insulated and confirm proper operation.
C. Install the radio/mounting plate assembly to the sub-dashboard according to instructions of installation kit.
D. Attach one end of the perforated support strap (supplied) to the screw stud on the radio using the hex nut
provided. Fasten the other end of the perforated strap to a secure part of the dashboard either above or
below the radio using the screw and nut provided. Bend the strap to position it as necessary.
CAUTION: The rear of the radio must be supported with the strap to prevent damage to the dashboard from
the weight of the radio or improper operation of the radio due to vibration.
E. Replace the dashboard trimpanel.
F. Install knobs on radio shafts.
-4-
IMPORTANT
A MOUNTING KIT IS
REQUIRED
FOR THIS INSTALLATION
PERFORATED STRAP
HEXNUT
SCREWSTUD
RADIO
NOSE PIECE COLLAR
(INCLUDED WITH RADIO)
SHAFTNUTS
DASHBOARD
METAL PART OF DASHBOARD
DRILL HOLE IF
NECESSARY
HEX NUT
SCREW
FORD-LINCOLN-MERCURFORD-LINCOLN-MERCUR
FORD-LINCOLN-MERCURY INSTY INST
Y INSTY INST
Y INSTALLALL
ALLALL
ALLAA
AA
ATT
TT
TION - 1984AION - 1984A
ION - 1984AION - 1984A
ION - 1984ANDOLDERNDOLDER
NDOLDERNDOLDER
NDOLDER
Important-This installation is designed for 1984 and older U.S. made Ford cars, trucks, and vans. For newer
vehicles, an installation kit may be required. See Kit Listing on Page 1 of this manual or refer to the in-store chart.
1. Remove the Existing Radio:1. Remove the Existing Radio:
1. Remove the Existing Radio:
A. Remove radio knobs and shaft nuts behind the knobs.
B. Locate and remove support brace at back of radio.
C. Pushradiobackintodashboardtoaccessthewiringandantennacablespluggedintotherearofthechassis
D. Un-plug the wiring harness(es) and antenna cable and remove the radio.
2. Wire the New Radio:2. Wire the New Radio:
2. Wire the New Radio:
A. In most cases it is easier to wire the radio before mounting it. Place the radio near the dashboard so the
wires can be led through the opening.
B. Carefully follow the diagram on pages 8 to wire the radio, making certain all connections are secure and
insulated with wire nuts or electrical tape to insure proper operation of the unit.
C. After completing the wiring, turn the unit on to confirm operation (ignition switch must be "on"). If unit does
not operate, re-check all wiring until problem is corrected. Once proper operation is achieved, turn off unit
and ignition switch, and proceed with final mounting of the radio.
3. Install the New Radiio:3. Install the New Radiio:
3. Install the New Radiio:
A. Thread a shaft nut halfway down each radio shaft.
B. Place the nosepiece collar on the radio nosepiece.
C. Place the radio behind dashboard and through the radio opening. Adjust the position of the shaft nuts so
that the radio nosepiece and collar are flush against the back of the dashboard.
D. Secure the radio with a shaft nut on each radio shaft.
E. Attach one end of the perforated support strap (supplied) to the screw stud on the radio using the hex nut
provided. Fasten the other end of the perforated strap to a secure part of the dashboard either above or
below the radio using the screw and nut provided. Bend the strap to position it as necessary.
CAUTION: The rear of the radio must be supported with the strap to prevent damage to the dashboard from
the weight of the radio or improper operation of the radio due to vibration.
F. Install knobs on radio shafts.
-5-
IMPORTANT
A MOUNTING KIT IS
REQUIRED
FOR THIS INSTALLATION
HELP!
RADIO
HEXNUT SCREWSTUD
PERFORATED STRAP
EXISTING DASH TRIMPANEL
SHAFTNUTS
MOUNTING PLATE FROM KIT
(NOT INCLUDED WITH RADIO)
SCREW
HEXNUT
Monday-Friday
Saturday 8:30am-7:00pmEastern
9:00am-5:00pmEastern
-6-
IMPORTANT
A MOUNTING KIT IS
REQUIRED
FOR THIS INSTALLATION
FORD-LINCOLN-MERCURFORD-LINCOLN-MERCUR
FORD-LINCOLN-MERCURY INSTY INST
Y INSTY INST
Y INSTALLALL
ALLALL
ALLAA
AA
ATT
TT
TION - 1985 AION - 1985 A
ION - 1985 AION - 1985 A
ION - 1985 AND NEWERND NEWER
ND NEWERND NEWER
ND NEWER
Important-This installation is designed for most 1985 through 1990 U.S. made Ford cars, and vans and an
installation kit is required for these vehicles. See Kit Listing on Page 1 of this manual or refer to the in-store
application chart. For 1991 and newer vehicles, the radio can be installed as shown on Page 2 of this manual
or you can use the AX-88-SNP kit. Instructions for use of the AS-88-SNP kit are included with the kit and are not
shown in this manual.
1. Remove the Existing Radio:1. Remove the Existing Radio:
1. Remove the Existing Radio:
A. Remove existing dashboard trimpanel surrounding the radio opening. This panel is usually secured by
screws and/or snap-in clips.
B. Remove the screws used to secure radio to the sub-dashboard.
C. Pull the radio forward to access the wiring and antenna cables plugged into the rear of the chassis.
D. Un-plug the wiring harness(es) and antenna cable and remove the radio.
2. Install the New Radio:2. Install the New Radio:
2. Install the New Radio:
A. Follow the instructions included with the installation kit to attach the radio to the mounting plate supplied
with the kit.
B. Place the radio near the dashboard so the wires can be led through the opening and following the
instructions of Step 2 on Page 2 and diagram on Page 8, carefully wire the radio making certain all
connections are secure and insulated and confirm proper operation.
C. Install the radio/mounting plate assembly to the sub-dashboard according to instructions of installation kit.
D. Attach one end of the perforated support strap (supplied) to the screw stud on the radio using the hex nut
provided. Fasten the other end of the perforated strap to a secure part of the dashboard either above or
below the radio using the screw and nut provided. Bend the strap to position it as necessary.
CAUTION: The rear of the radio must be supported with the strap to prevent damage to the dashboard from
the weight of the radio or improper operation of the radio due to vibration.
E. Replace the dashboard trimpanel.
F. Install knobs on radio shafts.
1-800-645-49941-800-645-4994
1-800-645-49941-800-645-4994
1-800-645-4994
HEXNUT PERFORATED STRAP
SCREWSTUD
RADIO
EXISTING DASH TRIMPANEL
SCREW SHAFTNUT
HEXNUT
MOUNTINGPLATEFROMKIT
(NOTINCLUDEDWITHRADIO)
HELP!
Monday-Friday
Saturday 8:30am-7:00pmEastern
9:00am-5:00pmEastern
-7-
IMPORTANT
A MOUNTING KIT IS
REQUIRED
FOR THIS INSTALLATION
CHRCHR
CHRCHR
CHRYY
YY
YSLER-DODGE-PLSLER-DODGE-PL
SLER-DODGE-PLSLER-DODGE-PL
SLER-DODGE-PLYY
YY
YMOUTH INSTMOUTH INST
MOUTH INSTMOUTH INST
MOUTH INSTALLALL
ALLALL
ALLAA
AA
ATT
TT
TIONION
IONION
ION
ALLU.S.MAALLU.S.MA
ALLU.S.MAALLU.S.MA
ALLU.S.MADECADECA
DECADECA
DECARS,TRUCKS,ARS,TRUCKS,A
RS,TRUCKS,ARS,TRUCKS,A
RS,TRUCKS,ANDVANDVA
NDVANDVA
NDVANSBUILNSBUIL
NSBUILNSBUIL
NSBUILTSINCETSINCE
TSINCETSINCE
TSINCE19741974
19741974
1974
Important-This radio cannot be installed in any U.S. made Chrysler, Dodge, or Plymouth vehicle without an
installation kit. Refer to the Kit Listing on Page 1 for the required kit. Complete kit installation is explained in the
instructions included with the kit.
1. Remove the Existing Radio:1. Remove the Existing Radio:
1. Remove the Existing Radio:
A. Remove the existing dashboard trimpanel surrounding the radio opening. This panel is usually secured
by screws and/or snap-in clips.
B. Remove the two large screws used to secure radio to the sub-dashboard.
C. Pull the radio forward to access the wiring and antenna cables plugged into the rear of the chassis.
D. Un-plug the wiring harness(es) and antenna cable and remove the radio.
2. Install the New Radio:2. Install the New Radio:
2. Install the New Radio:
A. Follow the instructions included with the installation kit to attach the radio to the mounting plate supplied
with the kit.
B. Place the radio near the dashboard so the wires can be led through the opening and following the
instructions of Step 2 on Page 2 and the diagram on Page 8, carefully wire the radio making certain all
connections are secure and insulated and confirm proper operation.
C. Install the radio/mounting plate assembly to the sub-dashboard according to instructions of installation kit.
D. Attach one end of the perforated support strap (supplied) to the screw stud on the radio using the hex nut
provided. Fasten the other end of the perforated strap to a secure part of the dashboard either above or
below the radio using the screw and nut provided. Bend the strap to position it as necessary.
CAUTION: The rear of the radio must be supported with the strap to prevent damage to the dashboard from
the weight of the radio or improper operation of the radio due to vibration.
E. Replace the dashboard trimpanel.
F. Install knobs on radio shafts.
1-800-645-49941-800-645-4994
1-800-645-49941-800-645-4994
1-800-645-4994
Audiovox Corporation, 150 Marcus Blvd., Hauppauge N.Y. 11788
FormNo.128-4874A
4SPEAKERWIRINGUSING4OHMSPEAKERS
RIGHT REAR SPEAKER
RIGHT FRONT SPEAKER
LEFT REAR SPEAKER
LIGHTGREEN
VIOLET
WHITE YELLOW
VIOLET
WHITE
LIGHTGREEN
YELLOW
RIGHT SPEAKER
USE WIRE NUTS OR SOLDER AND TAPE ALL SPLICES
LEFT SPEAKER
RADIO
BLACK
ORANGE w/WHITE STRIPE FUSED WIRE
GROUNDED METAL
PART
OF CAR BODY
(REMOVE ANY
PAINT)
EXISTING ANTENNA CABLE
ANTENNA
WIRING DIWIRING DI
WIRING DIWIRING DI
WIRING DIAA
AA
AGRGR
GRGR
GRAA
AA
AMM
MM
M
CAUTION: NEVER TURN ON RADIO WITHOUT ALL SPEAKERS CONNECTED. NEVER CONNECT RADIO TO ONLY ONE SPEAKER - A MINIMUM
OF TWO MUST BE USED.
ANTENNA SOCKET
ON REAR OF
RADIO
4-8OHMS
4 - 8 OHMS
IMPORTANT
CONNECT THE ORANGE w/WHITE
STRIPE WIRE TO THE "RADIO" OR
"ACCESSORY" FUSE IN THE FUSE
BLOCK OF THE VEHICLE.
LEFT FRONT SPEAKER
-8-

Other Audiovox Stereo System manuals

Audiovox CE520 User manual

Audiovox

Audiovox CE520 User manual

Audiovox XM XMAS100-UG002 User manual

Audiovox

Audiovox XM XMAS100-UG002 User manual

Audiovox MVS6950 User manual

Audiovox

Audiovox MVS6950 User manual

Audiovox CE405 User manual

Audiovox

Audiovox CE405 User manual

Audiovox CE5005 User manual

Audiovox

Audiovox CE5005 User manual

Audiovox CE506SLK User manual

Audiovox

Audiovox CE506SLK User manual

Audiovox CE502 User manual

Audiovox

Audiovox CE502 User manual

Audiovox CE620 User manual

Audiovox

Audiovox CE620 User manual

Audiovox CE500S User manual

Audiovox

Audiovox CE500S User manual

Audiovox Prestige P-57 User manual

Audiovox

Audiovox Prestige P-57 User manual

Audiovox CE445 User manual

Audiovox

Audiovox CE445 User manual

Audiovox CD6229i User manual

Audiovox

Audiovox CD6229i User manual

Audiovox CE525 User manual

Audiovox

Audiovox CE525 User manual

Audiovox CE445C User manual

Audiovox

Audiovox CE445C User manual

Audiovox CE448 User manual

Audiovox

Audiovox CE448 User manual

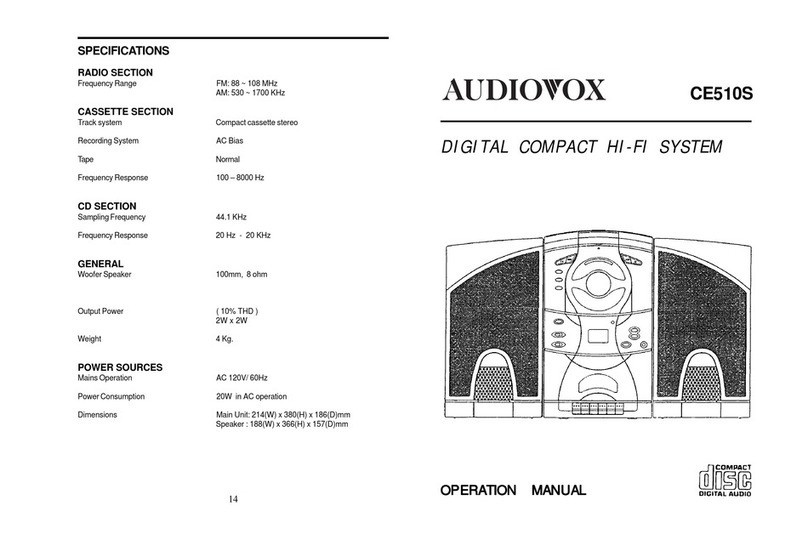
Audiovox Digital Compact Hi-Fi System CE510S User manual

Audiovox

Audiovox Digital Compact Hi-Fi System CE510S User manual

Audiovox CE503PBTG User manual

Audiovox

Audiovox CE503PBTG User manual

Audiovox CE304R User manual

Audiovox

Audiovox CE304R User manual

Audiovox ACD-30 User manual

Audiovox

Audiovox ACD-30 User manual

Audiovox Stereo System User manual

Audiovox

Audiovox Stereo System User manual

Audiovox Mini Hi-Fi System User manual

Audiovox

Audiovox Mini Hi-Fi System User manual

Audiovox CE600MP User manual

Audiovox

Audiovox CE600MP User manual

Audiovox CE620 User manual

Audiovox

Audiovox CE620 User manual

Audiovox CD1072 User manual

Audiovox

Audiovox CD1072 User manual

Popular Stereo System manuals by other brands

DGTEC DG-iPodMSS user manual

DGTEC

DGTEC DG-iPodMSS user manual

Aiwa NSX-Aj14 Service manual

Aiwa

Aiwa NSX-Aj14 Service manual

Sanyo DC-DAB03 instruction manual

Sanyo

Sanyo DC-DAB03 instruction manual

LENCO NXT-01 Specifications

LENCO

LENCO NXT-01 Specifications

Aiwa CX-NMT50 operating instructions

Aiwa

Aiwa CX-NMT50 operating instructions

Blaupunkt MS BT 26e instruction manual

Blaupunkt

Blaupunkt MS BT 26e instruction manual

Sharp WF-1100W Service manual

Sharp

Sharp WF-1100W Service manual

Philips MCM118D/37B owner's manual

Philips

Philips MCM118D/37B owner's manual

Sony SVBK-170P Service manual

Sony

Sony SVBK-170P Service manual

Audioaccess AVR21EN installation instructions

Audioaccess

Audioaccess AVR21EN installation instructions

Yamaha R-1330 Service manual

Yamaha

Yamaha R-1330 Service manual

Philips NTRX700 user manual

Philips

Philips NTRX700 user manual

Philips FW-R33 Specifications

Philips

Philips FW-R33 Specifications

DAS AUDIO INTEGRAL-WPM1 user manual

DAS AUDIO

DAS AUDIO INTEGRAL-WPM1 user manual

Philips BTM2360/96 user manual

Philips

Philips BTM2360/96 user manual

Yamaha GX-900RDS owner's manual

Yamaha

Yamaha GX-900RDS owner's manual

Sony HD-XB4K Service manual

Sony

Sony HD-XB4K Service manual

Sony SHAKE-X70D manual

Sony

Sony SHAKE-X70D manual

manuals.online logo
manuals.online logoBrands
  • About & Mission
  • Contact us
  • Privacy Policy
  • Terms and Conditions

Copyright 2025 Manuals.Online. All Rights Reserved.