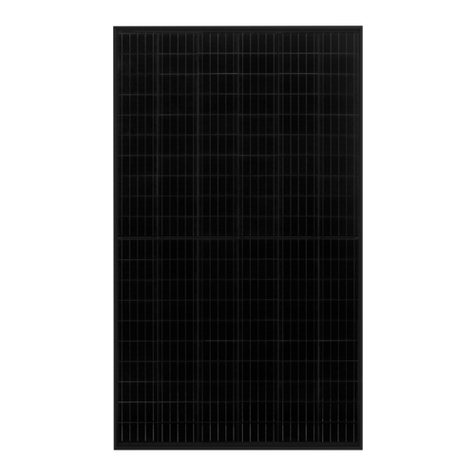
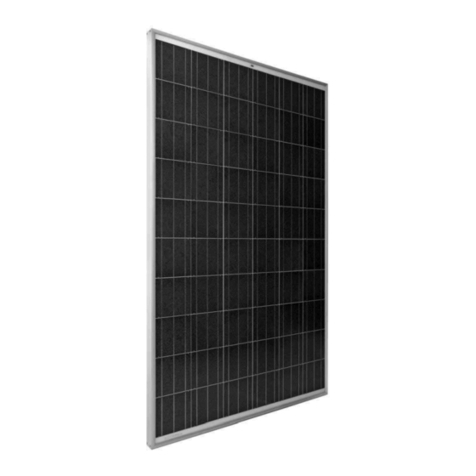
AUO PM072 series User manual

AUO Photovoltaic Module Installation
AUO Photovoltaic Module Installation AUO Photovoltaic Module Installation
AUO Photovoltaic Module Installation Manual
ManualManual
Manual
Version 2.0
Version 2.0Version 2.0
Version 2.0

Table of Contents
Table of ContentsTable of Contents
Table of Contents
Chapter 1 eneral Information
1.1 Introduction
1.2 Limited Warranty and Product Certification
1.3 Disclaimers
1.4 Safety Regulations
Chapter 2 Module Installation uidelines
2.1 Module Installation Methods
2.1.1 Bolted Installation
2.1.2 Clamp Installation
Chapter 3 Module Electrical Connection uidelines
3.1 Module rounding Method
3.1.1 Bolted rounding
3.1.2 Using Certified rounding Device for rounding
3.2 System rounding Method
Chapter 4 Maintenance uidelines
4.1 Cleaning Modules
4.2 Module Appearance Inspection
4.3 Module Connection and Cable Inspection

1
Chapter 1 eneral Information
1.1 Introduction
This Installation Manual describes the electrical characteristics and installation methods in the
use of the AUO Photovoltaic Module (hereinafter the "Module"). It also includes safety
precautions that must be taken into account before, during, and after installation. Compliance
with the recommendations in the Installation Manual will increase safety in the installation,
operation, and use of the Module. Please read the Installation Manual carefully before installing
the AUO Photovoltaic Module and keep the Installation Manual in storage for future reference.
[Important Reminder]
[Important Reminder][Important Reminder]
[Important Reminder]
THE INSTALLATION, OP
THE INSTALLATION, OPTHE INSTALLATION, OP
THE INSTALLATION, OPERATION, AND USE OF
ERATION, AND USE OF ERATION, AND USE OF
ERATION, AND USE OF THE AUO PHOTOVOLTAIC
THE AUO PHOTOVOLTAICTHE AUO PHOTOVOLTAIC
THE AUO PHOTOVOLTAIC
MODULE
MODULE MODULE
MODULE
REQUIRE TRAINED AND
REQUIRE TRAINED AND REQUIRE TRAINED AND
REQUIRE TRAINED AND CERTIFIED OR LICENSE
CERTIFIED OR LICENSECERTIFIED OR LICENSE
CERTIFIED OR LICENSED PROFESSIONALS WHO
D PROFESSIONALS WHO D PROFESSIONALS WHO
D PROFESSIONALS WHO ARE
ARE ARE
ARE
REQUIRED TO COMPLY W
REQUIRED TO COMPLY WREQUIRED TO COMPLY W
REQUIRED TO COMPLY WITH THE INSTALLATION
ITH THE INSTALLATIONITH THE INSTALLATION
ITH THE INSTALLATION
MANUAL
MANUAL MANUAL
MANUAL AND THE RELATED
AND THE RELATED AND THE RELATED
AND THE RELATED
RE ULATIONS AND LAWS
RE ULATIONS AND LAWSRE ULATIONS AND LAWS
RE ULATIONS AND LAWS
IN THE COUNTRY THE M
IN THE COUNTRY THE MIN THE COUNTRY THE M
IN THE COUNTRY THE MODULE IS INSTALLED I
ODULE IS INSTALLED IODULE IS INSTALLED I
ODULE IS INSTALLED IN.
N.N.
N.
IF THE CLIENT DOES N
IF THE CLIENT DOES NIF THE CLIENT DOES N
IF THE CLIENT DOES NOT FOLLOW THE INSTAL
OT FOLLOW THE INSTALOT FOLLOW THE INSTAL
OT FOLLOW THE INSTALLATION MANUAL AND AL
LATION MANUAL AND ALLATION MANUAL AND AL
LATION MANUAL AND ALL
L L
L
APPLICABLE LAWS FOR
APPLICABLE LAWS FOR APPLICABLE LAWS FOR
APPLICABLE LAWS FOR THE INSTALLATION, OP
THE INSTALLATION, OPTHE INSTALLATION, OP
THE INSTALLATION, OPERATION, AND USE OF
ERATION, AND USE OF ERATION, AND USE OF
ERATION, AND USE OF THE MODULE,
THE MODULE, THE MODULE,
THE MODULE,
IT COULD CAUSE DAN E
IT COULD CAUSE DAN EIT COULD CAUSE DAN E
IT COULD CAUSE DAN ER AND VOID THE LIMIT
R AND VOID THE LIMITR AND VOID THE LIMIT
R AND VOID THE LIMITE
EE
ED WARRANTY OF THE MO
D WARRANTY OF THE MOD WARRANTY OF THE MO
D WARRANTY OF THE MODULE.
DULE.DULE.
DULE.
1.2 Limited Warranty and Product Certification
Please refer to the limited warranty documents of the AUO Photovoltaic Module to learn
more about the details and restrictions of the product warranty.
The latest version can be found at the official website of AUO Solar under Download Center.
AUO Solar official website: http://solar.auo.com/
1.3 Disclaimers
AUO shall not be liable for any loss, damage, destruction, and expenses as a result or arising
from inappropriate installation, operation, use or maintenance.
AUO shall not be liable for any possible patent infringement and infringement of third-party
rights arising from the use of the AUO Photovoltaic Module. The client shall not obtain patent
or patent licensing, expressed or implied, through the use of the AUO Photovoltaic Module.
AUO retains the right to revise the Installation Manual, product specifications or product
information without prior notification.
1.4 Safety Regulations
The AUO Photovoltaic Module meets IEC 61215/IEC 61730 international standards with Class
A applications. It can be installed in systems that may come into direct contact with the public,

2
with a maximum voltage of greater than 50 VDC or with an output power of over 240 watts.
The Module also complies with IEC 61730-1/IEC 61730-2 standards while satisfying Class II
safety qualifications.
The AUO Photovoltaic Module is a power generation product and necessary safety and
protection measures must be taken to avoid electric shocks in the installation, operation, use,
and maintenance of the Module.
When installing modules at elevated positions, take appropriate safety and protection
measures to prevent personnel, tools, or the Module from falling from heights and causing
damage.
When installing the Module on a roof, the roof and the entire structure must retain a certain
level of fire resistance, and it must be evaluated by an architect or engineering experts to verify
that the roof can withstand the pressure and weight of the photovoltaic system (including the
Module).
Do not install, operate, or use the Module under hostile conditions such as high humidity, rain,
snow, or strong winds.
Operational Safety
Operational SafetyOperational Safety
Operational Safety
Please do not allow the packaging of the Module to sustain damage or falls; the Module
packaging must be stored in a dry and ventilated area sheltered from the rain.
Please refer to the printed instructions on the external packing box for the restriction on
the number of stacks of the package.
Before installing the Module, it is recommended not to open the Module packaging or
remove the Module from the original package.
For temporary placement after removing the Module from the packaging, please protect
the edges and corners of the Module from external damage.
When installing, using, or operating the Module, personnel must be equipped with
comprehensive protective equipment and use corresponding insulated tools (the
insulation protection capacity of protective equipment must be higher than the maximum
system voltage), such as wearing insulated shoes, insulated gloves, using dry insulation
tools etc.
When the Module is exposed to sunlight or other light sources, it may produce direct
current that can be fatal. Contact with charged components must be avoided to prevent
electric shocks or burns.
It is forbidden to use any tool to focus sunlight or other artificial light onto the Module.
Do not allow personnel to directly grasp the junction box or wires of the junction box to
move or transport the Module.

3
Do not place heavy objects on the front or back of the Module or damage the material on
the front and back of the Module.
The safety of the Module shall be ensured at all times. Avoid excessive vibration that may
cause hidden cracks in the cells, and prevent the Module from falling directly onto the
ground during transportation, as it may cause damage to the Module or the cells in the
Module.
Do not step, stand, or walk on the Module (when designing a system, consider planning
space or walkways for secure operations that can be used for the installation, operations,
or maintenance by personnel).
Do not dismantle or modify any components on the Module.
Do not make any additional processing on the external Module frame such as drilling
holes or cutting. With the exception of connecting the grounding wire for the Module, do
not damage or scratch the surface of the frame coating such as the anodic oxide layer on
the aluminum frame etc.
Do not add any substances onto the surface on the front and back of the Module.
It is forbidden to use a Module with a damaged front or back surface. In addition, prohibit
personnel from repairing damaged areas on the Module because contact with damaged or
broken surfaces or the Module frame may cause electric shocks.
Electrical Safety
Electrical SafetyElectrical Safety
Electrical Safety
The rated voltage and current of the Module is measured under standard testing
conditions. Under actual outdoor conditions, the voltage and current may exceed the
rated value under standard testing conditions (the environment and ambient temperature
at the site of the Module will affect the electrical characteristics of the Module; for
instance, reflected sunlight from the snow or low temperature (<25°C) would increase
the output in voltage, current or power). Therefore, please refer to the electrical
characteristics displayed on the Module and use 125% of the calculated value in the design
of the rated voltage, rated current, wire, fuse, and controller specifications and
parameters related to the output of the Module.
The Module automatically generates electricity under a light source and it is not equipped
with any switches or control. Power generation from the Module can be stopped by using
completely opaque material to cover the Module, moving the Module to a place with no
light source, or flipping the front of the Module onto a flat area (do not damage the
material on the front of the Module).
To prevent the dangers of electric arcs, burns, electrical shocks etc., the light source on
the front of the Module must be insulated (e.g. by covering with opaque materials) before
installation of the Module or system maintenance.
Before conducting electrical operations, please remove metal jewelry and objects from
your body. Be sure to wear appropriate protective equipment and use appropriate and
dry insulated tools. Do not conduct any operations if the Module or its component is

4
humid (e.g. junction box or connector etc.).
Do not disconnect the electrical connection when the Module is connected to a load to
prevent electric arcs or electric shocks.
Ensure that the connector is kept dry and clean. Do not use contaminated connectors for
connection (e.g. connectors with dust or moisture). To ensure the connector remains in
a normal state, please install the connector immediately after repackaging.
Ensure that the connection between connectors is seamless and the polarity connection is
correct.
Please connect grounding in accordance with the regulations of the installation site, the
country of the installation site, or IEC Standards.
Installation Safety
Installation SafetyInstallation Safety
Installation Safety
Do not install the Module in an area with flammable gas or flammable materials.
Do not install the Module in an area that may be flooded, partially soaked in water or
areas that are affected by continuous sprinkling.
The Module cannot be installed in areas with corrosive substances or areas that may affect
the safety or performance of the Module such as areas with salt spray, salt water, acid rain,
heavy industrial air pollution.
Consider the climate variations throughout the year when installing the Module. Avoid
shades produced by the surrounding environment that could shade the Module and affect
the power output and safety of the Module.
The Module operates normally between -40°C to +85°C. Please consider the average
monthly high and low temperatures of the installation site when installing the Module and
conduct installation procedures within a temperature range safe for humans.
The mechanical loading capacity (e.g. wind pressure or snow pressure) of the Module shall
be in accordance with requirements in the design of the system. Different installation
methods and installation sites require calculation by professionals to ensure that the
Module does not exceed its maximum permissible loading capacity.
Fire Safety
Fire SafetyFire Safety
Fire Safety
The fire safety classification of the AUO Photovoltaic Module under IEC61730-2
Standards is Class C. The laws and regulations, including related architectural regulations
on fire resistance capacity (the roof structural and installation method will affect the fire
resistance capacity of the architecture; fires may occur if the wrong method is adopted) of
the installation site or the country shall be followed when installing the Module.
When installing the Module on a roof, the material of the roof or the roof must be
covered with fire resistance material that corresponds to the fire resistance classification
of the Module. Make sure that there is sufficient space for ventilation between the Module
and the installation surface (a space larger than 10cm is recommended) for ventilation on
the back of the Module to prevent damage to the wires and to increase the performance

5
of the Module.
The laws and regulations of the installation site or the country shall be followed when
installing the Module. Use appropriate electrical components such as grounding
components, circuit breakers, or fuses.

6
Chapter 2 Module Installation uidelines
The Module should be installed at a location with the maximum amount of sunlight
throughout the year in accordance with local climate conditions. The Modules obtains
maximum power output when the Module faces direct sunlight. For installation in the
Northern Hemisphere under normal conditions, it is preferable to face the Module to the
south; whereas for installation in the Southern Hemisphere, it is preferable to face the Module
to the north.
It is recommended to install the Module at a tilt angle of at least 15 degrees to reduce dust
accumulation and facilitate the removal of water.
Before installing the Module, please verify that the site or building is suitable for installation
and meets the legal requirements of the site or country of installation. When installing on
buildings or rooftops, please take appropriate anti-seepage measures to prevent potential
seepage.
The company responsible for the installation must verify that the method of installation
satisfies the laws and requirements of the site or country of installation.
The installation method and racking system must be firm and stable. The racking system
installer must guarantee the sustainable and achievable load of the Module.
Please prevent shading or coverage of the Module by any substance, such as snow or flood, at
its lowest level to the ground during installation in accordance with the environment and
climate conditions of the installation site. In addition, the junction box of the Module must be
installed at an elevated position. Do not install the junction box at a low position.
During installation, avoid installation methods that could block the drain holes of the Module
or affect the functions of the drain holes.
When installing the Module parallel to the installation surface, ensure that there is sufficient
space for ventilation between the Module and the installation surface (a space larger than
10cm is recommended) for ventilation on the back of the Module to prevent damage to the
wires and to increase the performance of the Module.
A 10mm space between modules is recommended to allow for thermal expansion and
contraction of the metal frame of the Module.
The components and racking systems required for installing the module shall adopt materials
that are resistant to corrosion and ultraviolet and suitable for outdoor use.
Avoid electrochemical corrosion ( alvanic corrosion) caused by contact between the
Module frame and different metals during installation.
2.1 Module Installation Methods
The installation of the Module can be conducted through the recommended methods as
follows:

7
2.1.1
Bolted Installation
Bolted InstallationBolted Installation
Bolted Installation
Please use the mounting holes on the Module frame for installation. It is strictly
forbidden to drill additional holes that may damage the frame.
Please use the same type of stainless steel or corrosion-resistant installation
components for installation.
The frame of the Module is designed to include at least 4 symmetrical mounting holes
(as illustrated in Figure 1, the quantity, size and position of mounting holes are different
for each model; please refer to the corresponding Module Data Sheet for detailed
information).
To maximize the Module's sustainable static mechanical load (5,400 Pa on the front;
2,400 Pa on the back), at least 4 symmetrical mounting holes (symmetrical from top to
bottom/left to right) are required to fix the Module in position (as illustrated in Figure
2).
The PM060 and PM072 series modules require the use of M8 stainless steel bolts (use
only flat washers and spring washers 16mm in diameter to prevent mechanical
interference caused by oversized washers on the inner edges of the external Module
frame) and stainless steel nuts to attach the Module onto the racking system. (the
attachment method is illustrated in Figure 3. Certain models require a combination of
M6 stainless steel bolts. Please refer to the corresponding Module Data Sheet for
detailed information).
The PM096 series requires 4 symmetrical mounting holes at a distance of 322mm from
the short side of the frame, coupled with M6 stainless steel bolts, flat washers, spring
washers, and stainless nuts to attach the Module onto the racking system (the
attachment method is illustrated in Figure 3).
Please use a torque wrench to tighten the bolt. The torque should be sufficient to attach
the Module firmly onto the racking system. The reference torque for the M6 bolt is 7-11
N-m; the reference torque for the M8 bolt is 16-20 N-m.

8
Figure 1: Module Mounting Hole Illustration. Please refer to the corresponding Module Data
Sheet for detailed quantity, size and position of mounting holes.
Figure 2: Mounting Hole Installation Illustration. Please refer to the corresponding Module
Data Sheet for detailed quantity, size and position of mounting holes.
Figure 3: Mounting Hole Installation Method. NOTICE: The PM060 and PM072 series modules
require the use of M8 stainless steel bolts (use only flat washers and spring washers 16mm in
diameter to prevent mechanical interference caused by oversized washers on the inner edges
of the external Module frame) and stainless steel nuts to attach the Module onto the racking
system.

9
2.1.2
Clamp Installation
Clamp InstallationClamp Installation
Clamp Installation
The installer should ensure that the shade produced by the clamps do not fall on the
front of the module and block the cells, under all climate conditions year-round. In
addition, the installer should ensure that the clamps do not come into contact with the
glass surface or cause deformation of the Module frame.
The material of the clamps should be corrosion-resistant metal material. The
recommended specifications of the clamps are illustrated in Figure 4. Clamps approved
by the system installer can also be used for installation and clamp (AUO does not
provide related clamps).
Use at least 4 clamps in accordance with the direction of installation of the Module and
attach the Module symmetrically onto the racking system (the attachment method of the
clamp is illustrated in Figure 5; the clamp's position on the long frame is illustrated in
Figure 6; the clamp's position on the short frame is illustrated in Figure 7).
Please use a torque wrench to tighten the bolt. The torque should be sufficient to attach
the clamp firmly onto the racking system. The reference torque for the M8 bolt is 16-20
N-m (when using clamps approved by the system installer, please verify the torque for
fixing the bolt in place with the system installer).
Figure 4: Clamp Specifications

10
Figure 5: Clamp Installation Method
Maximum sustainable
Maximum sustainable Maximum sustainable
Maximum sustainable
static mechanical load of the Module (5,400 Pa on the front;
static mechanical load of the Module (5,400 Pa on the front; static mechanical load of the Module (5,400 Pa on the front;
static mechanical load of the Module (5,400 Pa on the front;
2,400 Pa on the back)
2,400 Pa on the back)2,400 Pa on the back)
2,400 Pa on the back)
Clamp range (D1
Clamp range (D1Clamp range (D1
Clamp range (D1-
--
-D2 clamp range) allowable for clamps
D2 clamp range) allowable for clampsD2 clamp range) allowable for clamps
D2 clamp range) allowable for clamps
Module Series
Module SeriesModule Series
Module Series
D1
D1D1
D1
D2
D2D2
D2
PM060 series 123 mm (4.84 in) 328 mm (12.91 in)
PM072 series 140 mm (5.51 in) 390 mm (15.35 in)
PM096 series 116 mm (4.57 in) 311 mm (12.24 in)

11
Maximum sustainable static mechanical load of the Module (2,400 Pa on the front;
Maximum sustainable static mechanical load of the Module (2,400 Pa on the front; Maximum sustainable static mechanical load of the Module (2,400 Pa on the front;
Maximum sustainable static mechanical load of the Module (2,400 Pa on the front;
2,400 Pa on the back)
2,400 Pa on the back)2,400 Pa on the back)
2,400 Pa on the back)
Clamp range (Edge
Clamp range (EdgeClamp range (Edge
Clamp range (Edge-
--
-D1 clamp range) allowable for clamps
D1 clamp range) allowable for clampsD1 clamp range) allowable for clamps
D1 clamp range) allowable for clamps
Module Series
Module SeriesModule Series
Module Series
(Edge)
(Edge)(Edge)
(Edge)
D1
D1D1
D1
PM060 series 0 122mm (4.80 in)
Figure 6: Position of Clamps on the Long Frame
Maximum sustainable static mechanical load of the Module
Maximum sustainable static mechanical load of the Module Maximum sustainable static mechanical load of the Module
Maximum sustainable static mechanical load of the Module
(2,400 Pa on the front;
(2,400 Pa on the front; (2,400 Pa on the front;
(2,400 Pa on the front;
2,400 Pa on the back)
2,400 Pa on the back)2,400 Pa on the back)
2,400 Pa on the back)
Clamp range allowable for clamps
Clamp range allowable for clampsClamp range allowable for clamps
Clamp range allowable for clamps
Module Series
Module SeriesModule Series
Module Series
D3
D3D3
D3
D4
D4D4
D4
PM060 series 50 mm (1.97 in) 198 mm (7.80 in)
PM060PWA, PM060PWB Not applicable Not applicable
PM072 series Not applicable Not applicable
PM096 series 52 mm (2.05 in) 209 mm (8.23 in)
Figure 7: Position of Clamps on the Short Frame

12
Chapter 3 Module Electrical Connection uidelines
The electrical connection/grounding must meet related regulations/standards of the
installation site or country and must be installed by a qualified installer.
Use series or parallel connections for the design of connections between modules in
accordance with the user's requirements for system power, voltage, or current.
Each Module is equipped with a junction box and connector with a certain level of water/dust
resistance and the junction box is equipped with two cables, one positive and the other
negative. Two Modules can be connected in series by connecting the positive cable of a
connector to the negative cable of the other connector; similarly, two Modules can be
connected in parallel by connecting their positive (or negative) connectors.
Incorrect connection or loose connection may cause electric arcs or electric shocks, damage
equipment, or cause fires. Please inspect and make sure that all electrical connections are firm
and fixed (the connections of the connectors should be firmly locked in place).
The maximum voltage in series connection of modules is the total voltage of all modules.
Please note that the maximum voltage in series connection cannot exceed the Module's
maximum permissible voltage (the maximum permissible voltage of the AUO Photovoltaic
Module is 1,000 VDC, as specified on the back of the Module). Similarly, the maximum current
in parallel connection of modules is the total current of all modules.
The output and voltage of the Module will exceed the rated values when operating under low
temperatures (<25°C). Consider the lowest possible ambient temperature of the year at the
installation site and use the open-circuit voltage temperature coefficient to calculate the
maximum number of modules allowable for series connection. The reference calculation
formula is as follows:
Maximum system voltage/module open-circuit voltage * [1 + module open-circuit voltage
temperature coefficient * (lowest ambient temperature of the installation site -25)]
The electrical connection of the module/system must be conducted with a dedicated cable for
solar photovoltaic systems with minimum requirements as follows:
1. PV1-F or PV Wire cable standards
2. The cross section of the cable must be greater than 4 mm
2
(or 12AW )
3. The rated voltage of the cable must exceed 1,000 VDC
4. The cable materials must be suitable for outdoor use, insulated, and sunlight and
ultra-violet resistant.
5. The applicable temperature range of the cable must be at least -40°C to +90°C.
When connecting cables, the minimum bend radius of the cable must be greater than 5 times
the cable diameter, as illustrated in Figure 8.

13
Figure 8: The Minimum Bend Radius of the Cable
The cable may be applicable for outdoor use and resistant to ultra-violet radiation but the
cable should be protected from direct sunlight or immersion in water. When necessary,
sunlight resistant cable trays or cable ties can be used to fix the cable at suitable positions
(please avoid damage or heavy pressure on the cable during fixture).
3.1 Module rounding Method
The Module must be grounded properly to ensure the safety of personnel and the work
environment. Please connect grounding in accordance with IEC Standards or the electrical
codes and regulations of the site/country of installation to ensure that the Module is correctly
grounded.
The grounding holes on the Module frame are marked with grounding symbols (as indicated
in Figure 9; the quantity, size and position of grounding holes are different for each model;
please refer to the corresponding Module Data Sheet for detailed information). Please use
the grounding holes on the Module frame for grounding. It is strictly forbidden to drill
additional holes that may damage the frame.

14
Figure 9: Module rounding Hole Illustration. Please refer to the corresponding Module Data
Sheet for detailed quantity, size and position of grounding holes.
The components required for grounding the module shall adopt materials that are resistant to
corrosion and ultraviolet and suitable for outdoor use.
Avoid electrochemical corrosion ( alvanic corrosion) caused by contact between the Module
frame and different metals during grounding.
Make sure that the grounding device is electrically connected to the Module frame when
conducting grounding (e.g., if the frame is aluminum alloy, the insulated and anti-corrosion
anodic oxide coating on the aluminum alloy surface must be scrapped off for the grounding
device to allow contact with the internal aluminum alloy in order to provide grounding).
The grounding of the Module can be conducted through the recommended methods as
follows:
3.1.1
3.1.1 3.1.1
3.1.1
Bolted rounding
Bolted roundingBolted rounding
Bolted rounding
Use M4 stainless steel bolts, cup washers, flat washers, star-shaped gaskets, and stainless nuts
to attach the grounding wire onto the Module frame for electrical connection (the
attachment method is illustrated in Figure 10).

15
Figure 10: Bolted rounding
3.1.2
3.1.2 3.1.2
3.1.2
Using Certified rounding Device for rounding
Using Certified rounding Device for roundingUsing Certified rounding Device for rounding
Using Certified rounding Device for rounding
Use grounding device tested and certified by third-party certification institutes that are
suitable for use in solar photovoltaic systems. The grounding shall be implemented in
accordance with the regulated method of the manufacturer of the grounding device and the
manufacturer must ensure the grounding performance of the grounding device.
3.2 System rounding Method
To achieve optimal system performance, it is recommended to ground the negative (or
positive) pole of the solar photovoltaic system array. Failure to correctly ground the system
will lower system performance and void the AUO Photovoltaic Module's limited warranty on
output. Please connect grounding in accordance with IEC Standards or the electrical codes
and regulations of the site/country of installation to ensure that the system is correctly
grounded.
System negative pole grounding: PM060, PM072 product series.
System positive pole grounding: PM096 product series.

16
Chapter 4 Maintenance uidelines
Periodic inspections and maintenance can improve the performance and reliability of the solar
photovoltaic system. The following methods are recommended for inspections and
maintenance.
4.1 Cleaning Modules
It is recommended to clean the modules at least once every year. The actual cleaning
frequency is dependent on the environmental conditions of the installation site. If dust or
dirt accumulates quickly, the intervals between cleaning must be shortened.
Workers are required to wear appropriate insulated protective equipment when
cleaning.
Please make sure the dust or dirt has been fully removed from the surface of the Module
when cleaning to avoid shading the surface of the Module.
It is recommended to perform cleaning operations in the early morning, evening, or
cloudy periods to lower the risks of electric shocks or burns.
When cleaning, use soft cloths or sponges with soft cleaning agents (do not use
abrasive/corrosive or acidic/alkali cleaning agents) and water close to the temperature of
the Module (to prevent thermal shocks from damaging the Module).
If it is necessary to clean the back of the Module, use tools that do not damage the
surface on the back of the Module.
When cleaning the Module frame, do not damage the surface of the frame (the frame is
generally aluminum and the surface is a layer of corrosion-resistant anodic oxide
coating).
4.2 Module Appearance Inspection
Before cleaning modules, please conduct a visual check for damage or cracks on the exterior
of each Module. The recommended inspection items are as follows:

17
Check for cracks or damage on the glass on the front of the Module.
Check for coverage of foreign matter on the front of the Module.
Check for irregularities or signs of burns on the back of the Module.
Check for signs of corrosion on the circuit welding of the cells.
4.3 Module Connection and Cable Inspection
It is recommended that inspections for module connection and cables be conducted every six
months. Inspection personnel are required to wear appropriate insulated protective
equipment to conduct operations. The recommended inspection items are as follows:
Check whether the module installation/grounding components are securely fastened for
signs of corrosion.
Check whether electrical connections are securely and seamlessly connected and for any
irregularities.
Check for damage to the cables and whether they are exposed or immersed in water.
Check whether the junction box is damaged or burnt and other irregularities such as
cracks in the sealant.
If you have any questions, please contact AUO Solar to learn more about how to resolve
issues in the installation of the Module.
© Copyright AU Optronics Corp. All rights reserved. AUO retains the right to update, delete, or revise information without
prior notice. All revisions and amendments are effective immediately.
This manual suits for next models
2
Table of contents
Popular Solar Panel manuals by other brands
Sunna Design
Sunna Design Sol EVERGEN M Series installation guide

Photocomm
Photocomm POWER-VALUE Installation and assembly instructions

Suniva
Suniva Optimus OPTXXX-60 Series Installation and instruction manual
AXITEC
AXITEC AXIblackpremium installation manual
RAVOLT
RAVOLT Generation 2 Installation guidelines
NRG
NRG SYMPHONIEPRO 9111 instructions
ROCKSOLAR
ROCKSOLAR RSF100W user manual
First Solar
First Solar 7 Series user guide
Go Power
Go Power GP-FLEX-100 owner's manual

Jinko Solar
Jinko Solar JKM PP-60 Series installation manual
CanadianSolar
CanadianSolar CS Series installation manual

CanadianSolar
CanadianSolar CS3W-PB-AG Series installation manual
