manuals.online logo
Brands
  1. Home
  2. •
  3. Brands
  4. •
  5. NRG
  6. •
  7. Solar Panel
  8. •
  9. NRG SYMPHONIEPRO 9111 User manual

NRG SYMPHONIEPRO 9111 User manual

This manual suits for next models

5

Popular Solar Panel manuals by other brands

O.N 23.8757.15 user manual

O.N

O.N 23.8757.15 user manual

PV-ezRack DFendr installation guide

PV-ezRack

PV-ezRack DFendr installation guide

Navitron HFC-2 installation instructions

Navitron

Navitron HFC-2 installation instructions

AXITEC 60-CELL installation manual

AXITEC

AXITEC 60-CELL installation manual

thermital TSOL 20 N BLU installation instructions

thermital

thermital TSOL 20 N BLU installation instructions

moovo KSM001 Installation and use instructions and warnings

moovo

moovo KSM001 Installation and use instructions and warnings

AZO Digital MPPT-3000 operating manual

AZO Digital

AZO Digital MPPT-3000 operating manual

Clenergy PV-ezRack SolarTripod installation guide

Clenergy

Clenergy PV-ezRack SolarTripod installation guide

Beretta SCF-20N installation manual

Beretta

Beretta SCF-20N installation manual

Solarland Portable Series Instruction handbook

Solarland

Solarland Portable Series Instruction handbook

Ubiquiti sunMAX user guide

Ubiquiti

Ubiquiti sunMAX user guide

Sonnenkraft GK5-HP manual

Sonnenkraft

Sonnenkraft GK5-HP manual

REC TwinPeak 2S Mono 72 Series installation instructions

REC

REC TwinPeak 2S Mono 72 Series installation instructions

Flexsolar C100 Instruction manual & warranty

Flexsolar

Flexsolar C100 Instruction manual & warranty

Energizer HardCase Sunpack 120W user guide

Energizer

Energizer HardCase Sunpack 120W user guide

solarwatt EasyIn 60M Series installation instructions

solarwatt

solarwatt EasyIn 60M Series installation instructions

Mission Solar Energy MONO Series Installation and user manual

Mission Solar Energy

Mission Solar Energy MONO Series Installation and user manual

Wiedenmann Favorit XP Translation of original operating instructions

Wiedenmann

Wiedenmann Favorit XP Translation of original operating instructions

manuals.online logo
manuals.online logoBrands
  • About & Mission
  • Contact us
  • Privacy Policy
  • Terms and Conditions

Copyright 2025 Manuals.Online. All Rights Reserved.

NRG INSTRUCTIONS
15W PV Panel & Mounting Bracket
support@nrgsystems.com | Page 1
30 August 2023
INTRODUCTION
SymphoniePRO’s 15W PV Panel and mounting bracket is used to provide charging power to SymphoniePRO
iPacks. The mounting bracket holds the 15W panel at an optimal angle for solar production.
PV Panel Mounting
SymphoniePRO’s 15W PV panel and mounting bracket (NRG part #9112 for tubular towers; NRG part #9111 for
lattice towers) should be mounted facing south in the northern hemisphere, and north in the southern
hemisphere, to maximize sun exposure.
Mounting bracket
Angle
bracket
NRG INSTRUCTIONS
15W PV Panel & Mounting Bracket
support@nrgsystems.com | Page 2
30 August 2023
Attach the mounting bracket to the back of the PV panel using the 4 small screws:
Put the angle bracket against the tower with the longer edge on top, thread the hose clamps through the outer
slots of the angle bracket as shown below and tighten securely. Use inner slots for lattice tower.
NRG INSTRUCTIONS
15W PV Panel & Mounting Bracket
support@nrgsystems.com | Page 3
30 August 2023
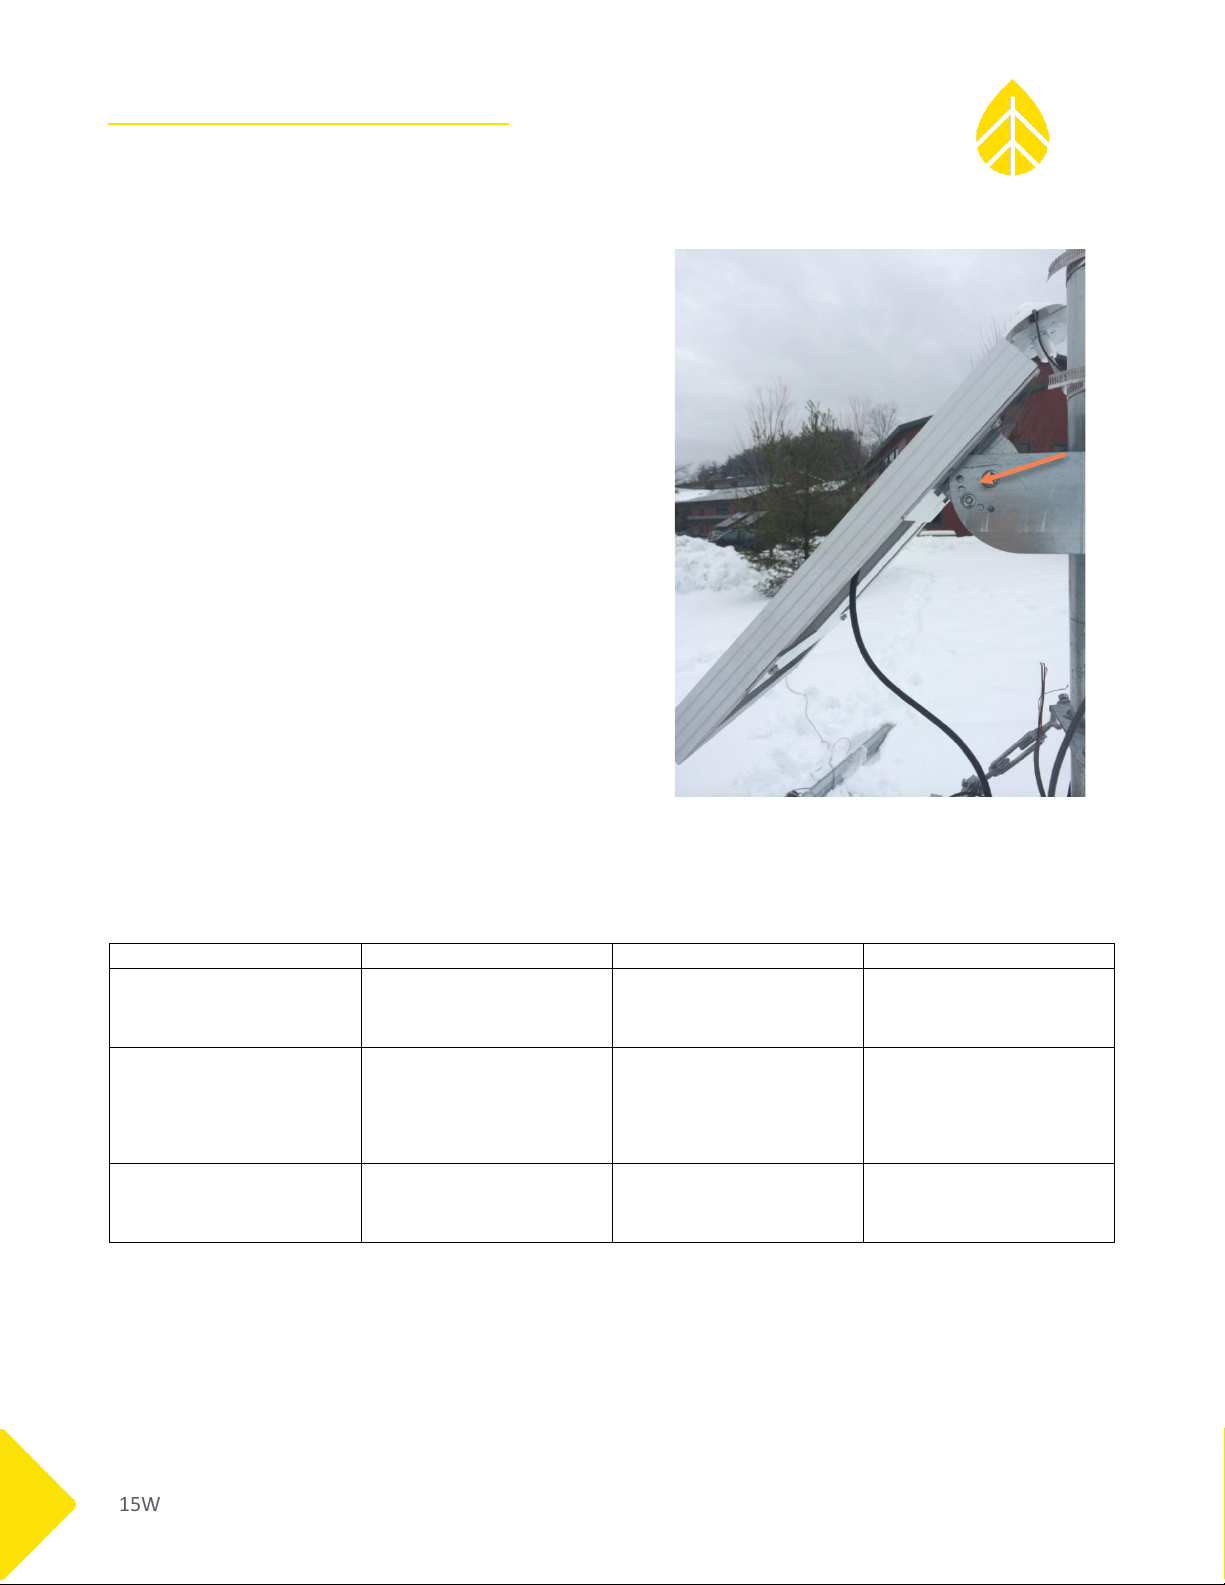
Put a washer on each long bolt. Align the holes in the
mounting bracket with the upper holes (closest to the tower)
of the angle bracket and insert one of the long bolts. Add a
washer and nut to the other end and tighten using a 7/16”
wrench.
Adjust the PV panel’s mounting bracket angle according to
latitude to optimize solar radiation and shedding of snow
and ice and install the second bolt in the holes to set the
desired angle. Add a washer and nut to the other end and
tighten using a 7/16” wrench.
When installing the PV panel, select a location that will
minimize shading. Even the shade from a cable can greatly
reduce the output of a PV panel. Coil and secure extra cables
with electrical tape to prevent them from flapping in the
wind.
Additional power may be required depending on the number
and type of sensors. External power terminals are available on the iPack for this purpose.
Note - Please review the following table to verify correct connections.
Connection Point
Do
Do NOT
Functional Notes
PV Terminals
Do…connect PV panels, DC
power sources between 14 and
28 V DC
Do NOT…connect power
sources in excess of 28 V DC,
including large PV panels
The PV terminals will charge the
iPackGPS’s internal battery; the
PV terminals will NOT charge an
external battery.
External Battery Terminals
Do…connect 12 V battery
and/or external charge
controller up to 14.3 V DC
Do NOT…connect PV panel or
power sources in excess of 14.3
V DC
The external battery terminals
are an input only, an external
battery will NOT be charged
from the iPackGPS through
these terminals nor will the
internal iPackGPS battery.
Grounding Post
Do…connect to wiring panel
grounding post.
Do NOT…leave disconnected or
connect other wires such as
shields.
This terminal will help provide
protection from electrostatic
discharge for the iPackGPS and
logger.