ausdom AW615S User manual
1080/ WebCam
User Manual • Uživatelský manuál •
Užívateľský manuál • Használati utasítás •
Benutzerhandbuch

2
Dear customer,
Thank you for purchasing our product. Please read the following instructions carefully
before first use and keep this user manual for future reference. Pay particular attention
to the safety instructions. If you have any questions or comments about the device,
please contact the customer line.
✉www.alza.co.uk/kontakt
✆+44 (0)203 514 4411
Importer
Alza.cz a.s., Jankovcova 1522/53, Holešovice, 170 00 Praha 7, www.alza.cz

3
Package Contents
•1x WebCam
•1x User’s Manual
•1x Lightweight Tripod
System Requirements
•IBM PC or compatible PC or laptop with USB port
•Pentium 1G or higher CPU
•Over 500 mb free hard-disc space
•256 mb memory
•Support DirectX 9.0 VGA card
For HD 1080P Video Recording
•2,4 GHz Intel CoreTM 2 Duo
•2 GB RAM
•1GB Hard drive space
•USB 2.0 port
4
Product Overview
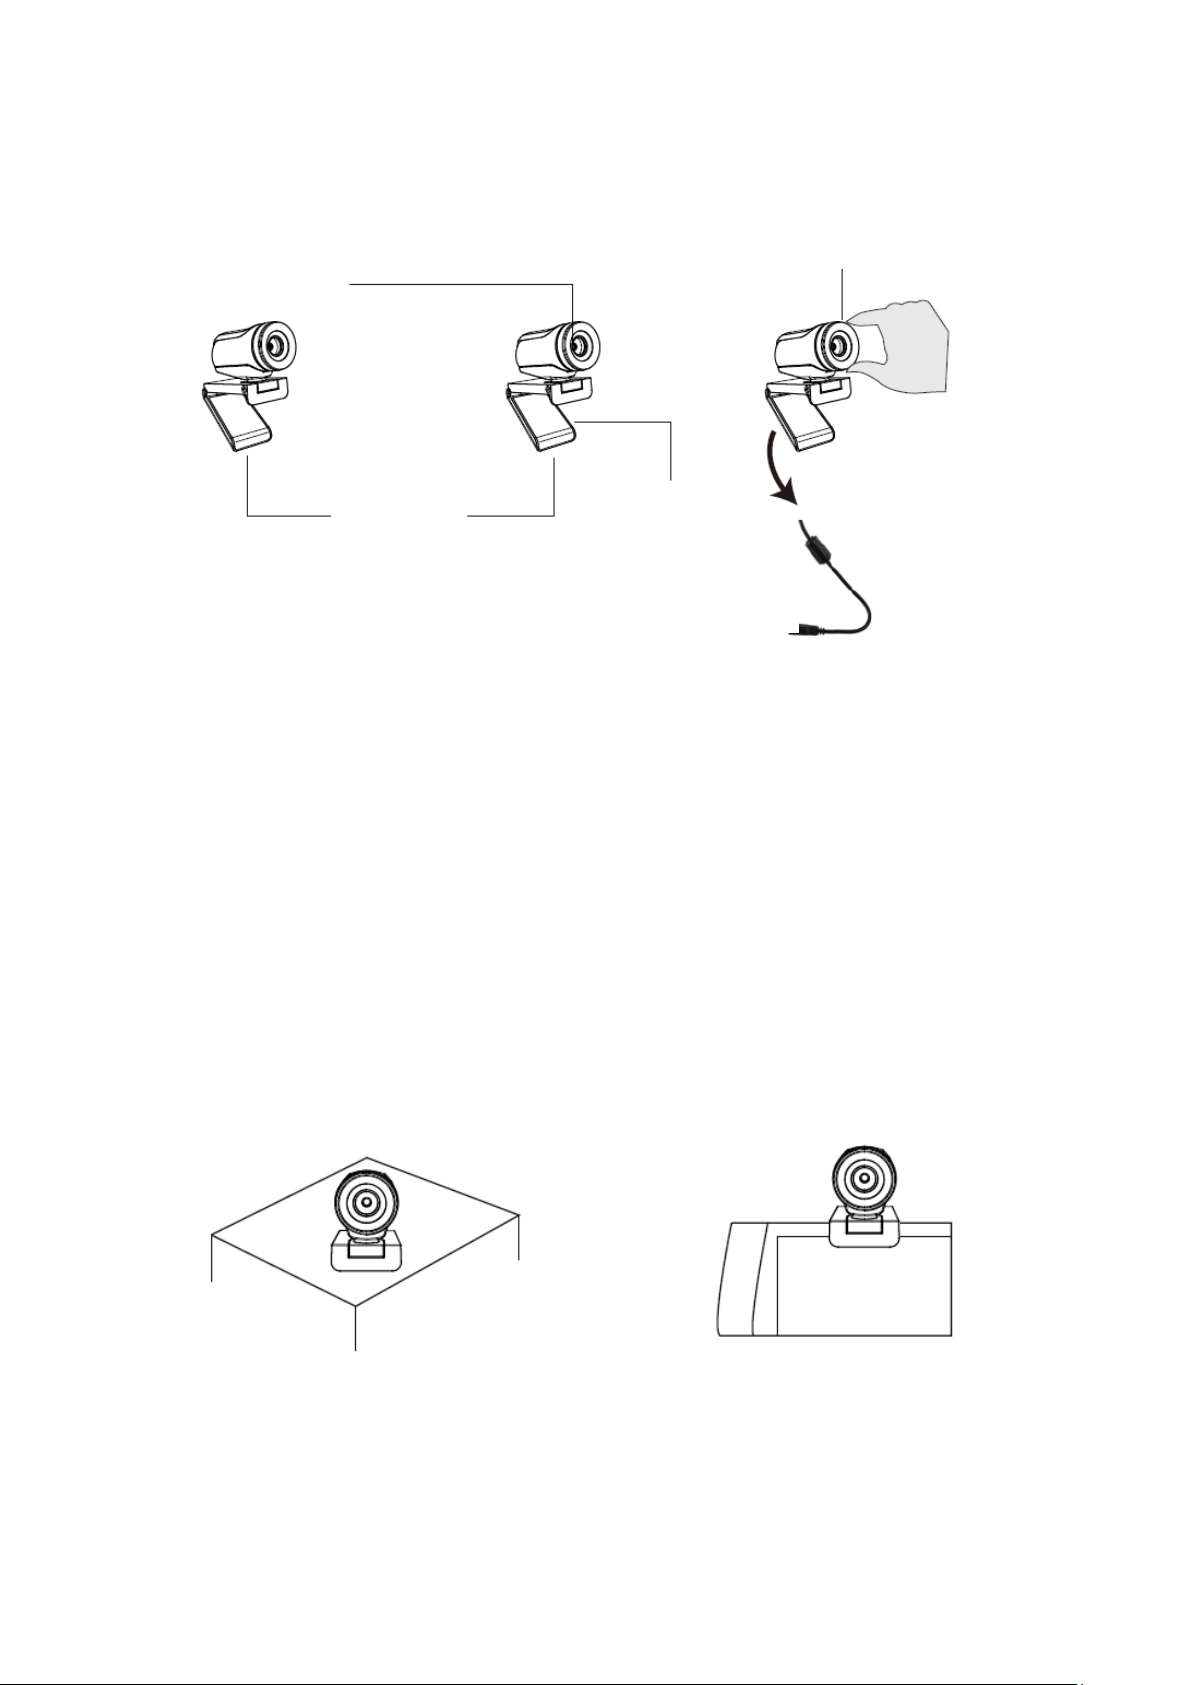
Mounting and Connecting the Camera
Place the WebCam where you want it on a computer monitor or a flat surface desktop.
For a computer monitor deployment, unfold the flexible clip and place the WebCam on
your computer monitor to grip the edge of the screen with the foldable flexible clip.
After fixing the WebCam, connect the USB cable to your PC’s USB port.
Use a universal tripod to rotate the hole in the bottom of the item, then you can place
the item where you want.
1080P Camera lens
USB Connection
Cable
Foldable
Flexible Clip
Manual swivel lens
Before using,
please adjust the
lens sharpness.
On a Desk
On a PC Monitor
Or

5
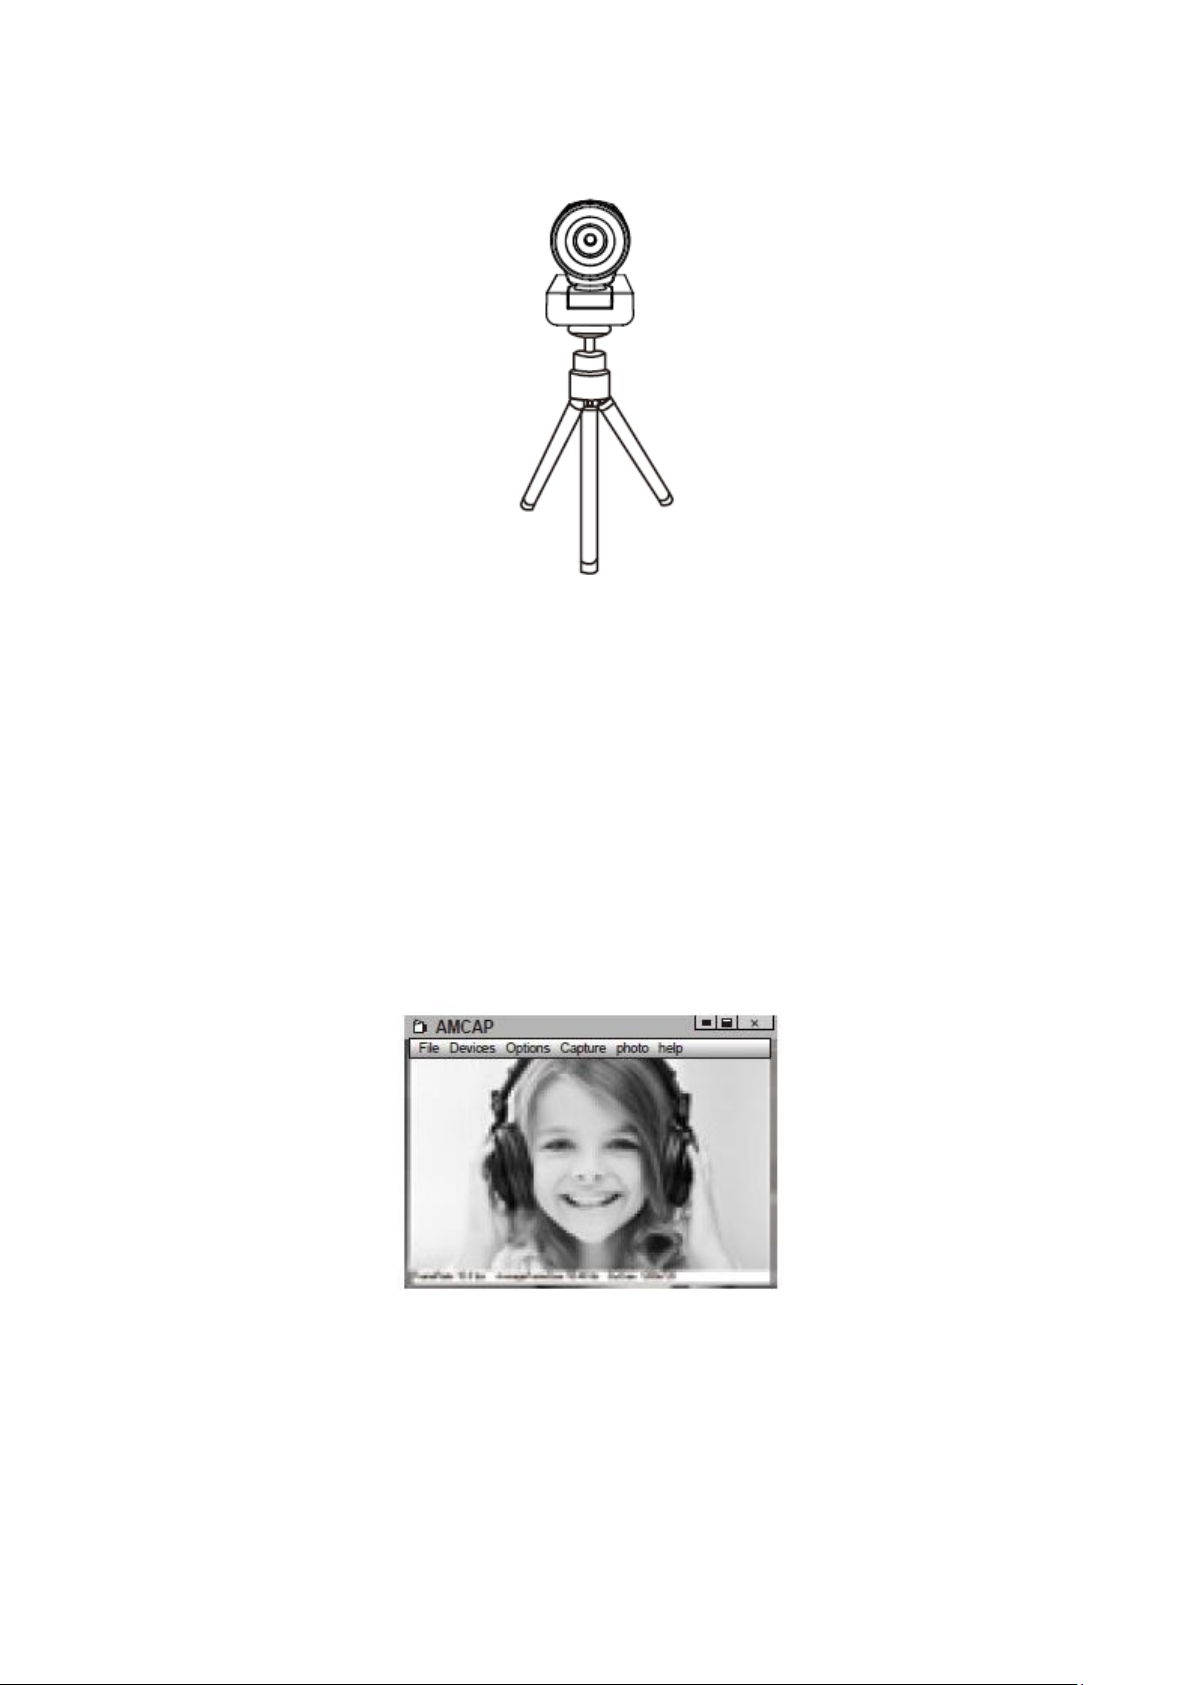
On Windows XP/Vista/7/8
Please download AMCAP Webcam Software to check whether it works, and use this
software to record a video. Only download and open it easily, no need to install.
Available from www.ausdom.com.
Using AMCAP Software Steps:
Please connect the webcam to your computer and wait till computer recognizes the
webcam before opening the AMCAP software.
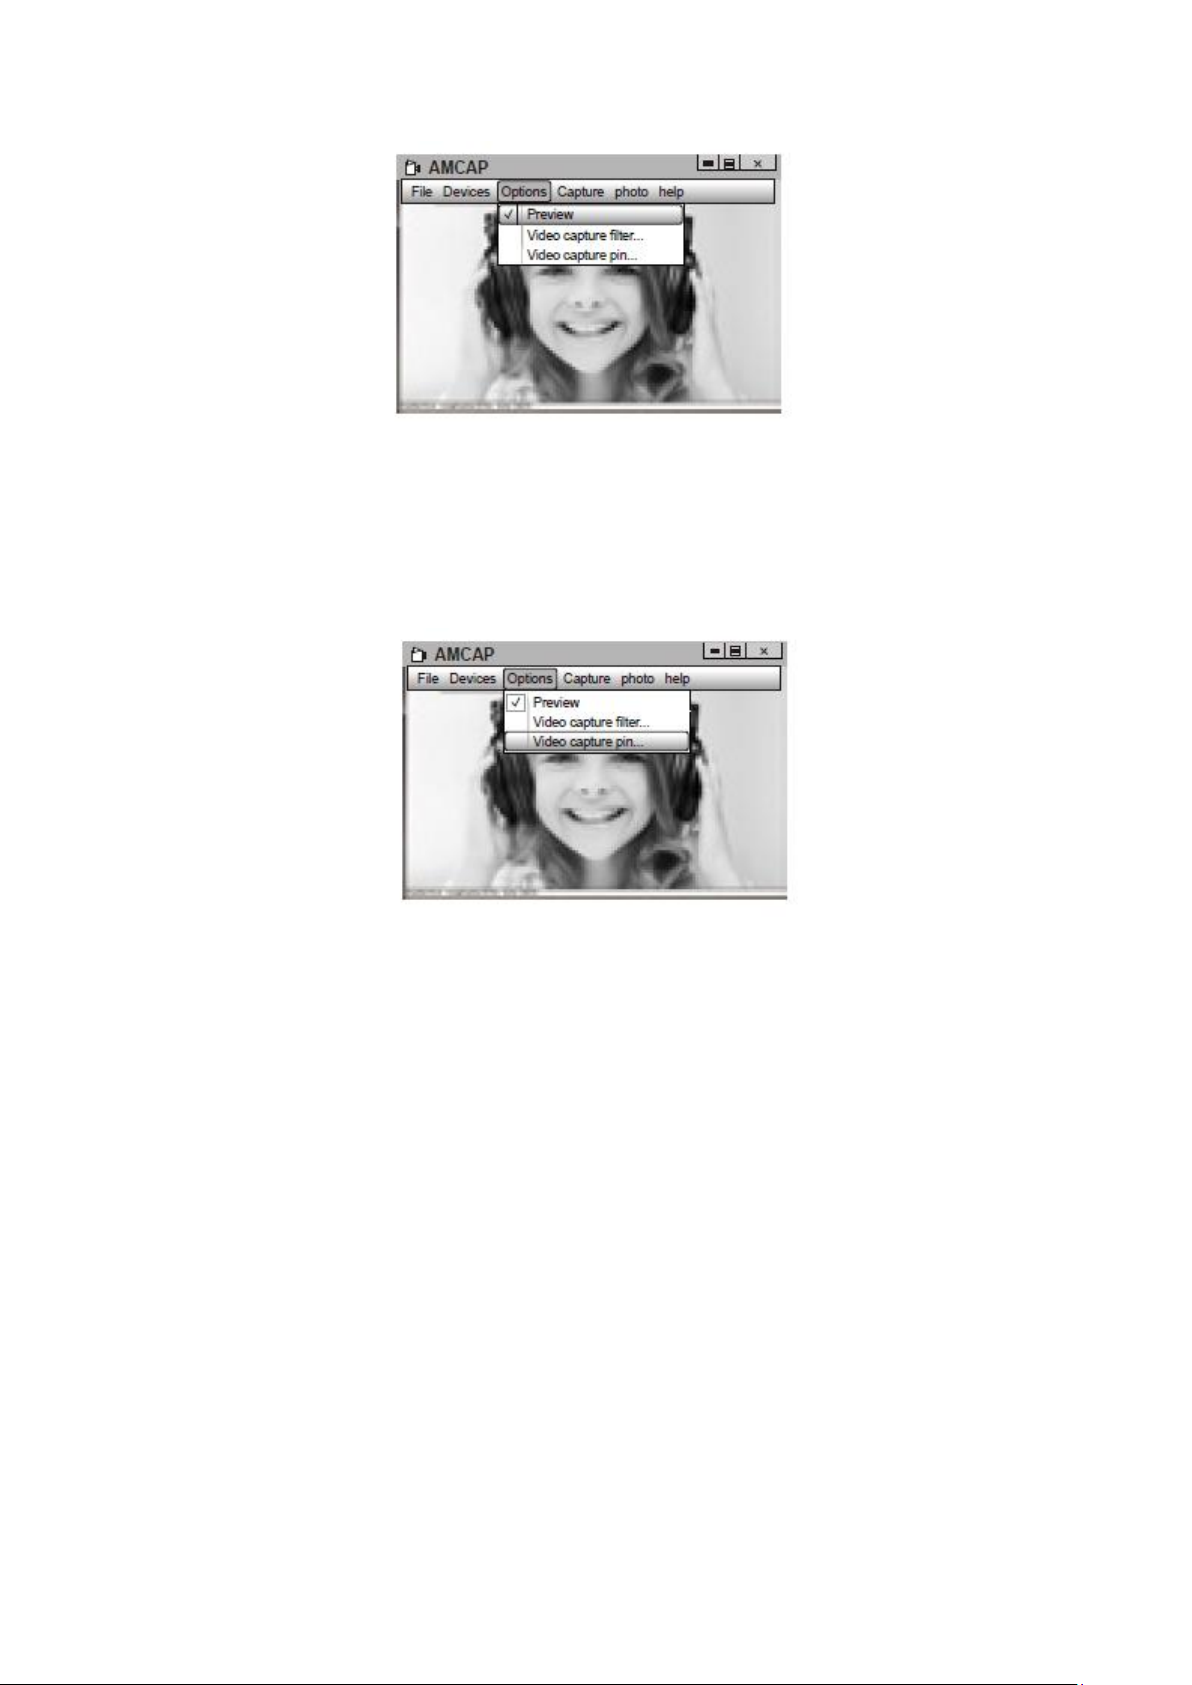
a) If the window is blank, please click the “Options“ and select “preview”. And make
sure you tick the webcam under “device”.
6
b) You can adjust settings like video/phone format/window size, Choosing “Video
Capture Pin…”under “options”.
c) If you want to disable microphone, the setting steps are as follows:
My computer →Press “right-hand button”→Manage →Device manager →
Sound, Game, Video controller →USB Audio device →Press “right-hand”button
→Stop
d) To adjust microphone volume:
-XP system: right click the voice icon in the lower right corner, open the volume
controller →Option →Attribute → Audio mixer →Choose ”USB Audio Device”or
“USB Microphone” →Sure →Adjust volume as your need. -
Win7/8/Vista system: Control panel →Sound →Record → Double click USB Audio
Device or USB Microphone → Microphone attribute →level →Adjust volume as
your need.
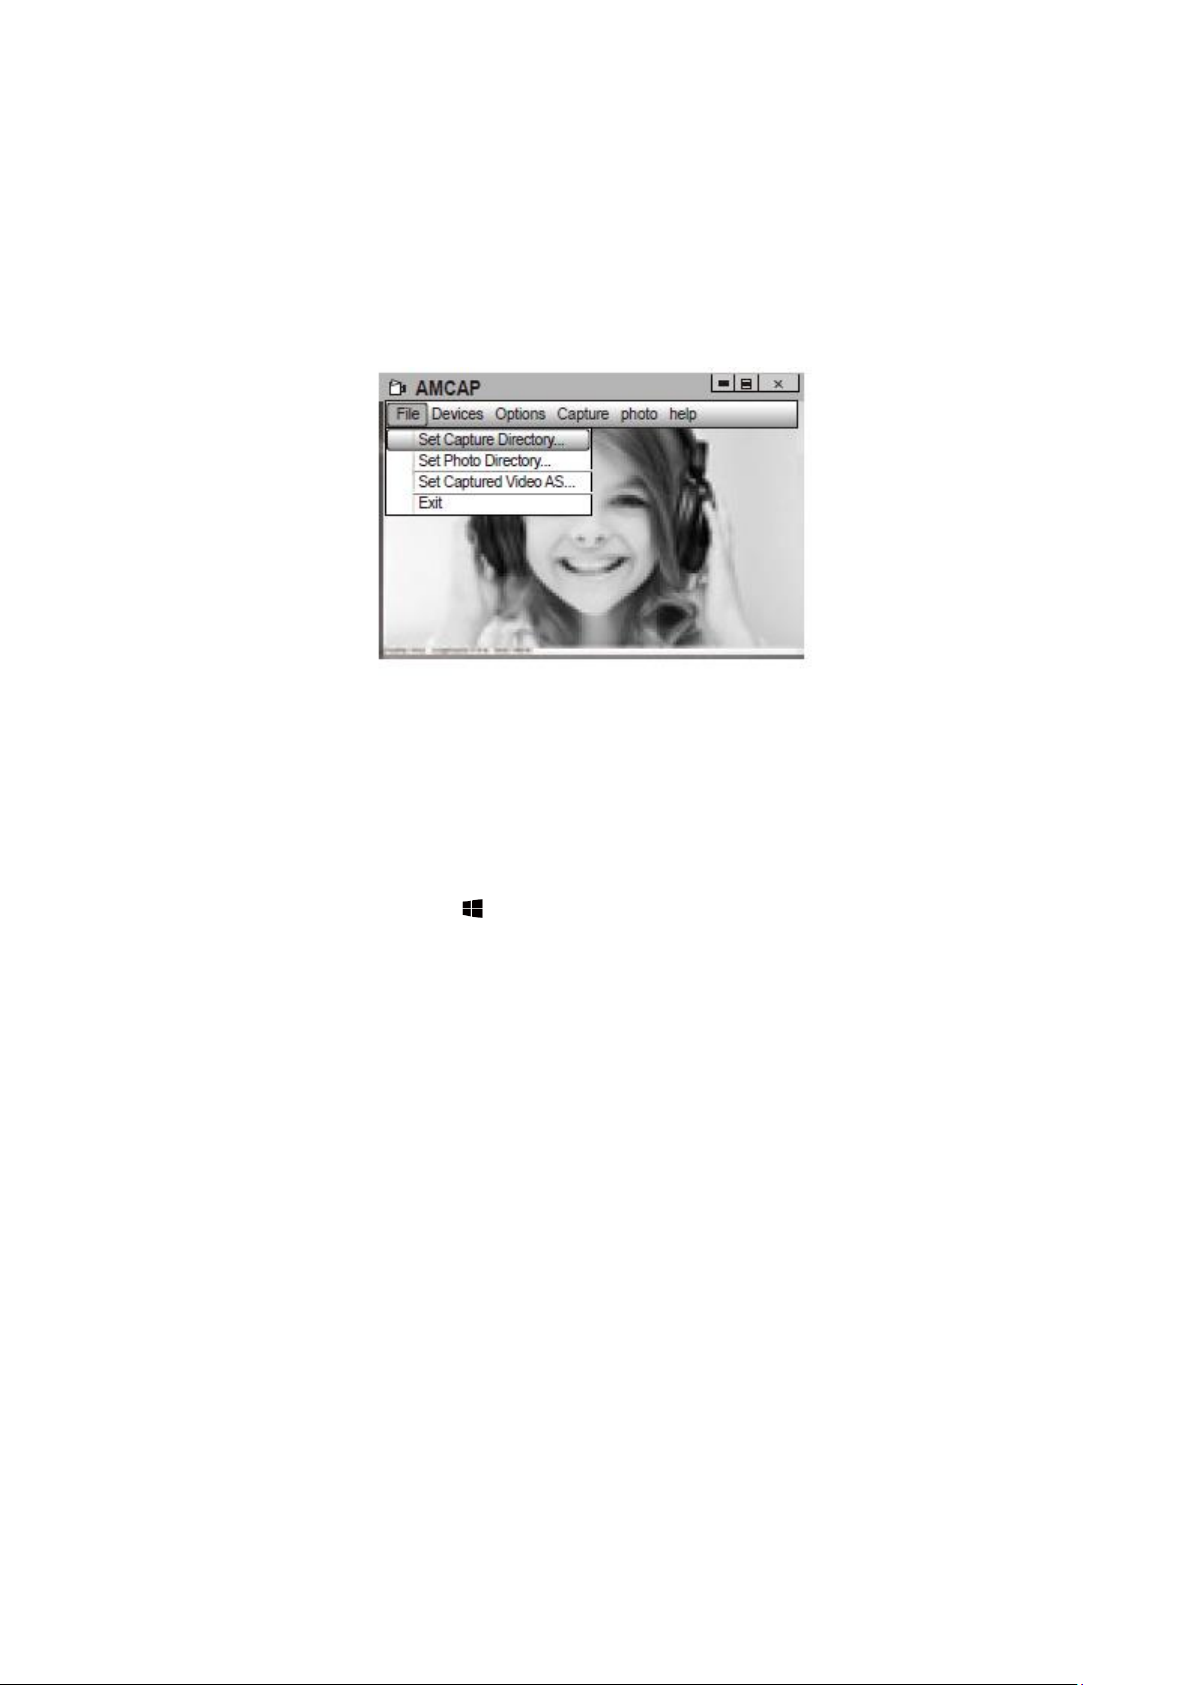
e) To record videos/take photos:
-Record videos: Capture →Start Capture →Select OK to start capture of video
sequence to save the files. You can select a directory for saving captured videos
before Starting to Capture, File →Set Capture Directory.
Take photos: Photo →Start photo

7
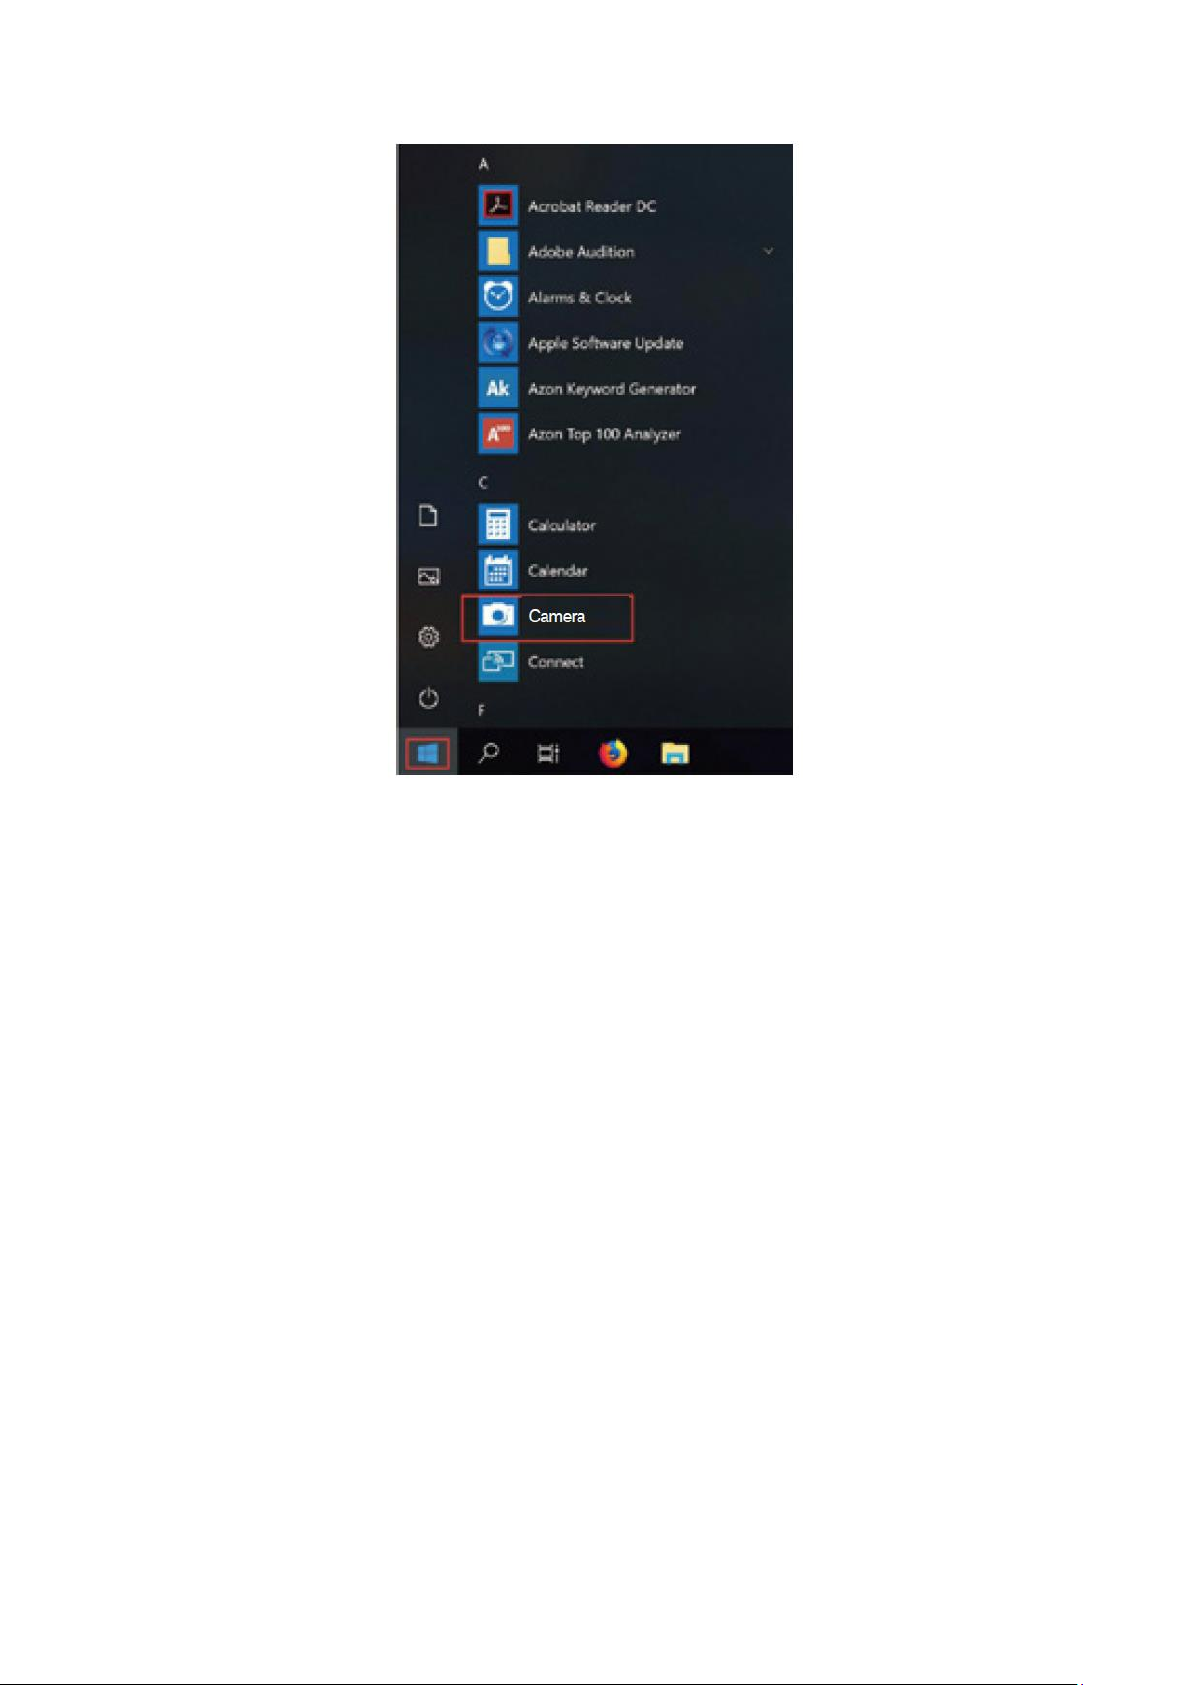
On Windows 10
a) Please connect the webcam to your computer and wait till computer recognizes
the webcam.
b) Select Start button, and select “Camera” in the list of apps.
8
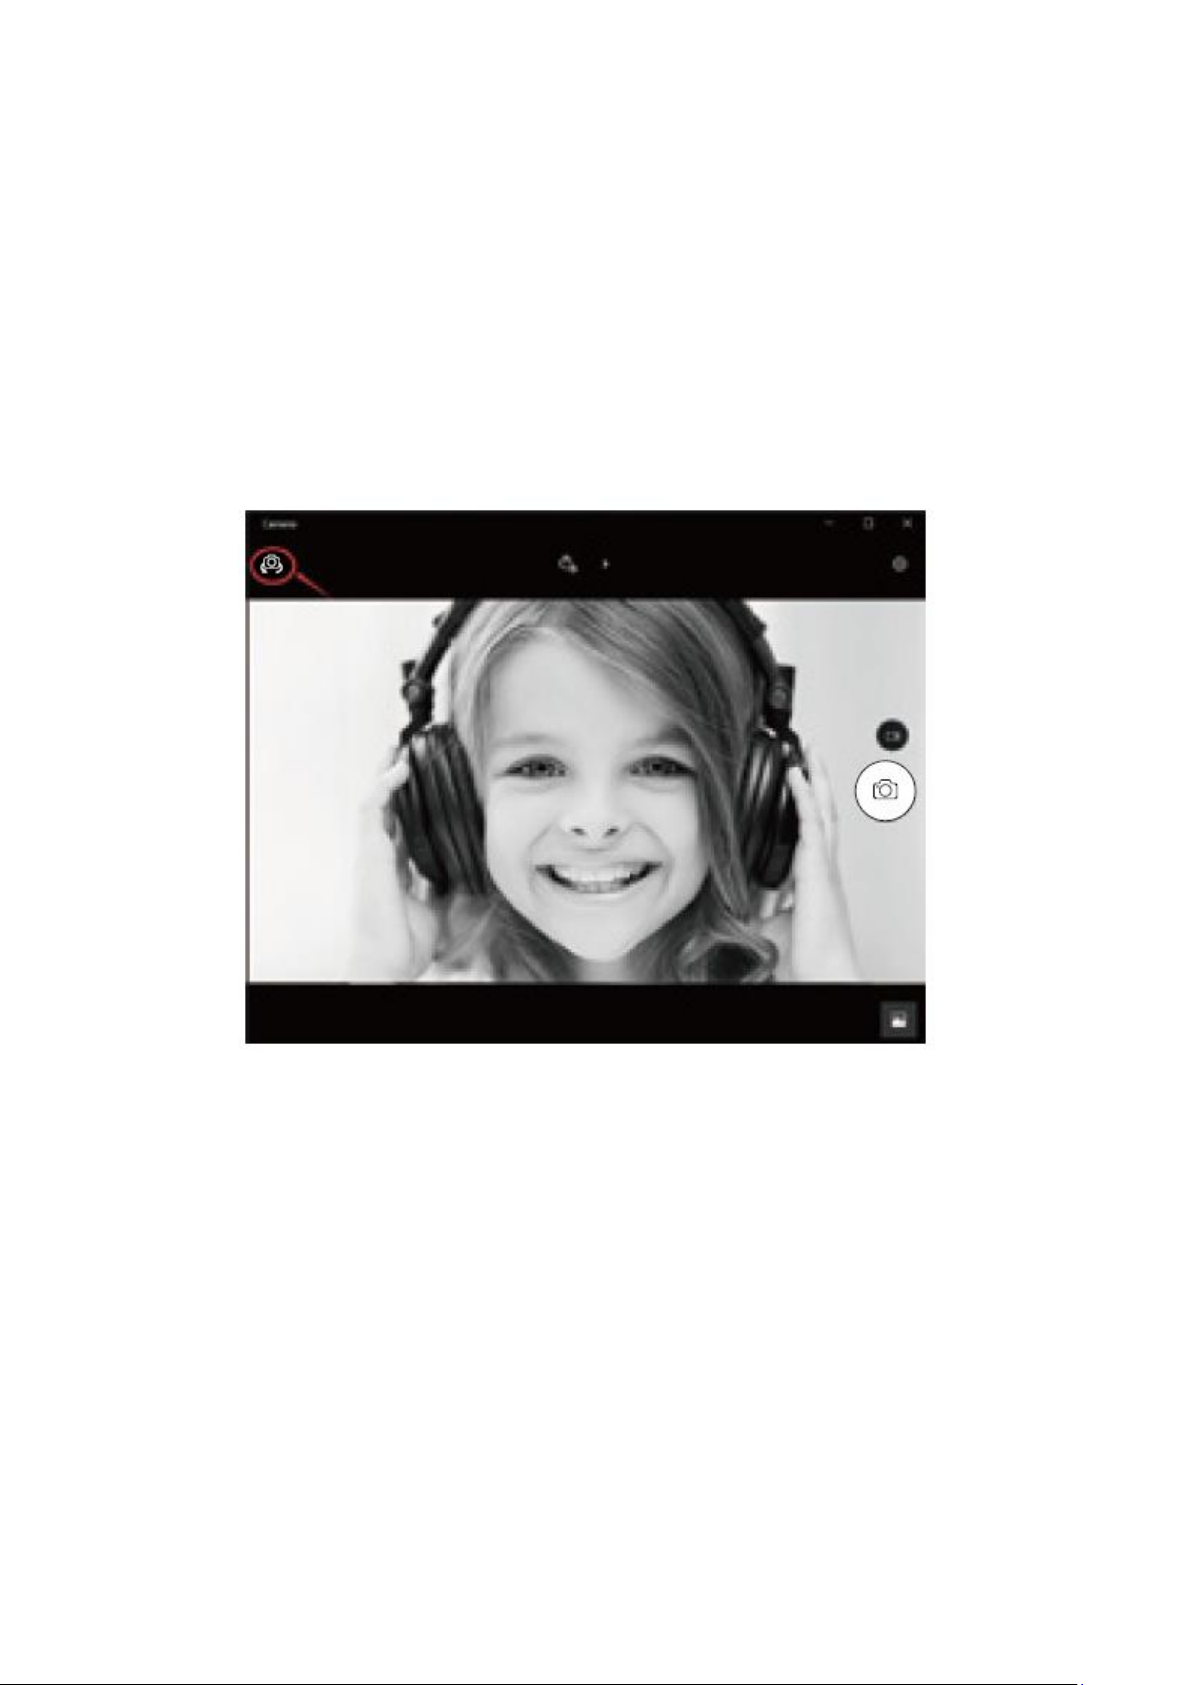
c) On the right side of the app, you’ll find two buttons: one for taking photos and
one for recording videos. The bigger button shows you the mode that’s currently
on. To switch the mode, just click or tap the other video or photo button. To take
photos/record videos:
Take photos: in photo mode →click or tap photo button.
Record videos: in video mode →click or tap video button to start →click or tap
video button again to stop.
d) To switch from built-in camera to AUSDOM camera, please click “camera switch”
at the top-left corner.
On a Mac
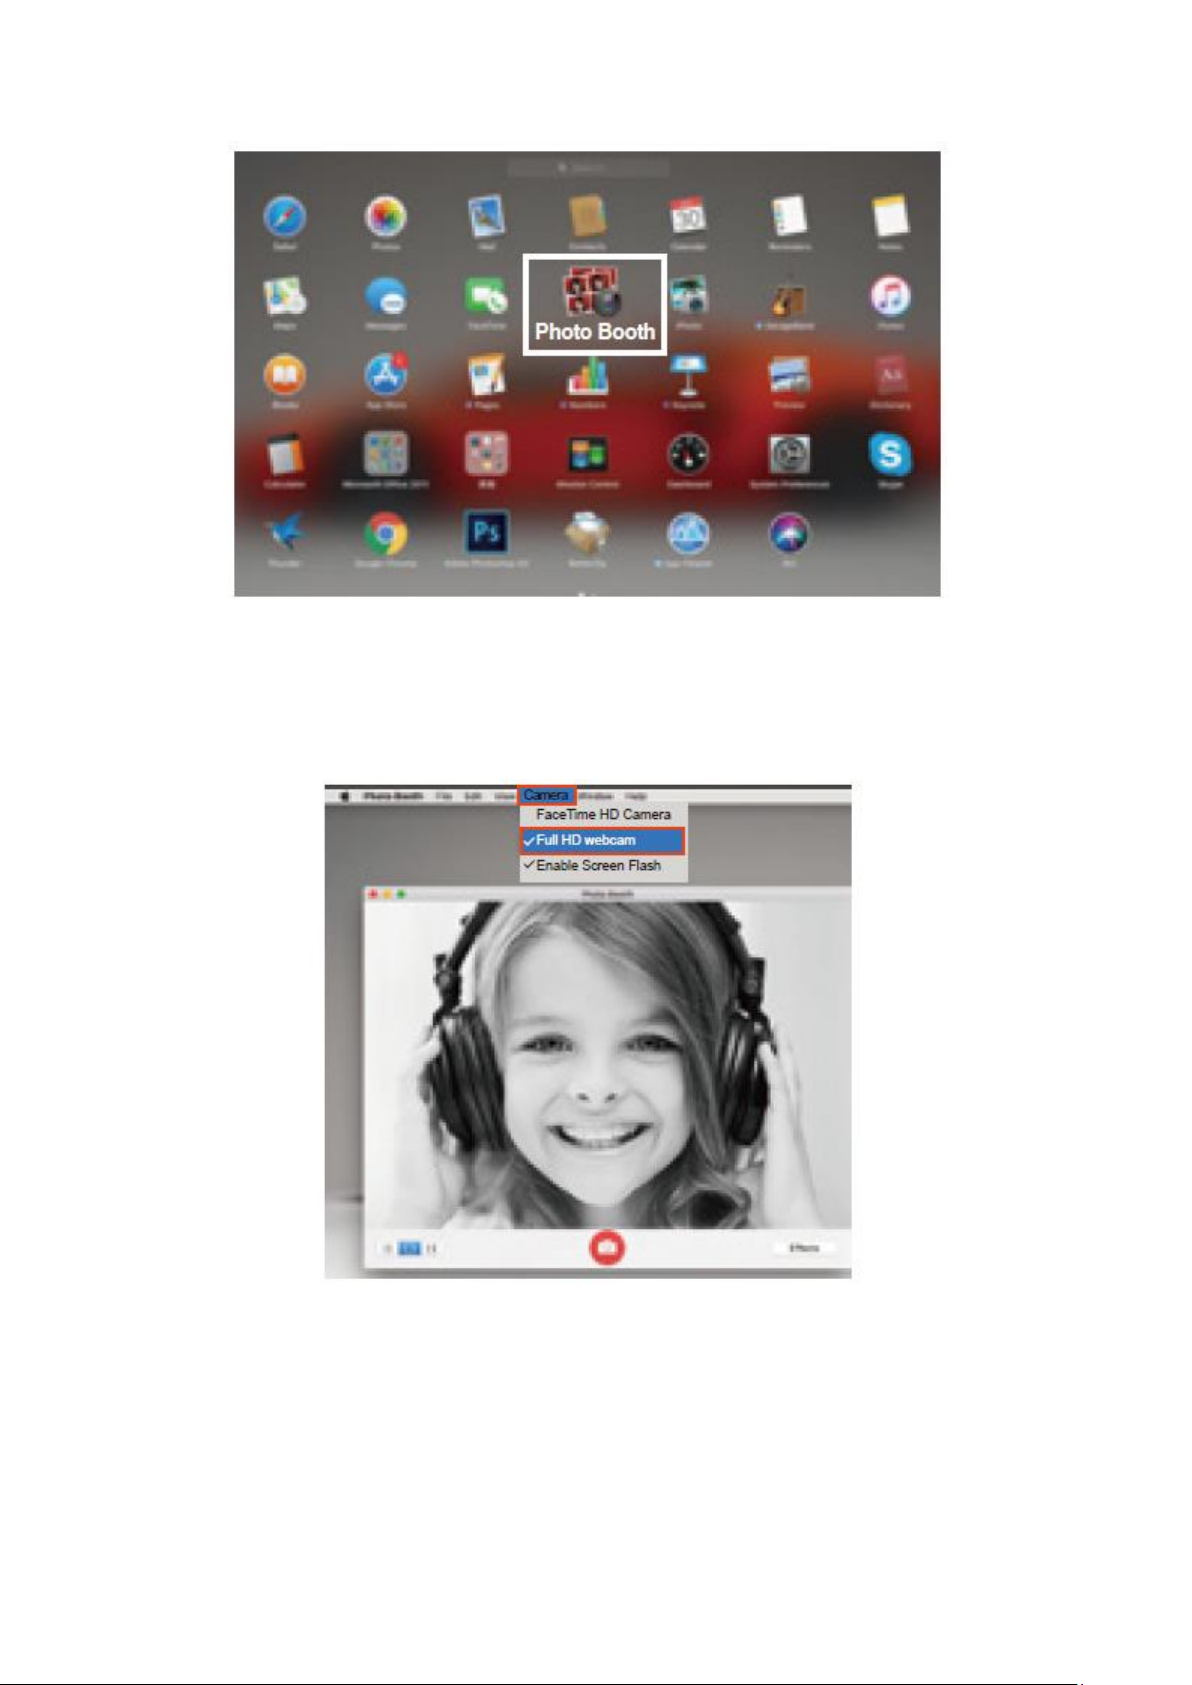
a) Please connect the webcam to your computer. Find out “Photo Booth” in Apple
system, and open it.
9
b) Choose AUSDOM camera under “Camera” in menu bar.

10
Specifications
Note: Features and technical specifications are subject to change without notice, we
apologize for any inconvenience.
Lens Spec.
F/No.
2.0
Viewing Angle
Horizontal: 90 °
Lens Material
Film-coated glass lens
Microphone Spec.
MIC.
Built-in
S.P.L.
-32dB
Directivity
Omni-directional
Others
Interface
USB 2.0/UVC 1.1 or 1.5 (Free
Driver)
Best Image Focal
Length Range
0,3 –1,5 meters
Power Consumption
≤220 mAh
Support OS
Windows XP/7/8/10 or updated
version, Mac OS 10.6 or updated
version, Chrome OSTM, Android
v5.0 or above.
Focus Mode
Manual
Exposure Mode
Auto
Automatic Whiteness
Balance
Auto/Balance
Low Luminance
Compensation
Auto
Frequency Response
300 Hz –8kHz
Minimum Illumination
< 5 Lux
Maximum Frame Rate
30 FPS
Video/Image Spec.
Video Resolution (Video
format: YUY2)
Max. Resolution: 1920*1080
30FPS
Min. Resolution: 160*120 30fps,
Default: 1280*720 8FPS
Video Resolution (Video
format: MJPG)
Max. Resolution: 1920*1080
30FPS
Min. Resolution: 160*120 30fps,
Default: 1280*720 8FPS
Photo Resolution
1920*1080
Photo Format
JPG
Storage Temp.
-10 °C – 80 °C
Operating Temp.
-10 °C – 45 °C

11
Warranty Conditions
A new product purchased in the Alza.cz sales network is guaranteed for 2 years. If you
need repair or other services during the warranty period, contact the product seller
directly, you must provide the original proof of purchase with the date of purchase.
The following are considered to be a conflict with the warranty conditions, for which the
claimed claim may not be recognized:
•Using the product for any purpose other than that for which the product is intended
or failing to follow the instructions for maintenance, operation and service of the
product.
•Damage to the product by a natural disaster, the intervention of an unauthorized
person or mechanically through the fault of the buyer (e.g. during transport, cleaning
by inappropriate means, etc.).
•Natural wear and aging of consumables or components during use (such as
batteries, etc.).
•Exposure to adverse external influences, such as sunlight and other radiation or
electromagnetic fields, fluid intrusion, object intrusion, mains overvoltage,
electrostatic discharge voltage (including lightning), faulty supply or input voltage and
inappropriate polarity of this voltage, chemical processes such as used power
supplies, etc.
•If anyone has made modifications, modifications, alterations to the design or
adaptation to change or extend the functions of the product compared to the
purchased design or use of non-original components.

12
EU Declaration of Conformity
Identification data of the manufacturer's / importer's authorized representative:
Importer: Alza.cz a.s.
Registered office: Jankovcova 1522/53, Holešovice, 170 00 Prague 7
IČO: 27082440
Subject of the declaration:
Title: Ausdom
Model / Type: AW615S
The above product has been tested in accordance with the standard(s) used to
demonstrate compliance with the essential requirements laid down in the Directive(s):
Directive No. (EU) 2014/30/EU
Directive No. (EU) 2011/65/EU as amended 2015/863/EU
Prague, 27.1.2021

13
WEEE
This product must not be disposed of as normal household waste in accordance with
the EU Directive on Waste Electrical and Electronic Equipment (WEEE - 2012/19 / EU).
Instead, it shall be returned to the place of purchase or handed over to a public
collection point for the recyclable waste. By ensuring this product is disposed of
correctly, you will help prevent potential negative consequences for the environment
and human health, which could otherwise be caused by inappropriate waste handling of
this product. Contact your local authority or the nearest collection point for further
details. Improper disposal of this type of waste may result in fines in accordance with
national regulations.

14
Vážený zákazníku,
Děkujeme vám za zakoupení našeho produktu. Před prvním použitím si prosím pečlivě
přečtěte následující pokyny a tento manuál si uschovejte pro budoucí použití. Věnujte
zvláštní pozornost bezpečnostním pokynům. Pokud máte jakékoliv dotazy nebo
připomínky k produktu, kontaktujte zákaznickou linku.
✉www.alza.cz/kontakt
✆255 340 111
Dovozce
Alza.cz a.s., Jankovcova 1522/53, Holešovice, 170 00 Praha 7, www.alza.cz

15
Obsah balení
•1x Webkamera
•1x Uživatelská příručka
•1x Lehký stativ
Systémové požadavky
•IBM PC nebo kompatibilní PC nebo notebook s USB portem
•Pentium 1G nebo vyšší CPU
•Více než 500 MB volného místa na pevném disku
•Paměť 256 MB
•Podporuje kartu DirectX 9.0 VGA
Pro HD 1080P videonahrávání
•2,4 GHz Intel CoreTM 2 Duo
•2 GB RAM
•1GB místa na pevném disku
•USB 2.0 port

16
Popis produktu
Připevnění a připojení kamery
Umístěte webovou kameru tam, kam chcete, na monitor počítače nebo na rovnou
plochu. Chcete-li nasadit na počítačový monitor, rozevřete klip a umístěte webovou
kameru na monitor počítače, aby byla zachycena sklopným pružným klipem za okraj
obrazovky. Po připevnění webové kamery připojte kabel USB k portu USB počítače.
Otáčením univerzálního stativu připevněte k otvoru ve spodní části produktu, poté
můžete předmět umístit na požadované místo.
1080P objektiv kamery
USB připojovací
kabel
Sklopné
Pružný klip
Manuálně otáčivá čočka
Před použitím
zaostřete
objektiv.
Na stůl
Na monitor počítače
Nebo
17
Pro Windows XP/Vista/7/8
Stáhněte si software AMCAP Webcam a zkontrolujte, zda kamera funguje, poté použijte
tento software k záznamu videa. Stačí jej jednoduše stáhnout a otevřít, není třeba jej
instalovat. K dispozici na www.ausdom.com.
Kroky pro použití softwaru AMCAP:
Připojte webovou kameru k počítači a před otevřením softwaru AMCAP počkejte, až
počítač webovou kameru rozpozná.
a) Pokud je okno prázdné, klikněte na „Možnosti“ (“Options”) a vyberte „náhled“
(“preview”). Nezapomeňte zaškrtnout webovou kameru v části „zařízení“
(“device”).

18
b) Můžete upravit nastavení, jako je formát videa/telefonu/velikost okna, výběrem
„Video Capture Pin…“ pod „Možnosti” (“Options”).
c) Chcete-li vypnout mikrofon, postupujte následovně:
Můj počítač →Stiskněte „pravé tlačítko“ →Správa →Správce zařízení →Zvukový,
Herní, Video ovladač →USB audio zařízení →Stiskněte „pravé tlačítko“ →
Zastavit:
(My computer →Stiskněte „pravé tlačítko“ →Manage → Device manager →
Sound, Game, Video controller →USB Audio device →Stiskněte „pravé tlačítko“
→Stop
d) Pro nastavení hlasitosti mikrofonu:
Pro systém XP: klikněte pravým tlačítkem na ikonu hlasu v pravém dolním rohu,
otevřete ovladač hlasitosti (Volume controller) →Možnost (Option) →Atribut
(Attribute) →Směšovač zvuku (Audio mixer) →Vyberte „USB audio zařízení“ (USB
audio device) nebo „USB mikrofon“ (USB Microphone) →Potvrdit (Sure)→
Upravte hlasitost podle potřeb
Pro systém Win7/8/Vista: Ovládací panel →Zvuk (Sound) →Záznam (Record)→
Poklepejte na zvukové zařízení USB nebo USB mikrofon →Atribut mikrofonu
(Microphone attribute) →úroveň (level) →Upravte hlasitost podle potřeby.
19
e) Pro nahrávání videa/zachycení fotografií:
Nahrávání videa: Zachytit (Capture) →Start Capture →Výběrem OK zahájíte
snímání videosekvence a soubory uložíte. Před zahájením záznamu můžete
vybrat adresář pro ukládání nahraných videí, File →Set Capture Directory.
Zachycení fotografie: Photo →Start photo
Pro Windows 10
a) Připojte webovou kameru k počítači a počkejte, až počítač webovou kameru
rozpozná.
b) Stiskněte tlačítko Startu , a v seznamu aplikací vyberte “Kamera” („Camera“).
20
c) Na pravé straně aplikace najdete dvě tlačítka: jedno pro fotografování a druhé
pro nahrávání videí. Větší tlačítko zobrazuje režim, který je aktuálně zapnutý.
Chcete-li přepnout režim, stačí kliknout nebo klepnout na druhé tlačítko (videa
nebo fotografie). Fotografování/nahrávání videa:
Fotografování: V režimu fotografie →klikněte nebo klepněte na tlačítko
fotografie.
Nahrávání videa: V režimu videa →pro spuštění klikněte nebo klepněte na
tlačítko videa →pro ukončení znovu klikněte nebo klepněte na tlačítko videa.
d) Chcete-li přepnout z vestavěné kamery na kameru AUSDOM, klikněte na
„přepínač kamery“ (“camera switch”) v levém horním rohu.
Table of contents
Languages:
Other ausdom Webcam manuals


