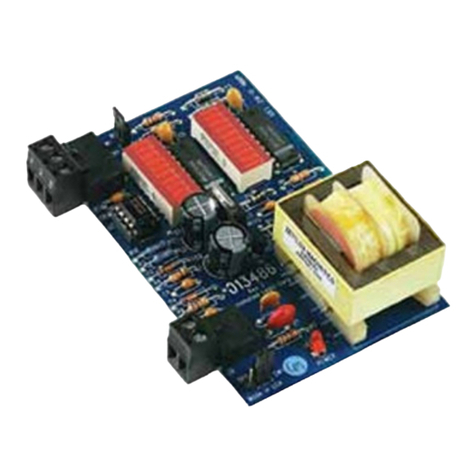
Automated Logic MX800 Owner's manual

Automated Logic Corporation •1150 Roberts Blvd. •Kennesaw, GA 30144 • 770/429-3000 •770/429-3001 Fax •
www.automatedlogic.com • Copyright 2000 Automated Logic Corporation. All rights reserved. Automated Logic, the
Automated Logic logo, SuperVision, Eikon, and Alert are registered trademarks of Automated Logic Corporation.
InterOp is a trademark of Automated Logic Corporation. BACnet®is a registered trademark of ASHRAE. All other brand
and product names are trademarked by their respective companies.
Technical Instructions
MX800
Using the MX800 2
Specifications 2
Mounting 3
Addressing 3
Power Wiring 3
Digital Outputs 3
Channel Numbers 4
Troubleshooting 4
LEDs 4
Protection 5
Production Date 5

Revised 3/29/00 • MX800 2 © 2000 Automated Logic Corporation
Using the MX800
The MX800 is part of the M-Line, which
allows a complete controls system to be built
a piece at a time. By attaching the MX800
expander to M or Mcpu controllers, your
systemcangrowasthesizeofthejob
increases. The MX800 has eight digital
outputs.
The MX800 provides the communications
circuitry and removable screw terminals for
I/O connections.
CAUTION Changes or modifications to this
unit not expressly approved by the party
responsible for compliance could void the
user’s authority to operate equipment.
NOTE This equipment has been tested and
found to comply with the limits for a Class A
digital device, pursuant to Part 15 of the FCC
Rules. These limits are designed to provide
reasonable protection against harmful
interference when the equipment is operated
in a commercial environment. This
equipment generates, uses, and can radiate
radio frequency energy and, if not installed
and used in accordance with the instruction
manual, may cause harmful interference to
radio communications. Operation of this
equipment in a residential area is likely to
cause harmful interference in which case the
user will be required to correct the
interference at his own expense.
Specifications
Power 24VAC ± 10%, 50-60Hz (24VAC
±10%, 60Hz for UUKL Smoke Control
Systems), 20VA power consumption
single Class 2 source only, 100VA or less.
Digital Outputs eight digital outputs,
relay contacts rated at 3A resistive @
24VAC. Configurable as normally open or
normally closed.
Environmental Operating Range 0°to
130°F(-17.8°to 54.4°C); 10 to 90%
relative humidity, non-condensing. (For
UUKL Smoke Control Systems, 32 to
120.2 °F[0to49°C]; 10 to 85% relative
humidity, non-condensing.)
Figure 1. Module Dimensions and Layout
23/4"
7cm
71/2"
19.05cm
I/O
Expansion Rotary
Address
I/O
Expansion
DO-8
DO-7
DO-6
DO-5
DO-4
DO-3
DO-2
DO-1
I/O
Expansion
MX800
POINT EXPANDER
On Off
Class 2
24 Vac, 50-60 Hz
20VA, 0.83A
Use Copper
Conductors Only
Gnd
24 Vac
Power
Run
Auto Off On
Digital Outputs
24V Max.
3A Max.
NC NO
Expander
Address
CAUTION:
To Reduce the Risk of Fire
or Electrical Shock,
Do Not Interconnect The
Outputs of Different
Class 2 Circuits
16
15
14
13
12
11
10
9
8
7
6
5
4
3
2
1
11 5/16"
28.73cm
1/4"
0.6cm
325/32"
9.6cm
Expander
I/O
HOA
Switches

Revised 3/29/00 •MX800 3 © 2000 Automated Logic Corporation
Status Indication Visual (LED) status of
expansion communication, running, and
power.
Protection Voltage, current, and ESD
protection on incoming power.
Listed by UL 916 (PAZX), cUL C22.2 No.
205-M1983 (PAZX7), FCC Part 15 -
Subpart B - Class A.
Mounting
Screw the MX800 into an enclosed panel
using the mounting holes provided on the
cover plate. Be sure to leave about 2 inches (5
centimeters) on each side for wiring.
Addressing
Before setting or changing the address, make
sure the MX800’s power is off. The MX800
only reads the address when the module is
turned on.
The MX800 uses a rotary switch to assign the
module’s expander number. If the module’s
expander address is three, set the switch to
three, as shown in Figure 2.
Power Wiring
Whenever possible, make sure the module’s
power and communications connections are
working properly before connecting any input
or output points.
CAUTION The MX800 module is a Class 2
device (less than 30VAC, 100VA maximum).
Take appropriate isolation measures when
mounting the MX800 module in a control
panel where non-Class 2 devices (for
example, 120VAC) or wiring are present.
You can power several modules from the
same transformer if you maintain the same
polarity.
The MX800’s operating range is 21.6VAC to
26.4VAC. If voltage measured at the module’s
power input terminals is outside this range,
the module may not work properly.
1. Turn the module’s power off. This
prevents the module from being powered
up before the proper voltage is verified.
2. Make sure the 24VAC power source is off.
3. Connect the power wires to the module’s
power terminals labeled Ground and
24VAC (see Figure 1 on page 2 for
location).
4. Apply power to the transformer.
5. Make sure that 24VAC is present at the
module’spowerinputterminals.
6. Set the module’s address. Refer to
“Addressing”on page 3 for details about
setting the address.
7. Turn the module’spowerswitchon.
When the module turns on, the Run and
Power LEDs turn on. The Run LED begins
blinking and the Error LED turns off. See
“LEDs”on page 4 to troubleshoot the
LEDs. If the module does not respond, call
Technical Support at (770) 429-3002.
Digital Outputs
The MX800 module has eight digital outputs
that can be connected to a maximum of 24
Volts AC/DC. Each output is a dry contact
(rated at 3A, 24VAC maximum) that can be
configured as normally open or normally
closed, according to the jumper setting.
Figure 2. Setting the expander’s address
1's

Revised 3/29/00 •MX800 4 © 2000 Automated Logic Corporation
Be sure the MX800’s power is off before
wiring any inputs or outputs. Connect the
output wiring to the screw terminals on the
module as shown in Figure 3.
NOTE Donotpowerpilotrelaysfromthe
same transformer that powers the MX800.
To verify each output’s operation, lock the
output to a known condition using the
Function Block’s Parameter page, then make
sure the equipment actually operates as
specified.
Each digital output can be placed in Manual
or Auto mode by setting the HOA switches
(see Figure 1 on page 2 for the switches’
location). Table 1 shows the status of the
digital output based on the output’s
configuration and the HOA switch position.
You can monitor the status of the HOA
switches through SuperVision by assigning
each switch a digital input in the FB using
channel numbers 81 through 88. Channel 81
corresponds to HOA switch number one;
channel 82 corresponds to HOA switch two,
and so on.
An off status on these channels means the
HOAswitchisinAutomode.Anonstatus
means the HOA switch is in Manual mode.
Channel Numbers
The following tables show the valid channel
numbers for each point on the MX800. Enter
the channel number in Eikon before the
Function Block is made, or on the FB’s
Parameter page in SuperVision.
Troubleshooting
LEDs
The MX800 module has several LED
indicators to show the status of certain
functions.
Power - lights when power is being supplied
to the module.
Run - flashes to indicate a normal condition.
Figure 3. Digital Output Wiring
Table 1. HOA Switch Positions
On Off Auto
Normally
open
output
DO
contacts
closed
DO
contacts
open
determined
by FB
programming
Normally
closed
output
DO
contacts
open
DO
contacts
closed
determined
by FB
programming
Status page
result (use
channel
numbers
81- 88)
ON ON OFF
N/C N/O
DRY
CONTACT
24VAC
B
A
B
A
B
A
B
A
B
A
B
A
B
A
B
A
Table 2. Digital Output Channel Numbers
Point Signal Type Channel
Number
DO 1 Digital
HOA Status† 11
81
DO 2 Digital
HOA Status† 12
82
DO 3 Digital
HOA Status† 13
83
DO 4 Digital
HOA Status† 14
84
DO 5 Digital
HOA Status† 15
85
DO 6 Digital
HOA Status† 16
86
DO 7 Digital
HOA Status† 17
87
DO 8 Digital
HOA Status† 18
88
† Use digital input microblocks to
monitor the status of HOA Switches.

Revised 3/29/00 •MX800 5 © 2000 Automated Logic Corporation
Expander Comm - flashes to indicate
expansion bus communications are valid.
Digital Output Status - lights when the digital
output is activated.
Protection
The MX800 module is protected by internal
solid state Polyswitches on the incoming
power. These Polyswitches are not
replaceable and will reset themselves if the
condition that caused the fault returns to
normal.
Production Date
To determine when a module was
manufactured, check the module status
report for the module in SuperVision. Refer to
the SuperVision User’s Guide for more
information about the module status report.
A sticker on the back of the module also
shows the date the module was
manufactured. The first three characters on
the sticker indicate the type of module. The
next three characters show the year, month,
and week of manufacture. (The month digit is
in hexadecimal.)
Table of contents
Other Automated Logic Control System manuals