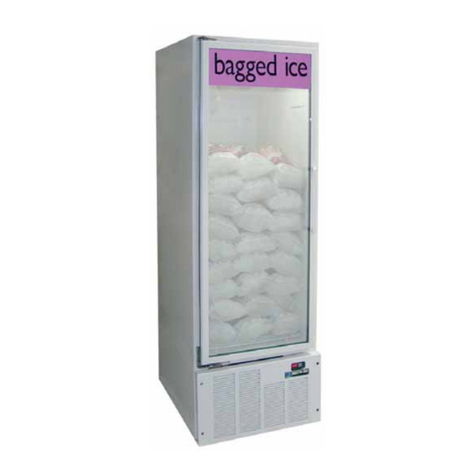
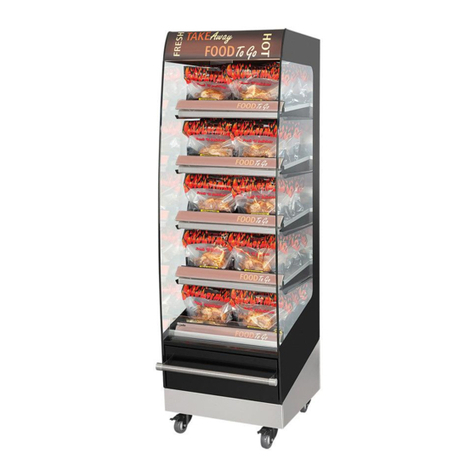
Automatic Products 310 Instruction and safety manual

75 WEST PLATO BOULEVARD • ST. PAUL, MINNESOTA 55107-2095
AUTOMATIC PRODUCTS international, ltd.
OPERATING SYSTEM &
SERVICE MANUAL
MODEL 310 CONTROL MODULE
MODEL 320 MERCHANDISER
PLEASE DONOT
REMOVE MANUAL
FROM MACHINE
APi 320 V4.59

general index
Table of Contents
Sections 1 & 2
Section 3
Quick Set Up Guide
Table of Contents
Section 4
Advance Set Up and Operations Guide
Section 5
Parts
Section 6
Trouble Shooting

WARRANTY . . . . . . . . . . . . . . . . . . . . . . . . . . . . . . . . . . . . . . . . . . . . . . . . . . . . . . . . . . . . . . . . . . . . . . . . . . . . . . . . .ii
INTRODUCTION . . . . . . . . . . . . . . . . . . . . . . . . . . . . . . . . . . . . . . . . . . . . . . . . . . . . . . . . . . . . . . . . . . . . . . . . . . . . .iii
HOW TO USE THIS MANUAL . . . . . . . . . . . . . . . . . . . . . . . . . . . . . . . . . . . . . . . . . . . . . . . . . . . . . . . . . . . . . . . . . . . .iii
STANDARD FEATURES . . . . . . . . . . . . . . . . . . . . . . . . . . . . . . . . . . . . . . . . . . . . . . . . . . . . . . . . . . . . . . . . . . . . . . . .iv
UNPACKING . . . . . . . . . . . . . . . . . . . . . . . . . . . . . . . . . . . . . . . . . . . . . . . . . . . . . . . . . . . . . . . . . . . . . . . . . . . . . .1.01
CLEANING . . . . . . . . . . . . . . . . . . . . . . . . . . . . . . . . . . . . . . . . . . . . . . . . . . . . . . . . . . . . . . . . . . . . . . . . . . . . . . .1.01
INSTALLATION . . . . . . . . . . . . . . . . . . . . . . . . . . . . . . . . . . . . . . . . . . . . . . . . . . . . . . . . . . . . . . . . . . . . . . . . . . . .1.02
TOWER INSTALLATION INSTRUCTIONS . . . . . . . . . . . . . . . . . . . . . . . . . . . . . . . . . . . . . . . . . . . . . . . . . . . . . . . .1.04
OPTIONAL EQUIPMENT . . . . . . . . . . . . . . . . . . . . . . . . . . . . . . . . . . . . . . . . . . . . . . . . . . . . . . . . . . . . . . . . . . . . .1.05
COMPONENTS . . . . . . . . . . . . . . . . . . . . . . . . . . . . . . . . . . . . . . . . . . . . . . . . . . . . . . . . . . . . . . . . . . . . . . . . . . . 2.01
Tower Power Supply . . . . . . . . . . . . . . . . . . . . . . . . . . . . . . . . . . . . . . . . . . . . . . . . . . . . . . . . . . . . . . . . . . . . . . 2.01
Lighting System . . . . . . . . . . . . . . . . . . . . . . . . . . . . . . . . . . . . . . . . . . . . . . . . . . . . . . . . . . . . . . . . . . . . . . . . .2.01
Main Product Shelves . . . . . . . . . . . . . . . . . . . . . . . . . . . . . . . . . . . . . . . . . . . . . . . . . . . . . . . . . . . . . . . . . . . . .2.01
Conveyer Shelf . . . . . . . . . . . . . . . . . . . . . . . . . . . . . . . . . . . . . . . . . . . . . . . . . . . . . . . . . . . . . . . . . . . . . . . . . 2.01
Removal of Product Shelf . . . . . . . . . . . . . . . . . . . . . . . . . . . . . . . . . . . . . . . . . . . . . . . . . . . . . . . . . . . . . . . . . . 2.01
Delivery Bin . . . . . . . . . . . . . . . . . . . . . . . . . . . . . . . . . . . . . . . . . . . . . . . . . . . . . . . . . . . . . . . . . . . . . . . . . . . .2.01
Heated Glass . . . . . . . . . . . . . . . . . . . . . . . . . . . . . . . . . . . . . . . . . . . . . . . . . . . . . . . . . . . . . . . . . . . . . . . . . . .2.01
DEX/UCS . . . . . . . . . . . . . . . . . . . . . . . . . . . . . . . . . . . . . . . . . . . . . . . . . . . . . . . . . . . . . . . . . . . . . . . . . . . . . .2.01
Printer Support . . . . . . . . . . . . . . . . . . . . . . . . . . . . . . . . . . . . . . . . . . . . . . . . . . . . . . . . . . . . . . . . . . . . . . . . . 2.01
Coin Mechs . . . . . . . . . . . . . . . . . . . . . . . . . . . . . . . . . . . . . . . . . . . . . . . . . . . . . . . . . . . . . . . . . . . . . . . . . . . . .2.02
Bill Validators . . . . . . . . . . . . . . . . . . . . . . . . . . . . . . . . . . . . . . . . . . . . . . . . . . . . . . . . . . . . . . . . . . . . . . . . . . .2.02
Debit Cards . . . . . . . . . . . . . . . . . . . . . . . . . . . . . . . . . . . . . . . . . . . . . . . . . . . . . . . . . . . . . . . . . . . . . . . . . . . . 2.02
The Chime . . . . . . . . . . . . . . . . . . . . . . . . . . . . . . . . . . . . . . . . . . . . . . . . . . . . . . . . . . . . . . . . . . . . . . . . . . . . . 2.02
Interlock Switch . . . . . . . . . . . . . . . . . . . . . . . . . . . . . . . . . . . . . . . . . . . . . . . . . . . . . . . . . . . . . . . . . . . . . . . . . .2.02
Temperature Monitoring . . . . . . . . . . . . . . . . . . . . . . . . . . . . . . . . . . . . . . . . . . . . . . . . . . . . . . . . . . . . . . . . . . . .2.03
The Refrigeration System . . . . . . . . . . . . . . . . . . . . . . . . . . . . . . . . . . . . . . . . . . . . . . . . . . . . . . . . . . . . . . . . . . 2.03
Refrigeration Control . . . . . . . . . . . . . . . . . . . . . . . . . . . . . . . . . . . . . . . . . . . . . . . . . . . . . . . . . . . . . . . . . . . . . 2.03
Defrost Processing . . . . . . . . . . . . . . . . . . . . . . . . . . . . . . . . . . . . . . . . . . . . . . . . . . . . . . . . . . . . . . . . . . . . . . . 2.04
Vend Motors . . . . . . . . . . . . . . . . . . . . . . . . . . . . . . . . . . . . . . . . . . . . . . . . . . . . . . . . . . . . . . . . . . . . . . . . . . . . 2.05
Cabinet and Shelf Harnesses . . . . . . . . . . . . . . . . . . . . . . . . . . . . . . . . . . . . . . . . . . . . . . . . . . . . . . . . . . . . . . .2.05
Selection System . . . . . . . . . . . . . . . . . . . . . . . . . . . . . . . . . . . . . . . . . . . . . . . . . . . . . . . . . . . . . . . . . . . . . . . .2.07
MasterMenu Keypad . . . . . . . . . . . . . . . . . . . . . . . . . . . . . . . . . . . . . . . . . . . . . . . . . . . . . . . . . . . . . . . . . . . . . 2.08
LogiCenter Board . . . . . . . . . . . . . . . . . . . . . . . . . . . . . . . . . . . . . . . . . . . . . . . . . . . . . . . . . . . . . . . . . . . . . . . . 2.09
Food Driver Board . . . . . . . . . . . . . . . . . . . . . . . . . . . . . . . . . . . . . . . . . . . . . . . . . . . . . . . . . . . . . . . . . . . . . . . 2.09
The Front Panel Display . . . . . . . . . . . . . . . . . . . . . . . . . . . . . . . . . . . . . . . . . . . . . . . . . . . . . . . . . . . . . . . . . . . 2.09
To achieve the most trouble-free operation from your APi 320 series Merchandiser, it is recommended that this service
manual be thoroughly read and the instructions followed pertaining to installation, servicing and maintaining of the unit.
Should you have questions pertaining to this manual or the vendor, please contact your APi distributor or write directly to:
Technical Service Dept.
Automatic Products int. ltd.
75 West Plato Blvd.
St. Paul, MN. 55107 USA
651-224-4391
651-602-3558 (fax)
©1999 Automatic Products international, ltd
table of contents

WARRANTY
ii
Automatic Products international ltd. (APi) expressly warrants these automatic merchandisers (the "Unit"),
manufactured by it, to be free under normal use and service from defects in material or workmanship for a
period of two (2) years from the date of delivery of this Unit to the original purchaser. This warranty extends
only to the original purchaser of the Unit.The exclusive remedy for this warranty is limited to the repair or
replacement, at APi's sole option, of any part or parts of the Unit that are returned to APi or to the
authorized dealer or distributor of APi from whom the unit was purchased with all transportation charges
prepaid, and which, on APi's examination, shall, conclusively appear to have been defective. This warranty
does not:
a. extend to any Unit, or part thereof, that was subjected to misuse, neglect, or accident by other
than APi after its delivery to the original purchaser;
b. extend to any Unit, or part thereof, that was modified, altered, incorrectly wired or improperly
installed by anyone other than APi or used in violation of the instructions provided by APi;
c. extend to a Unit which has been repaired or altered by anyone other than APi or authorized
dealer/distributor;
d. extend to a Unit which has had the serial number removed, defaced or otherwise altered;
e. extend to plastic or glass windows, lamps, fluorescent tubes and water contact parts;
f. extend to any unit used outdoors
g. extend to accessories used with the Unit that were manufactured by some person or entity
other than APi.
APi DISCLAIMS ALL OTHER WARRANTIES OF ANY KIND AS TO THE UNIT AND ALL WARRANTIES
OF ANY KIND AS TO ANY ACCESSORIES. THIS DISCLAIMER OF WARRANTIES INCLUDES ANY
EXPRESS WARRANTIES OTHER THAN THE LIMITEDWARRANTY PROVIDED ABOVE AS TO THE
UNIT AND ALL IMPLIED WARRANTIES OF MERCHANTABILITY AND FITNESS FOR A PARTICULAR
PURPOSE AS TO THE UNIT AND ANY ACCESSORIES. UNDER NO CIRCUMSTANCES SHALL APi BE
RESPONSIBLE FOR ANY INCIDENTAL, CONSEQUENTIAL OR SPECIAL DAMAGES, LOSSES OR
EXPENSES ARISING FROM OR IN CONNECTION WITH THE USE OF, OR THE INABILITY TO USE,
THE GOODS FOR ANY PURPOSE WHATSOEVER. No representative of APi or any other person is
authorized to assume for APi, or agree to on the behalf of APi, any other liability or warranty in connection
with the sale of this Unit.
APi reserves the right to make any changes or improvements in its products without notice and without
obligation, and without being required to make corresponding changes or improvements in Unit theretofore
manufactured or sold.
75 West Plato Boulevard
St. Paul, MN 55107

iii
introduction
The APi 120/320 features the MasterVend Control System and MasterMenu system which provide a user friendly menu
to setup and configure the machine. The simple operation and built in flexibility of this system allows each user to
customize the menu system to their preference. The system can be configured to display service and operational mode
messages in any of six different languages and support up to 110 selections. Robust testing capability as well as
extensive diagnostics and error reporting facilities are built in to provide ease of maintenance.
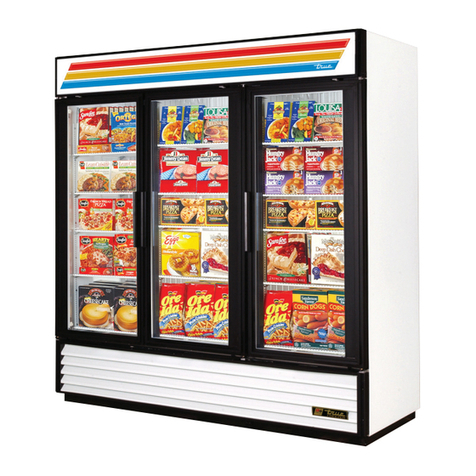
The APi 320 Series machine is designed to be used as a refrigerated or frozen, pre-packaged food merchandiser.
Changing the machine between refrigerated and frozen is accomplished by choosing between food or frozen on the
LogiCenter (LCB) board. In addition there is a default setting (jumper) on the Food Driver Board (FDB) to ensure that if
the FDB should loose communications with the LCB, the refrigeration unit will maintain the temperature of the default
setting, refrigerated or frozen. All APi 320 series machines are companion machines and are dependent upon a Control
module or 120 series snack merchandiser to control the machine.
The Control module is a cabinet that mounts to the right side of the API 320.The Control module contains a power
supply, LogiCenter board (LCB), selection keypad, coin mech and any other peripherals. The Control module is capable
of supporting up to two machines. When two machines are attached to one Control module, each machine has the
capability of being set up independently as a food or frozen.The APi 120 Series snack machine is capable of supporting
one 320 Series merchandiser.
HOW TO USE THIS MANUAL
This manual is divided into six basic parts:
1. Unpacking and Installation.
2. Components.
3. Quick set up Guide.
4. Advanced set up and Operating system.
5. Parts.
6. Troubleshooting.
◆◆◆◆◆◆◆◆◆◆◆◆◆◆◆◆◆◆◆◆◆◆◆◆◆◆◆◆◆◆◆◆◆
WATCH THROUGHOUT THE MANUAL FOR THIS
SPECIAL ◆DIAMOND MARK.THIS INDICATES A
POINT OF SPECIAL INFORMATION OR A HINT
THAT WILL ASSIST YOU IN SETTING UP,
OPERATING OR TROUBLESHOOTING THE
MACHINE.
◆◆◆◆◆◆◆◆◆◆◆◆◆◆◆◆◆◆◆◆◆◆◆◆◆◆◆◆◆◆◆◆◆
CAUTION: Certain procedures in both the operating section and the service
section require that voltage be on in the machine. Only trained personnel should
perform this function. Exercise extreme caution while performing these
procedures. These procedures will be marked with the lightening bolt symbol as
it appears at left.
◆
◆
◆
◆
◆
◆
◆
◆
◆
◆
◆
◆
◆
◆
◆
◆
CAUTION: Certain procedures in both the operating section and the service
section requires a qualified trained technician to perform the particular task at
hand.These procedures will be marked with the exclamation symbol as it appears
at left.

iv
STANDARDFEATURES
■Up to 80 selections.
■Multi drop buss capabilities.
■Extensive diagnostics capabilities.
■Friendly text based interface.
■Configuration upload and download capabilities.
■User programmable function keys.
■Flexible spiral spacing for large products.
■Eight point star drive motor.
■Four security levels.
■Six languages.
■Machine reset capability.
■Real time clock.
■Personal computer interface.
■Printer interface.
■Chime.
PRICING
■Global pricing by machine or by shelf.
■Extensive discounting capabilities.
■Shutdown capabilities.
■Combo vends.
■Product codes.
■Programmable spiral count.
■
Upload and download capabilities for pricing and set up.
■Programmable maximum payout.
■Extensive accountability, including all discounts and
free vends.
SCROLLING DISPLAY
■User friendly scrolling display to help with the
selection process and provide customer feedback.
■User programmable point of sale and
■Operational messages.
■20 character display.
OPTIONS
■Point of sale window.
■Delivery bin cushion.
■Base kit.
■Lexan window.
■MasterMenu™ online software.
■Transportable memory unit.
NOISE LEVEL:
Operates at less than 70 dB(A)
ACCEPTABLE AMBIENT OPERATING TEMPERATURE
RANGE
All equipment manufactured by Automatic Products
intl. Ltd. is designed to work properly in a temperature
range of 10˚C to 38˚C (50˚F to 100˚F) in still air (75% R.H.
non-condensing).The machine is being stored in a
temperature range of -18˚C to 68˚C (0˚F to 155˚F).
features of the APi 320 food/frozen merchandiser
Height 72”/ 183 cm 72”/ 183 cm 72” / 183 cm 72” / 183 cm
Width 10.25”/ 26cm 10.25” / 26cm 10.25” / 26cm 10.25” / 26cm
Depth 33.33” / 84 cm 33.33” / 84 cm 33.33”/ 84 cm 33.33”/ 84 cm
Voltage (AC) 120V 230V 120V 230V
Hertz 60Hz 50Hz 60Hz 50Hz
Standby Amperes 0.7A .35A 1.7A .8A
Running Amperes 1A .5A 16A 8A
Watts 120W 1440W 1920W 1840W
Refrigerant Type N/A N/A 404A 404A
Refrigerant Charge N/A N/A 27 oz / 76 Kg 27 oz / 76 Kg
High Side Test Pressure
N/A N/A 440 psi 440 psi
Low Side Test Pressure
N/A N/A 162 psi 162 psi
Shipping Weight 190 lbs / 86 kg 190 lbs / 86 k 800 lbs / 363 kg 800 lbs / 363 kg
SPECIFICATIONS 310
DOMESTIC
310
EXPORT
320
DOMESTIC
320
EXPORT

1.01
unpacking
The APi 320 Series is assembled and packed so that a
minimum amount of time is necessary for preparation to
install it on location. The following steps are
recommended to insure correct unpacking.
1. Shipping Damage: Thoroughly inspect the exterior of
the carton for damage which may have occurred
during shipment. Report any damage to delivering
carrier and follow their instructions.
2. Remove staples from lower edge and those at top of
carton, and slit carton vertically at the taped corner.
Open and remove carton. Remove the remainder of
the packing material. On machines shipped with lock
in place, the keys are taped inside the coin return.
3. Remove Vendor With A Fork Lift Truck:
Remove the carton from the vendor. From the front of
the vendor tip the vendor backward and run forks
under the cabinet.
4. Removing Vendor Without A Fork Lift Truck:
Remove the carton from the vendor. Break off the thin
piece of board behind the rear legs. From the front of
the machine tip the vendor back enough to clear the
lower legs from the holes in the front board. Push
the machine back off the base. Remove the pallet.
NOTE: Because the weight concentration is
toward the back of the cabinet, trucking and lifting
should be done from the back. CAUTION should
be taken when trucking from side .
5. On machines with lock in place, unlock, and turn
handle to open door. When no lock is furnished,
remove tape and turn handle. Swing door to its full
open position.
6. Remove all packing tape and paper from various
areas of machine and the shipping strap.
7. Warranty: The warranty card is attached to the cover
of this manual. It must be filled out in full and mailed
at once to insure coverage.
◆IMPORTANT: A set of anchoring brackets are sent
with each machine. The kit is located in the bottom of
the machine complete with instructions. It is
recommended that this kit be installed to prevent shifting
of the machine.
8. Air Deflector: Remove the air deflector from the
delivery bin. Loosen to four screws holding the screen
on the back of the machine, place the slotted holes in
the air deflector over the screws and push down,
re-tighten the screws.
CLEANING & MAINTENANCE
The 320 Series Merchandiser will do the best
merchandising job for you if it is kept clean.The amount of
cleaning your machine will require will vary from location
to location depending on the environment. We suggest
that a thorough cleaning be preformed at least twice a
year in a clean environment, in addition to this, light
cleaning that should be performed each service. The
display windows can be cleaned with any good glass
cleaner. The exterior and interior surfaces should be
cleaned with warm water and mild detergent (food grade).
Rinse thoroughly and dry all surfaces. Always use a clean
lintless disposable towel for cleaning.Their is an option
in the software to preform a manual defrost (see the
operating system section of this manual for instructions ).
The main product shelves can be best cleaned with the
spirals and product spacers removed. Refer to page 1.03
for removal of spirals and removal of the product spacers.
Clean the acceptor on the changer frequently as
accumulated dirt in this area can cause coins to hang or
not be accepted. Follow recommended cleaning
procedures as described by the manufacturer.
◆It Is extremely important that the air intake screen for
the refrigeration unit is cleaned weekly and that no
product is stored in this machine blocking this screen
or the condenser unit.This screen is located toward the
front and center of the machine floor.

1.02
Leveling the Machine on location is important for the
machine to function properly. The four leveling screws in
the legs are the means of leveling the machine. After
positioning the machine, level machine in front to rear and
right to left directions. After leveling, turn front right (lock
side) leveling screw in about one-half turn to drop this
corner slightly to make the door easier to close and lock.
Voltage and Polarity Check. It is important that this
machine is hooked up to the proper voltage and polarity.
Using a voltmeter, perform the following checks from the
illustration below.
◆NOTE: It is imperative that the machine is on it’s own
20 AMPERE SERVICE. Only the Control module may be
plugged into the same service.
NOTE: Should the readings be different from above,
have a certified electrician correct the problem.
For Health reasons it should be noted that cold
(refrigerated) or frozen vending machines are designed
for short term storage of already refrigerated or frozen
product. The definitions for cold and frozen machines are
as follows:
1. Cold is defined as 41°F (5°C) or lower for cold food.
All food in a Refrigerated machine must have a
product expiration date on the package. See your
product suppler for specifics on date codes and
expiration dates.
2. Slack is defined as a frozen machine set below 15°F
(-9°C) or lower for slacking precooked frozen food.
3. Frozen is defined as 0°F (-18°C) or lower for frozen
food. Items used in a frozen machine should have
frozen designated packaging.
When installing a machine, the machine should be
allowed to pull down to operating temperature before
loading product into the machine, approximately 1 hour
for a cold machine and 2 hours for a frozen machine.
See blue page 3.01 for instructions on setting temperature.
For more information on pull down times and health
control see page 2.03 of the components section of this
manual.
Loading Shelves. Open door to full open position, push
down on the two plastic lock levers on right and left side
panel by shelf to unlock shelf, holding lever down. Grasp
the shelf, under both front corners, lift front shelf slightly
and pull forward until shelf reaches its stop. The shelves
tilt down (do not drop) to make loading easier. Only one
product shelf should be in the loading position at a time.
When returning a shelf, be sure the shelf is in its full home
or vend position. Begin loading
with the top shelf. Move it to the loading position.The
height spacing for items is greatest in this shelf and the
tallest items should be placed there. Soft items, should
be placed in the lowest shelf, making the drop distance
as short as possible.
installation
CAUTION: THIS MACHINE IS DESIGNED
FOR INDOOR USAGE ONLY. ANY OTHER
USAGE MAY VOID THE MANUFACTURERS
WARRANTY.
CAUTION: THE FOLLOWING PROCEDURE
REQUIRES THAT THE MACHINE HAVE
POWER APPLIED AND A POTENTIAL
ELECTRICAL SHOCK HAZARD EXISTS.

1.03
IMPORTANT: Product must not be forced into the spiral
spaces but should fit freely. If the product is too tight, use
a larger pitch spiral. The bottom of the product should be
placed on top of the spiral wire that rests on the shelf
surface.
Vending Large Products
The 320 Series can be configured to use two spirals to
vend one product.The motor to be paired will be called
the left motor, and must be an even numbered motor. Any
even numbered motor may be paired.This motor must
always be paired to the odd numbered motor next in
sequence (i.e. motor “110” will always be paired with
motor “111” and “114” always with “115”). Only motors in
the same row of the machine can be paired. For more
information on Motor pairs see the operating system
section of this manual.
Adjusting the Stopping Position of the Spiral.
One primary difference that distinguishes the new motors
from previous motors is the presence of an eight sided
star at the drive hub of the motor. This permits the
stopping position of the spiral to be customized by the
operator to ensure the best possible delivery of product.
To change the stopping position of the spiral, remove the
spiral lock from the motor by pinching the shaft of the
spiral lock from the back side of the motor and pulling
forward on the front side of the spiral lock.The spiral lock
can be reinstalled in any of eight different positions by
turning the spiral lock to the position desired and pushing
the shaft of the spiral lock through the eight sided star at
the drive hub of the motor.
Removal of Spiral. Grasp the front of the spiral and turn
it clockwise for an even numbered selection and
counterclockwise for an odd numbered selection. Lift the
spiral up and off of the spiral lock. When replacing a spiral
attach it around the tab on the spiral lock and turn the
spiral to lock it in place. Be sure the front end of the spiral
is positioned properly. (see Figure 3). The spiral lock is
attached between the spiral retainer tabs. Give a light
forward pull on front of the spiral to check it is locked in
place.
Product Spacers
A product spacer is used to reduce the width of the
product area and can be used on any shelf . Spacers
should fit within 1/8” of the product but should not fit tight
against the product. There are four positions in each
column where these spacers can be placed. To install the
spacer, lift upward on the front of the spacer, align the lock
ear on the rear of the spacer with the slot on the rear of
the cabinet, push the spacer downward aligning the three
tabs on the lower edge of the spacer with the three sets
of slots on the shelf bottom. Pull the spacer forward to lock
in place.
Lock Product Shelves. After all the product has been
loaded be sure all shelves are returned to their vend
position behind the front roller guides.
Install Proper Price Tabs into price tab holder for each
selection in the main product area.
Quick Set up Guide. See page 3.01
installation

1.04
Control module Installation Instructions.
A. Remove the 3 hole plugs from the top, inside right
corner of the 320 cabinet. Once removed, remove the
foam insulation (pre cut) behind the holes.
B. Locate the front and rear lower support brackets on
the bottom right hand side of the 320 cabinet. (These
brackets have already been installed at the factory.)
There should be a 1/8” space opening between the
cabinet side and the mounting bracket, these
mounting brackets can be adjusted by loosening the
2 outside bolts from each of
the leg weld’s on the lock side of the cabinet.
C. Move the base of the Control module close to the 320
cabinet so the bottom left edge of the Control module
rests on the support bracket.Tip the Control module
to an upright position.
D. Install the upper mounting plate using the 1/4-20 kept
nuts provided. Install three in the refrigerated cabinet
and Three in the control module.
E. Put the insulation and plugs back into the 3 holes in
the refrigerated cabinet.
F. Locate the interconnect harness (communications
cable) coming out of the back of the 320 and route it
into the back of the Control module to the LogiCenter
board and plug into the P8 connector (MDB). When
using a MDB coin mech and/or bill validator these
peripherals must be plugged into the pig tail coming
off of the communications cable. The machine
attached to the Control module is considered Cabinet
1.
G. Level the Control module to the machine by adjusting
the leg levelers.
◆NOTE: Because the Control Module is top heavy
and unstable, always use two people when attaching
the it to the 320.
Using a Second Machine with a Control
module.
If a second machine is to be operated off of
the Control module, it should be placed to the right of the
Control module. The second machine is free standing and
does not physically attach to the Control module. Find the
interconnect harness coming out of the back of the
second machine and route it into the back side of the
Control module to the LogiCenter board and plug the
harness into the jumper coming out of the cabinet 1
interconnect harness. This machine is considered Cabinet
2.
◆NOTE:The second machine being run off of a
Control module MUST have it’s own 20 Ampere
service, It CAN NOT be plugged in on the same
circuit as Cabinet 1.
Connecting a 320 to a 120 Series Snack.
A 320 machine can also be driven of a 120
Series snack in lieu of a Control module. To
do this, locate the interconnect harness coming out of the
back side of the food cabinet and route it into the back
side of the snack (remove the triangular plate just above
the line cord) to the LogiCenter board and plug into the J8
connector.
This machine considered Cabinet 2. Only one 320 can be
operated off of a snack machine. NOTE:The 120 and 320
CAN be plugged into the same 20 Ampere service if
necessary.
installation
WARNING
TOP HEAVY EQUIPMENT
CAN CAUSE
PERSONAL INJURY.
USE 2 PEOPLE WHEN
ATTACHING 310 CONTROL
MODULE TO 320 MACHINE.
ONLY INSTALL THE
310 MODULE TO A
320 FOOD MACHINE.
NOTICE
COMMUNICATION CABLE INLET
COMMUNICATION CABLE FROM THE
320 FOOD MACHINE TO A 120 SERIES
SNACK MACHINE OR
310 CONTROL MODULE.
DISCONNECT CABLE (CONNECTIONS)
BEFORE MOVING MACHINES.

1.05
MasterMenu Online Software
MasterMenu Online software gives you the capability of
completely setting up any 120 Series Snack
merchandiser, 310 Control Module, 320 food
merchandiser, or 223 Hot beverage merchandiser on your
personal computer (PC).MasterMenu Online also has the
ability to load complete new logic board software revisions
to a machine. To load complete new software into a
machine the PC must be connected directly to the
machine logic board via a cable P/N 56800022 and the
DEX/UCS harness P/N 680509 . Software updates can be
sent to you via e-mail or as a file on a floppy disk.
MasterMenu Online Installation
Personal Computer Requirements
To install MasterMenu Online, you need:
■Personal or Multimedia computer with a 486 or
higher processor.
■Microsoft Windows 95 operating system or later.
■16 MB of Ram.
■5 MB of hard disk required.
■VGA or higher resolution video adapter.
■Microsoft Mouse or Compatible pointing device.
■3.5 inch floppy drive
CHIP
Two pieces are required to use CHIP, the touch memory
button (CHIP) and an Upload/download Harness that
allows Chip to communicate with the machine.
Touch Memory Button (Pn 17500003)
The Touch Memory Button (CHIP) can be used to
download to or upload from any 310 Control Module or
APi 20 Series machine. CHIP is capable of storing all
settable data from a machine, with the exception of the
time and date. Once CHIP is programed you can take it to
as many machines as you wish to upload the information
stored in CHIP.CHIP can be overwritten and reused as
many times as desired. CHIP is mounted on a key chain
holder. CHIP can be programed from a machine that is
already set up and then used to set up other machines
that are to be programed identically.
CHIP can also be programed from MasterMenu Online,
MasterMenu Online is a software program that allows you
to set up any 310 Control Module or 20 Series machine
on your personal computer (PC).This information can then
be stored by filename in you PC and is always accessible
for any changes you may want to make the machine in the
future, including pricing. To load CHIP from your PC
requires harness (Pn 17500004), included in this package.
Touch Memory Button (CHIP) and Upload/download
Harness (Pn 16800013)
The CHIP upload/download harness is attached to the
Logic Board (LCB) on J1 (upper right hand corner) and
the other end is mounted on the swing panel in a
depression just above the display, six of these harnesses
included in this package.
Chip Upload and Download Instructions.
1. Open Machine/Tower door, the display should
indicate “Enter for MasterMenu”.
2. Press Enter
3.
Press the > until the display indicates “Configuration”.
4. Press Enter
5. Press the > until the display indicates “Configuration
Load”.
6. Press Enter, the display should read
“MasterMenu Online”.
7. Press the + until the display indicates “Tmu
Upload” ( from Tmu to Lcb) or “Tmu Download”
(From board to Tmu).
8. Press Enter
9. The display will indicate “Awaiting Download” or
“Awaiting Upload”.
10. Press the memory button CHIP against the socket
and the display will indicate “Transfer in Progress”.
When the transfer is complete the display will prompt
“Transfer Complete”. If for any reason the transfer
was unsuccessful the display will prompt “Transfer
Error”.
Note: To Use MasterMenu Online or Chip the Software
on the Logic Board must Be at the Following Revision
or Higher: 3.5 Flash Memory and 3.0 Microprocessor
Echo Package
The Echo package contains the components necessary to
hook a voice synthesizer to any APi 20 series machine.
The voice synthesizer will Echo the display while in
service mode.
Base Kits
Base kits are available to make the vendor compatible
with other manufacturers.
Delivery Bin Cushion
A delivery bin cushion is available for use when vending
heavy items. This cushion is standard in the 320.
Lexan Window
A Lexan window is available as a direct replacement for
the outside tempered glass.
MasterMenu Online Software
MasterMenu Online software provides the means of
remotely configuring the AP 120/320 Series machines.
Conveyer Shelf
The is also a conveyor shelf available for the 320 Series
machine. This shelf is a direct replacement for a standard
shelf. It has a total of 4 columns and can be configured to
hold from 4 to 8 selections per column.
Control module Power Supply
optional equipment

2.01
The 115 VAC power cord from the wall outlet comes into
the machine and plugs into the back of the main junction
box located on the top center of the cabinet. The voltage
output to the board is 24 volts and 8 volts and is plugged
into Logic Center Board.
Lighting System
There are two fluorescent lamps in the APi 320 Series
machines. The lamps are located vertically on the inside
of the door along the edge of the outer glass which light
up the main product area. The starter is located on the
underside of the bottom lamp socket of each lamp. Each
lamp is covered by a plastic shield.
Main Product Shelves:
There are a maximum of five main product shelves per
machine. Each selection has its own motor mounted to
the back of the shelf. Every shelf has its own harness and
plug for connecting to the remainder of the circuit through
the cabinet receptacle, located in the rear right of the
cabinet. You also have the capability to adjust each shelf
1⁄2inch either up or down on any shelf. To do this the shelf
should be removed and the cabinet back harness
receptacle lowered or raised with the right & left shelf
tracks.
Note: When exchanging the shelves, you will not need
any parts but you will have to reprogram the machines for
prices and selections.
Removal of Product Shelf:
A. Lift up and push the lock levers toward the back of
cabinet.
B. Pull the shelf to its loading position.
C. Grasp shelf in front and rear center. Lift front of shelf
up above horizontal and pull shelf forward while lifting.
D. To install shelf, reverse above procedure.
Delivery Bin:
This is located below the display window on the door and
is mechanically operated. The linkage on the outside end
of the delivery bin may require occasional lubrication.
Should the door become difficult to operate, place a small
amount of grease on the arm tracks.
Removal of Delivery Bin:
A. Remove the screws from the sides of the
delivery bin.
These screws fasten into the lower door
brace and remove the two screws and
brackets at the
top of the delivery bin.
B. Grasp delivery bin on both sides and lift upand pull
back. Should the bin be tight, rock it by lifting on one
end, then the other.
Replacement of Delivery Bin:
A. Locate lip on front edge of delivery bin
over lower edge of opening in door and
behind trim. Press down
along lip to make sure it is fully engaged
between door and trim.
B. Install the four screws and two brackets, to secure bin
to door.
Heated Glass
The glass on the inner door is a double pane, heated,
thermal pane. There is a connector on the bottom right
hand side of the glass. The glass receives power for the
heater strip through this connector from the junction box.
DEX/UCS
The APi 310 supports DEX/UCS Communications
Protocol - NAMA Vending Industry Data Retrieval
Standard.The machine will automatically recognize the
DEX/UCS device when it is plugged into the control board
and will recognize when the device initiates the
communication protocol.The transmission/reception of
data to the device will then take place automatically.
Baffle Door
The baffle door is located above the delivery bin and
extends out from the bottom of the main product area.The
purpose of the baffle door is to seal the area between the
refrigerated cabinet and the delivery bin. Each time a
selection is made the baffle door is opened before the
product is delivered and is closed after the product has
been delivered.The baffle door is opened and closed by a
motor mounted toward the back left hand side of the
machine just above the compressor. The baffle door can
be re-opened one time after a vend by pressing the
coin return.
The Chime
The chime will sounded when the following events occur:
•Three times when an invalid key sequence is entered
from either the front panel or the MasterMenu™
Keypad.
• Three times when the customer enters an invalid key
sequence from the front panel.
• Five times when the customer has won a free vend
due to WINNER MODE.
• Five times when the customer attempts to purchase a
sold-out item as determined by spiral selection.
• A single time to indicate the acceptance of an action
by the control system.
Power Interlock Switch
The interlock switch is located on the bottom right corner
of the machine. When the door on the machine is open
the interlock breaks the power (hot and neutral) going into
the refrigerated cabinet control box. Power for the FDB
comes from the LCB via the interconnect harness and
this power is not interrupted by the interlock switch.
components

2.02
DEX/UCS
The APi 120 supports DEX/UCS Communications
Protocol - NAMA Vending Industry Data Retrieval
Standard. The machine will automatically recognize the
DEX/UCS device when it is plugged into the control board
and will recognize when the device initiates the
communication protocol.The transmission/reception of
data to the device will then take place automatically.
Printer Support
The machine is able to print to a 40 character wide printer
connected to the serial port.The communication is as
specified by the user in the Printer Setup Menu .The
machine uses only standard printer control codes to
maximize the number of possible supported printers. The
machine is able to print any of the following types of
information set by a menu item in the MIS Menu heading:
• MIS Data
• Machine Setup/Configuration Parameters
• Diagnostic Information
When an attempt is made to output data to the printer
without a printer connected, an error message will be
displayed indicating that the printer is not connected.
components
The 20 Series Machines Support the 24V Micromech, executive, and MDB protocols for Coin Mechs,
Validators and Card Readers.
NOTE: DO NOT ATTEMPT TO OPERATE TWO DIFFERENT PERIPHERALS
SIMULTANEOUSLY. FOR EXAPMLE: MDB WITH PULSE OR MICROMECH.
Peripherals in Column 1 and 2 can work together and columns 4 and 5 can
work together.
Micro Mech Pulse Validator Executive MDB Coin Mechanism MDB Bill
24V 15 pin 24V Validator
Mars TRC-6010XV VN2502-U5E 540 TRC-6510 VN2502-U5M
VN4010XV VN2512-U5E 560 TRC-6512 VN2512-U5M
VFM1-L2-U4C VN-4510
VFM3-L2-U4C
CoinCo 9302 LF BA32SA 9302-GX BA32SA**
USD-L701 BA32R USQ-G701 BA32R
USQ-L701 USO-G703
USQ-L701
Conlux USLX-001-01F USLZ-004-01F USLZ-004-01F
CCM 5 G
The APi 20 Series will automaticaly determine at power up which peripherals are connected and configure itself
accordingly.

2.03
components
Temperature Monitoring
To display the temperature of all food and/or frozen
cabinets in an installation depress and hold the “C” (for
temperatures to be displayed in Celsius) or “0” (for
temperatures to be displayed in Fahrenheit) button on the
front panel keypad. After three seconds, the temperatures
(in all refrigerated and frozen cabinets present in the
installation) will display for three (3) seconds and continue
to do so until the button is released.
The Refrigeration System
The refrigeration system is comprised of a 3/4 horse
compressor and is a hermetically sealed system (no
service ports).The refrigerant used in the refrigeration
system is 404a and the charge is 28 ounces. The
Compressor is turned on and off by a relay contained in
the refrigerated cabinet junction box.This relay is
energized by the Food Driver Board (FDB).The
temperature sensor is plugged into the P2 connection of
the FDB. The entire refrigeration assembly comes out in
one piece by removing the two screws (to the right of
the condenser) fastening the refrigeration assembly to the
cabinet bottom.
◆CAUTION: Because of the weight of the refrigeration
assembly it should be removed by two people.
Refrigeration Control
The refrigeration system in the APi 320 cabinets is
controlled by the Electronic control system (ECS)
according to the temperature range selected by the
operator in the MasterMenu system.The temperature
readings from the temperature sensor is accurate to 1ß F.
The temperature sensor data is monitored and the
readings averaged over time. The cabinet temperature is
checked once every 5 seconds. Using the Set
Temperatures menu item, the cabinets may be designated
as Ambient, Food, or Frozen.When a cabinet is
designated as Ambient, the Control System will not control
the temperature in that cabinet and the refrigeration
system in that cabinet will be disabled if it exists.
Temperature readings will still be available for cabinets
designated as Ambient.When a cabinet is designated as
Food or Frozen, the Control System will attempt to
maintain the temperature in the cabinet to within 3° F of
target temperatures specified in the Set Temperatures
menu item during normal operation (this is fixed at 36°F
(2°C) for Food and is settable from -15°F to +10°F (-26°C
to -12°C) for Frozen). To accomplish this, the refrigeration
unit will be turned on when the temperature exceeds the
appropriate target temperature by more than 3°F for 3
seconds during normal operation.The refrigeration unit
will then remain on until the temperature falls 3° below the
target temperature for 3 seconds.
Health Monitoring
The APi 120 and/or Control module allow for accurate
monitoring of all refrigerated and/or frozen cabinets in the
installation.This also allows for shutdown of each cabinet
individually by the machine without impact to the others.
When the machine shuts down a cabinet due to an out of
tolerance temperature, the light in that cabinet is turned
off, all selections in that cabinet disabled, and the display
updated to indicate “CABINET X OUT OF SERVICE”
(where “X” is “1” if the temperature sensor in Cabinet 1
detected the out of tolerance condition, or “2” if the
temperature sensor in Cabinet 2 detected the out of
tolerance condition). A temperature sensor is present in
each refrigerated and/or frozen cabinet.The Pull down
period describes the time elapsed between a cabinet
Power Up (Door Closed) and the point in time when the
cabinet temperature first reaches the target temperature.
Health processing is suspended during the Pull down
period. If the Pull down time period exceeds 75 minutes in
a Frozen cabinet or 30 minutes in a Food cabinet
however, vending will also be disabled in that cabinet for
health reasons. Vending will be allowed again after the
door to that cabinet has been opened and closed.The Pull
down period does not apply to the Ambient cabinets. If at
any time during normal operation after an initial Pull down
period, the temperature in a Frozen cabinet rises above
the set target temperature by 10° F for more than 15
continuous minutes of temperature readings, vending will
be prohibited in that cabinet. If at any time during normal
operation after the initial Power Up Pull down period, the
temperature in a Food cabinet rises above +45° F for
more than 5 continuous minutes of temperature readings,
vending will be prohibited in that cabinet.The cabinet
temperature control processing will remain unaffected by
this vending state. An error message will be recorded
indicating the Health Time-out occurred. Vending will be
allowed again after the door to that cabinet has been
opened and closed.

2.04
components
Defrost Processing
The refrigeration units in the 320 cabinets are defrosted
by the refrigeration control system at regularly scheduled
intervals based on the Defrost Interval, starting from the
Defrost Time selected in MasterMenu™ . A defrost cycle
will begin with the compressor and condenser fan turned
off and the defrost heater on.The heater will remain on
until the Defrost Thermal switch indicates that the
temperature of the air around the refrigeration coils has
reached the desired temperature. The compressor will
then be turned on two minutes later. Normal refrigeration
processing then resumes. A Defrost cycle will also occur
75 minutes after the door is closed in a Frozen cabinet or
45 minutes after the door is closed in a Food cabinet. If
the cabinet is a Food cabinet and the compressor has not
yet reached Pull down, the Defrost cycle will be delayed
until it reaches Pull down. Another Defrost Cycle will occur
either 6 or 8 hours later where 6 or 8 is the number of
hours specified in the Defrost Interval field of the Setup
Defrost Menu Item in MasterMenu™ . If a scheduled
defrost is to occur before 4 hours after the Power Up
defrost is complete, it will be delayed until 4 hours after
the Power Up defrost is complete. All subsequent
scheduled defrosts will occur at their normal times.
Manual Forced Defrost
Enter Master Menu, Configuration Menu, Setup Defrost menu item for specific cabinet, Press F2, compressor will turn off
and a defrost cycle will begin following the sequence above.
Normal Temperature Operation:
With temperature set at -15°F, the following three conditions indicate a correctly operating refrigeration unit:
1) Unit should reach that temperature within 1 hour.
2) After reaching that temperature, Compressor On cycle should not exceed 35 minutes.
3) During a defrost cycle, cabinet temperature should not rise above 0°F.
Current Readings: 120V Operation 230V Operation
Stand-by 1.5A ± .5A .75A ± .5A
Compressor On 12A ± 1A 7A ± .5A
Defrost Cycle 7A ± .5A 2.5A ± .5A
Defrost Heater
Resistance 23 ohms ± 3 85 ohms ± 6
30
45˚
8-12

2.05
components
Vend Motors
The vend motors used in the APi 320 machines have been specifically developed to operate with the APi MasterVend™
Control System and are different physically from previous motors. The motors are color coded, but one primary
difference that distinguishes the new motors from previous motors is the presence of an eight sided star at the drive hub
of the motor. This permits the stopping position of the spiral to be customized by the operator to ensure the best possible
delivery of product.The combinations of different colors on the motors and their hubs will help identify its function (see
figure 2.1).
Some of the motors used in the 120 & 320 will be of the fast trac style, with all electronics required to correctly operate
the motor contained inside the gear case or the motor housing and no external control board. Each of the motors used
with the MasterVend™ Control System will have two terminals. The two terminals continue to be used to identify the
shelf and column (selection) to be vended. In a cabinet that contains a Food Driver Board, their are left hand and right
hand motors, this permits odd and even motors to be paired and operate in counter rotating (similar to the current dual
spiral motor) and creates a very flexible means to vend items of many shapes and sizes. This is accomplished by
removing any motors between the two motors required to vend the properly and pairing the odd and even in the motor
pairs menu items.
Cabinet and Shelf Harnesses
The shelf and cabinet harnesses connectors are different than the snack motors, they have been changed to insure a
better connection.This change in addition to using a lower temperature grease in the motors, was made to insure the
motors would operate in colder temperatures.
360276
360275

2.06
components
SHELF WIRING DIAGRAM
Each motor requires two wires to operate correctly. These wires are: shelf common, and selection.
Each selection on a shelf has the same common shelf wire - all shelf harness use the wire #12 as a shelf common.This
corresponds to the selected shelf wire in the cabinet harness. The terminal for the shelf common in the harness is the
smallest of the two terminals.
Selection numbers are assigned from left to right, starting with selection 0. Each selection number corresponds to the
number of the wire for that selection.
Selection Wire Number
Shelf Common Number
8 Point Star Drive
Selection Number 0
through 9
Shelf Common

2.07
components
Selection System
The selection system used with the MasterVend™ Control System is different from all previous alpha-numeric systems
we have manufactured.The eleven digit selection panel (see figure 2.2) is located on the front control bezel and consists
of the numbers 0 through 9 and the letter C, which is defined as a clear button.The selection system used with the
MasterVend™ Control System is all numeric and uses three digits to identify all the selections. The first digit is used to
determine which cabinet is selected, the second digit determines the shelf selected, and the third digit, the selection on
that shelf. The left or first selection on each shelf is designated as selection 0, and on a ten select shelf the selection
numbers would be increase by one, so that the right hand selection will be selection 9.The numeric keys on the selector
panel can be used to enter numeric data any time it is required during setup or maintenance of the equipment.
Figure 2.2

2.08
components
MasterMenu™ Keypad
The MasterMenu™ keypad (pictured below) is located on the front of swing out panel directly below the selection
keypad. The MasterMenu™ keypad is only active when the door is open, so even in the event of vandalism to the
control bezel, no access to the control functions is permitted.The MasterMenu™ keypad consists of seven function
buttons, a *key, four coin payout buttons and the eight keys used to operate the MasterMenu™ functions. The entire
keypad becomes active once the machine door is opened.
Function Buttons
The seven function keys (F1-F7) are assigned to specific pre-determined menu headings, primarily for route service
personnel. See page 4.02 for specific menu heading for each of the function keys.
Pressing the *key before one of the function keys ¡through ¶are assigned to the second level of menu headings.
Coin Payout Buttons
The four coin payout buttons are used to pay coins out of an L+ or a standard US (dummy mech).The four coin payout
buttons are , , and .The four coin payout buttons may also be used to enter pricing
information while assigning prices. For example, to enter a price of $.65, pressing the key twice, the key
once and the key once, would result in .65 appearing on the display. See the price setting section for additional
information.
The skey is used for exiting the current menu without making any changes prior to commitment. Note: Closing the
main cabinet door will have the same effect as if the user pressed the skey and causes the machine to exit the
MasterMenu™ System and return to Operational Mode.
The ekey provides a dual purpose operation. It provides the a mechanism for entering a menu. It also provides a
means to commit insertions/modifications/deletions made in a menu item.
The +and -keys are used for incrementing and decrementing the available choices in a menu.
Note: Anywhere in this manual that the +or -keys are defined to sequence through numeric data, the front
panel may be used as an alternate input source.
The <and >keys have a dual purpose operation.They provide a means to select the menu heading immediately to
the left or right of the current menu heading.When inserting data within a menu , these keys also provide a means to
move the cursor from its current position to the position directly to its left or right.
The ykey is used to delete the character on the current cursor position, shifting all subsequent characters to the right
of that position left by one.
The fkey provides a mechanism to insert a character to the left of the current cursor position, shifting all characters
to the right of that position (including the current character) right by one.
Note: Depressing a function key will not cause you to enter the MasterMenu™ System.
F1
F3
F5
F7
F2
F4
F6
*
.05
.10
.25
1.00
ESC
INS
DEL
-+
ENTER

2.09
components
Control System and Boards
The MasterVend™ Control System consists of up to three different boards, depending on the configuration. All Model
120 and all Control modules consist of the LogicCenter board (LCB) and the display board. All 320 machines also
contain a Food Driver Board (FDB).
LogiCenter Board (LCB)
The LCB interfaces with the FDB (when used), display board, selector panel, MasterMenu keypad, coin mechs, bill
validators and all other peripherals. The LCB also stores all the programing and Mis information.In addition the LCB
supplies power to the FDB. (ESD sensitive)
Food Driver Board (FDB)
This board contains all the temperature monitoring functions for cabinet that it is contained in, and communicates with
the LCB via a 6 wire computer level interconnect harness. The FDB has three LEDs on it and the status of the FDB can
be determined by observing these LEDs. The three LEDs will give you the status of the communications between the
FDB and LCB, if the board is currently telling the refrigeration unit to run, and if the board is currently telling the machine
to go through a defrost cycle. (ESD sensitive)
The Food Driver Board is located on the front face of the Relay Box for the compressor assembly. This board controls the
function of all the refrigeration components along with providing the circuits for the vend motors and the baffle delivery
door. There are also two jumpers for default settings of this board.These jumpers are a set of three pins which will have
only two pins connected at any one time. The connection between the two pins is made by a small black cap, which
slides over the pins in use. The black caps are identical, and should not be removed from the board for any reason.The
two jumpers are the Cabinet selection jumper and the temperature control jumper.
Cabinet Selection Jumper
The position of this jumper identifies which cabinet is named CAB1 (Cabinet 1), or CAB2 (Cabinet 2).These are
abbreviated on the FDB board cover decal (pictured below) as C1 and C2 Cabinet 1 will contain the selections 110
through 157, and Cabinet 2 will contain the selections 210 through 257.All machines are shipped with this jumper
installed on CAB1.This jumper should be changed only if you are connecting a second cabinet to a 310 Control
Module or a 120 Snack.
Temperature Control Jumper
The second jumper on the board controls the default setting for the temperature in the event the FDB looses
communication with the LCB. This will hold the cabinet temperature at the setting indicated by the jumper. A jumper
set at “R”will hold the temperature at 36°F (2°C), and a jumper set at “F” will hold the temperature at -15°F (-26°C). If
you change the temperature in the SET TEMPS menu item, you must also change the position of the jumper to the
corresponding position.The position of this jumper can be verified through the hole in the board cover.
The Front Panel Display
The display is capable of displaying 20 alpha-numeric characters. The supported character set includes:
• Upper case alphabetic characters “A” through “Z”
• Numeric characters “0” through “9”
• Special characters: (, ), [, ], ., ‘, -, =, $, /, \, *, ^, +, , ,”, ?, _.
This manual suits for next models
1
Table of contents
