AUTOTERM PLANAR 2D-12 User manual

v06.2018
EN
Installation manual
for air heaters on maritime transport
PLANAR-2D-12/24
PLANAR-44D-12/24

2
Table of contents
1General instructions and operating principle........................................................3
2Safety precautions ...................................................................................................4
3Main requirements to installation of assemblies and units of the heater .............5
3.1 Installation of the heater............................................................................................5
3.2 Installation of air ducts. ............................................................................................6
3.3 Installation of the air intake pipe.............................................................................11
3.4 Installation of the exhaust pipe................................................................................13
3.5 Installation of the fuel system. .................................................................................14
3.6 Installation of the temperature sensor (optional).....................................................16
3.7 Installation of wiring of the heater. .........................................................................17
3.8 Installation of the control panel...............................................................................17
4Testing of the heater after installation .................................................................17
5Recommendations. ................................................................................................18
Production
ADVERS LLC
Novo-Sadovaja str. 106,
443068, Samara, Russia
+7(846)263-07-97
www.autoterm.ru
Sales department
AUTOTERM LLC
Trikatas 4, Riga, Latvia,
LV-1026
+371 20110229
www.autoterm-europe.com
Technical support
AUTOTERM LLC
Trikatas 4, Riga, Latvia
LV-1026
+371 25529999
service@autoterm-europe.com

3
Introduction
This manual is intended for users of air heaters PLANAR-2D-12/24 and PLANAR-
44D-12/24 (hereinafter referred to as heaters). The document covers main rules of
installation of the product on small maritime transport (e.g. yacht, boat, cutter) and function
tests of the product after installation. This manual should be used together with operation
manual of the heater.
1 General instructions and operating principle
The heater can be used only for the purposes specified in the operation manual.
The built-in fan of the air heater draws air through theair intake opening. The air heated
by the heater is channelled to cabins via outlet channels.
Fuel is supplied by a separate fuel pump from the fuel tank of the vessel or from an
additional fuel tank.
The heater is powered by a battery of the vessel.
Temperature in rooms can be regulated by using a temperature sensor and a control
panel, which sets heating parameters.
When a temperature sensor is installed, the heater is constantly comparing the actual
temperature with the set temperature and automatically adjusts the heating capacity
according to the heat demand.
The heater and its components must be installed by specialised
organisations, because the product is complex and consists of a
combustion chamber where fuel is burned, a heat exchanger that supplies
heat resulting from fuel burning, a fuel pump, an air blower, a control unit
controlling the heater according to the programme, etc.
If the heater is handled and/or installed improperly, there is a possibility
of fire hazard, because fuel and electrical components are being used.
That is why all safety precautions must be observed.

4
2 Safety precautions
2.1 Do not use or install the heater in places, where flammable vapours or gases or large
amounts of dust may form and accumulate.
2.2 Disable the heater, when the vessel is fuelled.
2.3 Disconnect the heater from its battery during repair works on the heater.
2.4 Take the safety precautions, which must be observed when working with an electrical
and fuel systems, when installing and dismantling the heater.
2.5 Do not connect the heater to the power circuit of the vessel, when the engine is
operating and there is no battery.
2.6 Do not disconnect the heater from power before the purge cycle ends.
2.7 Do not connect or disconnect connectors of the heater, when the heater is powered.
2.8 When the heater has been switched off, do not switch it on again for 5-10 seconds.
2.9 Do not step on the heater or put any objects on it and in it.
2.10 Do not cover the heater with clothing, pieces of fabric and so on, and do not place
such objects in front of the air intake pipe or inlet and output of the heated air.
2.11 For safety reasons, contact the service shop to troubleshoot the heater if it fails to
launch two times in a row.
2.12 In case of faults in the operation of the heater, contact specialised repair organisations
authorised by the manufacturer.
2.13 If the consumer fails to follow the requirements above, the warranty of the heater
becomes null and void.
2.14 To ensure reliable operation of the heater, switch it on once a month for 15-30
minutes, including in warm seasons of the year, when the heater is out of operation.
This action is necessary to remove any viscous film sediments on moving parts of the
fuel pump. Failure to do so may lead to premature failure of the heater.
2.15 Fuel in the system has to be changed at least once in a season.

5
3 Main requirements to installation of assemblies and units of the heater
Install the heater in a dry place that is protected from ingress of overboard water and
condensate, excessive vibrations and heat emissions, engine emissions or fuel or oil
contamination.
The heater must be installed following safety requirements and taking into account the
type of vessel. Consider everything related to peripheral equipment, for example, the
maximum permissible length of the exhaust gas channel, the location of the passage in the
board, air intake for burning, layout and length of electric wires, distance from the fuel tank,
layout of air ducts of warm air, intake of fresh air.
Consider the maximum heel of the vessel. A heel must not bring overboard water into
the discharge channel for exhaust gases, and bilge or overboard water must not get on the
heater.
All precautions should be observed when installing the heater to reduce the risk of
injuries to personnel or damage to the equipment as much as possible.
3.1 Installation of the heater
Install the heater, taking into consideration permissible operating position according
to Fig.1; take into account the possible heel of the vessel. Fig.1 shows two extreme
installation positions of the heater. The distance from surrounding objects must be sufficient
to ensure good ventilation; the distance from walls and partitions to the start of the inlet
opening of the heater must be no less than 50 mm (see Fig.1b). The distance from walls,
partitions to the start of the outlet opening of the heater must be no less than 250 mm.
Provide protection from penetration of foreign objects into intake and output openings,
when installing and operating the heater. Install the heater so that it is convenient to do
maintenance works.
Fig. 1a –Versions of installation of the heater
Air intake
a) –installation on the wall
b) –installation on the floor
Air intake
Prohibited
Prohibited
Prohibited
Prohibited
Possible harness
output version
Fig. 1b –Distance from walls

6
WARNING!!! Reliable operation of the heater depends on correct
installation of the heater. The heater must be installed horizontally
(according to Fig.1).
DO NOT install near flammable or heat-sensitive objects such as
sails, fenders, sheets, paper, gas pipelines, fuel tanks, etc.
When installing the heater, make sure that its casing does not contact the hull of the
vessel (Fig.2). Failure to do so may result in deformation of the heater casing, jamming of
the air blower fan and potential overheating.
It is recommended to use the bracket (can be supplied additionally) (Fig.3) and the
rubber seal for the installation surface of the heater, when installing the heater. Bend the
bracket to the desired position before installation.
Fig. 2 –Leave some free space
Fig. 3 –Installation bracket
3.2 Installation of air ducts.
The air for heating must be taken from clean space without exhaust gases. Never draw
air from the engine compartment.
Fresh air from outside or recirculated air from rooms can be taken for heating.
-Intake of fresh air.
The air is taken from outside, heated and supplied to inner rooms. This operation
renews air in cabins and lowers humidity. Note locations of outlet vents in cabins and make
sure that their number is sufficient. Avoid ingress of overboard or rain water into the inner
space of the heater.
-Air intake from inner rooms.
In this case, heated air is taken from inner rooms. The advantage of such option is fast
heating due to better use of heat. However, this operation does not lower humidity, and the
air in the room is not renewed.
Use only thermally stable air ducts to lay channels for heater air! To avoid
injuries to personnel or damage to the equipment, air channels must have heat
insulation. Heat insulation is also necessary to reduce heat losses, when
laying air ducts in unheated rooms.

7
Additional air duct components can be added to the heater for distributing hot air. Each
of the components has its own conductivity factor and it reduces total flow rate of hot air.
In order for you to be sure that the option you have selected for the installation of air ducts,
is acceptable and will not result in a massive flow rate reduction of hot air or overheating
of the heater, you need to calculate the total conductivity of complete air duct system (see
example below).
Components connected to heater should
not exceed coefficient of conductivity of
the heater (see Table 1). Otherwise, the
temperature of heated air can increase to
unacceptably high level, heat will be
distributed unevenly, and it could result in
overheating that could damage the heater.
Table 1 –Maximum coefficient of conductivity
of the heater
Heater
Size of
duct
Coef
PLANAR 2D-12/24
ø60 mm
50
PLANAR 44D-12/24
ø75 mm
30
PLANAR 44D-12/24
ø90 mm
100
If the sum of individual conductivity coefficients exceeds maximum coefficient of
conductivity of the heater (see Table 1), it can be reduced by increasing the diameter of the
air ducts or installing double channel system instead of a single channel system (Fig.4).
Fig. 4 –Single and double channel air ducts
Single channel system –Only one channel of air ducts connect at heaters air input
(only for PLANAR 2D) and output.
Double channel system –after the heater, the hot air duct splits into two channels. Up
until the point where air duct splits in two channels, it counts as a single channel system,
therefore single channel conductivity coefficients are used for calculations. After that point,
it becomes a double channel system so double channel conductivity coefficients must be
used for calculations.
When using double channel air ducts, at least one channel should
always be open.
See Fig.5 for example of installed air duct. Total conductivity coefficient can be seen
in Table 2. The sum of the individual conductivity coefficients is 44. It does not exceed the
coefficient of conductivity of the heater = 50. In this case, the installation is allowed.
Conductivity coefficients for components of single and double channel systems can
be seen in Table 3.

8
Table 2 –Example of calculating conductivity of
air duct
Nr
Part
Coef
1
Grille Ø 60mm 30°
5
2
Clamp for air duct
0
3
Air pipe Ø60mm, 0.3m
3
4
Air pipe Ø60mm, 1m
10
5
Air outlet side
0
6
Air pipe Ø60mm, bend 90°
12
7
Adjustable grille Ø60mm
14
Total
44
Fig. 5 –Example of an installed air duct.
The heater is supplied with inlet and outlet grilles already installed. In such a case, the
heater can be used for heating of the room (cabin), in which it is installed. If several cabins
need to be heated, lay air ducts along the perimeter of the vessel. Replace the inlet and/or
outlet grille on the heater to connect the air duct to it (only for PLANAR-44D-12/24 and
PLANAR-2D-12/24). Use a flat screwdriver to disengage hitches on the heater casing and
remove the grille. Install an adapter (only for PLANAR-44D-12/24) and attach the air duct
to it with a clamp. Use different shape adapters and connectors for distribution of warm air
(it is recommended to use Y-shaped adapters to reduce resistance and increase
effectiveness, if possible). Install deflectors on ends of air ducts (Fig.6a for PLANAR 2D,
and Fig.6b for PLANAR 44D).
Do not deform channels with heated air. This may add additional resistance to the flow
of warm air and reduce efficiency of heating.
When distributing supply of hot air, one of deflectors MUST be of a non-closable type
to avoid overheating of the heater.
Fig. 6a –Air duct connections for PLANAR 2D

9
Fig. 6b –Air duct connections for PLANAR 44D

10
Table 3 –Conductivity coefficients of the air duct parts
Number
Part
Single
Dual
1
Grille Ø60mm 30°
5
1
2
Flange Ø60mm
0
0
3
Air pipe Ø60mm, 1m
1
2,5
4
Grille for 2D casing
0
0
5
Air pipe Ø60mm, bend 90°
12
12
6
Y-shape adapter for air pipe Ø60mm with 45°
-
10
7
T-shape adapter for air pipe Ø60mm
-
2,5
8
Y-shape adapter with a control valve 3*Ø60mm
-
6
9
Adjustable grille Ø60mm
32
8
10
Deflector closable Ø60mm
25
5
11
Inlet grille for 44D casing
0
0
12
Outlet grille for 44D casing
0
0
13
Air pipe adapter for PLANAR 44D Ø96-Ø90mm
0,4
0,4
14
Air pipe Ø90mm, 1m
10
2,5
15
Air pipe Ø90mm, bend 90°
12
12
16
Flange Ø90mm
0
0
17
Grille Ø75/90mm 30°
6
1
18
Y-shape adapter for air pipe, 3*Ø90mm, 45°
-
3
19
Y-shape adapter with a control valve 3*Ø90mm
-
12
20
T-shape adapter for air pipe 3*Ø90mm
-
6
21
Deflector closable, Ø75/90mm
25
5
22
Transition for air adapters from Ø90mm to Ø75mm
33
0
23
Y-shape adapter for air pipe, from Ø90 to 2*Ø75mm, 120°
-
9
24
Air pipe Ø75mm, 1m
12
3
25
Air pipe Ø75mm, bend 90°
12
12
26
Y-shape adapter for air pipe Ø75mm
-
10
27
Y-shape adapter for air pipe Ø75mm, 45°
-
6
28
T-shape adapter for air pipe Ø75mm
-
2
29
Flange Ø75mm
0
0
30
Grille Ø75mm
5
1
31
Transition for air adapters from Ø75mm to Ø60mm
33
0
32
Y-shape adapter for air pipe, from Ø75 to 2* Ø60mm
-
9
33
Air pipe connector, Ø90mm
0
0
34
Air hose connector Ø75mm
0
0
0 = there is no conductivity coefficient for this part
- = part cannot be used in that system.

11
3.3 Installation of the air intake pipe.
The air for combustion must not be taken
from the cabin, engine or luggage compartmentof
the vessel. Air should be taken from well-ventilated
areas or from outside of the vessel.
The maximum length of the air intake pipe is 2
meters. The air pipe must be as short as possible (cut
to the necessary length). When laying the air duct,
avoid sharp bends and do not obstruct the opening of
the air intake pipe with foreign objects.
The air intake pipe is connected directly to the
pipe of the heater and fastened with a clamp. (Fig.7).
Fig. 7 –Connection of the air pipe to
the heater
The correct installation of the exhaust and air intake pipes is when they are on the same
side (Fig.8). The distance between them should exclude re-suction of exhaust gases through
the air intake (at least 20 cm).
Fig. 8 –Location of intake and exhaust pipes

12
3.3.1 Air intake from well-ventilated areas
Ambient pressure and sufficient ventilation using outside air must be present in the air
intake zone. Increased or reduced pressure in the air intake zones is not allowed. It is
recommended to attach the air duct all along its length to the hull of the vessel using plastic
clamps, when possible. Put a cap on the end of the air duct to protect it from drawing in
foreign objects.
3.3.2 Air intake from outside of the vessel.
An air intake pipe (Fig.9) should be used to take the air from outside Make an opening
Ø26+1 mm in the board of the vessel to install it. Install a rubber gasket between the flange
of the air intake pipe and the hull of the vessel. Attach the air duct using three bolts as shown
on Fig.9. Attach the air duct to the air intake pipe using the clamp. It is recommended to
attach the air duct all along its length to elements of the hull of the vessel using plastic tie
straps, when possible. Make a 3mm opening in the bottom point of the air duct to drain
condensate or any water, which has penetrated the air intake pipe.
Do not place the intake opening of the air intake pipe in front of the
incoming air flow of the moving vessel
1 –Air intake pipe;
4 –Gasket;
2 –Flange of the air intake pipe;
5 –Fastener assembly;
3 –Hull of the vessel;
6 –Clamp.
Fig. 9 –Installation of the air intake pipe

13
3.4 Installation of the exhaust pipe.
When installing the exhaust pipe, take into
consideration high temperature of the exhaust
pipe when heater is in operation. Cut the
exhaust pipe (flexible crinkled metal hose,
maximum length –1.5 meters) to the
necessary length. It is advised touse two-layer
exhaust pipe when installing the heater.
Attach the exhaust pipe (Fig.10) using clamps
and install it so that it is slightly inclined to the
bottom in the direction of exhaust. Install heat
insulation on the exhaust pipe to protect
individual sections of the vessel (wiring or
other heat-sensitive objects).
Fig. 10 –Attachment of the metal hose to the
heater
Make longitudinal cuts (about 15mm) on ends of the metal hose to ensure better sealing
when connecting the heater pipe to the pipe for discharge of exhaust gases through the board
of the vessel, but without going beyond the pipe to be covered.
The exhaust pipe needs additional insulation at every connection of the
metal hose, for example, using a heat resistant tape or sealant.
The end of the metal hose should not contact the rubber seal of the heater. Exhaust
gases are discharged overboard the vessel. Install the discharge of exhaust gases in a
location inaccessible to water (at least 60 cm above the waterline) and to avoid the
possibility of repeated intake of exhaust gases by the air intake pipe. It is advised to install
the discharge of exhaust gases in away, that does not allow exhaust gases to flow inside the
cabins (e.g. awayfrom open windows, doors), to avoid the possibility of inhaling dangerous
exhaust gases.
Do not place the output opening of the exhaust pipe in front of the
incoming airflow of the moving vessel.
To install the exhaust pipe adapter, drill a hole Ø 46+1 mm in the hull of the vessel and
install the exhaust pipe into it as per Fig.11 with the pipe looking upwards (to avoid
penetration of water). Install a rubber gasket between the flange of the exhaust pipe and the
hull of the vessel to heal the connection. If additional sealing is necessary, use a thermally
stable sealant.
1 –Exhaust pipe adapter;
2 –Flange of the exhaust pipe;
3 –Gasket;
4 –Hull of the vessel;
5 –Fasteners;
6 –Clamp;
7 –Metal hose.
Fig. 11 –Installation of the exhaust pipe
Heater
Clamp
Metal hose

14
3.5 Installation of the fuel system.
Act as instructed on Fig.12 to install the fuel system. The fuel pump and the fuel supply line
must be protected from heating.
Fig. 12 –Example of fuel supply to the heater
3.5.1 Fuel suction using a fuel suction hose.
Fuel is taken directly from the fuel tank of the vessel or an
additional tank. Drill a hole Ø16mm in the fuel tank to install a
fuel suction hose. When drilling the hole in the fuel tank, follow
safety precautions that should be observed when working with a
vessel, which is filled with fuel or explosive substance.
Cut the immersible tube of the fuel suction hose shorter
before installation (if needed). Its bottom end must be located
about 10-15 mm above the bottom of the tank, or at the height
to provide fuel for engine in the fuel tank at any time. The cut at
the end of the fuel suction hose must be made at a 45° angle to
the axis of the tube. Remove all burrs from the cut after the work
is done.
Install the fuel suction hose in the fuel tank as per Fig.13a.
Install the special washer of the fuel suction hose in the tank hole
as per Fig.13b. Apply a petrol-proof sealant on the threaded
surface of the fuel suction tank to properly seal the connection
between the fuel suction hose and the fuel tank.
Fig. 13a –Installation of
the fuel suction hose
Fig.13b –Installation of
the washer.
1 –Fuel tank;
3 –Pipe coupler;
2 –Fuel suction hose;
4 –Fuel pump.
Heater

15
3.5.2 Fuel suction from an additional fuel tank.
Consider convenience of fuelling, when
installing the fuel tank (Fig.14). Install the
fuel tank in such a way that the amount of fuel
and its potential leaks from the inlet, fuel
suction nozzle or connections can be visually
controlled. Thefuel, which may leak when the
fuel tank is filled, must not get on the exhaust
system, wiring or other object, which can be
damaged due to their contact with fuel.
Fig. 14 –Installation of the fuel tank
3.5.3 Installation of the fuel pump and the fuel supply line.
The fuel pump is connected to the heater through its own harness and supplies fuel
depending on the required heat capacity to the combustion chamber of the heater. When
running, the fuel pump makes characteristic metallic clicking noise.
It is preferable to install the fuel pump
closer to the fuel tank and below the low level
of fuel. To prevent leaks of fuel from the fuel
tank (by gravity), if sealing of the fuel pump
is compromised, it is preferable to place a fuel
tank so that the maximum fuel level is below
the cut on the fuel tube of the heater. The
position of the fuel pump is space must be as
per Fig.15.
-a –fuel extraction height up to 70 cm;
-b –Maximum height difference (fuel rise)
between the fuel pump and the heater, up
to 1.5 meters.
Fig. 15 –Working position of the fuel pump
Attach the fuel pump to the flexible rubber clamp (supplied with the heater), which
reduces the transfer of noise to the hull.
Act as instructed on Fig.12 to install the fuel supply lines. Use clamps to attach fuel
supply lines. Do not tighten the clamps too much to avoid leaks.
It is preferable to lay the fuel supply line on a straight line and with a small inclination
upwards in the direction of the heater. The fuel supply line should be fastened at equal
distances to prevent sagging, prevent effects of vibrations and avoid fractures. Do not allow
contact of the fuel pump and the fuel supply line with hot objects. Cut the fuel supply line
only using a sharp knife as per Fig.16. At the locations of cuts, there should be no narrowing
of the flow cross-section of the fuel line, debts or kinks.
Hull of the vessel or
additional bracket
Fuel tank
Bracket
Maximum level of input pipe of the heater
Preferred pump position
Minimum level of fuel in the tank

16
Fig. 16 –Cutting of the line before installation.
3.6 Installation of the temperature sensor (optional).
The temperature sensor (Fig.17) measures air temperature in the area of its installation
and allows running the heater in a set temperature mode. Install the sensor in a convenient
(appropriate) place in the heated room.
The operation of the heater with a temperature sensor is described in the operation
manual of the control panel.
The maximum length of the sensor harness is 5 meters. Temperature regulation
depends on the location of the sensor.
Follow these recommendations, when installing the temperature sensor:
Install the sensor:
✓in the largest heated cabin;
✓in the middle position of temperature
distribution in the cabin;
✓on a vertical internal wall of the cabin,
if possible;
✓at a distance from sources of heat.
Do not install the sensor:
close to the deflector, to avoid the effect
of the flow of warm air;
near the gangway;
behind cushions or curtains or other
accessories;
in a direct sunlight;
close to the ceiling.
When the temperature sensor has been installed, lay the line up to the heater location.
Connect the shoe of the temperature sensor to the corresponding connector on the heater.
(pos.1 –chip, pos.2 –pin shoe)
Fig. 17 –Temperature sensor
1
5020
+20
12±1
2
Красный
Черный
1
5020
+20
12±1
2
Красный
Черный
Correct
Incorrect
Red
Black

17
3.7 Installation of wiring of the heater.
Install electric harnesses of the heater according to the diagram of electrical
connections of the heater (see operation manual of the heater).
When installing electrical harnesses exclude the possibility of them being heated.
Install all the wire harnesses and electrical elements in dry and protected places. No
deformation or moving of wires is permissible, when the vessel is operated.
WARNING! Install electrical harnesses only when fuses are dismantled.
A vessel battery or an auxiliary battery powers the heater. Control the charge of the
battery on a regular basis. It is recommended to disconnect the heater from the battery to
avoid its discharge during long dockage or storage of the vessel. Do not disconnect the
heater from power before the purge cycle ends.
3.8 Installation of the control panel.
The control panel is intended for control of operation of the heater. Install the panel in
a convenient (appropriate) place protected from water. The panel is attached using double-
sided adhesive tape or a standard bracket. The wire may be brought out of the panel casing
through the back cover or the partition of the inner surface of the panel casing. Before
installation degrease the surface, where the panel is to be installed. Remove protective film
from adhesive tape and install the panel on the prepared surface.
4 Testing of the heater after installation
The heater can be put in operation only when the system has been fully installed!
After installation, check:
-tightening of clamps;
-reliability of attachment of electric contacts of harnesses and assemblies of theheater.
Fill the fuel main line with fuel, preferably using a fuel-priming device, which can be
ordered from official dealers. When the fuel system is filled, check that the fuel supply line
is sealed.
Start the heater and check its operation in minimum and maximum modes. Check
tightness and sealing of all connections of air ducts and fuel supply lines.
Run the heater in maximum mode for about 2 hours. During the first launch, the
exhaust pipe might emit some smoke for a short period of time.
The launch process of the heater starts with under a minute long power-on-self-test.
At that time heater self-checks itself for errors and makes no sound. After that it starts the
purge of the combustion chamber to remove any fuel vapours remaining from the
previous cycle of work. After the purge ends, starts the process of ignition and
continuation of the set mode.
Stop the heater. When the heater is stopped, the fuel supply stops, and the combustion
chamber and the heat exchanger are vented to reduce temperature.
After first launch, launch the heater while the vessel engine is operating, make sure
that the heater is working and there are no problems with electrical, and fuel connections.

18
5 Recommendations.
If the heater does not start after switching on, make sure there is fuel in the tank, check
the charge of the battery, check if connectors are properly connected and if the 25A fuses
are good.
If you were unable to find the root cause of the fault, contact the service center, the
dealer you bought the product from or the website www.autoterm-europe.com.
WARNING!
1 When starting the heater for the first time after installation, it is
preferable to fill the main fuel line up to the input nozzle of the heater
using a priming device. If there is no priming device, start the heater
several times until the main fuel line is filled.
2 Important to remember that if the heater has not started after
activation, the control unit will restart the heater in automatic mode. If
the heater does not start after two attempts, a fault code will be
displayed on the control panel. (Look for fault codes table in a
respective control panel manual.)
3 The cabin temperature sensor must be disabled (if it is installed), if
you need to start the heater at a temperature above 30С. Operation
with a temperature sensor is described in the operation manual.
For the correct operation, the heater needs regular (annual) maintenance. Stop the
heater and let all system parts cool down before any works:
-check for corrosion on electrical plugs and contacts (with battery disconnected);
-check sealing of fuel hoses;
-check sealing and corrosion in the system of exhaust gases;
-check whether air intake pipes and air ducts are clean;
-check air ducts for damages;
-run a computer diagnostic of the heater.
This manual suits for next models
3
Table of contents
Other AUTOTERM Heater manuals
AUTOTERM
AUTOTERM PLANAR-2D-12/24 User manual

AUTOTERM
AUTOTERM AIR-2D 12V/24V User manual
AUTOTERM
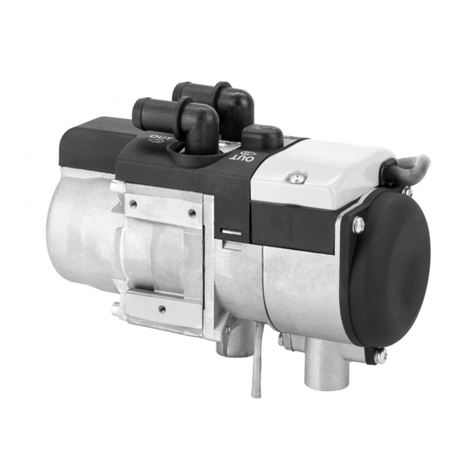
AUTOTERM FLOW-5D User manual
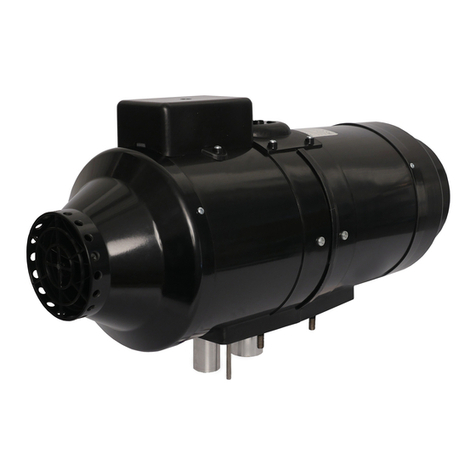
AUTOTERM
AUTOTERM PLANAR - 8DM - 12 User manual
AUTOTERM
AUTOTERM PLANAR-8DM-12 User manual
AUTOTERM
AUTOTERM PLANAR-4DM2-12/24-P User manual

AUTOTERM
AUTOTERM 14TC-10-24-C User manual
AUTOTERM
AUTOTERM PLANAR-8DM-12 User manual
AUTOTERM
AUTOTERM PLANAR AIR-2D 12V Specification sheet
AUTOTERM
AUTOTERM Air 4B User manual
