AV Department DCS 6000 User manual

AV Department Limited
www.avdept.co.uk
01383 825709
Title: Guide to DIS Conference Microphones
(DCS 6000)
Quick Guide

Basic System Components
1 x Central Unit
10 x Delegate Microphone Bases
10 x Microphone Stems
10 x 2m Cat 5 cable (STP)
2 x 10m Cat 5 cable (STP)
2 x System terminator
1 x Cat 5 Screened Joiner
The DIS 6000 series system is very flexible
and has many additional components.
This guide covers basic set up for dry hire
operation and notes further options for
serviced hires including geographic PC
control and PTZ camera control.
AV Department Limited
www.avdept.co.uk
01383 825709
Title: Guide to DIS Conference Microphones
(DCS 6000)

AV Department Limited
www.avdept.co.uk
01383 825709
Title: Guide to DIS Conference Microphones
(DCS 6000)
The Central Unit (CU)
Stage 1
Stage 2
Unpack and locate the CU at tech area.
Connect to the power but do not switch on
just now.
The Microphones
Unpack and locate the
microphones at the delegate
tables. The microphone
stems are attached to the
bases.

✔✗
AV Department Limited
www.avdept.co.uk
01383 825709
Title: Guide to DIS Conference Microphones
(DCS 6000)
Cables
Stage 3
The microphones daisy
chain together. Connect
them using the supplied
2m Cat 5 STP cables.
Consider your layout so that the first in the chain is nearest the CU to minimise
cable length. You may use more than one chain. No more than 20 devices on a
chain !Do not loop back to the CU!
Terminate the
microphone chain by
inserting a terminator
plug in the empty
socket on the last
microphone in each
chain.

AV Department Limited
www.avdept.co.uk
01383 825709
Title: Guide to DIS Conference Microphones
(DCS 6000)
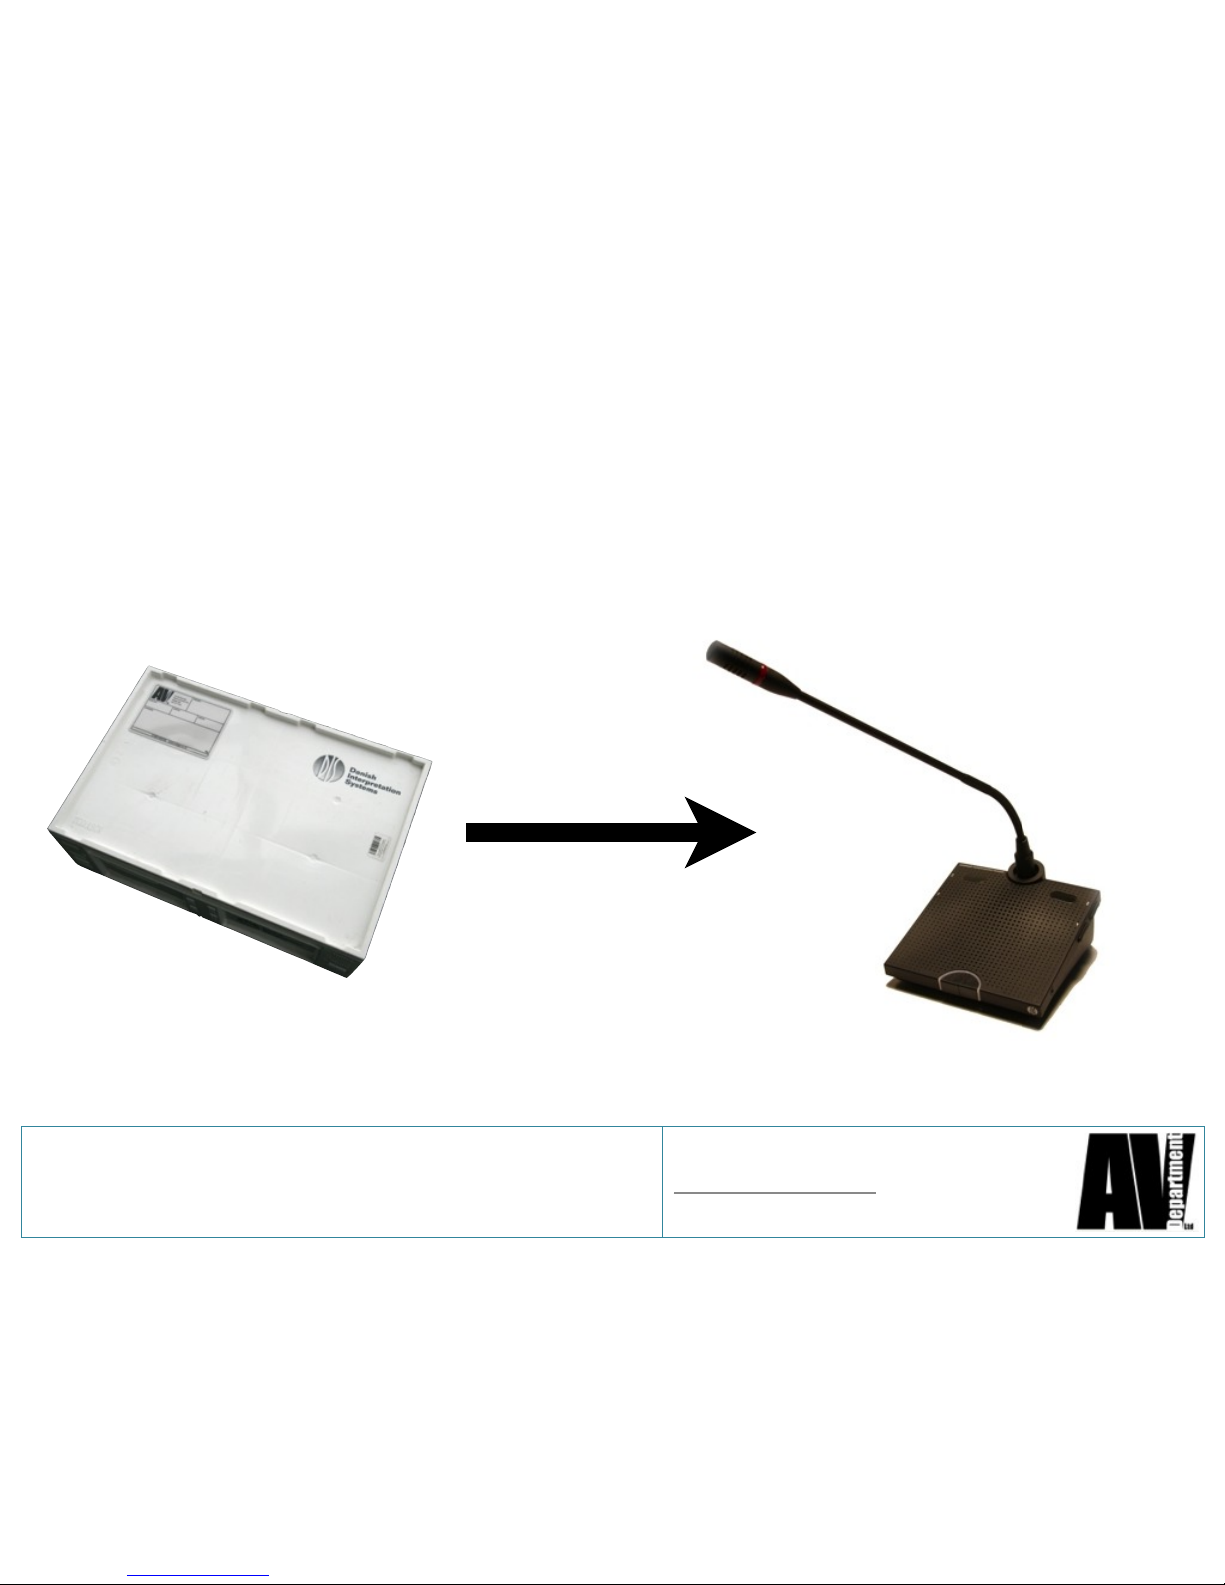
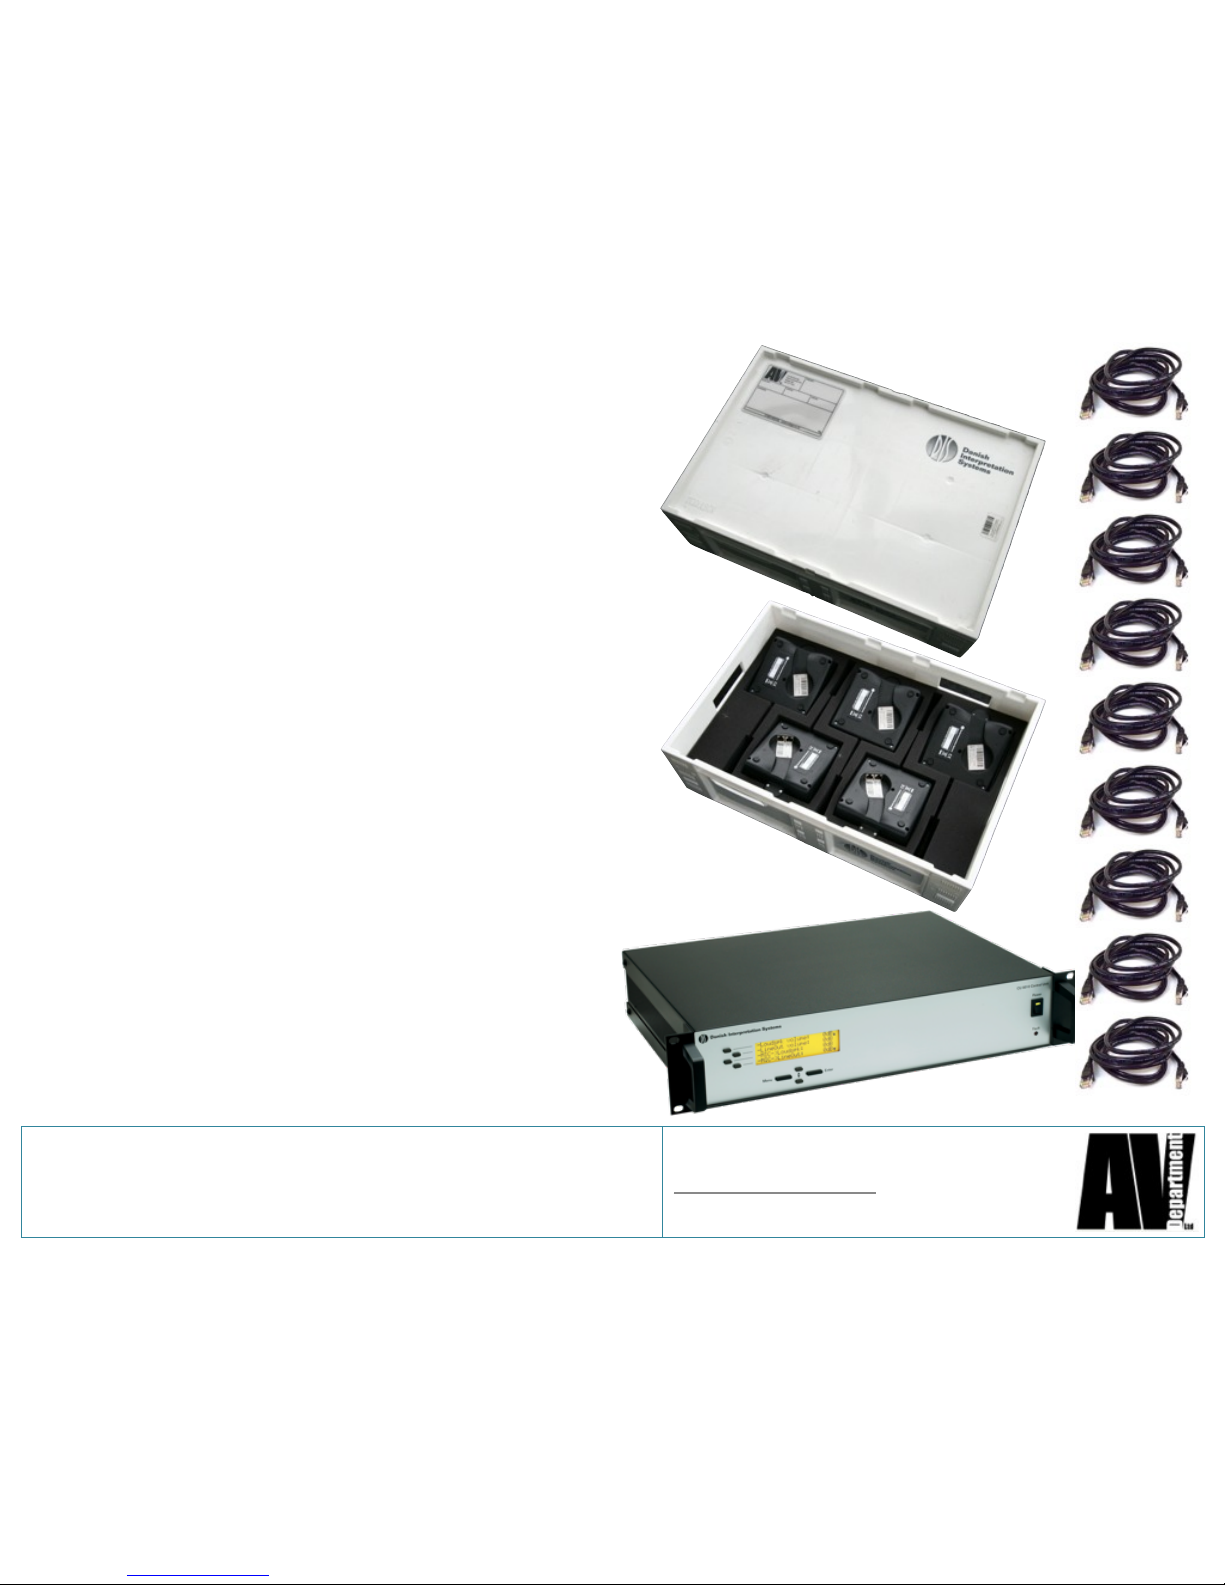
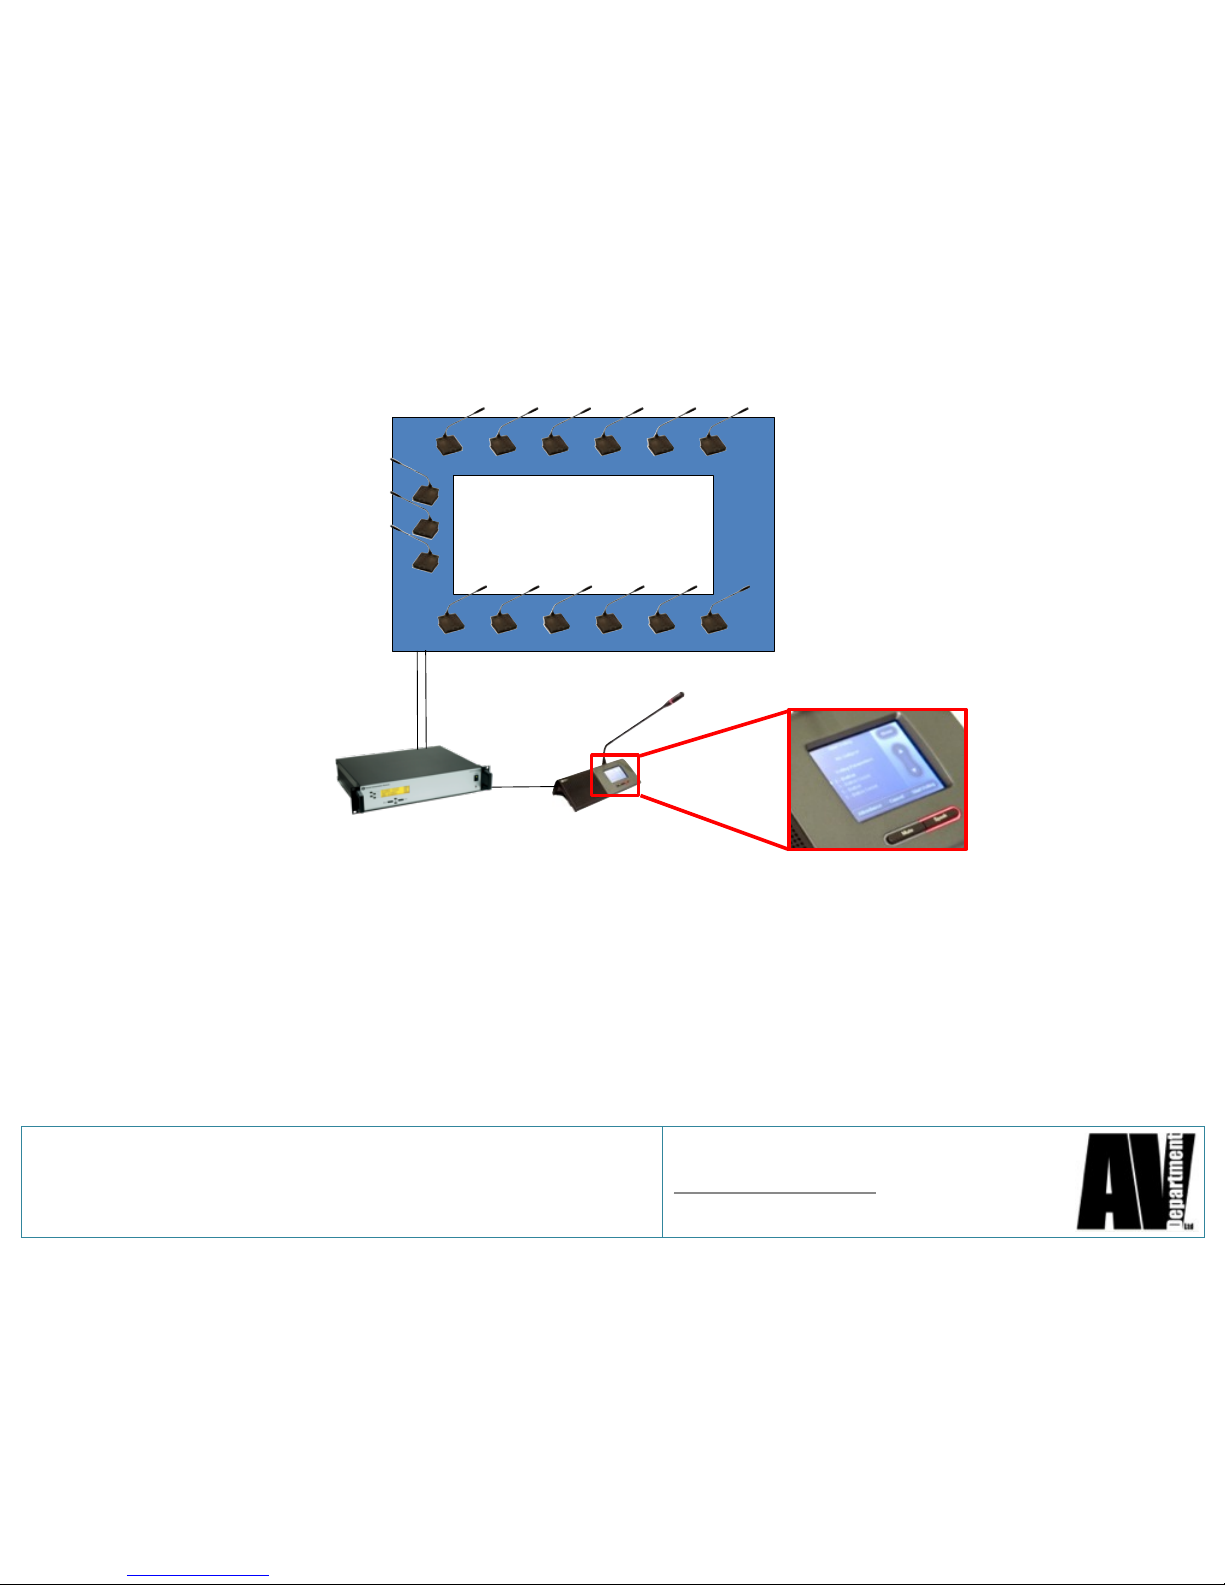
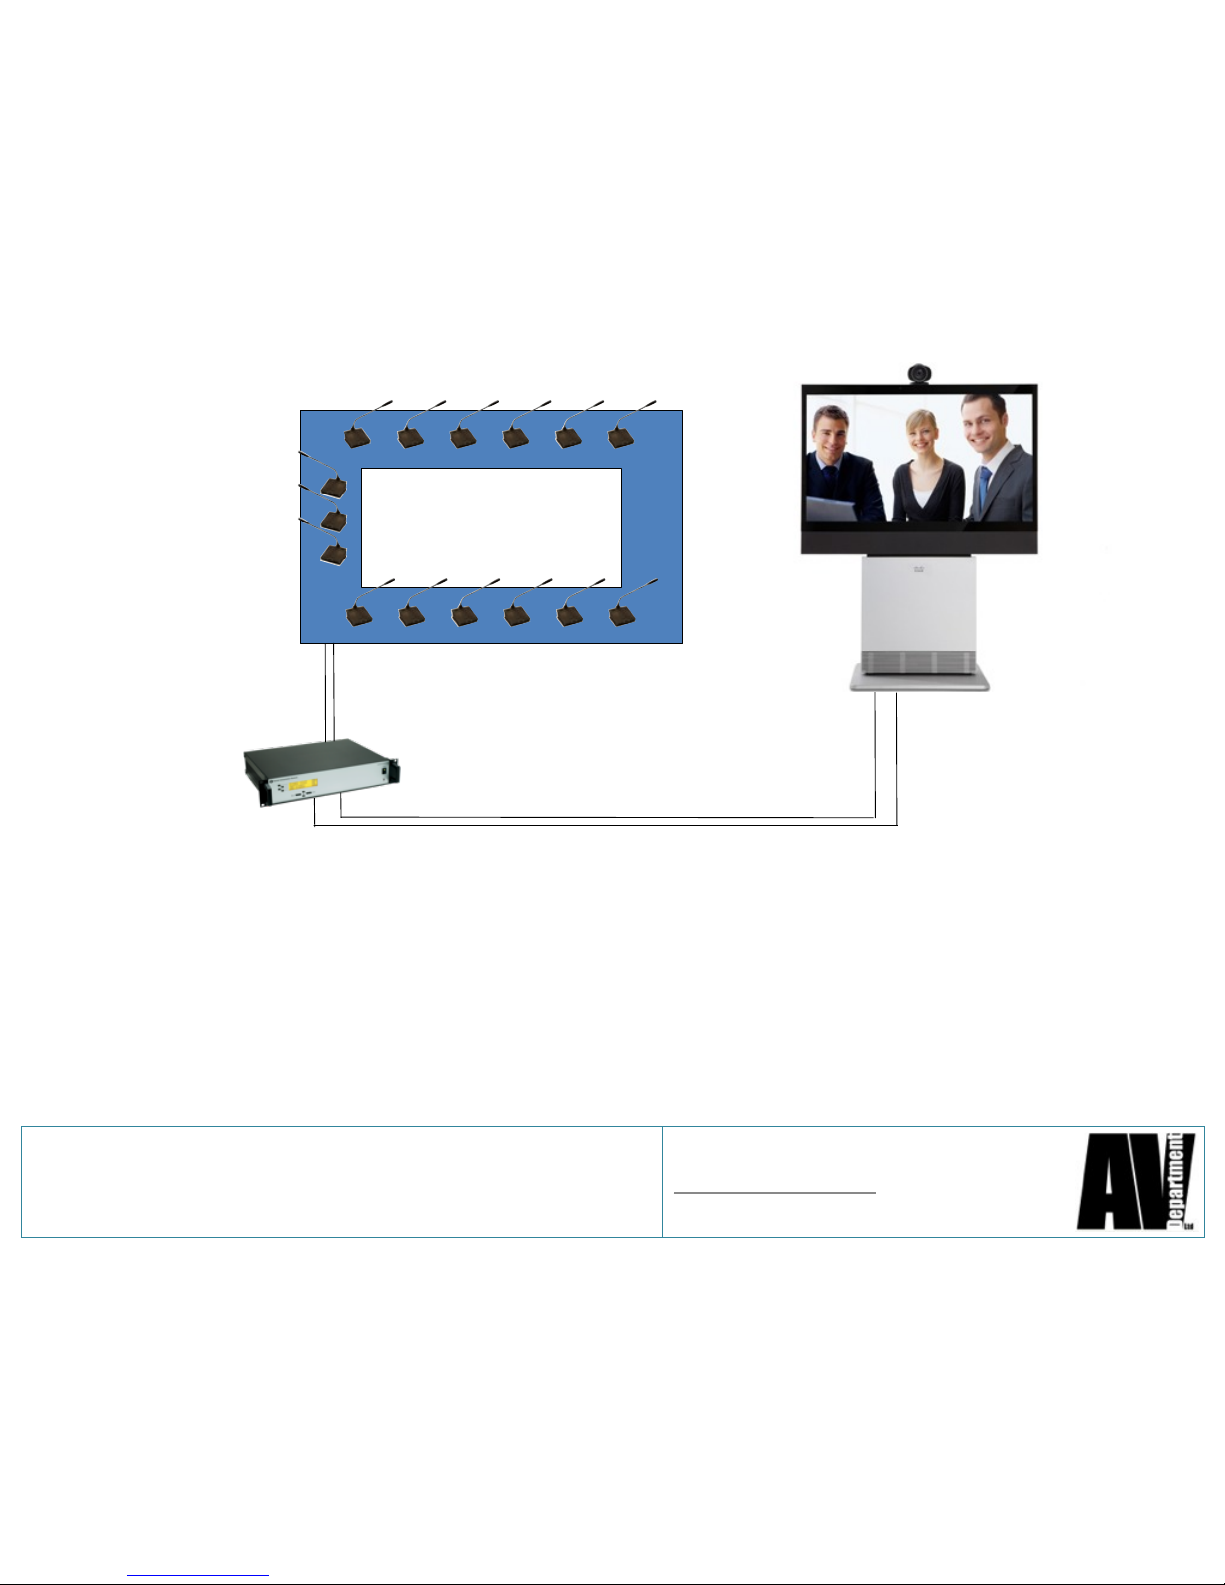
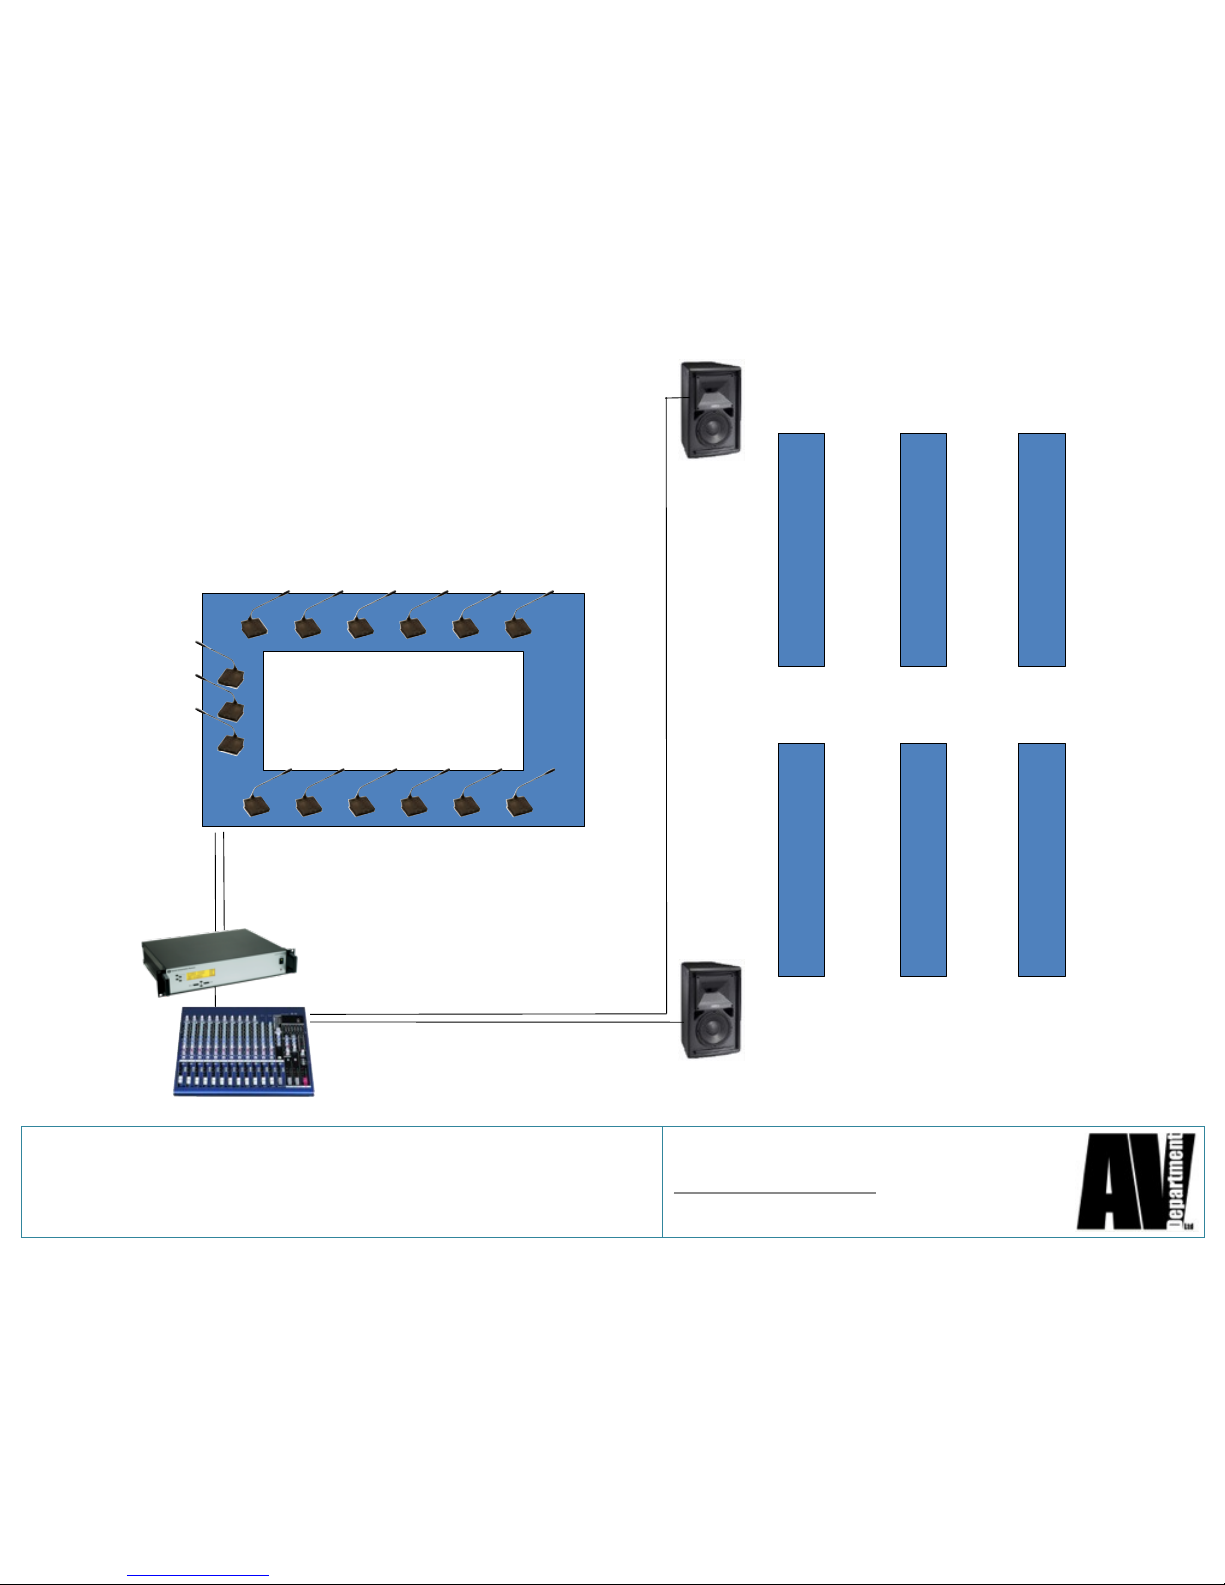
Connecting and powering the CU
Stage 4
Connect the CU to the first microphone in
the chain using the supplied 10m Cat 5
STP cables. If the CU is more than 10m
away add another cable using the supplied
screened joiner.
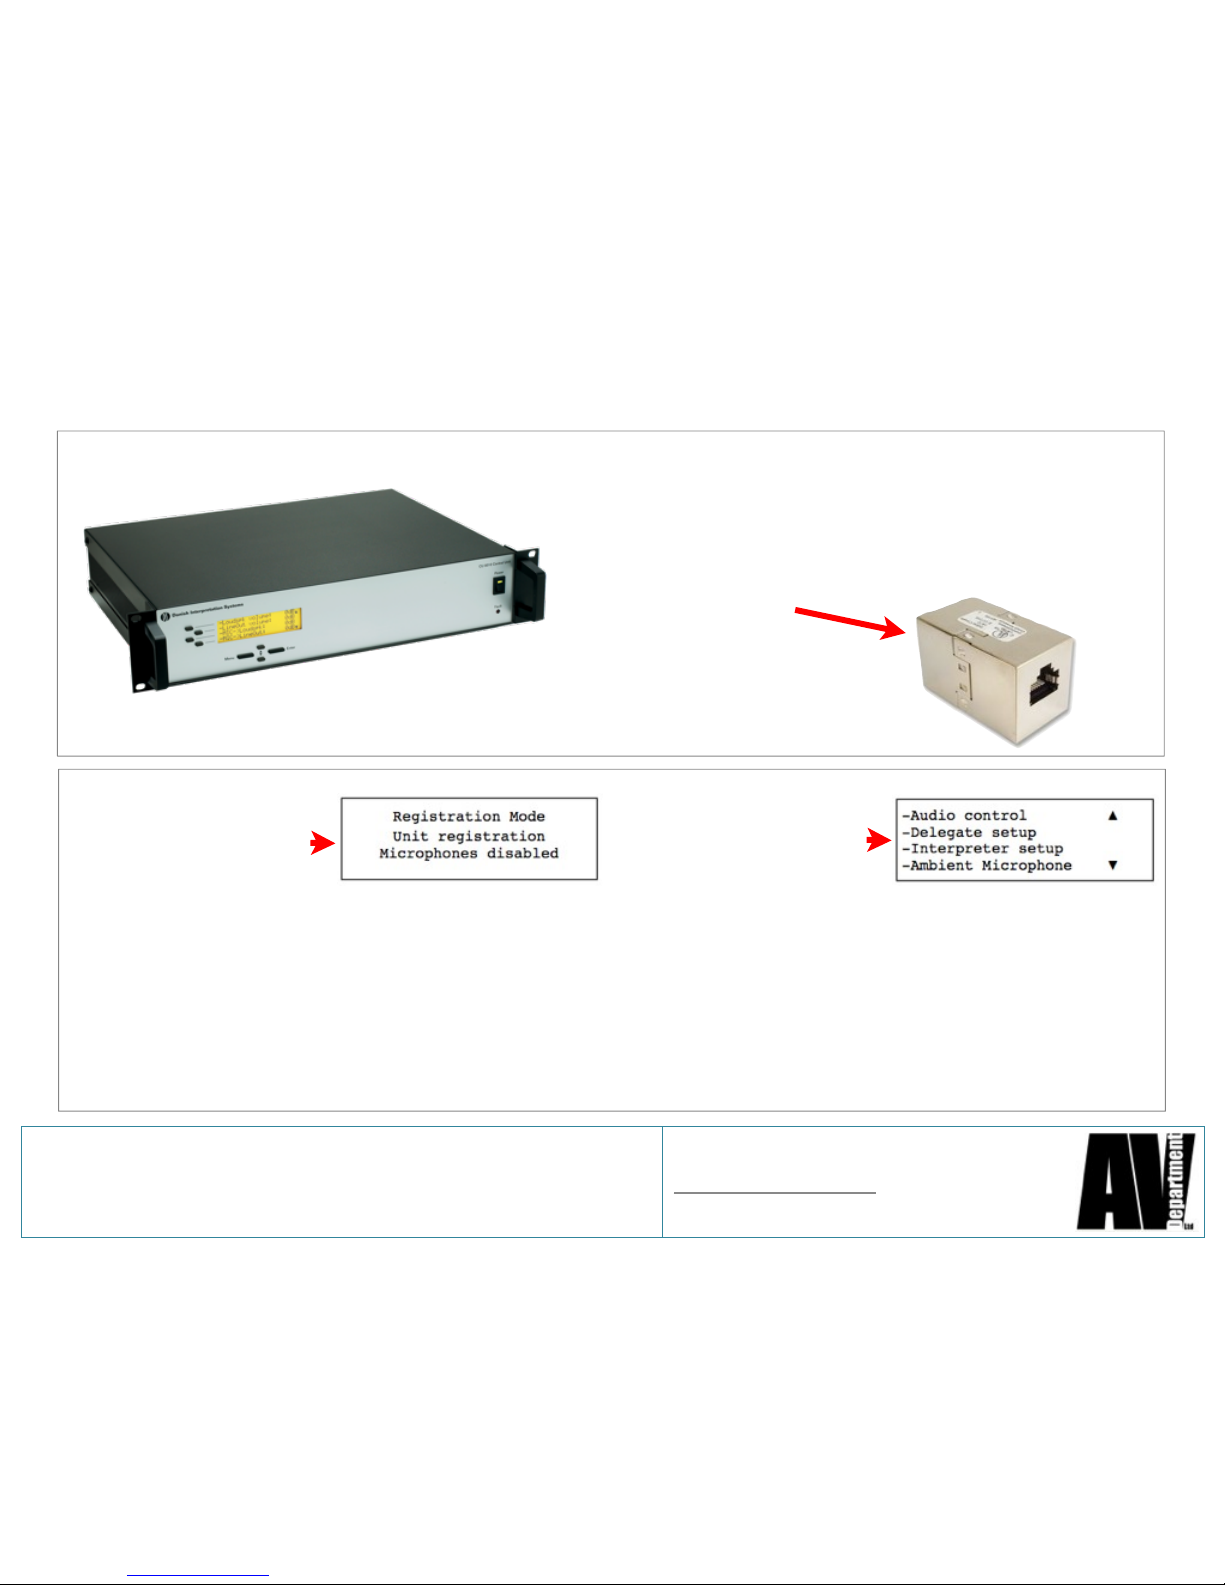
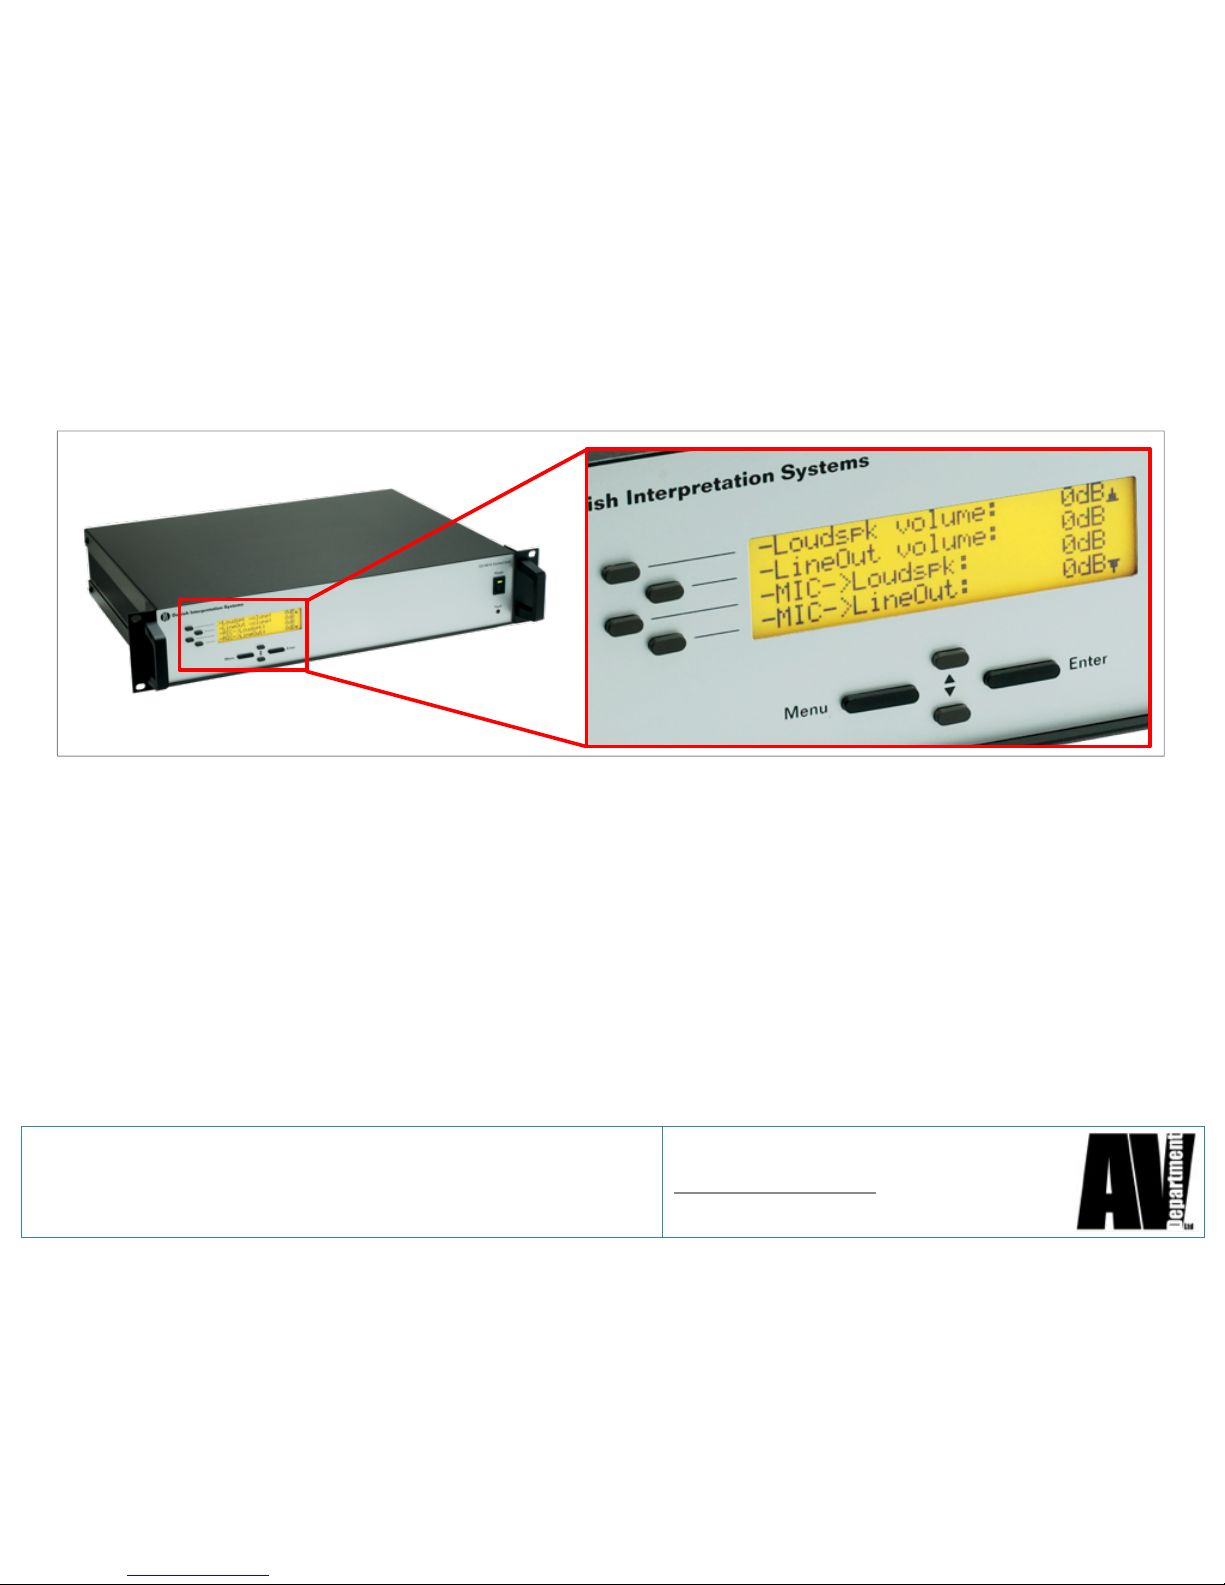
Power on the CU. The
Screen of the CU will show
the following screen.
Registration is the CU
communicating with all the
microphones and giving
them a unique number.
Once complete it will show
a menu screen.
While registration is going on all the microphones will have flashing lights on the
bases and mic stems. This lasts about a minute and then all lights will be off, the
menu screen will show on the CU and you should now be able to test a microphone.
!If the lights continue to flash for a prolonged period please refer to Trouble Shooting
at the back of this guide!

AV Department Limited
www.avdept.co.uk
01383 825709
Title: Guide to DIS Conference Microphones
(DCS 6000)
Adjusting the levels on the CU
Stage 5
Use the buttons to the side of the option displayed on the screen to select the option.
Use up / down buttons to scroll the screen to show full list of menu items.
The Up / down arrows on the display show more options are available (menu loops).
Once an option is selected ‘-’ turns to a ‘>’ and the value of the option is under lined.
Once under lined the up / down buttons adjust the value in steps of 1dB.
Once desired value is reached press ‘Enter’.
To exit out of a sub menu press ‘Menu’.
You must save the configuration to recall it automatically after a power down. To do this
return to the root menu. At the root menu select ‘Configuration’ and enter, Select ‘Save
Configuration’ and enter, follow on screen commands to save the configuration.

Boardroom table
External control can be provided by a chairman’s unit (DC6990).
The chairman’s unit touch screen shows which units are live. These can be selected
and switched off if they have been accidentally left on. The chairman’s unit can be
placed anywhere in the Cat 5 cable network, this maybe by the tech to allow control
or be used as a chairman’s microphone with control. More than 1 chairman’s unit
can be used to control microphones.
AV Department Limited
www.avdept.co.uk
01383 825709
Title: Guide to DIS Conference Microphones
(DCS 6000)

Boardroom table
External control can also be provided by a control PC
running the SW6000 software suite. This gives
control via Geographic ‘Mimic’ Diagrams. The
software suite also allows for camera control devices
to be connected and controlled via iPod Touch.
These options are not available on dry hire.
Call us for more details or visit the website.
AV Department Limited
www.avdept.co.uk
01383 825709
Title: Guide to DIS Conference Microphones
(DCS 6000)

Seated observersBoardroom table
To connect to Video Conferencing (VC) connect the VC audio output to CU Aux in.
Connect the CU out to the VC audio input. In CU ‘Audio Control’ menu, turn ‘LineIn-
>LineOut’ all the way down to ‘Off’ This will allow the microphone speakers to carry
all audio but remove incoming VC audio from the audio going back to the VC so
eliminating feedback / echo.
AV Department Limited
www.avdept.co.uk
01383 825709
Title: Guide to DIS Conference Microphones
(DCS 6000)

Seated observersBoardroom table
AV Department Limited
www.avdept.co.uk
01383 825709
Title: Guide to DIS Conference Microphones
(DCS 6000)
Simple layout for connecting a PA via the
XLR output on the CU. In CU ‘Audio Control’
menu, turn ‘LineOut volume’ ‘on’ and set to
desired level. (Range -40 to +20 dB)

Classroom tables
Top table
AV Department Limited
www.avdept.co.uk
01383 825709
Title: Guide to DIS Conference Microphones
(DCS 6000)
Active splitters, junction boxes and PSUs
are available to extend and create more
complex system layouts including
simultaneous interpretation.
Not available on Dry Hire!
Call us for more details or visit the website.
PS6000 in line PSU IS6132 Interpreters Console
RP6004 Repeater Splitter
CU6005 Central Unit
AO6008 Audio Breakout

AV Department Limited
www.avdept.co.uk
01383 825709
Title: Guide to DIS Conference Microphones
(DCS 6000)

Cabaret tables
Top table
AV Department Limited
www.avdept.co.uk
01383 825709
Title: Guide to Confidea Wireless Microphones
For Cabaret style seating
plans we would
recommend our Confidea
wireless conference
microphones by Televic
also available for dry hire.
Call us or visit our website.

AV Department Limited
www.avdept.co.uk
01383 825709
Title: Guide to DIS Conference Microphones
(DCS 6000)
Trouble Shooting
Q. Microphones continue to flash after power up and the system does not initialise.
A. There is an error or fault in a cable network.
•Check all lines are terminated.
•Check there are no cables left unconnected at the end of a chain.
•Check the chain is not looped back to the CU.
•Check all cables are Cat5 (or 6) STP (Screened Twisted Pairs) supplied by AVD
and no standard Cat5 UTP cables have been introduced to the cable network.
If there is still a fault power down and disconnect all but one chain and power up. If the
system initialises then the fault is in the other chains, repeat for all chains. Once you
have identified a faulty chain divide in half and re initialise if the fault clears then the
fault is in the half disconnected, repeat till faulty unit or cable is identified and
replaced. Reconnect all chains and re initialise. Please mark cables for our attention.
Q. Units at the end of a line do not power on or when in use power off mid ‘flow’.
A. There are too many units on a line or the line to the first unit is too long. Reduce the
number of microphones in a line, reduce the length of cable to the first microphone. Or
introduce an in line PSU (PS6000). This is a voltage drop issue. If you are pushing the
loudspeakers in the microphone bases then reducing the volume to these
loudspeakers may help as the amps in the bases are the biggest drain on the
available current.

AV Department Limited
www.avdept.co.uk
01383 825709
Title: Guide to DIS Conference Microphones
(DCS 6000)
Contact Details
AV Department Limited
Unit 83 East Way,
Hillend Industrial Park,
Dalgety Bay,
Fife. KY11 9JF
Tel. 01383 825709
Mob. 07905 437662
www.avdept.co.uk
This manual suits for next models
1
Table of contents
Other AV Department Microphone manuals