AvaLAN AW58EMVAP User manual

USER’S MANUAL
AvaLAN
NETWORKS
®
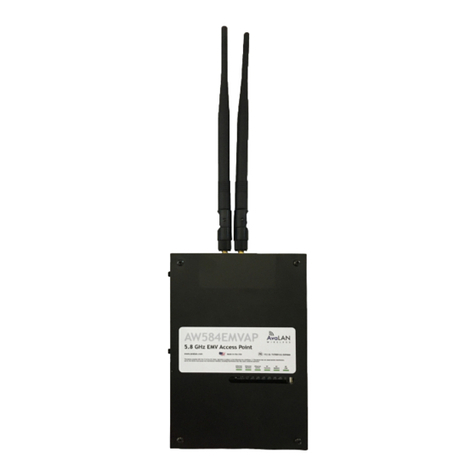
AW58EMVAP
AW584EMVSU
Wireless Forecourt Access Point and
Wireless In-Dispenser Unit
With Network Switch

AW58EMVAP | AW584EMVSU User’s Manual
PAGE 2Rev 01
READ THIS MANUAL BEFORE YOU BEGIN
Dispensers have both electricity and a hazardous, ammable and potentially explosive liquid. Failure to follow
the below precautions and the Warning and Caution instructions in this manual may result in serious injury.
Follow all rules, codes and laws that apply to your area and installation.
WARNING!
ONLY TRAINED AND CERTIFIED TECHNICIANS MAY WORK ON OR INSTALL AVALAN EMV KITS.
ADHERE TO AND COMPLY WITH ALL LOCAL, STATE, AND FEDERAL SAFETY PROTOCOL REQUIREMENTS DURING THE
INSTALLATION PROCESS.
SAFETY PRECAUTIONS - INSTALLATION AND MAINTENANCE
Before beginning the installation of this kit, block off the work area with safety cones. Always make sure ALL
power to the dispenser is turned OFF before you open the dispenser cabinet for maintenance. Physically lock,
restrict access to, or tag the circuit breakers you turn off when servicing the dispenser. If applicable, be sure
to trip (close) the emergency valve(s) under the dispenser BEFORE beginning maintenance.
Make sure that you know how to turn OFF power to the dispenser and submersible pumps in an emergency.
Have all leaks or defects repaired immediately.
Before you proceed, you must be trained to comply with all applicable safety measures associated with
working in this type of environment.
NOTE: This retrot kit may require installation of several wiring and hardware assemblies. Any installation or
modication must comply with the requirements of the National Electrical Code (NFPA 70), and NFPA 30 and
any other applicable codes.
Instructions within this manual may call for the removal and disposal of parts that presently make up the
dispenser.Whenever removing or discarding any part from the dispenser, those parts should be properly
disposed of or recucled according to Federal, State, and Local regulations. AvaLAN always recommends that
parts not under disposal regulations be recycled whenever possible.
Any questions concerning the isntallation and operation of this kit that are not covered in this document should
be referred to AvaLAN Technical Support.
AvaLAN Networks® Technical Support: (650)384-0000
Last Revision November 9, 2020
Firmware Version 2.2
Product Information
Product AW58EMVAP
Application 5 GHz Wireless Forecourt Access Point
Current Build Version 2.2
Hardware Platform AvaLAN Networks Proprietary Hardware
Product AW584EMVSU
Application 5 GHz Wireless In-Dispenser Communications System
Current Build Version 2.2
Hardware Platform AvaLAN Networks Proprietary Hardware
© by AvaLAN Networks®
AvaLAN Networks®
127 Jetplex Circle
Suite A
Madison, AL 35758

AW58EMVAP | AW584EMVSU User’s Manual
PAGE 3Rev 01
Danger indicates a hazard or unsafe practice which, if not avoided, will result in severe injury or
possibly death.
Warning indicates a hazard or unsafe practice which, if not avoided, may result in severe injury
or possibly death.
Caution indicates a hazard or unsafe practice which, if not avoided, may result in minor injury.
NOTE: Important information to consider, otherwise, improper installation and/or damage to Components
may occur.
INDICATORS AND NOTATIONS
1NFPA 30A states that:
“When maintenance to Class 1 dispensing devices becomes necessary and such maintenance may allow the
accidental release or ignition of liquid, the following precautions shall be taken before such maintenance is
begun:
• Only persons knowledgeable in performing the required maintenance shall perform the work.
• All electrical power to the dispensing device and pump serving the dispenser shall be shut off at the
main electrical disconnect panel.
• The emergency shut-off valve at the dispenser, if installed, shall be closed.
• All vehicle trafc and unauthorized persons shall be prevented from coming within 20 ft.(6 m) of the
dispensing device.
WARNING!
Electric shock hazard! More than one disconnect switch may be required to de-energize the
dispenser for maintenance and servicing. Use a voltmeter to make sure ALL circuits in the dispenser
are de-energized. Failure to do so may result in serious injury.
Lockout/Tagout requirements of the U. S. Dept. of Labor, Occupational Safety and Health Administration
(OSHA) may also apply. Refer to Title 29, Part 1910 of the Code of Federal Regulations (29CFR1910), Control of
Hazardous Energy Source (Lockout/Tagout)
1. Reprinted with permission from NFPA 30A-2012, Automotive and Marine Service Station Codes, Copyright
©2012, National Fire Protection Association, Quincy MA 02269. This reprinted material is not the complete and
ofcial position of the National Fire Protection Association on the referenced subject, which is represented only
by the standard in its entirety.
How To Use This Document
By following the installation instructions and performing the steps in the sequence presented, you will be
assured of a successful install.
NOTE: This kit may require installation of several wiring and hardware assemblies. Any installation or
modication must comply with the requirements of the National Electrical Code (NFPA 70), the Automotive
and Marine Service Station Code (NFPA 30A) and any other applicable codes.
NOTE: You must wear a static wrist strap, securely attached to an earth ground when handling any circuit
board, electronic component or assembly, or when reaching into the site controller or dispenser computer
enclosure. Do not use power tools.
AW58EMVAP | AW584EMVSU User’s Manual
PAGE 4Rev 01
UNPACKING AND INSPECTION ................................................... 5
SAFETY INFORMATION ........................................................... 5
INSTALLATION LOCATION ........................................................ 6
CONFORMITY AND STANDARDS ................................................. 7
REQUIRED TOOLS AND PARTS ................................................... 7
INSTALLATION BEST PRACTICES ............................................... 8
WHAT’S IN THE BOX ............................................................. 9
IN-DISPENSER INSTALLATION PROCEDURE ...................................10
IN-STORE INSTALLATION PROCEDURE ........................................11
OMNIA INSTALLATION FOR FLEX PAY IV ......................................12
LOAD BALANCING ACCESS POINTS ............................................13
Table of Contents

AW58EMVAP | AW584EMVSU User’s Manual
PAGE 5Rev 01
Unpacking and Inspection
Complete the following steps:
1. Before opening any cartons, count the number of cartons and verify the carton count against the
supplied packing list.
2. Inspect the cartons for damage made during transit.
3. File claim information with the carrier on the bill of lading.
4. Retain cartons suspected of damage for future claim purposes.
NOTE: You must wear an anti-static wrist strap, PN 916962 or equivalent, when removing electronic
components from static packages. Attach the wrist strap securely to an earth grounding point to prevent
possible damage from static electricity.
5. Remove all equipment from the shipping cartons and carefully inspect for visible damage.
NOTE: Any damage should be brought to the attention of the carrier and claims made immediately. Return
all equipment to the respective cartons for protection until actual installation is made. Save all cartons
until it is certain that return shipments are not required.
Safety Information
Read NFPA 30A and NFPA 70 (U.S. Installations)
Before installing the equipment, the installer must read, understand and follow this manual, NFPA 30A,
NFPA 70, and applicable federal, state and local codes and regulations. Failure to do so may adversely
affect the safe use and operation of the equipment.
CSA C22.1 (Canadian Installations)
For installation in Canada the installer must read and understand this manual, CSA C22.1
(Canadian Electrical Code) and applicable federal, provincial and local codes and regulations.
Emergency Power Cutoff
NFPA30A requires that an emergency power cutoff be installed. An emergency power cutoff is a single
control that removes AC power from all site fueling equipment and submersible pumps. Make sure the
control is accessible, labeled clearly, and installed away from dispensers. Make sure all station employees
know where the Emergency Power Cutoff is located and how to operate it. These guidelines are part of
the dispenser installation requirements and are provided here to afrm compliance to NFPA30A.
Electrical Circuits
Some of the procedures in this manual involve removal and connection of components during installation
or service. Disconnect power before executing these procedures.

AW58EMVAP | AW584EMVSU User’s Manual
PAGE 6Rev 01
Installation Location for Subscriber Units
Equipment may be installed in a variety of locations; all the cabinets and required wire-ways must be
located in a non-hazardous zone.
Ensure that all cabinets are located in an area that offers easy access for service, and free air space for
cooling 3” away from other equipment.
Environmental Requirements
Care should be taken to ensure that the temperature of the cabinets does not exceed
the operational ranges of -40°C to 70°C (-40°F to 158°F).
Power Requirements
The DC power source to the AW584EMVSU device must have an input voltage of 24VDC.
Installation Location for Access Point
Equipment should be installed in an indoor environment, not exposed to wind, rain, etc. This area of
the store front should allow the AP to be securely mounted and have visibility to all dispensers.
Environmental Requirements
Care should be taken to ensure that the temperature does not exceed the operational ranges of -40°C
to 70°C (-40°F to 158°F).
Power Requirements
The DC power source to the AW58EMVAP device must have an input voltage of 24VDC.
Figure 1A Figure 1B

AW58EMVAP | AW584EMVSU User’s Manual
PAGE 7Rev 01
Conformity with Standards
Ensure that all National, State, and local standards and codes are observed in site preparations, wiring,
and installation.
Power Wiring
Warning: USE THE SUPPLIED POWER CABLE ONLY.
Using other cables will void your warranty.
Emergency Stop Circuit
It is recommended that the electrical wiring for the AvaLAN AW584EMVSU be run through the Emergency
Stop circuit at the site so that all electrical power is cut whenever the Emergency Stop button is pressed.
The Emergency Stop Circuit wiring should be congured according to local electrical regulations.
Compliance
This device complies with Part 15 of the FCC Rules. Operation is subject to the following two conditions:
1) This device may not cause harmful interference and 2) this device must accept any interference
received, including interference that may cause undesired operation.
Requirements
REQUIRED TOOLS
The only tool we require is an Anti-Static Wrist Strap. No other tools are required.
REQUIRED PARTS
Quantity Part Number Description
1AW58EMVAP 5 GHz Wireless Forecourt Access Point
1AW584EMVSU 5 GHz Wireless In-Dispenser Communications System
2AW58EMVMK Mounting Kit
Complies with:
UL1238
CSA C22.2 No. 22
ISA 12.12.01
CSA C22.2 No. 213
LISTING NO: E212632
Class 1, Division 2, Group D, T5 -35°C ≤ Tamb ≤ 70°C
WARNING – EXPLOSION HAZARD. DO NOT REMOVE OR REPLACE WHILE CIRCUIT IS LIVE UNLESS THE AREA
IS FREE OF IGNITIBLE CONCENTRATIONS.
AVERTISSEMENT – RISQUE D’EXPLOSION. NE PAS RETIRER NI REMPLACER PENDANT QUE LE CIRCUIT EST
SOUS TENSION À MOINS QUE L’EMPLACEMENT NE SOIT EXEMPT DE CONCENTRATIONS INFLAMMABLES.

AW58EMVAP | AW584EMVSU User’s Manual
PAGE 8Rev 01
Installation Best Practices
INSTALLATION NOTES:
1) Installation and use shall be in accordance with the Flammable and Combustible Liquids
Code, NFPA 30
2) This device will connect to the Fuel Dispenser’s 24VDC power panel
3) The cables provided with the product shall be reliably routed separate (>2 inches) from
other wiring/cabling within the dispenser, unless all wiring insulation is rated for the highest
circuit voltage.
4) The Earthing conductor shall be minimum 18AWG and copper only.
5) Only use the supplied cable to power device.
6) The power supply should be Class 2 or equivalent.
7) Do not remove the attached power cable from the Subscriber Unit. Doing so will result in
damage to the unit.
Figure 2

AW58EMVAP | AW584EMVSU User’s Manual
PAGE 9Rev 01
Quick Disconnect Bracket
USB Key
Mounting Adhesive
What’s in the Box
AW584EMVSU
AW58EMVAP
Quick Disconnect Bracket
Mounting Adhesive
Power Supply
POE Injector
AW58EMVAP Radio
Antennas
Access Points Pairing
USB Key
AW584EMVSU Radio
Gilbarco Omni Adapter
Gilbarco Classic Adapter
Universal Power cable with no adapters
(Wayne style connector)
5ft CAT5 Cable

AW58EMVAP | AW584EMVSU User’s Manual
PAGE 10Rev 01
In-Dispenser Installation Procedure
When possible, mount the AW584EMVSU with access to the wiring trough where the dispenser communication
wires are located.
DANGER: Keep a minimum of 3” clearance between the radio (including from the
antenna) and any other equipment.
DANGER: DO NOT USE POWER TOOLS FOR INSTALLATION.
MOUNTING THE AW584EMVSU (IN-DISPENSER UNITS)
___ 1. Power down the dispenser.
___ 2. Open the dispenser bezel and nd a mounting location inside the
pump with a min. of 3” clearance from other equipment.
___ 3. Thoroughly clean the prospective mounting surface, removing any
oils, dirt, or residue.
___ 4. Attach the white side of Mounting Adhesive to the back of the
Quick Disconnect Bracket between the 4 holes on the opposite
side of the 45 degree angle.
___ 5. After selecting a mounting location, attach the Quick Disconnect Bracket metal mounting bracket
to the designated vertical area by removing the backing from the adhesive and placing it with
the tab oriented upwards. Hold in place for 10-15 seconds to conrm proper positioning
___ 6. Hook the opening on the over the tab of the metal mounting bracket.
___ 7. Remove the USB key off the Subscriber Unit and write the associated pump on the USB key.
CONNECTING THE DEVICE
___ 1. Connect each device to any of the four Ethernet ports as shown in the Installation Best Practices
___ 2. Connect the grounding wire to ground and onto the grounding screw.
___ 3. Connect the supplied 24VDC power cable to the dispenser’s power distribution board.
___ 4. Power on the pumps. All Subscriber Units will power up with successful boot tones (two quick
beeps) within approximately 20 seconds.
NOTE! Use care in storing and safeguarding all USB keys. USB keys will be needed for any Access Point or
Subscriber Unit replacement or additions.
If a USB key is lost at the time of a replacement or if adding a Access Point or Subscriber Unit, the unit
with missing USB key will have to be replaced. Warranty only covers failed units, not units replaced
because of lost USB key.

AW58EMVAP | AW584EMVSU User’s Manual
PAGE 11Rev 01
In-Store Installation Procedure
MOUNTING THE AW58EMVAP (INDOOR UNIT)
___ 1. Mounting Options:
A. Remove the white backing of the supplied adhesive and attach to the back of the quick
disconnect bracket (the lip will be facing away from you).
B. To wall mount use screws (not provided) for the 4 holes on the Enclosure.
___ 2. Locate an area on your store front that the AP can be securely mounted and has visibility to
all your dispensers. See Installation Location for Access Point on page 8
Note: Make sure to leave room for your antennas with a 3 inch clearance.
___ 3. Thoroughly clean the prospective mounting surface before removing the red adhesive
backing and applying to the back of the quick disconnect bracket with the ange at the top
of the bracket jutting away from the mount surface.
___ 4. Apply the quick disconnect bracket to the clean mounting area and hold in place for 10-15
seconds to conrm proper adhesion.
___ 5. Connect networking cable from the port in the AP to the female connector on the POE Injector
Note: CAT5 recommended and up to 100 meters supported
___ 6. Insert the lip from the Quick Disconnect Bracket into the horizontal opening at the top of AP
___ 7. Connect the male connector on the POE Injector to your existing switch
___ 8. Connect 24 VDC power supply at 120 VAC outlet and POE Injector. The POE Injector will have
a green light present when power is applied.
PAIRING RADIOS
___ 1. Power on all In-Dispenser Radios and gather all the Pairing Keys.
___ 2. Power on the Access Point wait 45 seconds.
___ 3. Insert the Access Points Silver Pairing Key and remove after afrming beeps.
___ 4. Within 15 Seconds, insert an In-Dispenser Radio Red Pairing Key into the Access Point. Then
allow up to 30 seconds for ascending beep pattern.
If pairing is unsuccessful there will be a failure tone (descending beep pattern). Remove the In-Dispenser
Radio Pairing Key and ensure the In-Dispenser Radio is on. Then repeat steps 3-4 until successful pairing
tones occur (ascending beep pattern).
Troubleshooting Mode:
Whenever the Access Point is silent you can insert In-Dispenser Pairing Key into the Access Point to enter
Troubleshooting mode. The Access Point will chirp how many Radios are connected and the In-Dispenser
Radios will chirp their signal strength.

AW58EMVAP | AW584EMVSU User’s Manual
PAGE 12Rev 01
Step 1) Connect the provided Gilbarco Omnia Adapter to the Universal Power cable.
Step 2) Cut one side of the provided CAT5 cable coming from the In-Dispenser radio.
Step 3) Strip the Green, Green-White, Orange, and Orange-White wires and connect to the screw
terminal of the M04216B003 plug.
Step 4) Connect 4-pin screw terminal to P304B on the Omnia Board.
Omnia Installation for Flex Pay IV

AW58EMVAP | AW584EMVSU User’s Manual
PAGE 13Rev 01
Load Balancing Access Points
With a le provided by AvaLAN engineering, a user can (via USB keying) set up redundant access points as well as set new
encryption keys and channel setting instructions. In this process, the user is able to create two AP’s with the same keys
and therefore load balance and auto-failover is enabled.
How to create a Redundant Access Point and set the Radio’s Frequency Channel:
Internet conguration:
If the Access Points can connect to the Internet, then register Access Points in the cloud account and set both Access
Points to have the same Keys and different frequency channels.
If no Internet access is available, the user must use the Access Point’s USB interface to congure:
Step 1 - Gather the required items:
1. A new USB stick (16GB or less)
2. Setup le (see Step 2)
3. Serial Number of the Access Point(s)
Step 2 - Make the setup les:
- Download template at APCong.AvaLAN-networks.com/APkey.cfg OR Request the template from support.
Step 3 - Rename the le:
- Put the last 6 digits of the serial number at the beginning of the name of the le followed by the text “APkey.cfg”.
- Every Access Point will have a different named le to allow storing all site congurations on a single USB drive.
Ex: If full serial numbers of the rst Access Point is “1A11C122AB21” then rename the le “22AB21APkey.cfg”.
Step 4 - Edit the Setup le using Windows Notepad or equivalent.
Note: See descriptions below to dene these variables.
FAP,NetworkName123
FEK,EncryptionKey123
FFR,6
EOF
Step 5 Unlock Access Point and apply changes:
- Use the Access Point’s USB Security Key to unlock the USB port.
- Insert the USB stick containing the Setup le.
- Listen for a conrmation tone.
- Remove the USB stick from Access Point.
FAP is the network name.
FEK is the Encryption Key.
The Network Name and Key can be up to 32 upper or lower case characters or numbers.
FFR is the frequency channel.
Available settings: Auto,1,2,3,4,5,6,7
Auto = the radio will scan periodically to nd a channel with the fewest number of APs
1 = 5180 2 = 5200 3 = 5220 4 = 5745 5 = 5765 6 = 5785 7 = 5805
Other manuals for AW58EMVAP
3
This manual suits for next models
1
Table of contents
Other AvaLAN Wireless Access Point manuals

AvaLAN
AvaLAN AW58EMVAP User manual

AvaLAN
AvaLAN AW58800HTA User manual

AvaLAN
AvaLAN AW49200HTA User manual

AvaLAN
AvaLAN AW58300HTA User manual

AvaLAN
AvaLAN AW58EMVAP User manual

AvaLAN
AvaLAN AW58100HTA User manual

AvaLAN
AvaLAN AW900R2-PAIR User manual

AvaLAN
AvaLAN AW58100HTA User manual

AvaLAN
AvaLAN AW58300HTS User manual

AvaLAN
AvaLAN AW58800HTP-PAIR User manual