Avalon Instruments Linear Fast Reverse User manual

USER MANUAL
Version 2.0 November 2019
All the pictures and contents included here are propriety of AVALON INSTRUMENTS.
They cannot be reproduced, published, copied or transmitted in any way, including the internet, without the
written permission of AVALON INSTRUMENTS.

SAFETY RECOMMENDATIONS AND WARNINGS
Read carefully the manual before nstall ng and us ng the mount.
Use the power cable suppl ed w th the mount or a 12V- 3A stab l zed power supply
as suggested n the manual.
Connect the power cable correctly and securely to the power socket.
Do not bend, pull or press the cable as th s may damage t.
Be sure to remove the power supply at the end of ts use or before any clean ng or
ma ntenance.
Th s mount must be used exclus vely by adults, do not allow use to ch ldren or to
people w th reduced mental capac ty.
Avo d to operate the mount except as str ctly nd cated n the manual.
Mod fy ng or alter ng n any way the character st cs of the mount w ll vo d the
manufacturer’s l m ted warranty.
Never mod fy the tens on of the belts (by ded cated screw), these s set n the factory
and any unauthor zed change w ll vo d the manufacturer’s l m ted warranty .
For any ass stance or repa r, please contact only the manufacturer.
After us ng t, avo d to store the mount n areas exposed to sunl ght or n wet places.
IMPORTANT NOTE: DO NOT USE ANY KIND OF LUBRICANT, SPRY, LIQUID OR
OIL ON THE BELT DRIVE SYSTEM!!!
Any use of lubr cants w ll vo d the manufacturer’s l m ted warranty.
© All Rights reserved 2

© All Rights reserved 3

Table of Contents
SAFETY RECOMMENDATIONS AND WARNINGS..................................2
Table of Contents...............................................................................................3
Technical S ecifications....................................................................................4
Forewords..........................................................................................................5
1. Packing Content.............................................................................................6
2 Mount Descri tion..........................................................................................7
3. LineAR initial Setu ......................................................................................8
!"
4. Telesco e balancing.....................................................................................14
!
#!!
5. LineAR Polar Alignment.............................................................................16
$%& '
$(& )
$*& )
$*&+,!*-!)
$*&&,!.
$/0&1*2
$3&!!*&
© All Rights reserved 4

Techn cal Spec f cat ons
Ty e of mount German Equatorial
Head weight 12 kg (27.5 lb) without counterweight and bar
Maximum load 20 kg (44 lb) for hotogra hic use, 25 kg (55 lb) for visual
Motion System Four-ste reducer via ulley-tooth belt system on ball bearing,
with no lay on both the axes.
Construction Material Anodized aluminium, worked out from single blocks with high
recision CNC machines
Transmission System Pulleys made with s ecial glass fiber olymer and high
recision tooth belts
RA Axis Heavy duty steel, diam. 35mm; all roller bearing axis
movement
DEC Axis Heavy duty steel, diam. 35mm; all roller bearing axis
movement
Polar Sco e Skywatcher (o tionally Losmandy)
Control System Avalon StarGO goto system
Counterweight Bar Quick release, 30mm diam. (1,181 "), stainless steel bar
Counterweight One, 6 kg (13,2 lb) stainless steel
Dovetail Plate Losmandy, 3" (75mm), dovetail, single knob with 2 tightening
oints
Warranty 2 years from the urchase date, extended to 5 years for the
transmission system
© All Rights reserved 5

Forewords
This manual describes the Avalon LineAR mount, the rocedures for its mounting and tuning on
the tri od and for the installation of a telesco e. Additional Information on the LineAR mount
and on the StarGO control system, containing also the rocedures for the use with third- arty
software and in articular with the ASCOM driver, are re orted in the StarGO manual which is
art of the mount su ly.
A careful reading of this manual will enable the use of your mount safely and with the
maximum satisfaction.
The mount design and its configuration could be subject to modifications, without rior
notification, based u on designer’s im rovements and the requests, if a licable, by the mount
users.
© All Rights reserved 6

1. Pack ng Content
O en the box to take all the content out. Extract all the com onents from the small cardboard
box and from the mount bag side ocket utting them on a clean, flat surface.
Component L st
•Mount Head with StarGO GoTO control
system.
•Polar sco e installed in the mount
•Losmandy ty e dovetail late for the
telesco e installation.
•Tri od late and screws for fixing the
mount to the tri od.
•Counterweight shaft
•6 kg stainless steel counterweight
•StarGO Control Key ad
•Key ad connecting cable
•Power cable
•Warranty Certificate & Testing Certficate
•Declaration of Conformity
•Metric Allen Wrench key set
•M8 screw for extreme latitudes regulation
•USB flash drive with manuals and
software
Box Content Accessories
© All Rights reserved 7

2 Mount Descr pt on
The Linear Fast Reverse is an innovative mount that accom lishes the movements of right
ascension and declination by means of ulleys and tooth belts in the lace of the classic worms
and gears. This choice has allowed to obtain several advantages such as a really steady motion
without lay (no backlash) and sudden eaks, factors of aramount relevance for long guided
ex osures and during high magnification visual observations. These features are of articular
relevance es ecially for the declination axis motor that can now quickly reverse the motion
without breaks to recover the lays: from here the mount name Fast Reverse.
The toothed belts used in the LineAR have the structure made of s ecial material with steel
strands to avoid any deformation, elongation and stress. It is im ortant to underline that in the
ulley-toothed belt system, no direct contact occurs between the ulley and the motion is
transmitted by the belt engaging from 50% to 90% of the girth surface. Consequently any error,
eventually resent, is
averaged among the cogs,
moreover soft, ledged over
the ulley, greatly reducing
the tracking error. On the
contrary, in the classical
worm–gear systems the
motion transmission is
erformed in a single contact
oint between the worm and
the gear thread and therefore
any error in one of the contact
surfaces is taken into account
as a tracking error.
Since there are no gears, there
is no need of eriodical
lubrication of the internal
com onents and therefore the
maintenance is extremely
reduced and limited to the
external cleaning.
The icture shows all the
main items of the mount.
Their use is described in
detail in Section 3.
© All Rights reserved 8

3. L neAR n t al Setup
The LineAR can work at latitudes range from 10° to 70°. For com actness ur oses, the
su lied is mount reset at about 40° and therefore the first o eration to erform is the
regulation of the latitude to the value related to the site in which the mount will be used.
The same o erations will be carried out in the case the mount is transferred in a site with a
different value of latitude.
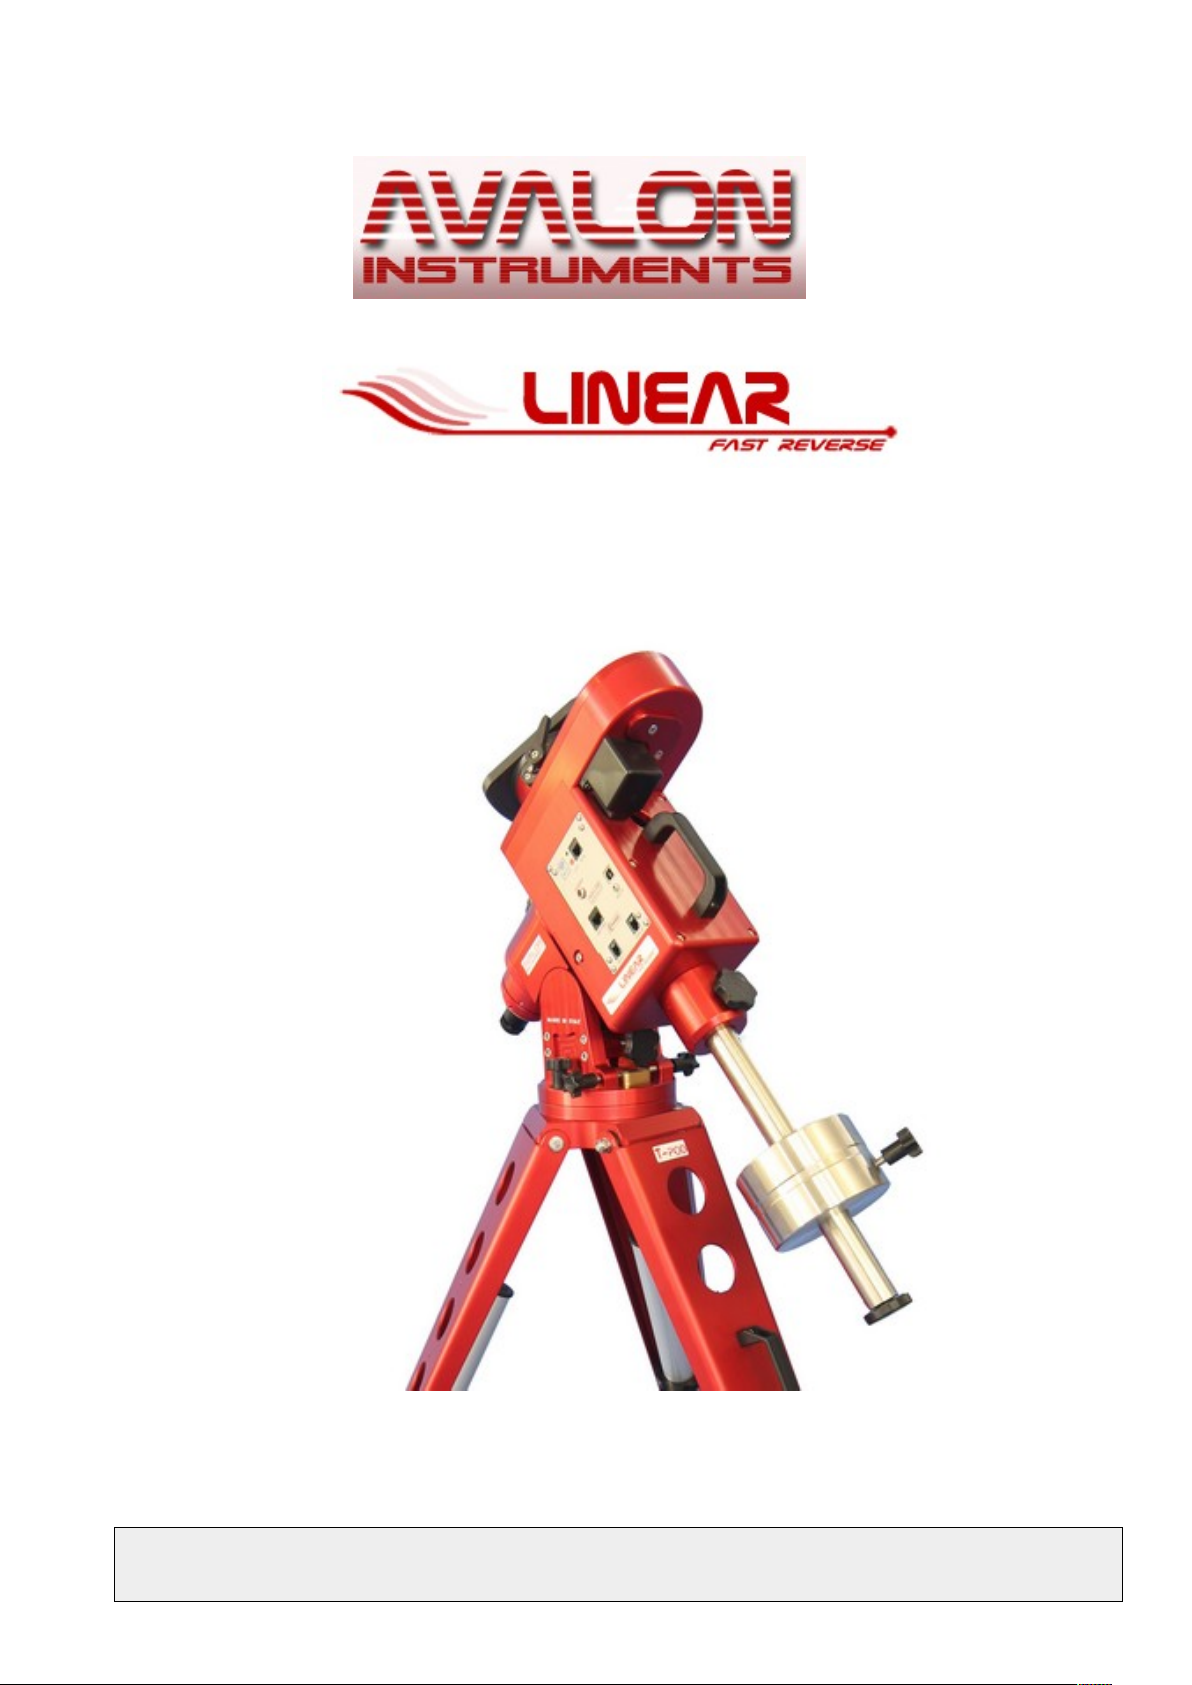
It is strongly recommended that the LineAR mount is used with the Avalon Instruments T- od
tri ode which has been designed to guarantee maximum erformance. If a different kind of
tri ode is used, it must have dimensions and characteristics com atible with the mount weight
and with the astronomical load to be installed. Section 3.2 describes the mount installation on T-
Pod tri od. Finally, the installation of suitable o tical tube will be described in section 3.3.
3.1 Lat tude Range Adjustment
This section describes in detail the rocedures to set the correct range of latitudes de ending of
the site where the mount will be used. The latitude range setting must be erformed before
installing the mount on the tri od.
As mentioned, the LineAR is designed to work at latitudes between 10° and 70°. To obtain such
a wide range of latitudes, the mount is rovided with a gusset with three ositions enabling
different ranges of latitude.
•Position 1 between 10° and 31°,
•Position 2 between 32° and 55°
•Position 3 between 56° and 70°.
On delivery, the gusset lug is set for the Central Euro e and North-Central United States
latitudes.
Should it be necessary to change the latitude beyond these limits - for exam le, to use the mount
in Northern Euro e or in the Tro ics, it is necessary to erform the re ositioning of the metallic
gusset laced under the mount.
This adjustment requires a 5 mm Allen wrench and the M8 hex head screws su lied as
standard.
The o erations required to adjust the range of useful latitudes are as follows:
© All Rights reserved 9

1) Unscrew the 2 screws under the base 2) Unscrew the 4 screws of the side bracket
3) Remove the bracket 4) Unscrew the brass item
5) Screw the brass item in osition 1 for
latitudes from 15° to 40° or in osition 3 for
latitudes from 45° to 70°
6) Remount the side bracket and
tight all screws
© All Rights reserved 10

7) For latitudes from 45° to 70° insert the hex
head M8 screw in the olar sco e side as in the
icture
8) For latitudes from 45° to 70° insert the hex
head M8 screw in the olar sco e side as in the
icture
3.2 Install ng the L neAR on the Tr pod
Whatever ty e of tri od is used it must be mounted with the right orientation. This need that the
brass contrast block which is installed over the tri od mounting late, is oriented to the North
with sufficient a roximation. A mechanical or digital com ass can be used to erform this task.
The LineAR comes with the late for attaching the mount on the tri od but the late must be
assembled on the tri od according to the instructions below.
The late is shi ed with the correct holes for mounting it on most of the tri ods available on
the market. The following figure shows how to mount it on a T-Pod:
Place the late on the to of the tri od and rotate it until the brass is aligned with one of the legs,
chosen arbitrarily. This leg will be designated the “North Leg” because it must be ointed to the
North to achieve a olar alignment. Attach the late with the 3 screws rovided for that
ur ose.
© All Rights reserved 11

The following are the ste s necessary to install the LineAR mount on a T-Pod tri od:
Rotate the mount azimuth knobs of a few turns
to make enough s ace for the insertion of the
tri od brass contrast block.
Put the mount on the tri od late, so that the
mount bottom late will fit erfectly with it
and the brass contrast block is in between the
two azimuth screws. The mount body will
remain well balanced over the tri od.
Tighten the two fixing screws equi ed with
lastic knobs in the two elongated holes to
maintain the mount firmly in osition.
Rotate the azimuth knobs until they touch the
contrast block.
Note: During the azimuth regulation for polar
alignment, these three screws must be slightly
loosened just enough to allow the mount to
rotate on the base. When the polar alignment
is reached tighten the screws again.
© All Rights reserved 12

3.3 Bar and Counterwe ght
NOTE: Installing the telescope without counterweigh, even with the AR and Dec latches
well tight is unsafe. There is the risk of a sudden rotation of the telescope around the
a is leading to hit the tripod legs with consequential damages.
The counterweight shaft has a s ecial groove to
allow a quick setu and a safe usage.
•Unscrew the knob at the bottom of the dec
axis, lace the shaft in the hole and ush
until the shaft is fully inserted; at this oint
tight the knob to ro erly fix the shaft.
De ending on the telesco e you want to use,
one or more counterweights will be needed.
•&,!"!,!
"&1!1
40!!
•Insert the counterweight on the shaft, lacing
it at about the centre. Firmly tighten the
counterweigh knob and then re-screw the
security screw on the end of the shaft.
3.4 Install ng the Opt cal Tube
The LineAR, as before mentioned, is rovided of a Losmandy ty e (75 mm) dovetail late
(saddle) to install the telesco e. Therefore the telesco e must be rovided of a male
dovetail bar of the same ty e.
Note: Before installing the tube, make sure you already installed both the shaft and the
counterweight and that the shaft is vertical and pointing to the ground (Counter Weight
Down - CWD position).
© All Rights reserved 13

Unlatch the DEC axis and rotate it until the
dovetail late is in horizontal osition, then
re-block the latches on both axis.
O en the dovetail clam by rotating its own
knob. Firmly take the OTA, insert its male
dovetail late in the mount dovetail saddle,
utting the side closer to the ground first.
Then, while still kee ing the OTA with one
hand, screw with care the clam until the
OTA is firmly locked on the mount.
© All Rights reserved 14

4. Telescope balanc ng
To guarantee a recise mount tracking it is necessary to correctly balance the telesco e in
both the rotation axes. To erform this o eration is needed to move manually and freely the
telesco e in RA and DEC. As antici ated, the LineAR is rovided of latches in both axes. To
freely move the telesco e, the latches need to be released by rotating the related levers in the
counter clockwise direction.
Note: Before performing the balancing of the telescope be sure to have the full control of it
before releasing the latches. An over unbalanced mount can move very quickly causing
damages to the optical tube or to the mount itself.
4.1 RA Balanc ng
1. Make sure the telesco e is firmly set
on the mounting latform.
2. Loosen the latch of the RA shaft and
lace the telesco e on one of the sides
of the frame. The counterweight bar
will extend horizontally on the
o osite side of the mount.
3. Let go the telesco e SLOWLY to see
which way the telesco e tends to
"fall."
4. Loosen the lock screw of the
counterweight, so that it can slide
along the bar.
5. Move the counterweight towards the osition in which it balances the telesco e (i.e. the
osition in which the telesco e remains stationary when the RA latch is loose).
6. Tighten the counterweight screw to lock it in the new osition.
4.2 Dec Balanc ng
Even if the telesco e should not move in Declination during an ideal tracking, it telesco e must
be balanced in this axis to revent any sudden motions when the DEC latch is loose and
articularly to ensure the absence of vibrations and a quick res onse during the hoto
autoguiding. To balance the telesco e in DEC:
© All Rights reserved 15

1. Loosen the RA axis latch and osition the telesco e horizontally on one of the sides of the
mount
2. Tighten RA latch to kee the telesco e in
osition.
3. Loosen the DEC axis latch and rotate the
telesco e to make the tube arallel to the
ground.
4. Release the tube - GRADUALLY - to see
which way the tube tends to rotate with
res ect to the Declination axis.
5. Slightly loosen the mount dovetail clam
knob and slide the telesco e either
forwards or backwards until it will not
remain in equilibrium when the DEC latch
is loose. DO NOT let go the telesco e tube
while the dovetail clam knob of the
mounting latform is loose!
6. Tighten the dovetail clam knob to lock the telesco e in lace.
! "
#
" $"
" % ""
#
© All Rights reserved 16

5. L neAR Mount Stat on ng
The LineAR is an equatorial mount and therefore it is necessary to make its olar axis arallel
with the Earth rotation axis.
In this cha ter the o erations to trim the latitude and the azimuth and to erform the mount
alignment to the celestial ole using the standard olar sco e (or the o tional alternative) will be
described.
5.1 Lat tude F ne Adjustment
The first o eration to erform (after the tri od
has been "levelled" using the a ro riate
s herical bubble level installed on the base
late) consists on inclining the olar axis at
the latitude of the observation site (for
exam le Milan and Venice are at 45 °, Rome
at 42 °, Palermo at 38 °) using the two
Altitude knobs (acting in ush- ull
arrangement) and the indication of the scale
latitude, engraved on the left side of the
mount. As mentioned, the mount adjustment
range in latitude goes from about 10 ° to 70 °.
The latitude adjustment is accom lished with both
hands: when you screw the back knob, unscrew the
same number of la s (or fraction) the front knob or
vice versa.
To increase the latitude (lift) of the olar axis,
turn the rear latitude adjustment knob clockwise.
To decrease the latitude (lower) of the olar
axis, turn the rear latitude adjustment knob
counter clockwise.
Note: In general it is better to make fine adjustments in latitude by moving the mount in
contrast with gravity, i.e. raising the polar a is of the mount.
© All Rights reserved 17

5.2 Az muth Regulat on
The azimuth regulation is erformed in a
similar manner, using both hands to turn the
other two adjustment knobs in o osite
directions simultaneously. When a knob is
rotated in one direction the other is rotated in
the o osite direction. Turn them so that the
screws attached to the knobs ress against the
brass adjustment ost and move the mount to
the right or left by a small amount. The
azimuth adjustment knobs are those
ositioned on both sides of the mount as seen
in the icture on the right.
Remember that setting u the mount in both
Latitude and Azimuth should be erformed
only during the im ortant hase of recise olar alignment, before starting an observation
or hotogra hic session. Once the olar alignment has been reached, THE MOUNT
SHOULD NOT BE MOVED FOR ANY REASON USING ALTITUDE OR AZIMUTH
KNOBS OR THE ALIGNMENT WILL BE LOST. After the alignment has been
established, moving the mount in Right Ascension and Declination and ointing the
telesco e to celestial objects should be erformed only by using the key ad or the software
commands.
Alt-Az Polar Alignment
The following table shows the knobs rotation arc-minutes amount for a fine Polar Alignment
adjustment with one full knob turn.
& &' &'
&% ( ( (
! )*+ ,)+ ,-,. ,)+ /*- **0.
© All Rights reserved 18

5.3 L neAR Polar al gnment
The procedure for Polar Alignment with
the LineAR mount depends on the Polar-
scope model. The M-uno mount comes
with the kywatcher Polar-scope inserted
on the RA axis. The optional Polar-scope
external mounting kit is also available the
for using an alternate Polar Alignment
procedure and/or polar scope use.
Furthermore a Losmandy polar-scope is
also available as an option.
Beginning in 2016, the Skywatcher
olar-sco e included with the mounts
have a different reticle view than earlier
models. However the Polar Alignemnt
rocedure with the LineAR mount
remains the same and is ex lained in the
following aragra hs.
5.3.1 Polar al gnment w th a Skywatcher Polar-scope
Looking though this sco e, with the reticle well lighted internally, it is ossible to se a reticle
layout similar to that on the right.
It is well known that the Polaris is at about 40 arcmin distance from the Celestial Pole and
therefore it orbits around the ole at that distance every about 24 hours. The cross in the
classical reticle center indicates the osition of the Pole. The circle around it re resents the orbit
of Polaris. The small circle on the orbit re resents the variable Polaris osition. The roblem
here is to osition the smaller circle at the correct Polaris angle as it is seen from the observation
site at the observation date and time. Years ago this osition was obtained using several ty es of
circular dials and erforming few calculations. The Avalon mounts are not rovided of these
kinds of circular dials. The two ictures below show two kind of skywatcher olarsco e model:
the classical reticle (with Octans, Big Di er and Cassio eia) and the new one (with the only
Octans constellation). For an accurate olar alignment with Avalon Instruments mounts it
doesn’t matter for the constellation osition. The reference oint it will be the small circle that
re resent the Polaris orbit.
© All Rights reserved 19

Polarscope view with classical reticle Skywatcher polarscope view with new reticle
Currently the most common method to get the exact osition of Polaris is using one of several
available com uter rograms or, better, mobile device a lications. These rograms rovide the
osition of Polaris both visually and in the hourly format as described in section 5.3.3. Once the
Polaris osition has been determined in terms of hour angle, the olar sco e should be rotated to
bring the small circle in that osition. With this ty e of reticle this o eration is a roximate, but
is accurate enough and is satisfactory for most a lications.
The new reticle has a different and more efficient engraving, as shown on the figure on the right.
The Cassio eia and Big Di er asterisms are missing and the Polaris orbit circle has a different
a earance. The circle has been re laced by a graduated annulus made u three concentric
circles. To obtain a recise olar osition with this ty e of reticle, it is necessary to determine
the Polaris hour angle with any of the rograms or a lications mentioned above. The small
circle re resenting Polaris must be ut in the annulus corres onding with that hour, starting with
the 0 of the annulus in the u er osition. The diagram on the right side of the figure rovides
information for a more recise ositioning of Polaris in the annulus, de ending on the selected
year. The Octans asterism is resent, but only for use in the southern hemis here.
Once the correct osition of the small Polaris circle has been established, the following
o erations should be erformed:
Once the correct osition of the small Polaris circle has been established, the following
o erations should be erformed:
© All Rights reserved 20
Table of contents
Other Avalon Instruments Accessories manuals