Avantco A37190 User manual

Multi function drive unit
2021 1
Operator's Manual for Attachment
Multi function drive unit
Product number
A37190
English
A438836 2021 1 EN 2018-
www.avanttecno.com

Multi function drive unit 2021 1

Multi function drive unit 2021 1
CONTENTS
1. FOREWORD ........................................................................................................................................ 5
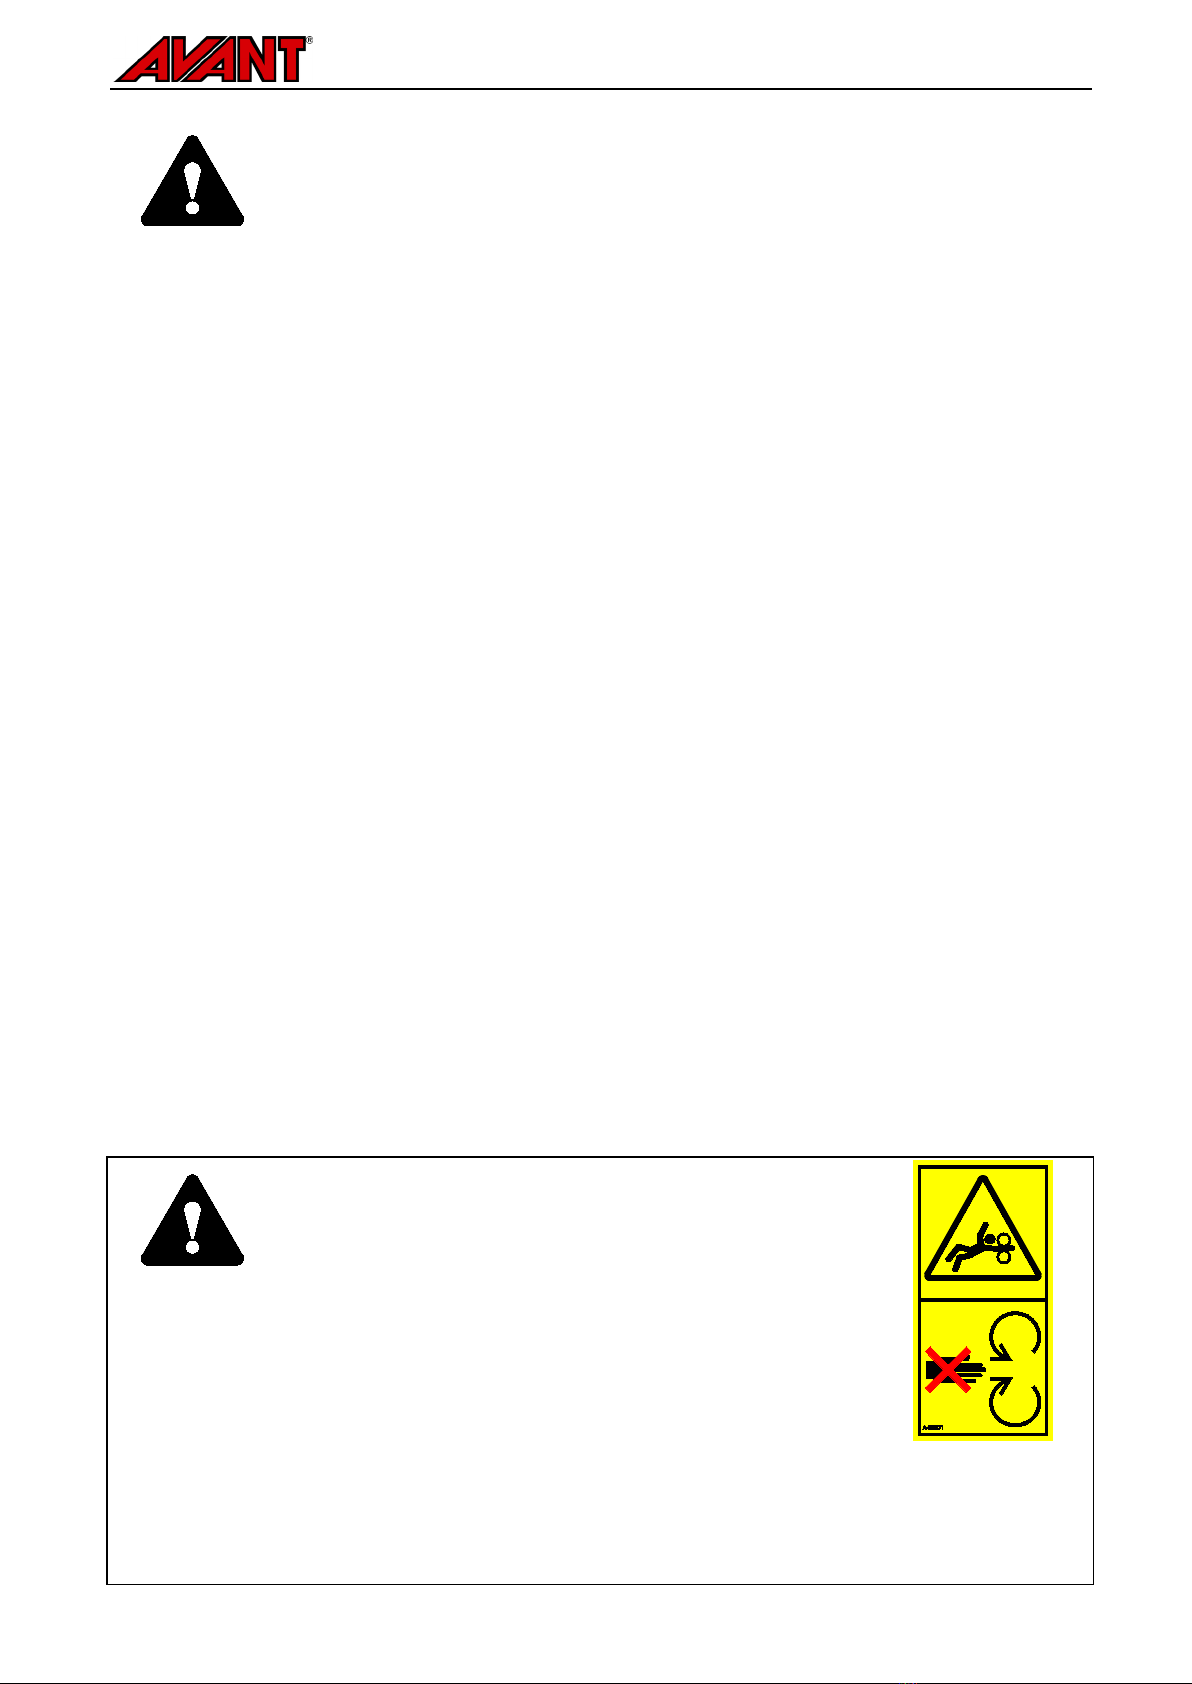
Warning symbols used in this manual ...................................................................................................................................6
2. DESIGNED PURPOSE OF USE.......................................................................................................... 7
3. SAFETY INSTRUCTIONS FOR USING THE MULTI FUNCTION DRIVE UNIT ........................ 8
4. TECHNICAL SPECIFICATIONS ....................................................................................................... 12
4.1 Rotating speed ............................................................................................................................................................12
4.2 Work tools for the drive unit.................................................................................................................................13
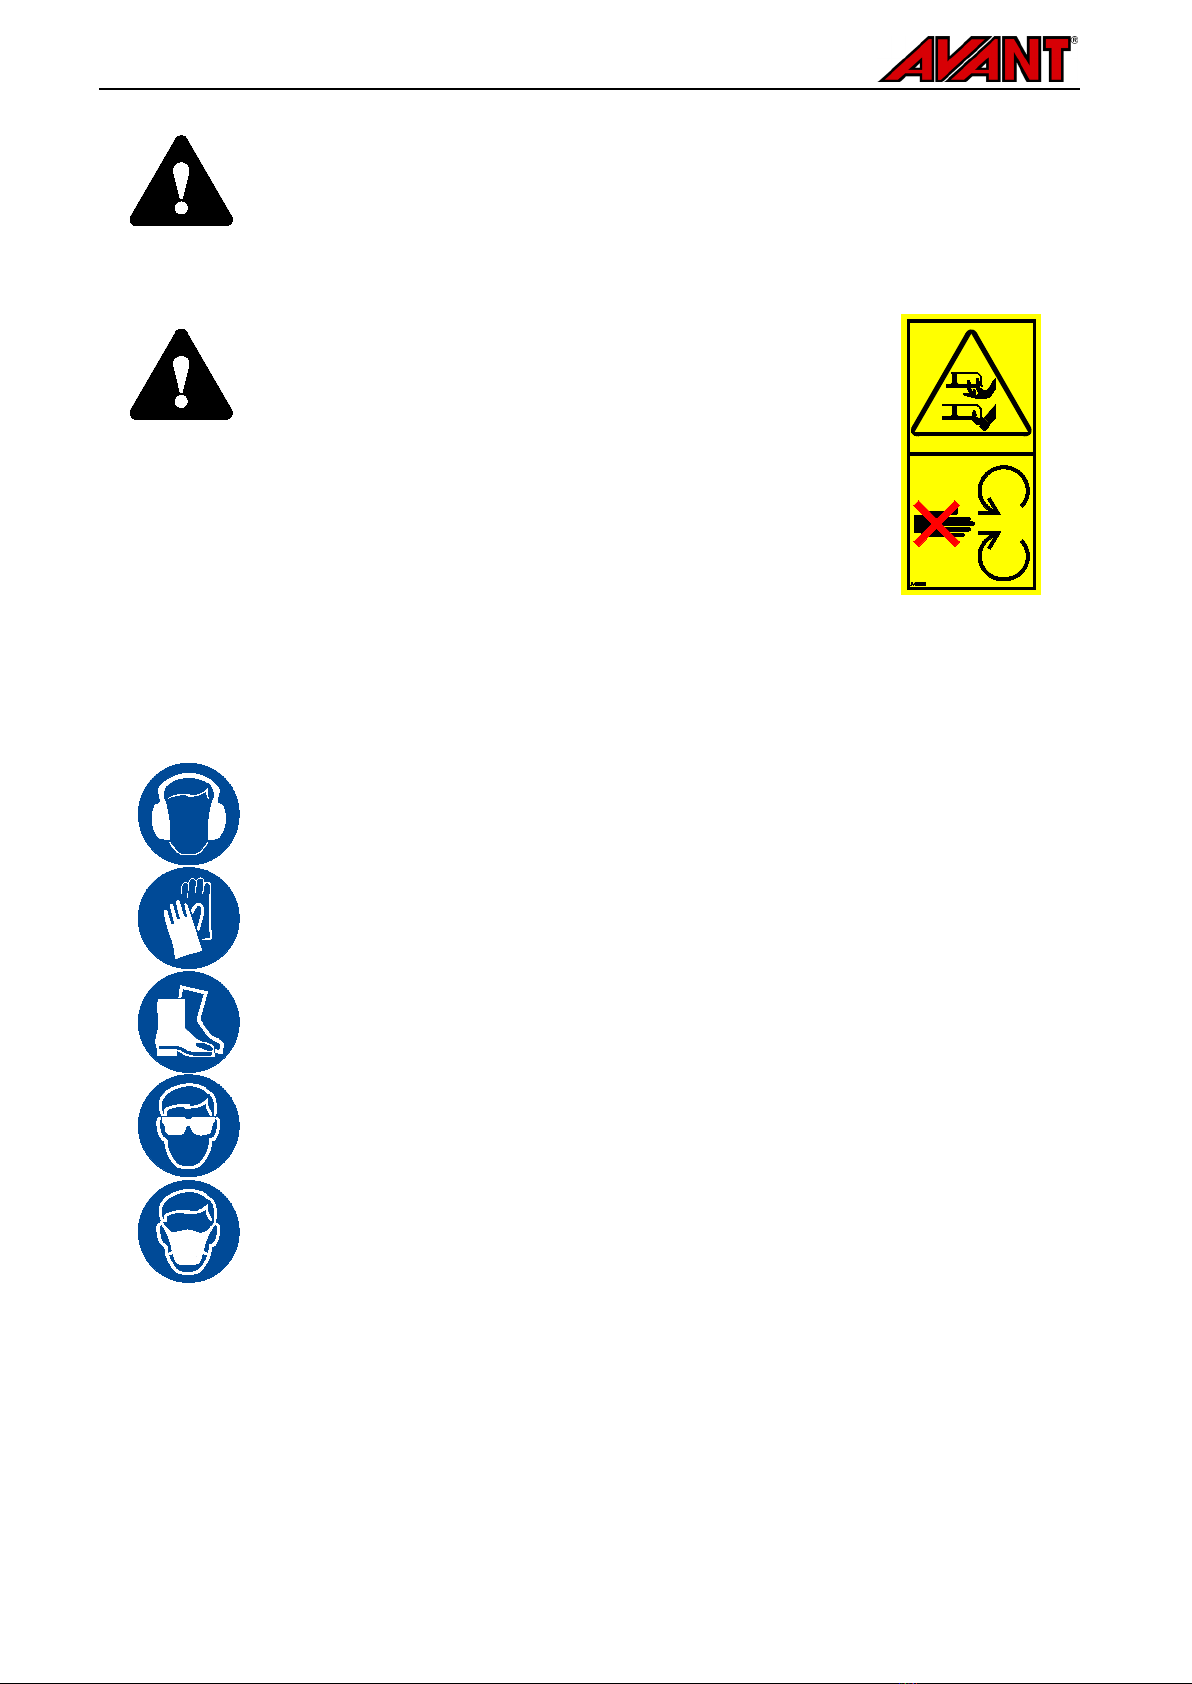
4.3 Safety labels and main components of the attachment ....................................................................................14
5. ASSEMBLING THE ATTACHMENT................................................................................................. 16
5.1 Connecting and disconnecting hydraulic hoses..................................................................................................17
6. OPERATING THE ATTACHMENT .................................................................................................. 19
6.1 Checks before use .....................................................................................................................................................20
6.2 Adjustments.................................................................................................................................................................21
6.2.1 Orientation..........................................................................................................................................................21
6.2.2 Side shift - Angle adapter 90° .........................................................................................................................22
6.2.3 Working on uneven ground............................................................................................................................23
6.3 Transport position .....................................................................................................................................................23
6.4 Storage ..........................................................................................................................................................................24
7. USING THE WORK TOOLS.............................................................................................................. 25
7.1 Changing of work tools ............................................................................................................................................25
7.2 Auger tools ..................................................................................................................................................................26
7.2.1 Using the auger...................................................................................................................................................27
7.3 Concrete mixer ..........................................................................................................................................................31
7.3.1 Storage of the concrete mixer .......................................................................................................................32
7.3.2 Using the concrete mixer................................................................................................................................33
7.3.3 To operate the concrete mixer.....................................................................................................................34
7.3.4 Cleaning of concrete mixer.............................................................................................................................35
7.4 Carousel broom .........................................................................................................................................................36
7.4.1 Using the carousel broom ...............................................................................................................................37
7.4.2 Broom side shift .................................................................................................................................................38
7.4.3 Storage of the carousel broom ......................................................................................................................38
7.5 Rotary hoe ...................................................................................................................................................................39
7.6 Screw pile adapter .....................................................................................................................................................41
7.6.1 Using the screw pile adapter ..........................................................................................................................42
7.7 Log splitter...................................................................................................................................................................43
7.7.1 Using the log splitter.........................................................................................................................................45
7.8 Cable/hose reel...........................................................................................................................................................46
7.8.1 Attaching the cable/hose reel .........................................................................................................................48
7.9 Screening drum...........................................................................................................................................................50
7.9.1 Using the screening drum................................................................................................................................51

7.10 XL weed brush ........................................................................................................................................................... 53
7.10.1 Using the XL weed brush................................................................................................................................ 54
7.10.2 Storage of the weed brush.............................................................................................................................. 54
7.11 Wire rope brush........................................................................................................................................................ 55
7.11.1 Using the wire rope brush..............................................................................................................................56
8. MAINTENANCE AND SERVICE ....................................................................................................... 57
8.1 Inspection of hydraulic components.....................................................................................................................57
8.2 Cleaning the attachment ..........................................................................................................................................58
8.3 Inspection of metal structures................................................................................................................................ 58
8.4 Lubrication...................................................................................................................................................................58
8.5 Maintenance of the work tools..............................................................................................................................58
8.5.1 Carousel broom ................................................................................................................................................58
8.5.2 XL weed brush...................................................................................................................................................59
8.5.3 Wire rope brush................................................................................................................................................60
8.5.4 Auger ....................................................................................................................................................................61
8.5.5 Rotary hoe .......................................................................................................................................................... 63
8.5.6 Log splitter ..........................................................................................................................................................63
9. WARRANTY TERMS .......................................................................................................................... 64

5 (66)
1. Foreword
Avant Tecno Oy would like to thank you for your purchase of this attachment for your Avant loader. It has
been designed and manufactured based on years of experience on product development and manufacturing.
By familiarizing yourself with this manual and following the instructions, you ascertain your safety and ensure
the reliable operation and long service life of the equipment. Read the instructions carefully before starting to
use the equipment or performing maintenance.
The purpose of this manual is to help you to:
operate the equipment in a safe and efficient manner
observe and prevent any hazardous situations
keep the equipment intact and ensure a long service life
With these instructions, even an inexperienced user can use the attachment and loader safely. The manual
includes important instructions for experienced AVANT operators as well. Ensure that all persons using the
loader have received proper guidance and familiarised themselves with the manual of the loader, each
attachment that are used, and all safety instructions before using the equipment. Using the equipment for
other purposes or use in any other way than described in this manual is prohibited. Keep this manual at hand
throughout the service life of the equipment. If you sell or transfer the equipment, be sure to hand over this
manual to the new owner. If the manual is lost or damaged, you can request a new one from your Avant
dealer or from the manufacturer.
In addition to the safety instructions included in this manual, you must observe all occupational safety
regulations, local laws, and other regulations concerning the use of the equipment. Particularly the regulations
concerning the use of the equipment on public road areas must be observed. Contact your Avant dealer for
more information about local requirements before you operate the loader on road areas.
Contact your local AVANT dealer for any questions, service, spare parts or about any problems that may
occur with the operation of your machine.
This manual contains the original instructions in English. Due to continuous product development some of the
details shown in this manual may differ from your equipment. Pictures may also depict optional equipment or
features that are not currently available. We reserve the right to change the contents of the manual without
notification. Copyright © 2021 Avant Tecno Oy. All rights reserved.

6 (66)
.
Warning symbols used in this manual
The following warning symbols are used throughout this manual. They indicate factors that must be taken into
account to reduce the risk of personal injury or damage to property:
WARNING SAFETY ALERT SYMBOL
This symbol means: “Warning, be alert! Your safety is involved!”
Carefully read the message that follows, it warns of an immediate hazard
that could cause serious personal injury.
The safety alert symbol by itself and with related safety statement
indicates important safety messages throughout this Manual. It is used to
draw attention to instructions involving your personal safety or the safety
of others. When you see this symbol, be alert, your safety is involved,
carefully read the message that follows, and inform other operators.
DANGER
This signal word indicates a hazardous situation which, if not avoided, will cause
death or serious injury.
WARNING
This signal word indicates a potentially hazardous situation which, if not avoided,
could cause serious injury or death.
CAUTION
This signal word is used when minor injury could result if the instructions are not
followed properly.
This signal word indicates information about the correct operation and maintenance
of the equipment.
Failure to observe the instructions accompanying the symbol can lead to equipment
breakdown or other property damage.

7 (66)
2. Designed purpose of use
The AVANT Multi function drive unit is an attachment that is suitable for use with AVANT compact loaders that
are shown in Table 1. The strong and robust hydraulically rotated multi purpose drive unit is equipped with
square shaft and pin locking system, which enables to use different work tools. The pin locking system makes
it possible to use different tools on the drive unit, and to change them quickly.
The drive unit can be fitted with the following work tools: augers, screw pile adapter, concrete mixing drum,
screw cone log splitter, screening drum, cable/hose reel, carousel broom and rotary hoe. The available tools
for the drive unit are shown in more detail in this manual.
The Multi function drive unit and its tools are not designed for any other use than what is specified in this
manual and must not be used for any other purposes than what is intended for.
The attachment has been designed to require as little maintenance as possible. The operator can perform
regular maintenance tasks. All repair work can’t be performed by the operator, and demanding repair and
maintenance operations are to be left for professional technicians. All maintenance work must be done using
proper safety equipment. Spare parts must be identical with original specifications, which can be ensured by
using only original spare parts. A separate spare parts catalogue may be available, consult your Avant dealer.
Familiarise yourself with the manual's instructions regarding service and maintenance. Please contact your
AVANT dealer if you have additional questions about the operation or maintenance of the equipment, or if you
require spare parts or maintenance services.
Table 1 - Multi function drive unit - Compatibility with Avant loaders
Model
220
225
225LPG
313S
320S
420
423
520
523
R20
525LPG
R28
528
530
630
R35
635
640
735
745
750
755i
760i
850
860i
e5
e6
A37190 •••••••(•)
It is recommended to use the attachment only with loaders marked with •in Table 1. When using with models
marked with (•), full performance may not be achieved. Additional counterweights may also be required. For
compatibility with a model not shown in table, contact your Avant dealer.

8 (66)
3. Safety instructions for using the multi function drive unit
Please bear in mind that safety is the result of several factors. The loader-attachment combination is highly
powerful and improper or careless use or maintenance may cause serious personal injury or property
damage. Due to this, all operators must carefully familiarise themselves about correct use and the operator's
manuals of both the loader and the attachment before starting operation. Do not use the attachment if you
have not completely familiarised yourself with its operation and the related hazards.
DANGER
Misuse, careless use, or using an attachment tha
t is in poor condition may
cause risk of serious injuries.
Familiarise yourself with the controls of the loader,
correct coupling procedure, and the correct way to operate the attachment at a safe
area. Study especially how to stop the equipment in a safe
manner. Read all safety
precautions carefully.
Read all safety instructions carefully before handling the attachment
WARNING
When attaching an attachment to the loader, ensure that the locking pins of the
loader's quick attach plate are in the lower
position and that they have locked
the attachment to the loader. Never lift or move an unlocked attachment.
This attachment is designed to be used by one operator at a time. Do not let others
near the danger area of the equipment when it is in use.
Always
transport the attachment as low as possible to keep the centre of gravity low,
and keep the telescopic boom retracted during driving.
Risk of crushing - Make sure that attachment is locked properly. An unlocked
attachment may move or fall over causing
serious injuries. When attaching the
attachment to the loader, ensure that the locking pins of the loader's quick attach
plate are in the lower position and that they have locked the attachment to the loader.
Also make sure that the drive unit tools are securely locked to the drive unit.
Hazard of entanglement - Rotating parts. Never leave the driver’s seat when the
attachment is running or if the auxiliary hydraulics control is locked on, except when
using tools that specifically need to be rotated whi
le staying near the attachment.
Always keep a safe distance between persons and machinery that may start or
move. Stop the equipment following the safe stopping procedure and lower the
attachment firmly on the ground before leaving the driver’s seat, or wh
en other
persons are present at the working area.
Hazard of entanglement - Never wear or allow any assisting persons to wear
loose clothes, such as loose shoelaces, or long scarves when working with or
near the attachment. Always stop the attachment be
fore anyone gets near it. Keep
hands and feet away from moving components. To eliminate the risk of entanglement
at the work site pay attention to proper clothing.
Risk of tipping over - Survey the operating area and plan work ahead. Make
sure in advanc
e that it is safe to work at the operating area. Ensure the stability of the
loader and firmness of ground also on even terrain.
Risk of crushing under the attachment or the loader boom - Lower the
attachment firmly on the ground before leaving the driver’s seat.
Make sure that
the attachment is properly supported during any maintenance or inspections. Do not
leave the driver’s seat when the loader boom is lifted. Going under a raised
attachment or loader boom is dangerous, as the boom may lower due to l
oss of
stability, mechanical fault, or if another person operates the controls of the loader.

9 (66)
WARNING
Risk of tipping over - Always transport the attachment as low and close to the
machine as possible to keep the centre of gravity low. On slippery surfaces drive
slowly and deliberately. Operate the controls of the loader slowly and calmly
especially on inclined terrain.
Note that the drive unit is hinged and moves freely. When transporting, the drive unit
must be tilted forward and locked with locking pin.
Do not tilt the drive unit up
excessively, as it could tip over. Keep the axle pointed towards the ground in a
position where the axle will not swing or hit the loader, ground, or any obstacle.
The loader can move slightly caused by the oscillating motion of rotating tool, make
sure that moving will not cause hazards. Do not press the loader boom down too
hard, and keep front tyres in contact with the ground.
Make sure that the attachment is properly supported for maintenance and
inspections. Store
the tool properly and make sure that the drive unit is supported
before removing the locking pin of the angle adjustment of the drive unit. Never
perform any maintenance or adjustments, or change drive unit tools, while the loader
engine is running.
Use the attachment only for its intended use and only with original tools on the
attachment.
Shut down the loader and place the attachment to a safe position as shown in Safe
stopping procedure before any cleaning, maintenance, or adjustments.
Pay attention to the surroundings and any other persons and machines moving in the
vicinity. Pay attention to the contours of the terrain and other hazards, such as
branches and trees that can reach to the driver's area, loose rocks, and slippery
surfaces.
Make sure to use only an attachment that is in good condition. Do not modify the
attachment in any way that could affect its safety.
Use the attachment only for its intended purpose. Other use may create unnecessary
safety risks, and the equipment may get damaged.
Make sure that the loader is equipped with necessary safety components, and that
they are in working condition. Seat belt must be used. If there are specific hazards
related to the operating area, use appropriate safety equipment.
Also read the safety instructions and correct use of the loader from the operator's
manual of the loader.
DANGER
Risk of serious injuries from rotating parts -
Keep safe
distance. Entanglement around the rotating tools or
getting crushed under the loader
boom can cause
serious injuries or death.
Do not leave the driver’s seat
while the attachment is in operation, or when it is lifted off
from the ground, unless using tools that are specifically
intended to be used while staying near them. Also, keep
other
s at a safe distance from the equipment and stop the
attachment immediately latest when there are others closer
than 1 meter from the attachment. Follow safe stopping
procedure when going near the attachment or when changing
tools.

10 (66)
DANGER
Risk of entanglement and crushing -
Stop the attachment before cleaning or
removing blockages.
The attachment can start to rotate immediately after a blockage is
removed. Always follow the safe stopping procedure to prevent all rotating parts from
moving when clearing a blockage.
. ..
DANGER
Risk of cutting and severing -
Sharp edges and severing
points on work tools.
Beware of the sharp blades and risk
of crushing especially during maintenance or when removing
blockages. Always stop the attachmen
t by following the safe
stopping procedure. To make sure that the attachment will
not rotate, disconnect the multiconnector (or hydraulic quick
couplings) before going near it. Note that the loader boom
moves down and may be tilted even if the engine has b
een
stopped. Never go under a raised boom or any component of
the attachment. Keep away from the moving linkage.
Remember to wear proper personal protective equipment:
The noise level at the driver's seat may exceed 85 dB(A) depending on loader
model and operating cycle. Extended exposure to loud noise can cause
hearing impairment. Wear hearing protection while working with the loader.
Wear protective gloves.
Wear safety boots whenever working with the loader.
Wear safety glasses e.g. when handling hydraulic components.
Handling some types of materials materials can cause spreading of dust.
Protect yourself from dust with a respirator mask.

11 (66)
Safe stopping of the attachment, before going near the attachment:
WARNING
Always stop the attachment following safe stopping procedure before leaving
the driver's seat.
Safe stopping procedure prevents all unintentional movements of
the attachment. Note that the loader boom can move down even if the engine of the
loader is turned off. Safe stopping procedure:
Lower the boom and the attachment on the ground.
Shut down the loader engine and lock the parking brake.
Release residual pressure from the hydraulic system; move all hydraulic control
levers to their extreme positions a couple of times.
Prevent starting of the machine, remove ignition key.

12 (66)
4. Technical specifications
Table 2 - Multi function drive unit - Specifications
Product number A37190
Width: 550 mm
Height: 560 mm
Length: 405 mm
Maximum torque: 1355 Nm
Weight: 80 kg
Tool fixing: 57 mm, square
Hydraulic energy input: 30-60 l/min
20 MPa (200 bar)
Suitable AVANT loaders: See table 1
Angle adapter, 90°: A37323
See page 21
Available drive tools: See table 3
4.1 Rotating speed
Different work tools are operated at different speeds. Use the Graph below to estimate the rotating speed, with
the help of the operator's manual of the loader.
Horixontal axis: Hydraulic oil flow, in litres per minute
Vetical axis: Rotating speed of the Multi function drive unit, in revolutions per second
Graph 1 - Rotating speed of the Multi function drive unit, in revolutions per second
.

13 (66)
4.2 Work tools for the drive unit
Shown below in Table 3 are the work tools for the Multi function drive unit. Changes to availability are
possible, ask your Avant dealer for latest information or see Avant website.
For detailed information about each tool, see the related page in this manual.
Table 3 - Multi function drive unit - Specifications of available drive tools
Product: Auger Cable/hose reel Carousel broom Concrete mixing
drum XL weed brush
Product number Multiple auger
models avilable A37311 A37317 A37395 A429932
See page 26 45 36 31 52
Product: Screening drum Screw cone log
splitter
Screw pile
adapter
Rotary hoe Wire rope brush
Product number A37207 A37500 A418530 A37491 A431157
See page 49 42 41 38 54

14 (66)
4.3 Safety labels and main components of the attachment
Listed below are the labels and markings on the attachment. They must be visible and readable on the
equipment. Replace any unclear or missing label. New labels are available via your retailer or contact
information provided on the cover.
WARNING
Make sure all warning decals are readable.
The warning labels contain important
safety information and they help to id
entify and remember the hazards related to the
equipment. Replace damaged or missing warning labels with new ones.
A46771 A46772 A46803 A46805
To apply a new label: Clean the surface thoroughly to remove all grease. Allow it to dry completely. Peel off
the protective film of the label and press firmly to apply. Take care not to touch the glue of the label.
Attachment identification plate A420014
.

15 (66)
Table 4 - Decal locations and warning messages
Decal Warning message
1 A46771 Misuse hazard -
Read instructions before
use.
2 A46772 Crushing hazard -
Do not go under a
raised attachment; stay away from raised
equipment.
3 A46803
Pinching and cutting hazard, keep clear
of moving parts, do not leave the
equipment running. Operate the
attachment only from the driver’s seat.
4 A46805
Beware of entanglement around the
rotating tool; do not go near the
equipment while it is rotating. Watch out
also entanglement of loose clothes, hair,
jewellery or similar. Keep a safe distance
and follow safe stopping procedure.
5 A420014 Attachment identification plate
Table 5 - Multi function drive unit - Main components
1 Frame with Avant quick coupling brackets
2 Tool shaft, square
3 Tool locking pin
4 Locking pin
5 Drive motor cover
6 Swinging joint
7 Locking pin holder
8 Multiconnector holder

16 (66)
5. Assembling the attachment
Attaching the attachment to the loader is quick and easy, but it must be done carefully. The attachment is
mounted to the loader boom by using the quick attach plate on the loader boom and the counterpart on the
attachment.
If the attachment is not locked to the loader, it may detach from the loader and cause a hazardous situation.
The loader must not be driven and the boom must never be lifted when the attachment has not been locked.
To prevent hazardous situations, always follow the coupling procedure shown below. Also remember the
safety instructions shown in this manual. The attachment is mounted to the loader as follows:
WARNING
Crushing risk - Make sure that an unlocked attachment will not move or fall over.
Do not stay in the area between the attachment and the loader. Mount the attachment
only on level surface.
Never move or lift an attachment that has not been locked.
Avant quick coupling system:
Step 1:
Lift the quick attach plate locking pins up and turn them backwards into the slot
so that they are locked in the upper position.
If your loader is equipped with a hydraulic attachment locking system, see
additional instructions about the use of t
he locking system from the relevant
manuals.
Make sure that the hydraulic hoses are positioned so that they will not get in
between the coupling plate of the loader and the attachment, and that they will
not get squeezed or chafed against sharp edges.
Step 2:
Turn the quick attach plate hydraulically to an obliquely forward position.
Drive the loader onto the attachment. If your loader is equipped with a
telescopic boom, you can utilise this.
Align the upper pins of the loader’s quick coupling plate s
o that they are under
the corresponding brackets of the attachment.
Step 3:
Lift the boom slightly –
pull the boom control lever backward to raise the
attachment off the ground.
Turn the boom control lever left to turn the bottom section of the quick
attach
plate onto the attachment.
Lock the locking pins manually or lock the hydraulic locking.
Always check the locking of both locking pins.

17 (66)
WARNING
Risk of falling objects -
Prevent dropping of
attachment.
An attachment that has not been complet
ely locked
to the loader may fall on the boom or towards the
operator, or fall under the loader during driving,
causing loss of control of the loader. Never move or
lift an attachment that has not been locked.
Before moving or lifting the attachment, make sure
that the locking pins are in the lower position and
come through the fasteners on the attachment on
both sides.
WARNING
Risk of crushing - Avoid tipping over the attachment.
Excessive tilting or lifting of an
unlocked attachment increa
ses the risk of tipping the attachment over. Do not use the
automatic locking of the locking pins when the attachment is lifted more than one meter
from the ground. If the locking pins do not return to the normal position when tilting, do
not tilt or raise the attachment any more. Lower the attachment on the ground and secure
the locking manually.
5.1 Connecting and disconnecting hydraulic hoses
On Avant loaders the hydraulic hoses are connected using the multi connector system. If you have an Avant
300-700 series loader with the conventional quick couplers and wish to change to the multi connector system,
contact your Avant dealer or service point for instructions or installation services.
WARNING
Risk of movement of the attachment and ejection of hydraulic oil -
Never connect
or disconnect quick couplings or other hydraulic components while the control
lever of the auxiliary hydraulics control lever is locked on or if the system is
pressurized. Connecting or disconnecting the hydraulic couplings while th
e system is
pressurized may lead to unintended movements of the attachment, or ejection of high-
pressure fluid, which can cause serious injuries or burns. Follow safe stopping procedure
before disconnecting hydraulics.
Keep all fittings as clean as possible; use the protective caps on both the attachment and
the loader. Dirt, ice, etc. may make using the fittings significantly more difficult. Never
leave the hoses hanging on the ground; place the couplings onto the holder on the
attachment.
Connecting the multiconnector system:
1.
Align the pins of the attachment connector with corresponding
holes of the loader connector. The multiconnector will not connect
if the attachment connector is upside down.
2. Connect and lock the multiconnector by turning
the lever towards
the loader.

18 (66)
The lever should move easily all the way to its locking position. If the lever does not slide smoothly, check the
alignment and position of the connector and clean the connectors. Also shut down the loader and release the
residual hydraulic pressure.
To disconnect the multiconnector system:
Before disconnecting put the attachment down on a solid and even
surface.
1. Switch off the auxiliary hydraulics of the loader.
2. While pushing unlock button, turn the lever to disconnect
the
connector.
3.
After ending operation put the multiconnector on its holder on the
attachment.
Conventional quick couplings
(alternative couplings for some loader models):
Before connecting or disconnecting the standard quick couplings, the
residual pr
essure must be released as shown below. The conventional
quick couplings will not connect, if there is pressure in the hydraulic
system.
To connect and disconnect the standard couplings, move the collar at the end of the female fitting. The hoses
should be connected so that the fitting equipped with a coloured cap is connected to the corresponding fitting
of the loader. Note that the protective caps on the loader and the attachment can be fastened to each other
during operation to reduce the accumulation of dirt. When disconnecting the standard quick couplings a small
amount of oil may drip from the couplings. Wear protective gloves and have some cloth at hand to keep the
equipment clean.
Disconnecting hydraulic hoses:
Before disconnecting the fittings, lower the attachment to safe position on solid and level surface. Turn the
control lever of the auxiliary hydraulics to its neutral position.
When uncoupling the attachment, always disconnect the hydraulic couplings before
unlocking the quick coup
ling plate, to prevent hose damage and any oil spills. Reinstall
the protective caps on the fittings to prevent impurities from entering the hydraulic
system.

19 (66)
6. Operating the attachment
Check the attachment and the operating environment once more before starting to work, and that all obstacles
have been removed from the operating area. Quick inspection of the equipment and the operating area before
use are parts of ensuring safety and the best performance of the equipment.
DANGER
Risk of serious injuries from rotating parts -
Keep safe
distance. Entanglement around the rotating tools or
getting crushed under the loader boom can cause
serious injuries or death.
Do not leave the driver’s seat
while the attachment is in operation, or when it is lifted off
from the ground, unless using tools that are specifically
intended to be used while staying near them. Also, keep
others at a safe distance from the equipment and stop the
attachment immediately latest when there are others closer
than 1 meter from the att
achment. Follow safe stopping
procedure when going near the attachment or when changing
tools.
DANGER
Risk of entanglement and crushing -
Stop the attachment before cleaning or
removing blockages. The attachment can start to rotate immediately af
ter a blockage is
removed. Always follow the safe stopping procedure to prevent all rotating parts from
moving when clearing a blockage.
DANGER
Risk of crushing or entanglement from contact with moving parts -
Never leave the
equipment unattended while the engine is running. Follow safe stopping procedure.
DANGER
Risk of cutting and severing -
Sharp edges and severing
points on work tools.
Beware of the sharp blades and risk
of crushing especially during maintenance or when removing
blockages.
Always stop the attachment by following the safe
stopping procedure. To make sure that the attachment will
not rotate, disconnect the multiconnector (or hydraulic quick
couplings) before going near it. Note that the loader boom
moves down and may be tilted
even if the engine has been
stopped. Never go under a raised boom or any component of
the attachment. Keep away from the moving linkage.
.

20 (66)
DANGER
Risk of crushing -
Going under the loader boom or an
attachment can cause serious injury or death.
Never go
under the loader boom and prevent others from getting near
lifted boom or attachment. Going under a raised attachment
or loader boom is dangerous, as the boom may lower due to
loss of stability, mechanical fault or when other person
operates t
he controls of the loader. Lower the attachment
firmly on the ground to a safe position before leaving the
driver’s seat.
Keep in mind that the loader boom can be lowered or tilted
even if the engine has been shut down (crushing hazard).
The loader is not
intended to be left to keep a load elevated
for longer periods. Always lower the attachment to a safe
position before leaving the driver's seat.
. ..
CAUTION
Risk of thrown parts - Avoid running the attachment at very high speed.
Operating
the attachment at too high speed may cause high vibrations, noise, or thrown parts from
the attachment, or damage that could lead to personal injury. See recommended input
flow in this manual.
6.1 Checks before use
Check that the drive unit and its tool are intact, they can rotate freely to correct operating direction and
that there is no string or other foreign material coiled around the auger, broom or other tool in use.
Use only when all pins are locked and secured in place .Make sure the tool locking pin and the drive
unit angle lock pin, and their safety pins are in good condition and that you can securely lock the tool
with the pin.
Check each work tool according tho their specific instructions shown in this manual before you
operate the Drive unit.
Ensure that bystanders are at a safe distance when operating the equipment. Do not let anyone to
enter danger area of the boom or to stay directly in front of the loader. Also make sure that it is safe to
reverse with the loader. Never assume that bystanders will remain where you last saw them;
especially children are often attracted to the moving equipment.
Check the general condition of the attachment and the loader, and check for possible hydraulic oil
leaks. Do the daily checks of the loader, see the operator's manual of the loader. The attachment must
not be used, if there is a fault in the hydraulic system of the loader or the attachment. Refer to Chapter
8 for maintenance instructions.
Operate the attachment and the controls of the loader only when seated on the driver’s seat. Ensure
that the loader and the attachment are used in a safe manner and as intended. Do not allow children
to operate the equipment.
Never operate the loader or attachments while under the influence of alcohol, drugs, medication that
may impair judgement or cause drowsiness, or if not otherwise medically fit to operate the equipment.
Remember correct working methods and avoid leaving the driver’s seat unnecessarily. Practise the
use of the attachment and the controls of the loader in a safe area. If you are unfamiliar with the
particular loader model, it is recommended to practice its use without any attachments.
Table of contents
Popular DC Drive manuals by other brands

Cole Parmer
Cole Parmer Masterflex I/P 7592-20 operating manual

Geckodrive
Geckodrive G251X manual

Danfoss
Danfoss iC7 Series operating guide

GFA
GFA ELEKTROMAT SI 75.20 FU-55,00 installation instructions

Emerson
Emerson unidrive m200 user guide

Allen-Bradley
Allen-Bradley Rockwell Automation PowerFlex 700 Series Original instructions