RUS-3
* Перед запуском программы AVerTV 6 мы рекомендуем выйти из режима Media Center.
Установка драйверов ипрограммного приложения под Windows Vista™
1. Появится диалоговое окно мастера подключения нового оборудования. Нажмите кнопку
«Отмена», чтобы отменить работу мастера.
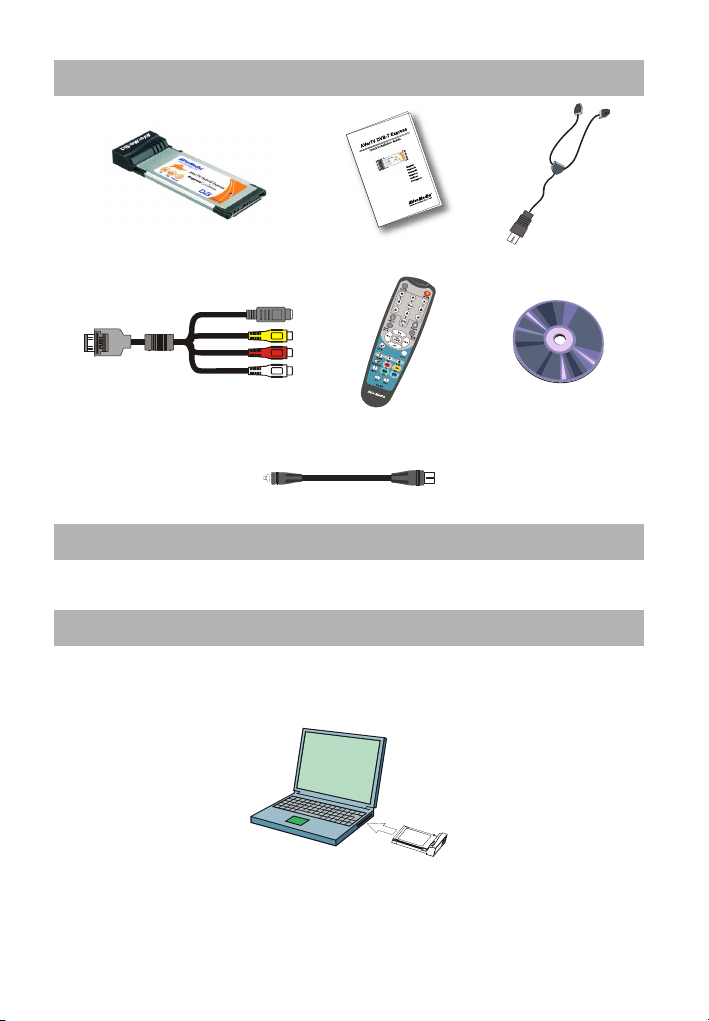
2. Поместите установочный компакт-диск впривод CD-ROM.
3. Вдиалоговом окне “AutoPlay” (Автозапуск) выберите «Запустить Autorun.exe» (Run
Autorun.exe).
4. После запуска установочной программы выберите Программное обеспечение AVerTV.
5. Вслучае появления диалогового окна “User Account Control” (Упр авление учетной
записью пользователя) выберите «Разрешить» (Allow).
6. Нажмите «Далее» для продолжения процесса установки.
7. После ознакомления слицензионным соглашением выберите “Япринимаю условия
данного лицензионного соглашения” инажмите «Далее».
8. Выберите «Полная» (Complete), чтобы установить все программное обеспечение, включая
AVerTV 6, Acrobat Reader, DirectX 9.0c иДрайвер. Нажмите кнопку «Далее». Для
опытных пользователей рекомендуется выбрать опцию Специальная (Custom), азатем
щелкнуть на кнопку Следующая (Next), чтобы выбрать программное обеспечение,
которое вы желаете. Для выбора другой папки назначения, щелкните на кнопку Просмотр
(Browse).
9. Затем нажмите «Завершить», чтобы закончить установку.
Примечание:
1. Если всистеме не установлен DirectX 9.0c или выше, программа установки с
компакт-диска автоматически установит его всистеме. Убедитесь, что всистеме
установлен DirectX 9.0c или выше, иначе программное обеспечение кТВ-тюнеру не
сможет корректно работать.
2. Если на компьютере не установлен Acrobat Reader, мастер установки программы будет
автоматически запущен впроцессе инсталляции.
Запуск приложения AVerTV
Чтобы запустить приложение из меню Программы, просто выберите Пуск
Программы AVerMedia AVerTV 6 AVerTV 6.
Удаление программного обеспечения
--Windows XP / Windows XP Media Center Edition--
Если вы находитесь врежиме Media Center, то необходимо переключиться в
стандартный режим Windows. Чтобы удалить установленное программное
обеспечение ТВ-тюнера, просто выберите Пуск Программы AVerMedia
AVerTV 6 Uninstaller (Программа удаления) Remove All (Удалить все)
Далее OK Готово.
--Windows Vista™ --
1. Чтобы удалить программное обеспечение из системы компьютера выберите Пуск (Start)
→Программы (Programs) →AVerMedia →AVerTV 6.
2. Выберите Uninstaller (Удаление программы). Впоявившемся меню выберите Run as
administrator (Запустить как администратор).
3. При появлении диалогового окна “User Account Control” (Управление учетной