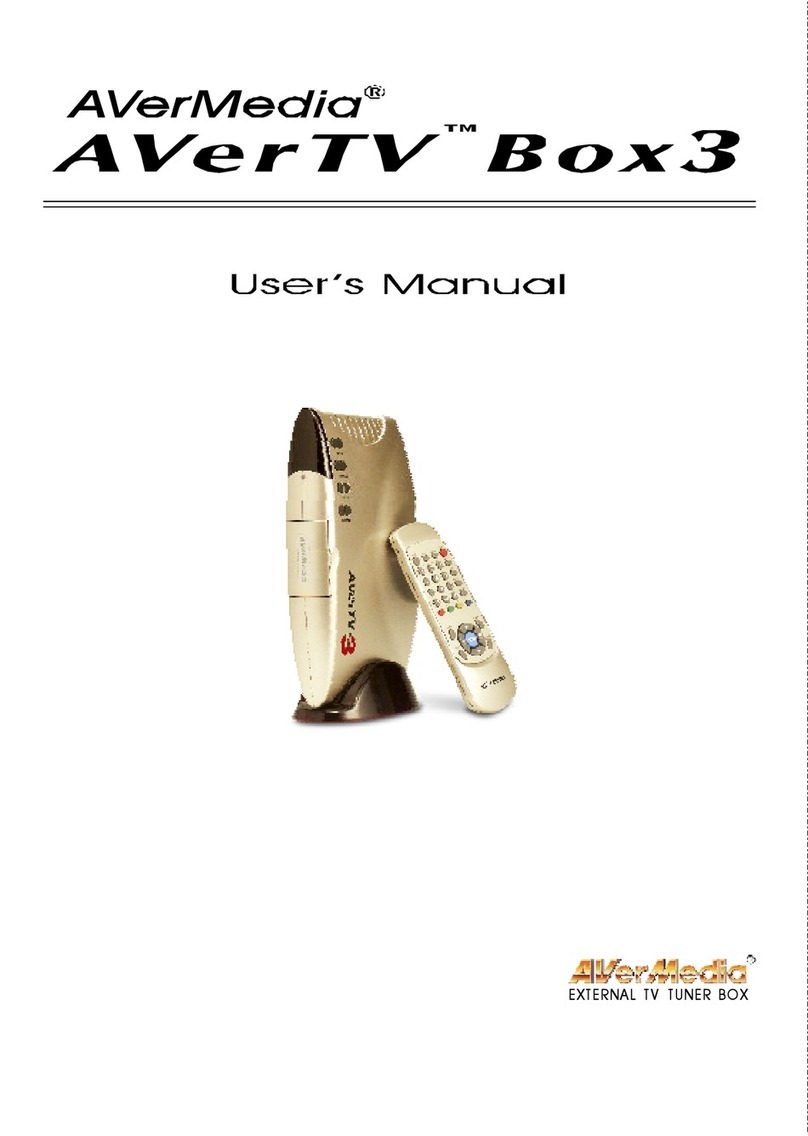
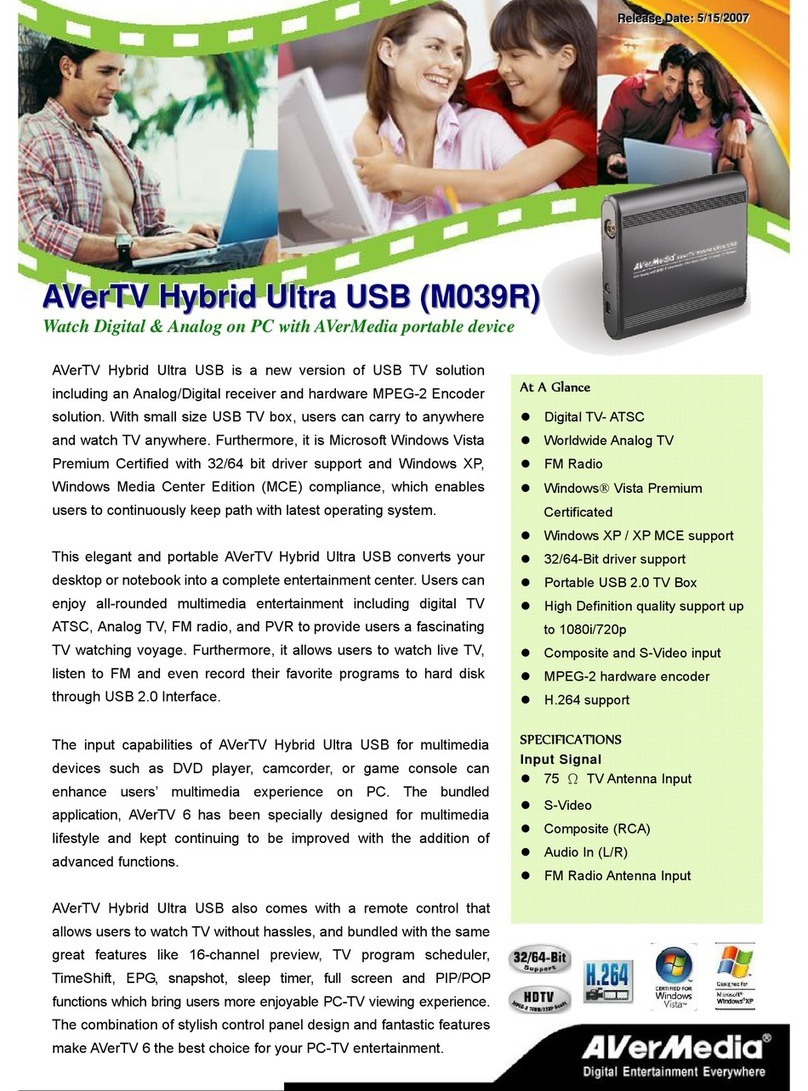
Avermedia DVB-T STB5 User manual

AVerMedia®DVB-T STB5/STB7
User’s Manual
English
Deutsch
Français
Italiano
Español
Português
www.avermedia.com

FCC NOTICE
This device has been tested and found to comply with the limits for a Class B digital device, pursuant to Part 15 of the
FCC Rules. These limits are designed to provide reasonable protection against harmful interference in a commercial,
industrial or business environment. This equipment can generate, use and radiate radio frequency energy and, if not
installed and used in accordance with the instruction, may cause harmful interference to radio communications. However,
there is no guarantee that interference will not occur in a particular installation. If this equipment does cause harmful
interference to radio or television reception, which can be determined by turning the equipment off and on, the user is
encouraged to try to correct the interference by one or more of the following measures:
• Reorient or relocate the receiving antenna.
• Increase the separation between the equipment and receiver.
• Connect the equipment into an outlet on a circuit different from that to which the receiver is connected.
• Consult the dealer or an experienced radio/TV technician for help.
This device complies with Part 15 of the FCC Rules. Operation is subject to the following two conditions: (1) this device
may not cause harmful interference, and (2) this device must accept any interference received, including interference that
may cause undesired operation.
CAUTION ON MODIFICATIONS
To comply with the limits for the Class B digital device, pursuant to Part 15 of the FCC Rules, this device must be
installed in computer equipment certified to comply with the Class B limits. All cables used to connect the computer and
peripherals must be shielded and grounded. Operation with non-certified computers or non-shielded cables may result in
interference to radio or television reception.
Any changes or modifications not expressly approved by the grantee of this device could void the user's authority to
operate the equipment.
CE NOTICE
This is a Class B product.
DISCLAIMER
No warranty or representation, either expressed or implied, is made with respect to the contents of this documentation, its
quality, performance, merchantability, or fitness for a particular purpose. Information presented in this documentation has
been carefully checked for reliability; however, no responsibility is assumed for inaccuracies. The information contained
in this documentation is subject to change without notice.
In no event will AVerMedia be liable for direct, indirect, special, incidental, or consequential damages arising out of the
use or inability to use this product or documentation, even if advised of the possibility of such damages.
TRADEMARKS
AVerMedia are registered trademarks of AVerMedia TECHNOLOGIES, Inc. IBM PC is a registered trademark of
International Business Machines Corporation. Macintosh is a registered trademark of Apple Computer, Inc. Microsoft is
a registered trademark and Windows is a trademark of Microsoft Corporation. All other products or corporate names
mentioned in this documentation are for identification and explanation purposes only, and may be trademarks or
registered trademarks of their respective owners.
COPYRIGHT
©2005 by AVerMedia TECHNOLOGIES, Inc. All rights reserved. No part of this publication may be reproduced,
transmitted, transcribed, stored in a retrieval system, or translated into any language in any form by any means without
the written permission of AVerMedia TECHNOLOGIES, Inc.

Table of Contents
Chapter 1 Introduction................................................................1
1.1 What’s in the package ....................................................1
Chapter 2 Identifying Each Part..................................................2
2.1 Touch Buttons ................................................................2
2.2 Front Panel .....................................................................2
2.3 Rear View.......................................................................3
2.3.1 Connecting the Power Adapter ............................................. 3
2.3.2 Connecting a VGA Monitor or LCD Porjector ................. 3
2.3.3 Connecting the PC ................................................................... 4
2.3.4 Connceting a PC’s Audio....................................................... 4
2.3.5 Connecting the External Speaker.......................................... 5
2.3.6 Connecting the VHF/UHF Antenna..................................... 5
2.3.7 Connecting the TV Set or VCR ............................................ 5
2.3.8 Connecting the TV Set or Video Device............................. 6
Chapter 3 Using AVerMedia® DVB-T STB5/STB7...................7
3.1 Making Configuration....................................................7
3.1.1 Basic Operation ....................................................................... 7
3.1.2 First Time Setting Wizard..................................................... 7
3.2 Introducing Main Menu .................................................8
3.3 Introducing Main Icons..................................................9
3.4 Remote Control..............................................................9
Chapter 4 OSD Menu Settings....................................................12
4.1 Program Manager ..........................................................12
4.1.1 Channel Scan ........................................................................... 12
4.1.2 Editing...................................................................................... 13
4.1.3 Electronic Program Guide(EPG) ......................................... 15
4.1.4 View Program Lists................................................................ 15
4.2 User Settings..................................................................15
4.2.1 Set your Preference................................................................. 16
4.2.2 Parental Lock ........................................................................... 16
4.2.3 Change the Password ............................................................. 17
4.2.4 PIP Mode ................................................................................. 17
(※This function is only for AVerMedia®DVB-T STB7)
4.3 System Settings..............................................................17
4.3.1 System Setup............................................................................ 17

4.3.2 First Time Setting Wizard......................................................18
4.3.3 Restore to Default ....................................................................18
4.4 Game............................................................................. 18
4.4.1 Gomoku......................................................................................18
4.4.2 OXO............................................................................................19
4.4.3 Dragonet.....................................................................................19
4.5 Information ................................................................... 19
4.6 Timer............................................................................. 19
LIMITED WARRANTY ............................................................ 20

User’s Manual
1
EnglishDeutschFrançaisItalianoEspañolPortuguês
Chapter 1 Introduction
Thank you for purchasing the AVerMedia®DVB-T STB5/STB7. This product can turn
your VGA monitor or LCD projector into a digital terrestrial TV or radio boom box
with or without turning on your computer. Above all, to operate this device, no
software driver is required.
1.1 What’s in the package
AVerMedia®DVB-T STB5/STB7 package contains the following items:
User’s Manual
AVerMedia® DVB-T STB5/STB7
Power Adapter
Audio Cable
VGA Cable
Remote Control
(Batteries included)
Vertical Stand

AVerMedia®DVB-T STB5 / STB7
2
Chapter 2 Identifying Each Part
2.1 Touch Buttons
Touch buttons on the top panel of the product provides quick access to
frequently-used functions.
2
3
4
No. Button Function
1 POWER Turns on/off the
device
2 SOURCE Toggles between live
TV/Radio broadcasts
and computer
graphics.
3 VOLUME Increases (UP) or
decreases (DOWN)
the volume.
4 CHANNEL Goes to the preceding
(UP) or succeeding
(DOWN) program.
2.2 Front Panel
12 3
No. Description
1 Headphone Jack. By plugging in mini stereo mini jack, you can listen
to the audio with headphone.
2 The LED Indicator lights when the DVB-T STB5/STB7 is turned
on.
3 Infrared Sensor. When using the remote control, please aim it at
the Infrared Sensor.

User’s Manual
3
EnglishDeutschFrançaisItalianoEspañolPortuguês
2.3 Rear View
The ports allow connecting to your TV antenna, PC, VGA monitor, LCD projector,
speakers, video, or S-Video source etc. (For more information, please see description
below.)
2.3.1 Connecting the Power Adapter
Connect the power adapter to the power jack of AVerMedia® DVB-T STB5/STB7 and
the power outlet. AVerMedia® DVB-T STB5/STB7 will be automatically turned on.
Power Outlet Power Adapter
2.3.2 Connecting a VGA Monitor or LCD Porjector
Connect the product’s VGA OUT port to a VGA monitor or LCD projector.
VGA / LCD Monitor
LCD Projector

AVerMedia®DVB-T STB5 / STB7
4
2.3.3 Connecting the PC
To share the VGA monitor with a PC, or to work on the PC and enjoy the digital terrestrial
programs at the same time (Press the SOURCE button on the front panel or the TV/PC
button on the remote control), you should attach the AVerMedia® DVB-T STB5/STB7 to
the PC. Connect the product’s VGA IN port to the PC's VGA output port using the supplied
VGA cable.
VGA Cable VGA Port
IBM compatilbe PC
2.3.4 Connceting a PC’s Audio
Connect the product’s jack marked as to the PC’s LINE OUT or SPEAKER
jack.
Audio Cable
Audio Jacks
on your PC
IBM Compatible PC

User’s Manual
5
EnglishDeutschFrançaisItalianoEspañolPortuguês
2.3.5 Connecting the External Speaker
Connect the external speakers to the jack marked as .
Speaker
2.3.6 Connecting the VHF/UHF Antenna
Attach the aerial or indoor VHF/UHF TV antenna to the ANT. IN port.
TV Antenna
()
75
Ω
2.3.7 Connecting the TV Set or VCR
For receiving analog signal, you can connect TV antenna cable to the product’s
ANT. IN port and also connect your cable between the product’s ANT. OUT and
your TV Antenna In or VCR RF In.
RF Cable
VCR
ANT. I n / R F I n
Te l e v i s i o n
(Not supplied)

AVerMedia®DVB-T STB5 / STB7
6
2.3.8 Connecting the TV Set or Video Device
You can connect the AVerMedia® DVB-T STB5/STB7 to the TV set or any video
input device, such as a VCR, for viewing digital terrestrial programs. There are two
ways to make the connections: A/V (RCA) jacks or S-Video port. S-Video port
delivers better picture quality than composite A/V jacks.
Composite AV (RCA) connection
VIDEO
AUDIO (L)
AUDIO (R)
AV (RCA) Cable
(Yellow)
(Yellow)
(White)
(White)
(Red)
(Red)
INPUT
Te l e vi s i o n
(Not Supplied)
S- Video connection
If you connect to the TV set, you need to switch to the appropriate video mode to
access the digital TV/Radio programs. For instructions on changing the video mode,
refer to your TV’s user manual.
S-Video Cable
(Not supplied) INPUT
S-Video
Television
Use the “N/P” switch
to select the NTSC
or PAL system.
Use the “N/P” switch
to select the NTSC
or PAL s
y
stem.

User’s Manual
7
EnglishDeutschFrançaisItalianoEspañolPortuguês
Chapter 3 Using AVerMedia® DVB-T STB5/STB7
3.1 Making Configuration
If this is your first time to use AVerMedia® DVB-T STB5/STB7, you need to scan
channels to get locally active channels. Before scanning, it is very important to
understand how to enter menu or set up some basic configurations first. For more
information, please refer to the description below.
3.1.1 Basic Operation
Before entering the menu, keep in mind that the current selection is highlighted with
YELLOW color in the menu. Refer to the following steps for how to enter and
change the menu settings.
1. To enter the OSD menu, press the MENU button on the remote control, and you
will see six main menus on the screen.
2. Press
▲or ▼to select the desired main menu and press LIST/OK or ►to
enter the sub menu.
3. Press
▲or ▼again to select the setup item you want. To change the original
settings such as Country or Language, Press ◄or ►to switch between the
preset options.
4. Press MENU or LIST/OK on the remote control to save the change and exit the
current page.
5. To return to real-time TV, press EXIT repeatedly.
6. The icon like this appeared on the screen represents the red button, yellow
button, green button, blue button, or some gray button such as MENU on the
remote control.
3.1.2 First Time Setting Wizard
If this is your first time to use AVerMedia® DVB-T STB5/STB7, the First Time Setting
Wizard dialog box will appear. Follow the instruction on the screen to scan channels
and do some basic configurations.
Note : If you exit this setup page by accident, first press MENU on the remote
control, choose “System Setting”→“First Time Setting Wizard”, and then you
can enter this page again.
1. To start the “First Time Setting Wizard”, press ◄or ►on the remote control to
select YES and press LIST/OK.

AVerMedia®DVB-T STB5 / STB7
8
2. Press ◄or ►to choose your Country and Language. Then select Next and
press LIST/OK.
3. If you want to setup user’s preference, select YES and press LIST/OK.
4. Next, press ▲or ▼to select the desired setup item such as “Menu Color”,
“Transparent Level”, “Border Pattern” and so on (For more details, please refer
4.2.1 Setup your Preference) and press ◄or ►to change the setting. Finally,
select Next and press LIST/OK.
5. Select YES if you want to start searching program automatically. Or select NO
or BACK to exit the current setup page.
6. The “Automatic Search” box will appear, indicating the scanning percentage,
channel number and frequency. When scanning, active TV/Radio programs will
be listed inside the box. After channels are scanned, the syatem will return to
the real-time program automatically. To terminate the scanning, press “EXIT”.
3.2 Introducing Main Menu
After completing basic configuration and scanning, you can press Menu to evoke
main menu including “Program Manager”, “User Settings”, “System Settings”,
“Game”, “Info”, “Timer”. This section will briefly introduce main menu, sub menu and
setup item. For more details, please refer to Chapter 3.
Main Menu
Program Manager
User Settings
Timer
EPG
List
Program Editing Sort by Name
Sort by Service ID Sort by Program No.
TV Program List Radio Program List
Transition Style
Program Lock Program Control
Change PIN
This function is only for AVerMedia DVB-T STB7
System Settings
( )
System Setup
First Time Setting Wizard
Default
Display Type Regional Setting
Game
GomokuGomoku
OXO
Dragonet
Info
Calendar
Product Info
Sleep Timer

User’s Manual
9
EnglishDeutschFrançaisItalianoEspañolPortuguês
3.3 Introducing Main Icons
The following table explains the meanings of main icons when using the device.
Icon Description Icon Description
Attention
Mute
The button on the remote
control doesn’t work for this
model.
The device delivers the
audio of PC by the
external speaker or the
headphone.
No signal or no programs. The device delivers the
audio of programs by the
external speaker or the
headphone.
The resolution and the
frequency (Hz) of your PC
monitor cannot support the
PIP feature.
The device delivers the
audio of PC by audio
output.
This program is locked
(Parental Lock).
Tips for remote control
buttons.
The device delivers the audio
of programs by audio output.
3.4 Remote Control
The accompanying remote control allows you to switch between various TV/Radio
channels, adjust the volume, change the OSD menu settings, switch between PC
graphics and digital terrestrial broadcasts, etc.
1
2
3
4
5
6
7
8
9
10
20
19
17
16
15
14
13 12
11
18
21
22
23

AVerMedia®DVB-T STB5 / STB7
10
No. Button Function
1 POWER Turn on / off the device
2 Numeric
Buttons
!Enter the channel number or the teletext page number.
!Enter the password for locked channels.
3 CH RTN Return to the previously selected channel.
4 MENU !TV Mode:Enter the OSD menu.
!OSD Menu:Save the setting.
5 LIST/OK !TV Mode:Enter the menu of TV or Radio Program List.
!OSD Menu:Confirms the selection.
6 Vol◄/►!TV Mode:Increase / Decrease the volume
!OSD Menu:Enter or exit the sub menu.
!PIP Mode:Move the PIP small screen by using the
arrow buttons (※This function is only for AVerMedia®
DVB-T STB7).
7 EXIT Exit the current menu, dialog box, setup page or OSD menu.
8 PIP Enter the PIP mode, allowing simultaneous display of both
the PC graphics and digital terrestrial programs. (※This
function is only for AVerMedia®DVB-T STB7).
9 TV/PC Toggle between live TV/Radio broadcasts and computer
graphics.
10 PREVIEW Display 9 consecutive TV programs on the screen. Under
this mode,you can switch between all programs and
favorite programs by pressing FAV.
11 AUTOSCAN Scan programs automatically.
12 FAV !If you have set any favorite program, you can switch
between these programs.(For more information, please
refer to “OSD Menu setting”)
!If you want to set or cancel favorite programs, go to that
program first, and press FAV for more than one second.
13 TXT The “TELETEXT” function is not available for this product.
14 SLEEP(red
button)
TV Mode:Set the time to turn off the device or cancel this
function.
15 AUDIO/LANG
(blue button)
TV Mode:Set audio mode and language.

User’s Manual
11
EnglishDeutschFrançaisItalianoEspañolPortuguês
16 MUTE(green
button)
TV Mode:Turn on / off the sound.
17 PIP Move PIP Mode : This button can turn on/off the PIP-positioning
mode. When turned on, you can move the PIP screen by
using the arrow buttons (▼!◄►). (※This function is only
for AVerMedia®DVB-T STB7)
18 SUBTITLE
(yellow button)
The “SUBTITLE” function is not available for this product.
19 EPG View EPG information.
20 CH ▲/▼!TV Mode:Go to next or previous program.
!OSD Menu:Function as the UP and DOWN arrow button.
!PIP Mode:Move the PIP screen by using the arrow
buttons (※This function is only for AVerMedia®DVB-T
STB7).
21 INFO Display the current program information.
22 TV/RADIO Switch between TV and Radio programs.
23 PC BGM/RES. AVerMedia®DVB-T STB5:
!This button lets you switch between the live audio of
digital terrestrial programs and PC audio when
connecting to TV and computer at the same time.
AVerMedia®DVB-T STB7:
!TV Mode:This button lets you switch among various
VGA resolutions.(1280×1024、1280×768、4:3、
PANORAMA、640×480、800×600、1024×768)
!PC Mode:This button lets you switch between the live
audio of digital terrestrial programs and PC audio when
connecting to a TV set and a computer at the same time.
Important Info for PIP Mode:
PIP mode supports common VGA modes only. To have the PIP mode work properly,
make sure your computer’s VGA resolution and frequency are configured according
to this table.
Resolution Frequency (Hz)
640 x 480 60, 72, 75, 85
800 x 600 60, 72, 75, 85
1024 x 768 60, 70, 75, 85
1280 x 1024 60

AVerMedia®DVB-T STB5 / STB7
12
Chapter 4 OSD Menu Settings
The product provides a menu for users to set up both basic and advanced
configurations including “Program Manager”, “User Settings”, “System Settings”,
“Game”, “Info” and “Timer”. This chapter will briefly introduce each menu item. For
instructions on the operation in the OSD menu, refer to 3.1.1 Basic Configuration.
4.1 Program Manager
On the “Program Manager” page, three
items will be listed on the screen. In this
page, you can delete unwanted programs,
set favorite programs, change the program
order and so on.
4.1.1 Channel Scan
In this page, you can choose “Automatic
Search”, “Manual Search” or “All Frequency Search” to scan channels. It is strongly
recommended to use “Automatic Search” or “All Frequency Search” to search for
the active channels unless you are quite familiar with local digital terrestrial
frequencies and bandwidth.
Note: It is necessary to do channel scan when you use the product for the first time.
Otherwise, no digital terrestrial channels are accessible. During the scanning,
do not press any button to avoid any potential problems.
Automatic Search:
1. Press MENU to enter the menu. Choose “Porgram Manager” →“Search” sub
page.
2. Select “Automatic Search” and a warning
message will appear. If you want to overwrite
the previous program list, selelct YES.
Otherwise ,select NO. To abort this operation,
simply select CANCEL.
3. The “Automatic Search” box will appear,
indicating the scanning percentage, Channel
Munber and Frequency. When scanning, active
TV/Radio programs will be listed inside the box. After channels are scanned,
the syatem will return to the real-time program automatically. To terminate the
scanning, press “EXIT”.
Manual Search:
If there are any channels missing after auto scan, or you want to add new programs,
you can choose to manually scan the desired channels as long as you have got the
correct frequency and bandwidth data.
Main Menu
Program Manager
User Settings
System Settings
Game
Info
Timer
Automatic Search
Progress
Channel No.
Frequency
TV List Radio List
TTV
CTV

User’s Manual
13
EnglishDeutschFrançaisItalianoEspañolPortuguês
1. Press MENU to enter the menu. Choose “Porgram Manager” →“Search” sub
page.
2. On the “Manual Search” page, select “Frequency” and “Bandwidth” and press
the numeric button or ▲/▼on the remote control to specify the correct
frequency and bandwidth. Then press LIST/OK.
Note : If the certain frequency carries programs, the figures at the bottom of this
page will show the percentage of strength and quality.
3. After selecting “OK” and pressing LIST/OK, the system will begin to manually
scan channels.
4. When the channel scanning is completed, the system will return to “Manual
Search” page and bring you back to the program you are watching earlier.
5. Repeat steps 1 to 3 if you want to scan more channels.
All Frequency Search:
You will never miss any channels by using “All Frequency Search”.
1. Press MENU to enter the menu. Choose “Porgram Manager” →“Search” sub
page.
2. Select “All Frequency Search” and a warning message will appear. If you want
to overwrite the previous program list, selelct YES. Otherwise, select NO. To
abort this operation, simply select CANCEL.
3. The “All Frequency Search” box will appear, indicating the scanning percentage
and frequency. All Frequency search may take you a while, please be patient.
4. After channels are scanned, the syatem will return to the real-time program
automatically. To terminate the scanning, press “EXIT”.
4.1.2 Editing
You can setup your favorite programs, place programs in proper order, delete
programs and so on.
Setup your Favorite Porgram:
When completing setting, you can acess your favorite programs quickly and easily
by pressing FAV on the remote control.
1. Press MENU to enter the menu. Choose
“Porgram Manager” →“Editing” sub page.
2. Select “Program Editing” and the “Program Edit
Table” will appear.
3. Press
▲/▼to highlight your favorite program
and press LIST/OK on the remote control. The
mark !will appear, indicating that the
Program edit table
No. Program Name Favor Move Del
Pg Dn Pg Up MENU:Save
TTV
TTV-NEWS
TTV-LIFE
PTS
PTS-NEWS
FTV
FTV-EDUCATION
FTV-NEWS
CTV
CTV-NEWS

AVerMedia®DVB-T STB5 / STB7
14
program has been selected as your favorite one. To abort the selection, press
LIST/OK again to make the mark !disappear.
4. Repeat step 3 to mark more programs. Press Menu to save your setting and
exit the current page.
5. Surely, you can use FAV button on the remote control to setup your favorite
programs. For more details, please refer to 3.4 Remote Control.
Change Program Sequence:
1. Press MENU to enter the menu. Choose “Porgram Manager” →“Editing” sub
page.
2. Select “Program Editing” and the “Program Edit Table” will appear.
3. Press
▲/▼to highlight the program that you want to move and press LIST/OK
on the remote control. The mark "will appear, indicating that the program has
been selected for moving. To abort the selection, press LIST/OK again to make
the mark "disappear.
4. Press !or #until the desired location is highlighted. Then the marked
program will be moved to the new location.
5. Press Menu to save your setting and exit the current page.
Delete Programs:
1. Press MENU to enter the menu. Choose “Porgram Manager” →“Editing” sub
page.
2. Select “Program Editing” and the “Program Edit Table” will appear.
3. Press
▲/▼to highlight the program that you want to delete and press LIST/OK
on the remote control. The mark "will appear, indicating that the program
has been selected for deletion. To abort the selection, press LIST/OK again to
make the mark "disappear.
4. Repeat step 3 to mark more programs. Press Menu to save your setting and
exit the current page.
Sort programs:
With this function, you can sort programs by name, service ID, program number.
1. Press MENU to enter the menu. Choose “Porgram Manager” →“Editing” sub
page.
2. Select the way of sorting you like and the program will be rearranged
automatically.

User’s Manual
15
EnglishDeutschFrançaisItalianoEspañolPortuguês
Item Description
Sort by Name Sort by ascending program names.
Sort by Service
ID
Sort by service ID.
Note:Service ID is officially used to verify “channel service”
(which is so-called “Programs”). Basically, different channel
service will be identified with different numbers.
Sort by Program
No.
Sort by Program Number.
Note: When scanning, the system will give every channel service
a number, which we called “Program No.”
4.1.3 Electronic Program Guide(EPG)
Electronic Program Guide (EPG) is a service that allows you to check the next
succeeding program schedule and even the program schedules of the whole week.
Please be noted whether EPG service is provided or not depends on the channel
providers in your region/country.
1. Press MENU to enter the menu. Choose “Porgram
Manager” →“EPG” sub page.
2. In the “EPG” page, the EPG of the selected program
lists inside the blue box located at the lower right
corner of the screen (as shown at right).
3. Press
▲/▼to select a program and press LIST/OK.
4. Press
►to move the highlight in the blue pane. Press LIST/OK and then you
can see the program guide on that day.
Note:In this setup page, the button ◄/►can only move the highlight but cannot
adjust volume.
5. You can also see the program guide by pressing the EPG button on the remote
control. For more information, please refer to 3.4 Remote Control.
4.1.4 View Program Lists
1. Press MENU to enter the menu. Choose “Porgram Manager” →“List” sub page.
2. Select “TV Program List” or “Radio Program List”. All programs will be listed in
this page.
4.2 User Settings
You can configure your paference setting, enabel/disable the parental lock and
change your password.
TV Program List
No.
Program Name
2005/01/01 01:10
TTV
TTV-NEWS
TTV-LIFE
PTS
PTS-NEWS
FTV
FTV-EDU.
FTV-NEWS
CTV
Pg Dn Pg Up
Other manuals for DVB-T STB5
1
This manual suits for next models
1
Table of contents
Languages:
Other Avermedia TV Receiver manuals

Avermedia
Avermedia AVerTV Mobile iOS EW330 User manual

Avermedia
Avermedia MCE 2005 User manual

Avermedia
Avermedia VCEB23TRS A867R User manual

Avermedia
Avermedia AVerTV PLUG & WATCH User manual

Avermedia
Avermedia M039R User manual

Avermedia
Avermedia AVerTV Combo PCI-E User manual

Avermedia
Avermedia TV TUNER BOX User manual

Avermedia
Avermedia AVerTV Box W9 User manual

Avermedia
Avermedia DVB-S User manual