Avidsen 127063 User manual

SMART CONTROL
MODULE
HomeControl
Ref.127063
www.avidsen.com
V3
AvidsenHome
Works with
VOICE ASSISTANTS

TABLE OF CONTENTS
A - SAFETY INSTRUCTIONS 05
1 - OPERATING PRECAUTIONS 05
2 - MAINTENANCE AND CLEANING 05
3 - RECYCLING 05
B - PRODUCT DESCRIPTION 06
1 - KIT CONTENTS 06
2 - HOMECONTROL SMART MODULE 06
3 - MEANING OF THE WARNING LIGHT 06
C - INSTALLATION 07
1 - OPERATION 07
2 - WIRING DIAGRAM 07
3 - INSTALLING THE MOBILE APPLICATION AND CREATING AN ACCOUNT 07
4 - HOMECONTROL PAIRING 09
D - USING THE PRODUCT 11
1 - HOMECONTROL SMART MODULE USE 11
1.1 USING THE COUNTDOWN FEATURE 12
2 - BENEFIT AND USE OF PARTS IN THE AVIDSEN HOME APPLICATION
12
2.1 CREATING A FAMILY 12
3 - USING THE PRODUCT WITH GOOGLE HOME 13
3.1 IF YOU HAVE AN ANDROID SMARTPHONE WITH GOOGLE ASSISTANT 13
EN3
TABLE OF CONTENTS
3.2 IF YOU HAVE AN ANDROID SMARTPHONE WITHOUT GOOGLE ASSISTANT
OR AN IPHONE 14
4 - USING THE PRODUCT WITH AMAZON ALEXA 15
5 - SCENARIO AND AUTOMATION 15
5.1 TRIGGERING A SET OF ACTIONS (SCENARIO) 15
5.1.1 PROGRAMMING THE “I’M GOING” SCENARIO 16
5.2 - CREATING AN AUTOMATION 18
5.2.1 PROGRAMMING THE “LIVING ROOM LIGHTING” AUTOMATION 20
E - TECHNICAL AND LEGAL INFORMATION 24
1 - TECHNICAL CHARACTERISTICS 24
2 - RADIO CHARACTERISTICS 24
3 - WARRANTY 25
4 - HELP AND ADVICE 25
5 - PRODUCT RETURNS - AFTER SALES SERVICE 25
6 - EC DECLARATION OF CONFORMITY 25
EN3

EN 4
EN5
A - SAFETY INSTRUCTIONS
1 - OPERATING PRECAUTIONS
• Do not allow children to operate the product.
• This product is designed exclusively for indoor
use.
• This product is designed to work with a
smartphone.
Electrical installation must meet current
standards (NFC 15-100) and should preferably
be done by a qualified person.
• This product is designed to be mounted in a
flush-mounted box.
2 - MAINTENANCE AND CLEANING
• Always unplug the product from the mains
before carrying out any maintenance.
• Your product does not require any specific
maintenance.
• Use a soft, slightly damp cloth to clean your
product.
• Do not use abrasive or corrosive substances.
• Do not spray any products directly onto the unit.
3 - RECYCLING
This logo denotes that devices no longer
in use should not be disposed of as
household waste. They are likely to
contain hazardous substances that are
dangerous to both health and the
environment. Return the equipment to
your local distributor or use the recycling collection
service provided by your local council.
Pour en savoir plus :
www.quefairedemesdechets.fr

EN 6
B - PRODUCT DESCRIPTION
1 - CONTENTS OF THE KIT
2 - HOMECONTROL SMART MODULE
3 - MEANING OF THE WARNING LIGHT
The LED located on the connected module gives the following indications:
- LED lit up
red
:the output is powered
-LED off:the output is not powered
-LED flashing: in pairing mode
Note: the above information is the default settings; the status of the LEDs according to the output can be
changed in the app
1HomeControl Smart Module
2Quickstart
1RESET button and ON/OFF status change button - Warning light
2Mains power supply 230V AC
3Outlet 230V AC (device to be operated)
1x 1 2x 1
1
3
2
OUT
L N
IN
LN
EN7
C - INSTALLATION
1 - OPERATION
This smart module can be used to control any
device within the 10A limit. Simply connect the 230V
mains and the device to be operated.
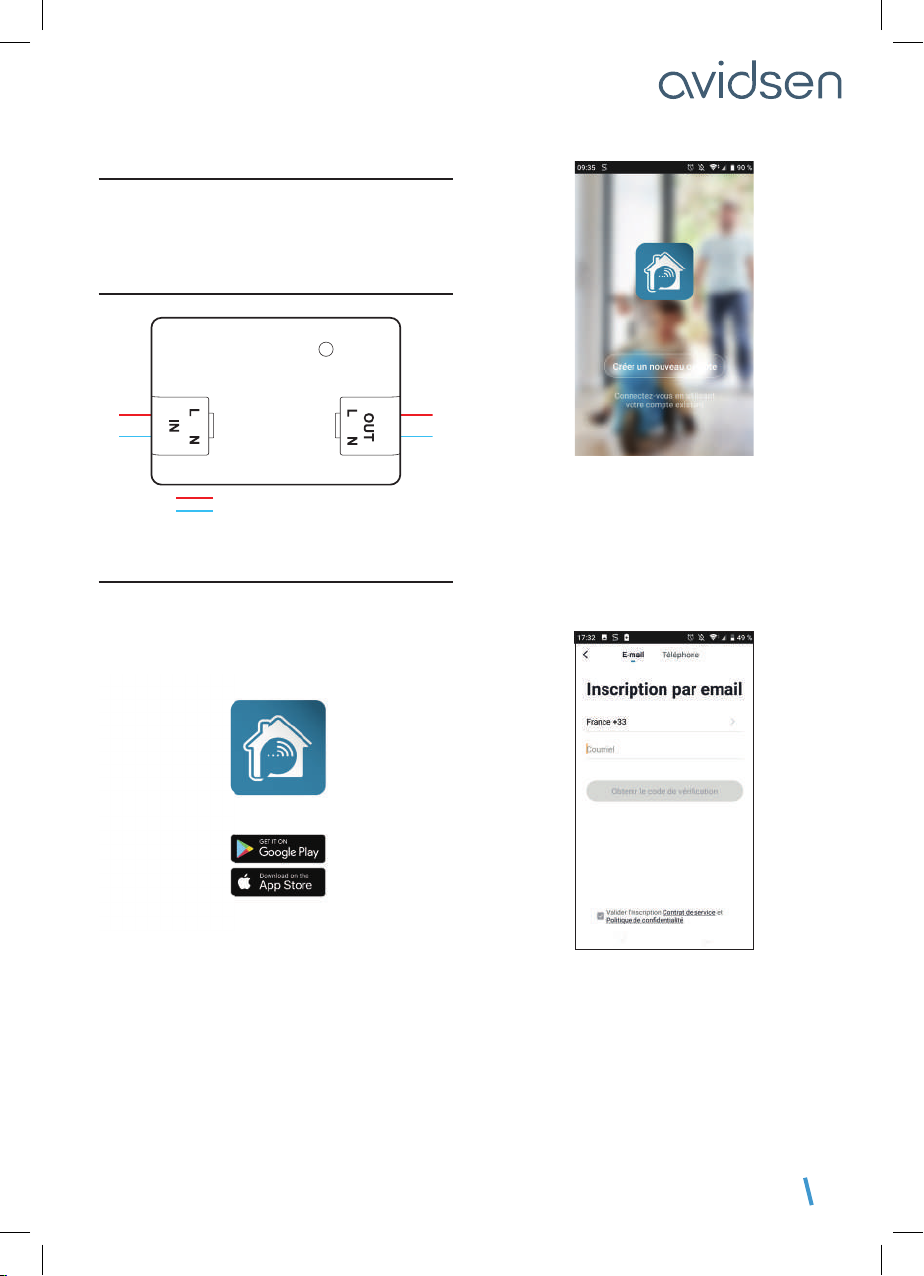
2 - WIRING DIAGRAM
3 - INSTALLING THE MOBILE APP AND
CREATING AN ACCOUNT
Once your plug is connected, follow the instructions
below to pair it.
Download the Avidsen Home app from the Android
Play Store or Apple App Store.
Launch the app and log in if you already have an
account. If not, press CRÉER UN NOUVEAU
COMPTE (CREATE A NEW ACCOUNT) and let
the application guide you.
After accepting the privacy policy, you can create
an account with an email address or with a
phone number. Choose the method that suits
you; however, we recommend that you create your
account with an email address.
Procedure by email
phase wire
230V input 230V output
neutral wire
EN 8
C - INSTALLATION
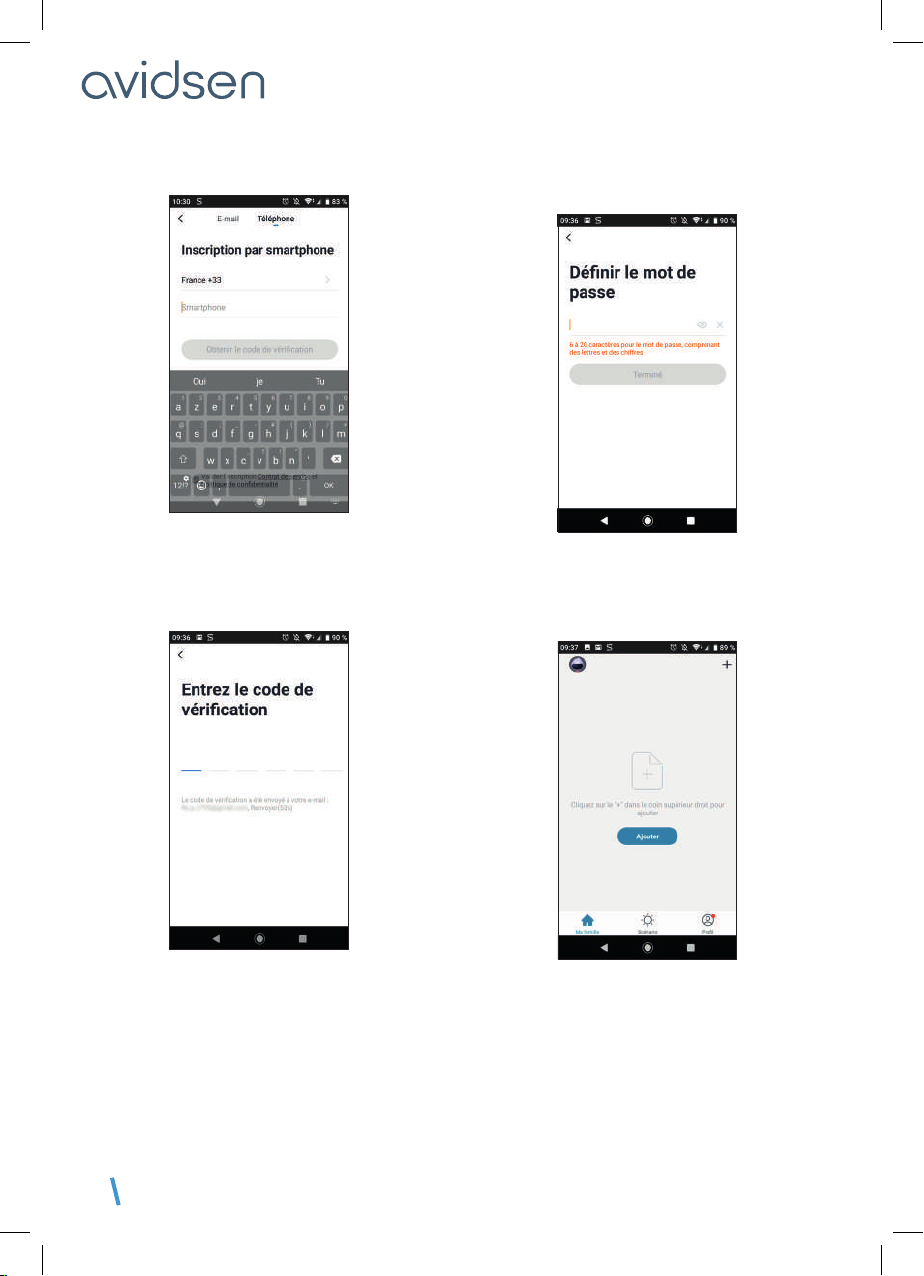
Procedure by phone
In both cases, choose your country and then, after
entering your email address or phone number, select
Obtenir le code de vérification (Get verification
code).
In a few seconds, you will receive a validation code
in your email inbox or by SMS. Enter this code to
finalise registration.
Note that this email may go into your spam folder.
If you do not receive a code before the countdown
has ended, press renvoyer (return) and check the
email address or telephone number entered.
To complete your registration, set a password
between 6 and 20 characters long with letters and
numbers only, then press Terminé (Finished).
The application will redirect you directly to your
account home page where you can start pairing
your devices.

EN9
C - INSTALLATION
4 - HOMECONTROL PAIRING
If you have more than one item to pair (plugs,
cameras, other bulbs) switch on only one item at
a time.
The following information may vary depending on
the app updates.
As soon as it is switched on, the module will be in
pairing mode by default. The indicator light will then
flash until the pairing procedure is completed.
To start the pairing, press AJOUTER (ADD).
Make sure your phone is connected to your router’s
2.4 GHz WiFi network.
Select the product that you wish to pair and select
the HomeControl Smart Module
Make sure the module is plugged in and that
it is flashing. If not, press the button for five seconds
until the indicator starts flashing

EN 10
C - INSTALLATION
Select your 2.4 GHz WiFi network (N.B. your
smartphone must be connected to the WiFi network
to which the module will be connected), enter
your network password and press CONFIRMER
(CONFIRM).
IMPORTANT: if a location authorisation request
message appears, you need to accept it for your
Android or iOS device to receive your WiFi.
IMPORTANT: This device is compatible with 2.4
GHz - WPA/WPA2 networks. Not compatible with 5
GHz WiFi or with WEP encryption. Please check the
WiFi settings of your router or contact your Internet
service provider if you experience connection
difficulties.
Please wait while the pairing procedure takes place.
This stage can last several minutes.
Your smart module is now operational and will appear
in your app. You can now control your Avidsen
HomeControl smart module from your smartphone.
5 - RESETTING THE HOMECONTROL MODULE
The following instructions may help you if
you have any problems during the pairing
procedure:
To reset the module to zero, press and hold (for 5
to 10s) the button located on the top of the module.
The indicator light will flash to confirm the reset.
OUT
L N
IN
LN
The smart module will automatically be removed
from the Avidsen Home app. If not, tap the pencil
..........
Table of contents
Other Avidsen Control Unit manuals

Popular Control Unit manuals by other brands

Festo
Festo Compact Performance CP-FB6-E Brief description

Elo TouchSystems
Elo TouchSystems DMS-SA19P-EXTME Quick installation guide

JS Automation
JS Automation MPC3034A user manual

JAUDT
JAUDT SW GII 6406 Series Translation of the original operating instructions

Spektrum
Spektrum Air Module System manual

BOC Edwards
BOC Edwards Q Series instruction manual

KHADAS
KHADAS BT Magic quick start

Etherma
Etherma eNEXHO-IL Assembly and operating instructions

PMFoundations
PMFoundations Attenuverter Assembly guide

GEA
GEA VARIVENT Operating instruction

Walther Systemtechnik
Walther Systemtechnik VMS-05 Assembly instructions

Altronix
Altronix LINQ8PD Installation and programming manual


