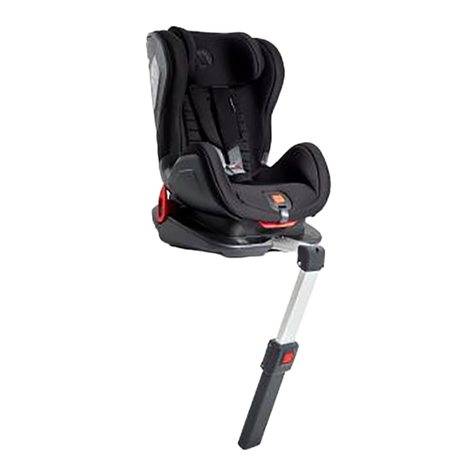
Avionaut GLIDER User manual

EN
DE
PL
RU
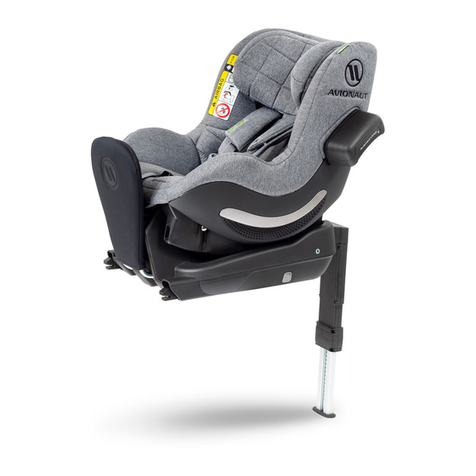
GLIDER 9-25 KG
GLIDER ISOFIX 9-18 KG
USER GUIDE
ECE R44/04

3
21
8
12
9
13
10
14
4 5 6 7
11
15

26 2725
24
20 21 22 23
19181716
35343332
31
30
28 29

1
6
4
2
3
5
1
9
46 474544
40 41 42 43
393837
36
5554
53
52
515048 49

1. Headrest
2. Cover
3. Belt pads
4. Shoulder belts of the harness
5. Harness buckle
6. Harness safety lock
7. Harness adjustment strap
8. Safety belt tensioner
9. Safety belt tensioner buon
10. Recline Lever
11. Seat belt latch
12. Red roung gaps
13. Instrucon manual storage compartment
14. Seat shell
15. Base
16. Lap secon of safety belt roung
17. Safety belt gap
Accessories*
18. Support leg / Accessories
19. isox releasing mechanism
20. Isox connectors / Accessories
21. Top Tether strap mounng
22. Top Tether strap / Accessories
23. Top Tether strap anchorage / Accessories
24. Support leg locking buons / Accessories
25. Support leg adjustment buon / Accessories
* (The Avionaut Glider accessories are included when buying a car seat with the isox system either
with a support leg or a top tether strap)
18
25
24
7
6
5
4
3
2
111
21
23
13
22
14
15
20
19
17
16
12
8
9
10
Dear Customer!
Thank you for buying the Avionaut Glider car seat.
During the development process of our car seat we paid special aenon to safety comfort,
ease of use and design. The product is made according to the highest quality norms and
meets the stringest safety requirements.
Research shows that a large percentage of child car seats are not used properly. Therefore,
we advise you to take me and read through the instrucon manual carefully. Your child’s
opmal safety can only be guaranteed if the Avionaut Glider car seat is properly used.
EN

The exceponal features of the Avionaut Glider.
Due to a high demand for a car seat that is both suitable for dierent child ages and dierent car
mounngs, we decided to meet the client’s requirements by creang a more universal car seat
with a safer design.
We have created the Avionaut Glider car seat together with the development and markeng
engineers, safety laboratories as well as through consultaons with disnguished child safety and
design specialists. The result is that the seat is very safe and has remarkable shape.
The Avionaut Glider can be called a 3 in 1 car seat due to three dierent opons for the in-car
installaon. The rst opon is the modern and fast car seat installaon using a 3-point safety belt
and a 5-point harness to secure your child. The second opon is to x your car seat with the isox
system with either support leg or top tether strap and the 5-point harness to secure your child.
The third opon, for older children, is to secure your child using the 3-point safety belt directly.
The adjustable headrest and its special shape as well as the use of the 5-point harness (on shoulder
belts) and an-slippery pads increase the safety of a child traveling in the car seat. Addionaly,
adjustable reclining posion allows your child to travel well and comfortably even when asleep.
Special holes in the Avionaut Glider’s seat shell and its breathing cover fabric make the car seat
breathe. The child does not sweat or overheat, which results in a more connous journey.
All the soluons menoned above make the Avionaut Glider car seat a leading product that is
safe, versale and durable. Both parents and children can enjoy the friendliness and increased
length of use as well as the sense of safety for their child traveling in the Avionaut Glider car seat!
Important!
The child restraint (child car seat) belongs to the category – “universal”. It has been approved
according to the regulaon 44, amendment 04, for group I 9-18 kg and group II 15-25kg and is
suitable for installaon in most of the cars (though, not all of them).
Read through the instrucon manual carefully and keep it for future reference. Not adhering to
the terms of use shown above can have serious consequences for your child.
EN
List of Contents
1. BASIC INFORMATION FOR THE AVIONAUT GLIDER CAR SEAT USER
2. IN CAR INSTALLATION AND REMOVAL OF THE AVIONAUT GLIDER CAR SEAT USING
3-POINT SAFETY BELT
2.1 Pre Installaon
2.2 Installaon
2.3 Check List
2.4 Removal
3. IN CAR INSTALLATION AND REMOVAL OF THE AVIONAUT GLIDER CAR SEAT USING ISOFIX
SYSTEM WITH A SUPPORT LEG
3.1 Pre Installaon
3.2 Installaon
3.3 Check List
3.4 Removal
4. IN CAR INSTALLATION AND REMOVAL OF AVIONAUT GLIDER CAR SEAT USING ISOFIX
SYSTEM WITH A TOP TETHER STRAP
4.1 Pre Installaon
4.2 Installaon
4.3 Check List
4.4 Removal
5. PLACING YOUR CHILD IN THE AVIONAUT GLIDER CAR SEAT
5.1 Use of the Avionaut Glider car seat’s 5-point harness to secure your child Group I 9 -18 kg
5.1.1 Height adjustment of the harness’ shoulder belts, headrest and crotch belt with a
buckle
5.1.2 Placing your child in the Avionaut Glider car seat
5.1.3 Recline posion adjustment
5.1.4 Check list
5.1.5 Removing your child from the Avionaut Glider car seat
5.2 Fastening a child in a seat of your car using 3-point car seat belt. Grupa II 15-25 kg
5.2.1 Removing the 5-point car seat harness
5.2.2 Adjusng headrest height
5.2.3 Placing your child in the Avionaut Glider car seat
5.2.4 Recline posion adjustment
5.2.5 Check List
5.2.6 Removing your child from the Avionaut Glider car seat
6. MAINTENANCE AND CLEANING
6.1 General Informaon
6.2 Removing the cover
6.3 Reng the cover
6.4 Correct funconing and cleaning of the harness buckle, isox, support leg and top
tether strap
7. RECYCLING
8. WARRANTY
9. QUESTIONS
EN

1. BASIC INFORMATION FOR THE AVIONAUT GLIDER CAR SEAT USER
• Because of dierent types of car safety belts and dierent car seat mounngs currently used
please make sure that the car seat is suitable for your vehicle before you buy it.
• Always use a car seat, even on short journeys, as most of the accidents happen during such
journeys. The Avionaut Glider car seat can be installed both on the front and rear seats of your
car, even if the car has been equipped with air bags. It is recommended that you install your
child car seat on the rear seats. Should you use the front seats make sure that the front car seat
is moved as far away from the dashboard as possible and if possible please switch o the airbag.
• The child car seat must always be properly fastened even if a child does not travel in a car. In car
installaon using a 3-point safety belt is only possible in cars that are approved and equipped with
3-point safety belts that have been approved according to ONZ/EKG nr 16 or similar.
• The Avionaut Glider car seat is not suitable for at home use. Use it only in a car. The Avionaut
Glider car seat must not be used without its cover. The cover contributes to the safety of the child
car seat. Always cover your child car seat if you park your car in the sun. Child car seat’s parts can
become hot and cause burns and the seat can become discoloured.
• Never leave your child unsupervised in the car. During long journeys take short brakes so the child
can move a lile before connuing the journey.
Keep your instrucon manual in the instrucon manual storage compartment of your Avionaut
Glider car seat for future reference.
• The manufacturer acknowledges that the child car seat may leave marks on your car’s upholstery.
It is inevitable due to the ght in-car installaon requirement. The manufacturer does not take
responsibility for any damage, arising from the use of a child car seat, caused to your car.
• The seat may become unsafe aer an accident due to damage that is not immediately noceable.
It should therefore no longer be used.
1
EN

2. IN CAR INSTALLATION AND REMOVAL OF THE AVIONAUT GLIDER CAR
SEAT USING 3-POINT SAFETY BELT
2.1 Before Installaon
The Avionaut Glider car seat can only be installed on a forward facing seat equipped with a
3-point seat belt, which has been approved according to ECE R16 regulaon or similar (pic. 1).
Correct roung of your seat belt is essenal for your child’s safety. It must be routed in a correct
order, menoned in the instrucon manual, along red markings on the Avionaut Glider car seat.
Please see the tags on the Avionaut Glider cover. Never route the belt in any other way than
described above!
In some cases, the buckle of the safety belt may be too long and therefore sits too high against
the base of the Avionaut Glider car seat, making it dicult to install the car seat securely. If this
is the case choose a dierent posion in the car (pic. 4). In case a headrest of a car seat, where
the Avionaut Glider seat will be installed, does not let you align the Avionaut Glider child seat
with that car seat, please remove the headrest (pic. 5). Remember to put the headrest back in
its place if the seat is used by an adult person.
If the Avionaut Glider is equipped with an isox base, a support leg and is being installed using a
seat belt, isox connector plugs must be reinserted, in case they were removed before (pic. 29)
and the support leg removed. The gap that appeared aer removing the support leg must be
covered with a plug that comes with the leg (pic. 26). However, if the Avionaut Glider is provided
with a top tether strap, instead of the support leg, the strap must be removed (pic. 34).
Should an isox connector come out of the seat base it can only be put back in aer “clicking”
the seat into the isox anchorage (read 3.2 and 3.3) or by using the isox connector plug, which
needs to be reinserted into the Avionaut Glider isox connector. The isox connectors can then
be put back into the base (pic .29).
2
2.1
EN

2.2 Installaon
A. Place the Avionaut Glider car seat facing forward, in the direcon of travel, on the seat
of your car (pic. 1)
B. Open both shoulder secon seat belt latches in the upper part of the Avionaut Glider
backrest (pic. 6)
C. Pull the seat belt as far out as possible. Put the shoulder secon of the seat belt through
red gaps in the upper part of the Avionaut Glider car (pic. 7) and catch the seat belt
on the red hook, in the lower part of the red gap, where the seat belt puller is (pic. 8) The seat
belt, in the other red gap, must be pulled down towards the car seat and temporarily blocked
using the upper latch (pic. 9). (It will prevent the seat belt from rolling back up and facilitate
further car seat installaon)
D. Make sure that the lower belt tensioners are turned facing down (pic. 10). Route the lap
secon of the seat belt in front of the Avionaut Glider seat and through the lower seat belt
tensioners (pic. 11).
E. Put the tongue secon of the seat belt into the buckle (pic. 12). Make sure the seat belt
is not twisted.
F. Release the upper latch (temporarily blocked). Tighten the Avionaut Glider Car seat
by pressing it into the seat of a car and at the same me pull the shoulder secon of the seat
belt towards the reel to eliminate any slack. While ghtening the seat, block the upper seat
belt latches (pic. 13). At the end of the installaon ghten the seat belt and turn the lower
tensioners 45 degrees up (pic. 14).
The picture above shows the properly installed Avionaut Glider car seat using 3-point
seat belt.
2.2
EN

2.3 Check list
For your child’s safety, aer installing the Avionaut Glider car seat please check, if:
• The seat belt is ght and not twisted
• The lap secon of the seat belt goes over the markings, red belt tensioners and that
they are in a ght vercal posion
• The shoulder secon of the seat belt is properly routed and goes through both red gaps
and behind the hook on the side of the seat belt reel
• Both upper latches are blocked
• The Avionaut Glider car seat is ght and stable on the car seat.
2.4 Removal
A. Release the seat belt from the buckle (pic. 15)
B. Loosen up the lower belt tensioners by turning the hook back to its horizontal posion
(pic. 16)
C. Release the upper seat belt latches (pic. 17)
D. remove the seat belt from the upper latches (pic. 18)
E. Remove the Avionaut Glider car seat from your car
3. IN CAR INSTALLATION AND REMOVAL OF THE AVIONAUT GLIDER CAR
SEAT USING THE ISOFIX WITH THE SUPPORT LEG
3.1 Before installaon
The Avionaut Glider car seat equipped with the isox can only be installed on a forward
facing seat (pic. 2).
In case a headrest of a car seat, where the Avionaut Glider seat will be installed, does not let
you align the Avionaut Glider child seat with that car seat, please remove the headrest (pic. 5).
Remember to put the headrest back in its place if the seat is used by an adult person.
If the Avionaut Glider is equipped with an isox base, a support leg and is being installed using a
seat belt, isox connector plugs must be reinserted, in case they were removed before (pic. 29)
and the support leg removed. The gap that appeared aer removing the support leg must be
covered with a plug that comes with the leg (pic. 26). However, if the Avionaut Glider is provided
with a top tether strap, instead of the support leg, the strap must be removed (pic. 34).
Should an isox connector come out of the seat base it can only be put back in aer “clicking”
the seat into the isox anchorage (read 3.2 and 3.3) or by using the isox connector plug, which
needs to be reinserted into the Avionaut Glider isox connector. The isox connectors can then
be put back into the base (pic. 29).
2.3
2.4
3
3.1
EN

3.2 Installaon
A. Pull out the isox connectors as far out as possible. In order to pull the isox connectors out you
need to remove the plugs by moving the isox releasing mechanism (pic. 19). Push the isox
connectors fully into the Avionaut Glider seat base and then pull them as far out as possible unl
you can’t push them back into the base (pic. 20)
B. Place the Avionaut Glider onto a car seat so that the Avionaut Glider isox connectors face the
isox anchorage system between the seat and the backrest of the car seat (pic. 21). Click the
Avionaut Glider isox connectors into the isox anchorage system. When clicking in, the indicators
informing you about the correct installaon, should be green (pic. 22) and your Avionaut Glider
car seat can be easily aligned with the backrest of the car seat
D. Push the Avionaut Glider seat into the car seat so that the Avionaut Glider seat’s backrest is
aligned paralell with the backrest of the car seat (pic. 23)
E. Remove the plug of support leg (pic. 24) put the support leg into the hole in front of the Avionaut
seat base pressing the two catches in the leg so that they click in the two holes in the Avionaut
Glider seat base and pull the leg out so that it touches the oor (pic. 25)
The picture above shows the properly installed Avionaut Glider car seat using the isox system
with the support leg.
3.2
EN

3.3 Check list
For your child’s safety aer installing the Avionaut Glider car seat please check, if:
• Isox connectors are properly xed, the indicators are green and the back of the Avionaut
Glider car seat is aligned and touches the backrest of the car seat,
• The support leg is properly xed and the foot of the leg touches the oor
• The Avionaut Glider car seat is not loose when vigorously pulled le and right,
in the direcon of travel
3.4 Removal
A. Press the red buon on the support leg and slide the leg back into its base. Press the two
catches in front of the Avionaut Glider seat base and pull the support leg out (pic. 26).
B. Pull the isox releasing mechanism towards you and move the Avionaut Glider seat away
from the car seat (pic. 27)
C. Slide the isox connectors back into the Avionaut Glider seat base (pic. 28)
D. Remove the Avionaut Glider car seat from the car
E. Pull the isox connectors as far out as possible, put the isox connector plugs on and slide
them back into the Avionaut Glider seat base (pic. 29)
4. IN CAR INSTALLATION AND REMOVAL OF THE AVIONAUT GLIDER CAR
SEAT USING THE ISOFIX WITH TOP TETHER STRAP
4.1 Before Installaon
The Avionaut Glider car seat can only be installed on a forward facing seat equipped with the
isox and top tether anchorage (pic. 3) (Please also read 3.1)
In order to find the top tether anchorage, please refer to the vehicle’s owner manual. The
anchorage is marked with a special tag (pic. 20) and can be found in various places in a car
(please do not confuse with a baggage mounng ring) (pic. 31)3.3
3.4
4
4.1
EN

4.2 Installaon
A. Aach the top tether strap to the upper part of the Avionaut Glider backrest (pic.32)
B. Pull out the isox connectors as far out as possible. In order to pull the isox connectors out you
need to remove the plugs on the isox connectors by moving the isox releasing mechanism (pic.
19). Push the isox connectors fully into the Avionaut Glider seat base and then pull them as far
out as possible unl you can’t push them back into the base (pic. 20)
C. Place the Avionaut Glider onto a car seat so that the Avionaut Glider isox connectors face the
isox anchorage system between the seat and the backrest of the car seat (pic. 21)
D. Click the Avionaut Glider isox connectors into the isox anchorage system. When clicking in,
the indicators informing you about the correct installaon, should be green (pic. 22) and your
Avionaut Glider car seat can be easily aligned with the backrest of the car seat
E.Push the Avionaut Glider seat into the car seat so that the Avionaut Glider seat’s backrest is
aligned paralelly with the backrest of the car seat (pic. 23)
F. Thread the Top tether strap between the car seat’s backrest and the headrest, aer nding the
top tether anchorage, click it into it and pull the top tether strap ght (pic. 33). Pull the loose
strap and secure it with the Velcro
The picture above shows the properly installed Avionaut Glider car seat using the isox system
with the top tether strap.
4.2
EN

4.3 Check list
Aer installing the Avionaut Glider car seat please check, for your child’s safety, if:
• Isox connectors are properly xed, the indicators are green and the back side of the Avionaut
Glider car seat is aligned and touches the backrest of the car seat,
• The top tether is installed correctly, the strap is tight and routed between the backrest and
headrest of the car seat
• The Avionaut Glider car seat is not loose when vigorously pulled le and right, in the direcon of
travel
4.4 Removal
A. Loosen up the top tether strap and remove it (pic. 34)
B. Pull the isox releasing mechanism towards you and move the Avionaut Glider child car seat
away from the seat of your car (pic. 27)
C. Slide the isox connectors back into the Avionaut Glider seat base (pic. 28)
D. Remove the Avionaut Glider car seat from the car
E. Pull the isox connectors as far out as possible, put the isox connector plugs on and slide them
back into the Avionaut Glider seat base (pic. 29)
5. PLACING YOUR CHILD IN THE AVIONAUT GLIDER CAR SEAT
5.1 Use of the Avionaut Glider car seat’s 5-point harness to secure your child.
Group I 9 -18 kg
5.1.1 Height adjustment of the harness’ shoulder belts, headrest and crotch
belt with a buckle
Before fastening your child in the Avionaut Glider car seat adjust the correct height of the
shoulder belts of the harness and the croch belt gap. The appropriate height of the shoulder
belts depends on the height of the headrest and should be adjusted accordingly.
A. Open the harness by pressing the red buon on the buckle (pic. 35)
B. Press the red harness adjuster buon and loosen the shoulder belts, pull them as far out as
possible (pic. 36) (don’t pull the shoulder pads)
C. Place your child in the Avionaut Glider car seat (pic. 37). Adjust the shoulder belts and the
headrest to the desired height by leaning the headrest forward and holding its upper part pull
the headrest up or down depending on the need (pic. 38)
4.3
4.4
5
5.1
5.1.1
EN

D. Adjust the crotch belt and the buckle to an appropriate length by pung the end of the belt
through one of the two gaps in the sing part of the child car seat (pic. 39). The crotch belt
should not be xed to the gap that is further from the backrest before the weight of the child
reaches 15kg
E. Place your child into the Avionaut Glider car seat and check if:
• The height of harness’ shoulder belts is correct when the child’s back is straight (pic. 38) (the
shoulder belts’ height is correct when they fully hide in the car seat’s shell at the height of child’s
shoulders)
• The crotch belt gap is correct (pic. 39) (the crotch belt gap is correct when it slightly stands out of
the seat near the child’s crotch)
5.1.2 Placing your child in the Avionaut Glider car seat
A. Sit your child in the Avionaut Glider car seat and make sure the child’s back is straight (pic. 37)
B. Place the shoulder belts on child’s shoulders, put both tongue parts of the buckle and insert them
into the buckle. It will make a clear clicking sound (pic. 40). Make sure the belts are not twisted
or double folded
C. Pull the seat’s harness ght by pulling the harness adjustment strap (pic. 41) unl the harness
ts snugly around the child’s body. The ghter the harness around your child is the beer it is
protected
5.1.2
The picture above shows the properly installed Avionaut Glider car seat using 3-point seat
belt.
EN

5.1.3 Recline adjustment
The Avionaut Glider’s recline angle can be adjusted to six dierent posions.
A. Pull the recline lever up. It is located under the front part of the seat. Depending on the need,
pull the seat forward or rearward (pic. 42)
B. When the seat is in the desired posion, release the lever and move the seat unl you hear a
clear clicking sound
C. Aer you adjust the seat to the desired recline posion always pull the Avionaut Glider car seat
to check if it has locked
5.1.4 Check list
In order to provide opmum safety to your child always check before you travel if:
• The Avionaut Glider car seat is stable and safely installed in the car
• The height of the harness’ shoulder belts is appropriate for your child
• Belts are not twisted
• An-slippery parts of the shoulder belt pads are laid at on child’s shoulders and breast cage
• The child is correctly fastened in the harness
• The child seat’s belts are not damaged (if they are, you must not use the Avionaut Glider car seat)
• Make sure the lap secon of a seat belt is routed low so the child’s pelvis is held ghtly
5.1.5 Removing your child from the Avionaut Glider car seat
A. Return the Avionaut Glider car seat to the sing posion (please also read: 5.1.3)
B. Press the red buon on the buckle to realese it (pic. 35)
C. Loosen the shoulder belts by pressing red buon on the adjuster and pull them as far forward
as possible (pic. 36) (do not pull the shoulder belt pads)
D. Pull the shoulder belts apart and remove the child from the Avionaut Glider car seat.
5.1.3
5.1.4
5.1.5
EN

5.2 Fastening a child in a seat of your car using 3point car seat belt.
Group II 15-25 kg
5.2.1 Removing the 5-point car seat harness
Before removing the 5-point car seat harness, make sure that the child is big enough to
be fastened in the Avionaut Glider car seat using 3-point car seat belt. After removing the
5-point car seat harness it should never be reinstalled as it could be done incorrectly. In case
the Avionaut Glider car seat is equipped with an isox system, the 5-point harness has been
removed and the child will be fastened using the 3-point car seat belt, the isox can be used
to posion the child car seat against the car seat. If your car is not equipped with the isox
anchorage make sure the isox connectors do not damage the upholstery within the car.
A. In order to remove the harness you must place the car seat in a recline posion (please read
5.1.3)
B. Press the red buon on the harness’ buckle to realese it (pic. 35)
C. Loosen the shoulder belts by pressing red buon on the adjuster and pull them as far forward
as possible (pic. 36) (do not pull the shoulder belt pads)
D. Undo the shoulder belt pads, open the storage compartment in the back of the Avionaut Glider
car seat and remove the belt pads from the hooks (pic. 43)
E. Remove the harness belts from the seat. Firstly, remove metal locking clips and then remove the
tongue secon of the buckle (pic. 44) remove the belts from the slots in the backrest and the
harness adjustment strap (pic. 45). Do not remove the harness adjustment strap itself.
F. Remove the metal tongue part of the buckle from the crotch belt and remove the belt with the
buckle from the Avionaut Glider car seat (pic. 46)
5.2.2 Adjusng headrest height
Before placing the child in the Avionaut Glider car seat, and fastening the harness, adjust an
appropriate height of the headrest. Lean the headrest forward and while holding its upper part
pull the headrest up or down as desired (pic. 38)
5.2
5.2.1
5.2.2
EN

5.2.3 Placing your child in the Avionaut Glider car seat
A. Sit your child in the Avionaut Glider car seat making sure that the child’s back is straight
B. Open the shoulder secon seat belt latch found in the upper part of the Avionaut Glider backrest
(pic. 6)
C. Pull the seat belt as far out as possible. Put the shoulder secon of the seat belt through the red
gaps in the upper part of the Avionaut Glider car seat and catch the seat belt on the red hook in
the lower part of the red gap where the seat belt puller is located and lock the latch. Thread the
shoulder part of the belt under the headrest (pic. 47)
D. Sit the child in the Avionaut Glider car seat. Thread the lap part of the seat belt through the belt
roung at the back of the armrest. Then thread both the shoulder and the lap parts of the seat
belt with the tongue part of the buckle through a slot between the seat and the armrest of the
Avionaut Glider car seat (pic. 48). Insert the tongue part of the seat belt into the buckle.
E. Release the shoulder seat belt latch in the upper part of the Avionaut Glider car seat (pic. 6).
Tighten the shoulder secon of the seat belt by pulling it towards the reel so that the seat ts
neatly around the child’s body (pic. 49) and lock the shoulder seat belt latch.
The picture above shows a properly seated child in the Avionaut Glider car seat using 3-point
seat belt.
5.2.3
EN

5.2.4 Recline posion adjustment
Before changing the recline posion, loosen the car’s seat belt so that both the shoulder and lap
secons of the seat belt are loose.
The recline adjustment of the Avionaut Glider seat belt has been described above. Please see
5.1.3
Aer changing the Avionaut Glider car seat recline posion, check if the car’s seat belt ts the
child’s body neatly, is ght and not twisted..
5.2.5 Check List
In order to provide opmum safety for your child always check before you travel if:
• The Avionaut car seat is safely installed in your car
• The height of the headrest is appropriate for your child
• Seat belts are not twisted
• The child is safely secured in the harness
• Car seat harness belts are not damaged (if they are you must not use the Avionaut Glider car seat)
• Make sure that the shoulder secon of a seat belt does not press hard against child’s neck and that
the lap secon of a seat belt is threaded low so that the child’s pelvis is ghtly held
5.2.6 Removing your child from the Avionaut Glider car seat
A. Return the Avionaut Glider car seat to the sing posion (please also read: 5.1.3)
B. Release the car seat belt by pressing the red buon on the buckle and pull it to a side (pic 50)
C. Remove your child from the Avionaut Glider car seat
D. Thread the car seat belt through the safety belt gap and insert it into the buckle. Always fasten
the Avionaut Glider car seat aer removing your child from the car seat
5.2.4
5.2.5
5.2.6
EN
This manual suits for next models
1
Table of contents
Languages:
Other Avionaut Car Seat manuals

Avionaut
Avionaut AeroFIX User manual

Avionaut
Avionaut AeroFIX RWF Guide

Avionaut
Avionaut AeroFIX Guide

Avionaut
Avionaut Cosmo Guide

Avionaut
Avionaut MaxSpace Guide

Avionaut
Avionaut evolvair User manual

Avionaut
Avionaut KITE+ Guide

Avionaut
Avionaut GLIDER BELT FIXED Guide

Avionaut
Avionaut MaxSpace User manual

Avionaut
Avionaut SKY User manual