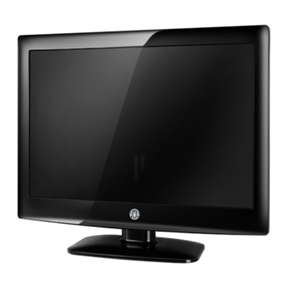
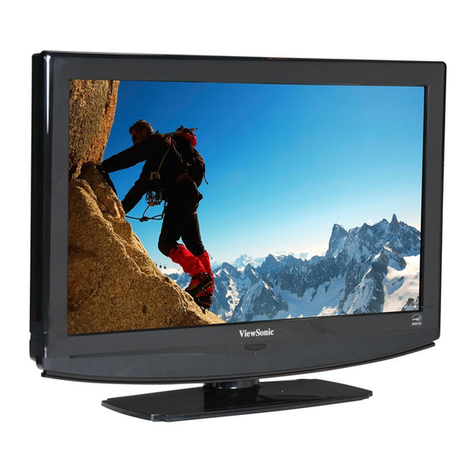
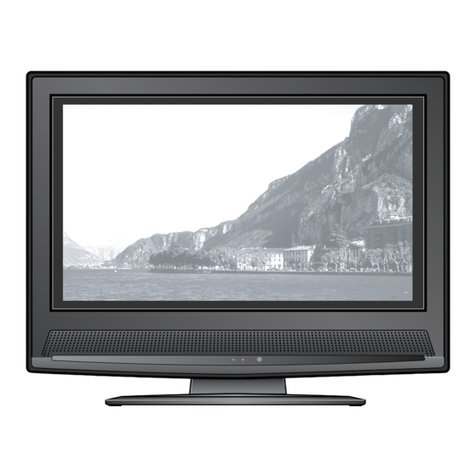
AWA MSDV2203-F3-D0 User manual

USER MANUAL
Please read this User Manual carefully to ensure use of this product and keep this
manual for future reference
MSDV2203-F3-D0
22"(56cm)HD READY LCD Television
N294


CONTENTS
-1-
SAFETY INSTRUCTIONS.................................................................................................2
INSTALLATION......................................................................... ......................................3
WALLMOUNTING INSTALLATION GUIDLINES.............................................................4
ACCESSORIES................................................................................................................5
FRONT PANEL................................................................................................................ 5
KEY BOARD(RIGHTSIDE)............................................................................................. 6
REAR PANEL..................................................................................................................6
ANTENNACONNECTION...............................................................................................7
CONNECTING TO PC......................................................................................................8
PC PRESET......................................................................................................................9
CONNECTING TOAVEQUIPMENT.................................................................................10
REMOTE CONTROL................................................................ .......................................11
BATTERY INSTALLATION..............................................................................................11
KEYS FUNCTION............................................................................................................12
OPERATION.....................................................................................................................13
BASIC OPERATION......................................................................................................... 13
TELETEXT.......................................................................................................................14
EPG..................................................................................................................................15
MENU OPERATION..........................................................................................................16-20
DVD operation...................................................................................................................21-25
TROUBLESHOOTINGS....................................................................................................26
TECHNICAL SPECIFICATION........................................................................................ 27

-2-
SAFETY INSTRUCTIONS
1.Read these safety instructions.
2.Keep these safety instructions.
3.Heed all warnings.
4.Follow all safety instructions.
5.Do not use this apparatus near water.
6.Clean only with dry cloth.
7.Do not block any ventilation openings. Install in
accordance with the manufacturers instructions.
8.Do not install near any heat sources such as radiators ,
stoves, or other apparatus (including amplifiers)that
produce heat.
9.Protect the power cord from being walked on or
pinched particularly at power outlets, and the point
where they exit from the apparatus.
10.Only use attachments/accessories specified by the
manufacturer.
11.Unplug this apparatus during lightning storms or
when unused for long periods of time.
12.Refer all servicing to qualified service personnel.
Servicing is required when the apparatus has been
damaged in any way, such as the power-supply cord
or plug is damaged, liquid has been spilled or objects
have fallen into the apparatus, the apparatus has been
exposed to rain or moisture , does not operate normally,
or has been dropped.
13.Apparatus must not be exposed to dripping or
splashing and no objects filled with liquids, such as
vases, should be placed on the apparatus.
IMPORTANT SAFETY INSTRUCTION
TO REDUCE THE RISK OF ELECTRIC SHOCK, DO
NOT REMOVE COVER (OR BACK).NO USER
SERVICEABLE PARTS INSIDE. REFER SERVICING
TO QUALIFIED SERVICE PERSONNEL.
RISK OF ELECTRIC SHOCK
DO NOT OPEN!
CAUTION
CAUTION
The symbol indicates that dangerous voltages
constituting a risk of electric shock are present
within this unit.
The symbol indicates that there are important
operating and maintenance instructions in the
literature accompanying this unit.
To prevent fire or shockhazard, do not expose this
appliance to rain or moisture.
WARNING:
Thank you very much for purchasing this TV. To enjoy
your product from the very beginning, read this manual
carefully and keep it handy for easy reference.
INSTALLATION
CAUTION
Locate the TV in the room where light does not strike
the screen .
Total darkness or a reflection on the picture screen can
cause eyestrain. Soft and indirect lighting is recommended
for comfortable viewing.
Allow enough space between the TV and the wall to
permit ventilation.
Avoid extremely warm locations to prevent possible
damage to the cabinet or premature component failure.
This TV can be connected to AC 100-240 Volts. 50/60 Hz.
Never connect to a DC supply or any other power supply.
Do not cover the ventilation openings when using the TV.
directly
Never tamper with any components inside the TV, or any
other adjustment controls not mentioned in this manual.
All LCD-TVs are high voltage instruments. When you
clean up dust or water drops on the LCD PANEL or
CABINET, the power cord should be pulled out from the
receptacle, then wipe the TV with a dry soft cloth. During
thunder and lighting, unplug the power cord and antenna
cord to prevent damage to your TV. All repairs to this TV
should only be performed by qualified TV service personnel.
Warning: Change or modifications to this unit not expressly
by the part responsible for compliance could void the user 's
authority to operate the Equipment.
a. Do not expose to dripping or splashing.
b. No objects filled with liquids, such as vases, shall be
placed on the apparatus.
c. The mains plug of this device is used as the disconnect
device and shall remain readily accessible and operable.
d. No naked flame sources, such as lighted candles, should
be placed on the apparatus.
e. Allow suitable distances around the apparatus for sufficient
ventilation. Ventilation should not be impeded by covering
ventilation openings with items such as newspapers, table
cloths, curtains and such like.
This symbol indicates that thisproductincorporates
double insulation between hazardous mainsvoltage
and user accessible parts.When servicing use only
identical replacement parts.
WARNING:To reducethe risk of fire orelectric shock,
do not expose this apparatusto rain or cords.
The display panel is avery sensitive and high technology
product, giving you finely detailedpictures. Occasionally,
a few non-active pixels mayappear on the screen asa
fixed point of black, blue,green or red. Please notethat
this does not affectthe performance of your product.
These pixels shall not beregarded as a failure.

-3-
INSTALLATION
High voltages are used in the operation of this television
receiver. Do not remove the cabinet back from your set.
Refer servicing to qualified service personnel.
To prevent fire or electrical shock hazard, do not expose
the television receiver to rain or moisture.
Do not drop or push objects into the television cabinet
slots or openings. Never spill any kind of liquid on the
television receiver.
Do not block the ventilation holes in the back cover.
Adequate ventilation is essential to prevent failure of
electrical components.
Do not trap the power supply cord under the television
receiver.
Never stand on, lean on, or suddenly push the television or
its stand. You should pay special attention to children.
Serious injury may result if it falls.
Do not place your television on an unstable cart, stand,
shelf or table. Serious injury to an individual , and damage
to the television, may result if it falls.
When the televisionreceiver is notused for an
extended period of time, it is advisable to disconnect
the ACpower cord fromthe ACoutlet.
Avoid exposing the television receiver to direct sunlight
and other sources of heat. Do not stand the television
receiver directly on other products which give off heat,
e.g. video cassette players and audio amplifiers. Do not
place naked flame sources, such as lighted candles on
the television.
Dim:515*320mm(
If the television is to be built into a compartment or similar
enclosure, the minimum distances must be maintained. Heat
build-up can reduce the service life of your television, and
can also be dangerous.

For wall mountingwith the optional bracket, please readthe following instruction and the bracket
instruction. Make surequalified service personnel perform the operation.
AWA bears no responsibility forimproper mounting that results in accidentor injury.
Wall MountingHoles Spacing and Location
Base Stand DisassembleIllustration
How to removethe stand from the TV
(The LCD Displayis very fragile, and must beprotected at all times when removingthe
base stand. Besure that no hard or sharpobject, or anything that could scratchor
damage the LCDdisplay, comesinto contact withit. DO NOTexert pressure onthe front
of the unitat any time because the screencould crack.)
1.Use the screwdriverto remove 4 screws from thescrew location.
2.Remove the basestand from the Main body.
4 Wall mount M4 Screws
-4-
INSTALLATION
100 mm
100 mm

FRONT PANEL
AC Power Cord......................... 1
Infrared Remote Control............ 1
User s Manual ........................ 1
Battery(AAA)........................... 2
ACCESSORIES
INSTALLATION
-5-
1 2 3
4 5 6
7 8 9 0
+
CH
_
+
_
VOL
1: Remote controlsensor.
2: Indicator LED: GREEN POWER ON.
RED STANDBY.
3: Key board
4: Power: Press this button toturn the unit
ON from STANDBY mode.
Press it againto turn the set back to
STANDBY.
5: ACpower switch:Press to turn ON/OFF TV.
6: DVD Player.
30 30
3
4
2
1
5
6

INSTALLATION
KEY BOARD
1.SOURCE
Todisplay the inputsource menu.
2.MENU
Todisplay main MENU.
3.CH+/CH-
In TV mode to change thechannel up
and down.
In MENU mode,to select themenu items .
In standby mode,it can turnon the TV.
4.VOL+/VOL-
Toadjust sound level.
In MENU mode,toselect the menuitems.
REAR PANEL
-6-
SOURCE
MENU
CH+
CH-
VOL+
VOL-
SOURCE
MENU
CH+
CH-
VOL+
VOL-
DVD SIDE PANEL
OPEN/CLOSE
PLAY/PAUSE
STOP
NEXT
USB
PREV
SD/MMC/MS
Disc label side facing you
Disc data side
×ó
ÓÒ
µçÔ´ÊäÈë
All the terminals are(from left to right):
AC POWER SOCKET, HDMI input,VGA ,YPbPr input,AV,Rear Audio input,PC AUDIO input,
ANTENNA SOCKET.
Note: 1.AV and YPbPr share the Rear Audio input channel.
2. When HDMI port get DVI signal ,the audio signal receives from the PC Audio channel.
USB
In DVD mode,press DVD/USB button
on the Remotecontrol, insert aUSB or
a MP3 playerwith USB interfaceto play
the MP3, JPEGfiles.
3 in 1Card Reader
In DVD mode,press DVD/USB button
on the Remotecontrol, you can
insert three kindsof card (SD,MMC,
MS) to playthe mp3 musicand JPEG
files. Allthe function isthe same to
playing a disc.
Caution:
When using USB/3in 1 CardReader
function, please donot insert inthe wrong
direction, or elseit will damagethe unit.

ANTENNA CONNECTION
INSTALLATION
Note:
Aerial connections:IEC(female).
Input impendance:75 unbalanced.
-7-

STEPS:
CONNECTING TO PC
Be sure boththe TV and computer areset to Poweroff.
1.Connect VGA and audio cable.
2.Connect the powercord.
3.Power on theTV, switch theinput source to VGA mode.
4.Power on thePC.
This sequence isvery important.
INSTALLATION
-8-
×ó
ÓÒ
µçÔ´ÊäÈë

PRESET MODE(recommended resolution is 1024*768@60Hz)
INSTALLATION
PC PRESET
-9-
1
2
3
4
5
6
7
8
9
720*400
640*480
800*600
800*600
800*600
800*600
1024*768
1024*768
1024*768
70
60
56
60
75
72
60
70
75
31.47
31.47
35.156
37.88
46.88
48.08
48.36
56.48
60.02
RESOLUTION V.Freq.(Hz) H.Freq.(KHz)

INSTALLATION
CONNECTING TO AV EQUIPMENTS
-10-
It can be connected to the following appliances: VCR, multi disc player, DVD, camcorder, video game
or stereo system, etc.....
YPbPr can support these video formats:480i,576i,480p,576p,720p,1080i,1080p,
This TV provides one group of AV ,one group of YPbPr for convenient connectionto VCR,
DVD or other video equipment. Please refer to the owner s manual of the equipment to be
connected as well.
You can use the input terminals on TV set rear as follows.
×ó
ÓÒ
µçÔ´ÊäÈë
To audio outputs
VIDEO EQUIPMENT
TO VIDEO
output
WR
W R
W R
GBR
GBR
Yellow (video)
White(audio L)
Red(audio R or Pr)
Y
W
R
Blue(Pb)
Green(Y)
B
G
HDMI
VIDEO EQUIPMENT with YPbPr
WR

REMOTE CONTROL
-11-
Remark:
BATTERY INSTALLATION
1. Remove the battery cover.
2. Inserting the 2 AAA 1.5V batteries making sure the polarity (+ or -) of the batteries
matches the polarity marks inside the unit.
3. Mount the battery cover. Replace with new batteries when the TV set begins to show
the following symptoms: Operation is unsteady or erratic. Sometimes the TV set does
not function with Remote Control Unit.
1) Alkaline Battery Recommended.
2) Remove batteries when they are exhausted or if the remote control is not to be used for
an extended period of time.

REMOTE CONTROL
KEYS FUNCTION
-12-
1
OK
23
456
7890
+
CH
_
+
_
VOL
POWER MUTE
TV AUDIO
RECALL/GOTO
TV MENU SOURCE
DVD MENU SOUND EXIT
PIC
SLEEP ASPECT
TEXT
TV/RADIO
DVD SETUP
EPG FAV INFO
DISPLAY DVD AUDIO
ANGLEPBCDVD/USB TITLE
SUBPAGE SIZE MIX
REVEAL HOLD LIST INDEX
RETURN SUBTITLE
FREEZE
2
3
4
1
5
6
7
8
9
10
11
12
13
14
15
16
17
18
19
20
21
22
23
24
25
26
27
28
29
30
31
32
33
34
35
36
1:POWER:To setthe TVto standby orpower on.
2:NUMERIC KEY:For direct accessto channels.
3:TV MENU:To displayTV menu.
4:CURSOR:To movewithin the menu.
6:VOL+/- :To adjustsound level.
7:PIC:To switchpicture mode.
8:SLEEP:Set timer toturn off theTV.
10:TV/RADIO:In DVB mode,it is used to switch
between digital TVchannels and radio
stations. Display/remove theprogramme
information.
11:EPG:To displayinformation about the
program being viewedand what's on next in
DTV mode.
12:FAV:To accessyour favourite channelslist
in TVor DTV mode.
14:TITLE:(page25)
19:TELETEXT KEYS:(page 14)
20:MUTE:To disableor enable thesound output.
21:TV/AUDIO:To selectthe available audio
language of TVprograms .
22:: RECALL/GOTO: To access thepreviously
viewed channel.
23: SOURCE: To select input source.
24: OK:To confirmselection.
25: EXIT:To returnto the previousmenu
or exit menu.
26: SOUND:To switchsound mode.
27: CH+/CH-:To accessthe next orprevious
channels.
28: ASPECT: To change picture aspect ratio.
29: TEXT:To enteror exit TELETEXT.
30: INFO:To displayinformation about the
channel being viewedor further information
about the programwhen in smallEPG
screen in DTVmode.
35: SUBTITLE:To switchbetween different
subtitles in DTVmode.
37:FREEZE:To freezethe picture.
37
NOTE: For the functionof DVD button ,please
refer to theDVD part at the back ofthis
instruction book.(page25-26)

OPERATION
-13-
BASIC OPERATION
TURN ON THEUINT
Press the POWERbutton on the remote control toswitch on the power. Thepower
indicator will lightup in green colour, pressthe POWER buttonagain to switchoff
the power,and the indicatorwill change tored.
CHANNEL SEARCH
Press the SOURCEbutton on the remote control toselect the TVor DTV inputmode,
and press theOK button to confirm.If you areusing the unit for the firsttime, an
Installation Guide menuwill be displayed to guide youthrough
WATCH TV PROGRAM
Press the CH-or CH+ button to select theprevious or next channels or pressthe 0-9
buttons to entera channel number directly.Press CH.LISTbutton to viewthe channels
list and press the buttons to selectthe desired TVprogrammes.
CHANGE VOLUME
Press the VOL- or VOL+ button toadjust the volume level. Press theVOL - button
repeatedly to decreasethe volume; press the VOL+ button repeatedly to increase
the volume from0 to 100.
Press the PIC button repeatedly tocycle through the available video picturemodes.
CHANGE SOUND MODE
Press the SOUND button repeatedly tocycle through the available sound modes.
VIEW CHANNELINFORAMTION
Press the INFObutton to display the preset channelinformation.
MUTE
Press the MUTE button to cutoff the soundoutput, press this button again toresume
sound output.
CHANGE INPUT SOURCE
Press the SOURCE button then pressthe buttons to select the inputsource and
press the OKbutton to confirm.
the channel scan,
Use the remotecontrol to finish channel scan (youcan also refer to CHANNEL MENU
(page 16) inthis manual for the channel scanoperation).
CHANGE PICTURE MODE
EXIT MENU
OK
NEW INSTALLATION
Menu Language English
Auto Tuning

OPERATION
-14-
E
TEXT
SELECTING A PAGE
DIRECT ACCESS
TO THE ITEMS
INDEX
SUB PAGE
HOLD
REVEAL
Press: You will obtain:
TELETEXT
Enter the numberof the page required using the0 to 9
up/down. Example: page120, enter 120. The number is
displayed top left,the counter turns and then thepage is
displayed. Repeat thisoperation to view another page. If
the counter continuesto search, this means that thepage is
not transmitted. Select another number.
Coloured icons aredisplayed at the bottom of thescreen. The 4
coloured buttons onthe remote control are used toaccess the
items or correspondingpages. The colouredicons flash when
the item orthe page is not yet available.
This returns tothe contents page (usually page 100).
Certain pages containsubpages which are automatically
displayed successively.This key isused to stopor resume sub-
page acquisition. Theindication appears topleft.
To freeze the page.
To display or hide the concealed information (games solutions).
This is usedto enter orexit teletext mode.The summary
appears with alist of items that can beaccessed. Each item
has a corresponding 3 digit page number. If the channel
selected does notbroadcast teletext, theindication 100 will
be displayed andthe screen will remain blank (inthis case,
exit teletext andselect another channel).
Teletextis an informationsystem broadcast bycertain channels which can be
consulted like anewspaper. Italso offers accessto subtitles forviewers with
hearing problems orwho are not familiar with thetransmission language (cable
networks, satellite channels,etc.)
SIZE To zoom the page.
LIST To saveand display your favouritepages.
MIX To mixteletext with video pictures.

OPERATION
-15-
EPG (Electronic Programme Guide)
DTV
800 France 2
802 France 5
803 ARTE
804 LCP
805 France 3
801 France 4
PROGRAMME GUIDE DTV 801 France 4
1555.1625 Last Exit
20 Feb 2006 16:07
20 Feb
16:00 17:00
Information
Last Exit
Programme 2
Programme 3
Programme 4
Programme 5
EXIT Reminder
OK
INFO
Movie 1
DATE
Schedule
The EPG (ElectronicProgramme Guide) menu is used tolook at what is
being broadcast ona DTV orRadio channel at a later pointin time.
he detailed programme
information of thechannel currently being viewed will bedisplayed.
Press the EPGbutton to access the EPG menu,t
To seewhat is goingto be broadcast after the currentprogramme, press the
button to viewfuture programmes andpress the buttonto return towards
the programmes televisedat the current time.
To viewa different channel,press the or button. To book awanted
programme for laterwatching, press the blue button toenter Reminder menu.
Press the greenbutton to enter the schedule list.
To exitthe EPG menuand watch the selected channel, pressthe EPG
or EXIT button.

OPERATION
-16-
EXIT MENU
OK
CHANNEL
Auto Tuning
DTV Manual Tuning
ATV ManualTuning
Programme Edit
1.CHANNEL MENU
The first itemof the menuis CHANNELmenu( for TVsource only).
Youcan search channelsand edit programshere.
1).Auto Tuning:Search all the channels automatically(ATV, DTV &Radio)
Press the buttonsto select countrythen press the buttons to select start or
cancel.
Press the OKbutton to start or exit autotuning .
NOTE: Allthe channels includingATV, DTV andRadio can be tuned at theone time .
2).DTV Manual Tuning: Youcan select aDTV channel then find the programin this
channel.
Pls press the buttons to selectthe channel ,then press the OK button tosearch
the programs .
NOTE: Bad NormalGood refers tothe signal intensity.
Please select country first
then select Start toupdate info
Country selection
Start Cancel
Australia
DTV Manual Tuning
UHF CH 30
Please select channel then
press OK to search
Bad Nomal Good
EXIT MENU
MENU OPERATION
OK

OPERATION
-17-
icon will disappear.
3). ATV Manual Tuning :Youcan change thesound system to search the analog
TV channels andfine tune thechannels, then store the channels youselected.
Press the red button to store the channel aftermanual tuning .
4). Programme Edit:Youcan edit programs in the followingitems.
Delete
Press the redbutton, it will shows a reddelete cursor.
Press the buttons to choose the program.
Press the redbutton again, the program will bedeleted.
Rename
Youcan only rename ATV programs.
Move the cursorto the program, press the greenbutton to rename the program,
Press the TVMENU button to exit edit ,Press the EXITbutton to exit the menu.
Move
Move the cursorto the program, press the yellowbutton, it will show a yellow
cursor, Pressthe buttons tomove the program.
Skip
Press the buttons to choose the program, then pressthe blue button to skip
this program, the icon will show on the rightside of the program.
Choose the skippedprogram and press the blue buttonagain to cancel skip, the
FAV
Press the buttons to choose the program, press theFAV button, itwill show
on the rightside of the program.Choose the FAV program andpress the FAV button
again to cancelFAV, the icon will disappear .
SKIP
SKIP
ATV ManualTuning
Storage To
EXIT SAVE
System BG
Current CH 1
Search
Fine-Tune
Skip Yes
Frequency 255.25MHz
Once your favouritegroup is created,youcan press theFAV button toquickly access
your favourite channellist.
Storage To: To select the channel number you want tosave to.
System: To select the TV sound system.
Current CH: To select the current channel.
Search: Tosearch backward/forward.
Fine-Tune:To fine tuning when the signal level of current channel isweak.
Skip: When it setto Yes, the currentchannel will be skipped while you are
changing channels by pressing the CH+ orCH- buttons.

-18-
The second itemof the menuis PICTURE menu.
You can adjustpicture effect here,including contrast, brightnessand colour as
well as otherpicture functions.
Press the buttonsto select items and press the buttons to adjust.
EXIT MENU
OK
PICTURE
Picture Mode Dynamic
Contrast
Brightness
Colour
Sharpness
Tint
70
70
70
70
0
OPERATION
NOTE:
1).Tint is available in NTSCsystem only.
2).PC Setup isavailable in VGAmode only.
EXIT MENU
OK
SOUND
Sound Mode Standard
Treble
Bass
Balance
Surround Sound Off
3.SOUND MENU
The third itemof the menu is the SOUNDmenu.
Youcan adjust the sound effect here,including treble, bassand balance aswell
as other soundfunctions.
Press the buttonsto select and press the buttonsto adjust.
50
50
0
2. PICTURE MENU
EXIT MENU
OK
PICTURE
Colour Temp Normal
Red
Green
Blue
Aspect Ratio 16:9
Noise Reduction ON
70
70
70
EXIT MENU
OK
PICTURE
PC Setup
EXIT MENU
OK
PICTURE
Auto Adjust
H-Position
V-Position
Clock
Phase
70
70
70
70
(1) (2)
(3) (4)
Other manuals for MSDV2203-F3-D0
1
Table of contents
Other AWA LCD TV manuals