AWID HH-6600 User manual

User’s Manual
HH-6600 RFID Handheld Reader
Esc
alpha
Func Enter
a
bc
d
e
fgh
m
r
q
i
j
n
ok
p
Del
t
x
yz
BkSp
uvw
l
s
123
456
7
89
0
@
%
“
<
,
/
.
.-
+
=
(
[
[
102008A


Preface
This manual explains how to install, operate and maintain the HH-6600.
No part of this publication may be reproduced or used in any form, or by any electrical or
mechanical means, without permission in writing from the manufacturer. This includes electronic
or mechanical means, such as photocopying, recording, or information storage and retrieval
systems. The material in this manual is subject to change without notice.
© Copyright 2009 Applied Wireless Identications Group, Inc. All rights reserved.
AWID website address: http//www.awid.com
AWID is a registered trademark of Applied Wireless Identications Group, Inc.
Bluetooth is a registered trademark of Bluetooth SIG.
Regulatory Compliance Statements
Federal Communication Commission Interference Statement
This equipment has been tested and found to comply with the limits for a Class B digital
device, pursuant to Part 15 of the FCC Rules. These limits are designed to provide reasonable
protection against harmful interference in a residential installation. This equipment generates,
uses and can radiate radio frequency energy and, if not installed and used in accordance with
the instructions, may cause harmful interference to radio communications. However, there is
no guarantee that interference will not occur in a particular installation. If this equipment does
cause harmful interference to radio or television reception, which can be determined by turning
the equipment off and on, the user is encouraged to try to correct the interference by one of the
following measures:
Reorient or relocate the receiving antenna.
●
Increase the separation between the equipment and receiver.
●
Connect the equipment into an outlet on a circuit different from that to which the receiver is●connected.
Consult the dealer or an experienced radio/TV technician for help.
●
FCC Caution:
Any changes or modications not expressly approved by the party responsible for compliance
could void the user’s authority to operate this equipment.
This device complies with Part 15 of the FCC Rules. Operation is subject to the following two
conditions: (1) This device may not cause harmful interference, and (2) this device must accept
any interference received, including interference that may cause undesired operation.
About This Manual
i

ii
This device and its antenna(s) must not be co-located or operating in conjunction with any other
antenna or transmitter.
RoHS Statement
This device conforms to RoHS (Reduction Of Hazardous Substances) European Union
regulations that set maximum concentration limits on hazardous materials used in electrical and
electronic equipment.
Laser Information
The AWID HH-6600 series is certied in the U.S. to conform to the requirements of DHHS/CDRH
21CFR Subchapter J and to the requirements of IEC 825-1. Class II and Class 2 products are
not considered to be hazardous. The HH-6600 series contains internally a Visible Laser Diode
(VLD) whose emissions do not exceed the maximum limits as set forth in the above regulations.
The scanner is designed so that there is no human access to harmful laser light during normal
operation, user maintenance or during prescribed service operations.
The laser safety warning label required by the DHHS/IEC for the HH-6600 series’s optional laser
scanner module is located on the memory compartment cover, on the back of the unit.
CAUTION!
Use of controls or adjustments or performance of procedures other than those
specified herein may result in hazardous laser light. Use of optical instruments
with the scanner will increase eye hazard. Optical instruments include binoculars,
microscopes, and magnifying glasses. This does not include eye glasses worn by
the user.
Notices
This unit is equipped with battery packs and backup battery. It is possible that the AWID HH-
6600 may not power-on due to battery discharge as a result of storage.
In the above situation, plug the HH-6600 to the USB charging cable which is with DC in port or
put the unit into the AWID HH-6600 Cradle (with 12V/2AAC-DC adapter), and recharge the unit
for 16 hours in order to fully charge its backup battery.
The backup battery will charge from external power or the main battery (if the main battery still
has enough power to turn on). In the event the main battery is fully charged, refrain from using
the HH-6600 for 16 hours in order for the main battery to fully charge the backup battery.
Backing-up data by backup battery only without the main battery installed in battery compartment
may take as long as 6 hours. Therefore, in order to prevent data protection failure due to backup
battery failure, do not leave the HH-6600 without the rechargeable battery pack installed, or
without connection to AC power for an extended period of time.
NOTE:
The rst time you use the HH-6600, you must turn on the backup battery switch. ●See turn on
the backup battery & grip battery switch on page 6 for more information.

iii
Battery Charge Notice
It is important to consider the environment temperature whenever you are charging the Lithium-
Ion battery pack. The process is most efcient at normal room temperature or slightly cooler. It
is essential that you charge batteries within the stated range of 0°C to 40°C. Charging batteries
outside of the specied range could damage the batteries and shorten their charging life cycle.
Storage and Safety Notice
Although charged Lithium-Ion batteries may be left unused for several months, their capacity may
be depleted due to build up of internal resistance. If this happens they will require recharging
prior to use. Lithium-Ion batteries may be stored at temperatures between -20°C to 60°C,
however they may be depleted more rapidly at the high end of this range. It is recommended to
store batteries within normal room temperature ranges.
IMPORTANT NOTE
FCC Radiation Exposure Statement:This equipment complies with FCC radiation exposure limits
set forth for an uncontrolled environment. This equipment should be installed and operated with
minimum distance 1.5cm between the radiator & your body.
FCC Radiation Exposure Statement
This equipment complies with FCC radiation exposure limits set forth for an
uncontrolled environment . End users must follow the specific operating instructions
for satisfying RF exposure compliance. To maintain compliance with FCC RF exposure
compliance requirements, please follow operation instruction asdocumented in this manual.
For hdesktop operation only. This PRFID Handheld Terminal meets FCC RF exposure
guidelines when used in hand-held or desktop operation.

Table of Contents
Preface...................................................................................i
About This Manual................................................................................ i
Regulatory Compliance Statements...............................................................................i
Federal Communication Commission Interference Statement.................................i
RoHS Statement...................................................................................................... ii
Laser Information ..........................................................................................................ii
Notices ..........................................................................................................................ii
Battery Charge Notice .............................................................................................iii
Storage and Safety Notice.......................................................................................iii
Chapter 1 ..............................................................................1
Getting Started.....................................................................................1
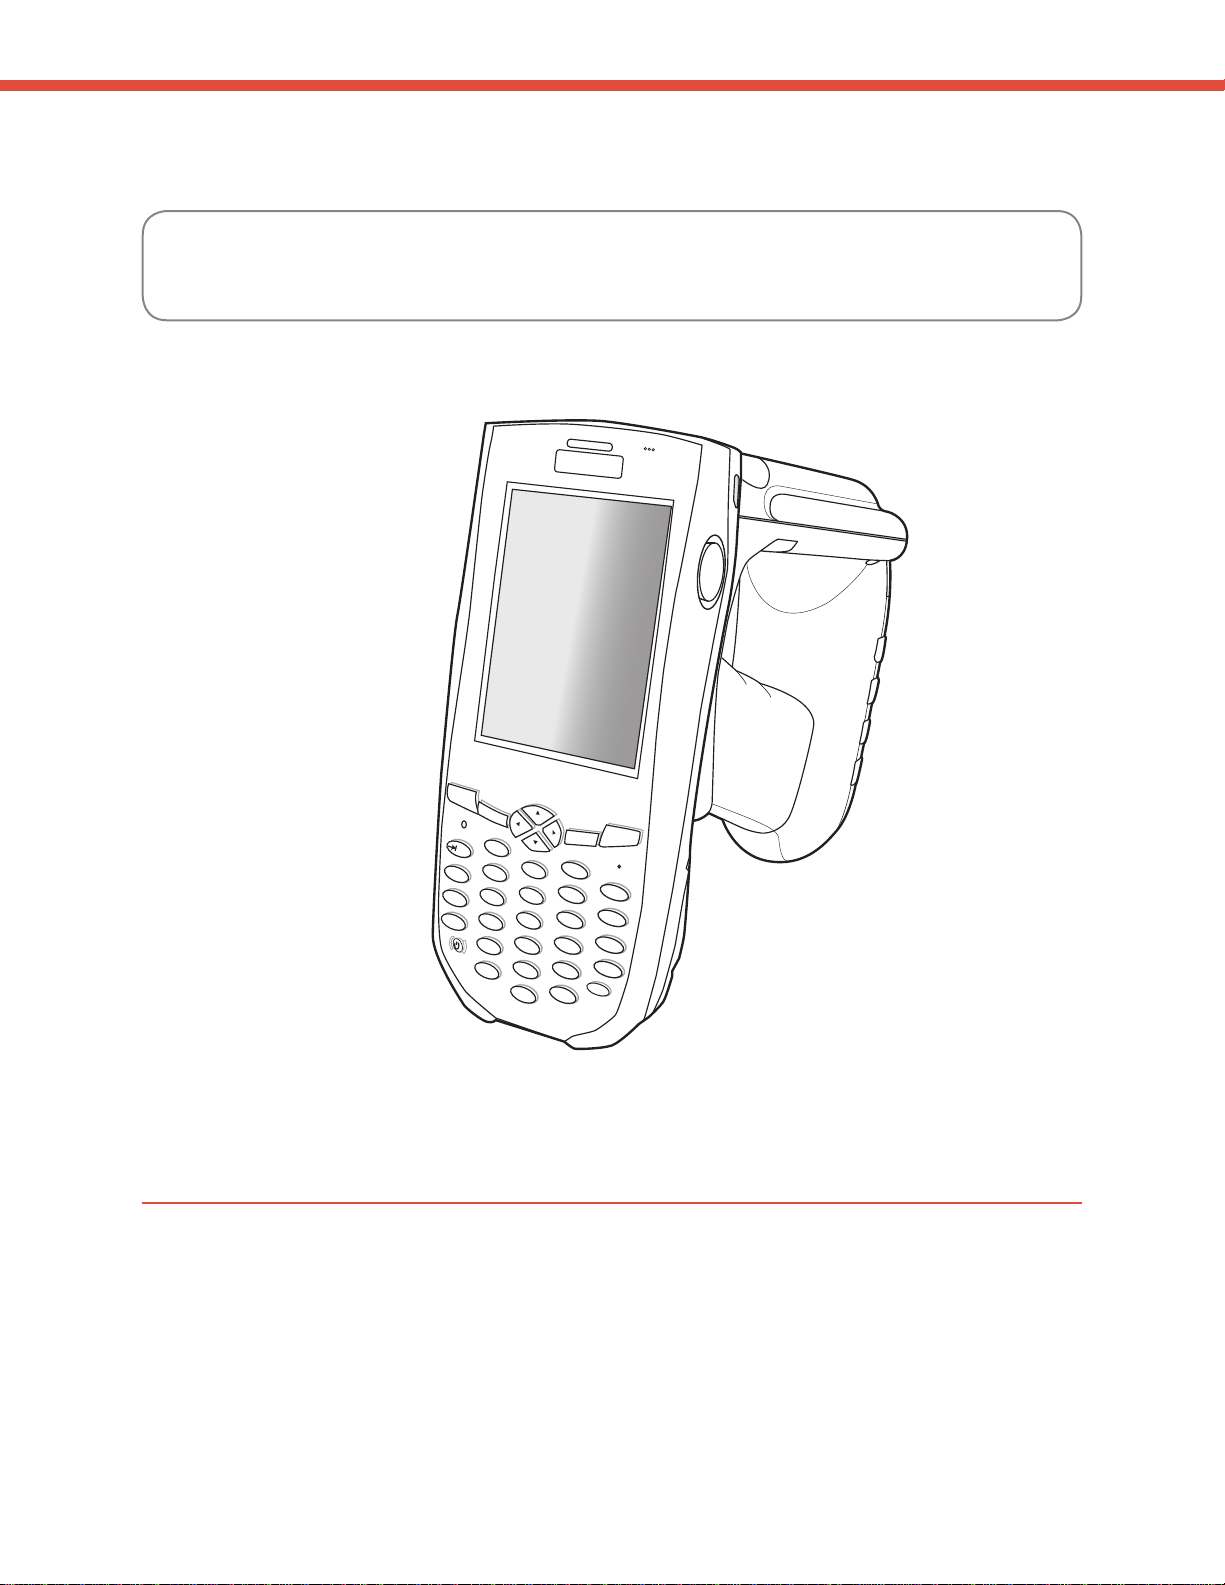
Introducing the HH-6600...............................................................................................1
Features...................................................................................................................1
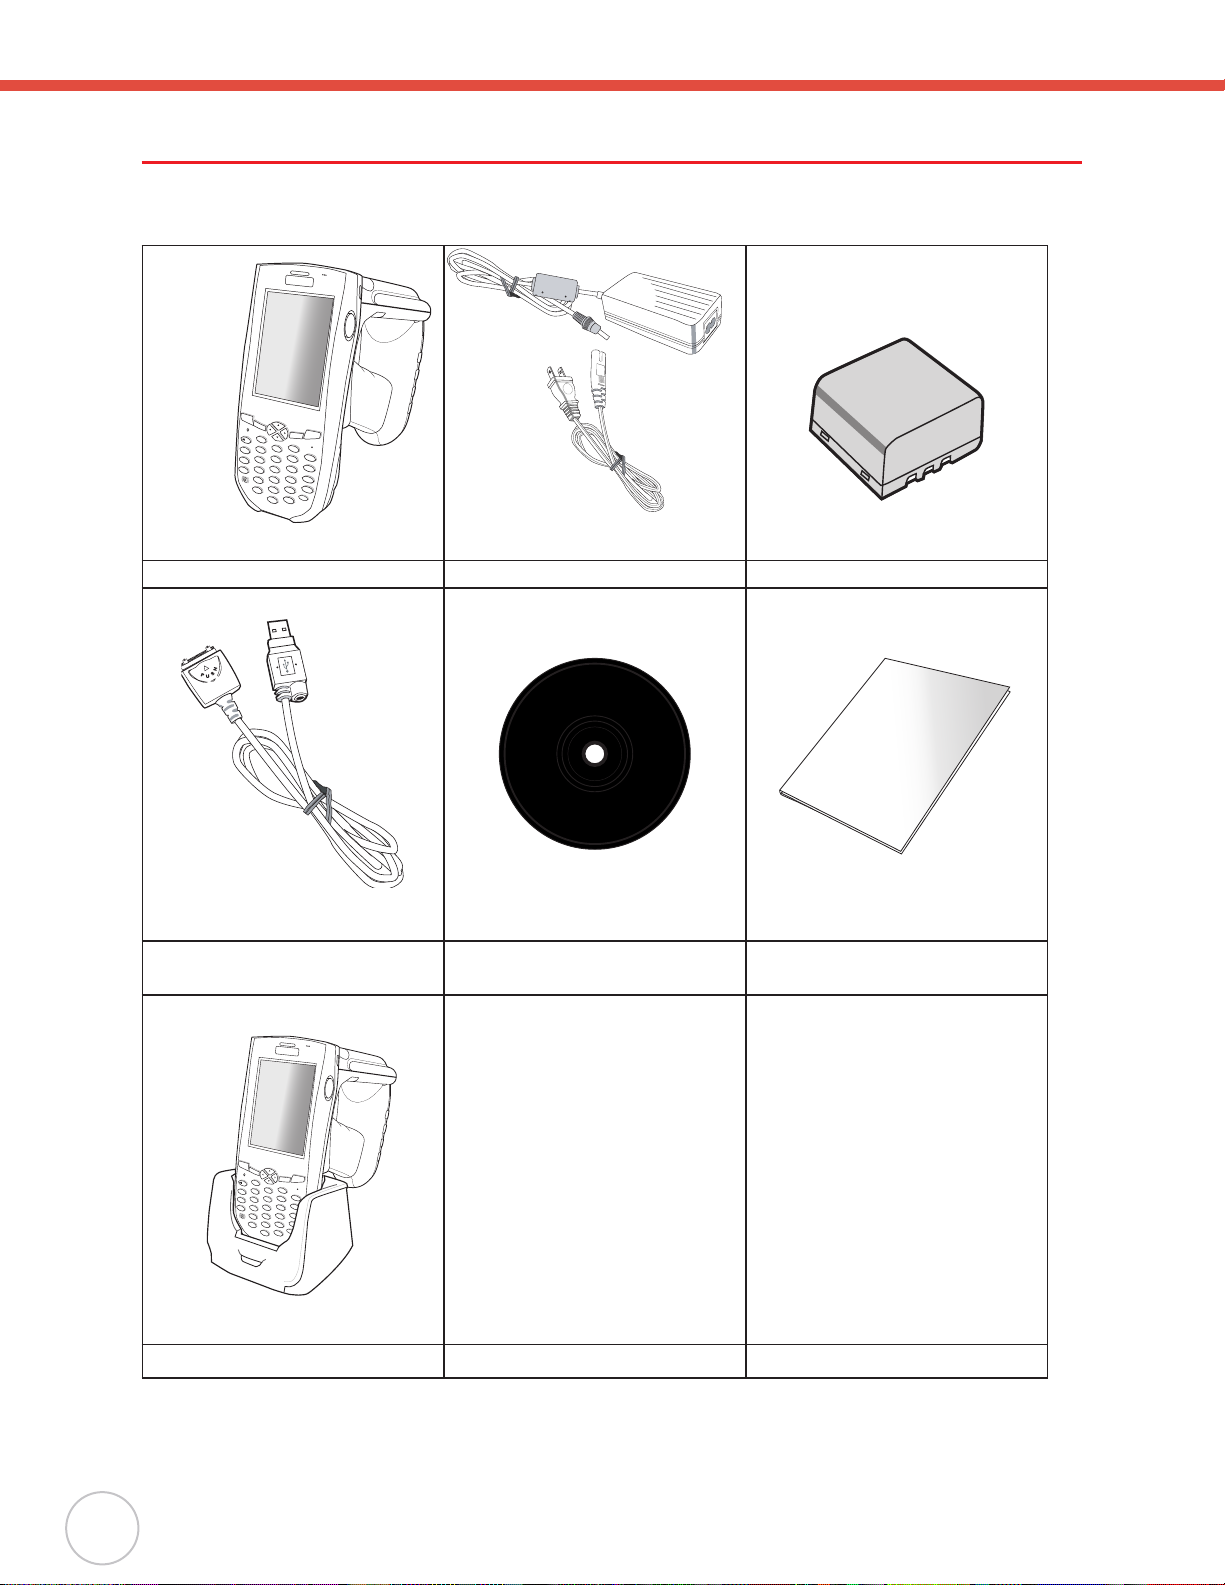
Package Contents.........................................................................................................2
ATour of the HH-6600...................................................................................................3
Back View................................................................................................................4
Bottom View.............................................................................................................5
Setting up the HH-6600.................................................................................................5
Installing the Battery................................................................................................5
Charging the Battery................................................................................................8
Charging the Battery using the Synchronization Power Cable ..........................8
Charging the Battery with the Docking Station...................................................8
Checking the Battery Status...............................................................................9
Connecting the HH-6600 to a PC............................................................................9
Turning the HH-6600 on for the First Time ............................................................10
Powering On ....................................................................................................10
Calibrating the HH-6600 Screen......................................................................11
Setting the Time and Date ...............................................................................12
Adjusting the Screen Brightness......................................................................12
Chapter 2 ............................................................................13
Using the Hardware ...........................................................................13
Using Function keys ..............................................................................................13
Toggle toAlpha Mode and CAPS ..........................................................................14
Adjusting Settings........................................................................................................15
iv

v
Checking the Main and Backup Battery Status...........................................................16
Using the Stylus ..........................................................................................................17
Using the Laser Scanner.............................................................................................17
Scanner Settings.........................................................................................................18
Scan2Key....................................................................................................................19
Using the RFID............................................................................................................19
Launching UHF RFID Demo Program...................................................................19
Chapter 3 ............................................................................22
Getting Connected .............................................................................22
Establishing Device-PC Connection............................................................................22
Installing Microsoft ActiveSync ..............................................................................22
Connecting the Device to Your Computer..............................................................22
Using ActiveSync to Exchange Files...........................................................................23
Using the WLAN..........................................................................................................24
Setting up the Wireless Local Area Network Card.................................................24
Obtaining an IPAddress via DHCP Server......................................................24
Specifying an IPAddress .................................................................................25
WiFi Connection...............................................................................................26
Using the Summit Utilities................................................................................28
Admin Login...........................................................................................................28
Scan Available AP..................................................................................................28
Encryption:.............................................................................................................29
Commit and Activate..............................................................................................29
Appendix .............................................................................30
System Specications ........................................................................30


1
Chapter 1
Introducing the HH-6600
Thank you for purchasing the HH-6600 handheld terminal. Your HH-6600 was
designed for RFID mobile application.
HH-6600 UHF
AWID’s HH-6600 UHF handheld terminal is a rugged dual technology multi-tag UHF RFID and
barcode reader. It can read both EPC Gen 1 and Gen 2 RFID tags and comes with embedded
RFID middleware and Windows CE 5.0 for easy integration. The HH-6600 has a battery life of
up to 12 hours – long enough for operation. Connectivity options include WLAN 802.11b/g and
Bluetooth. It has an IP54 rated and 4 feet (1.2 meter) drop tested rugged PDA construction.
Features
Dual technology barcode scanner & RFID reader●
Built in Barcode Scanner
●
IP54 rated and 4 feet (1.2m) drop tested
●
Lightest in its class
●
Windows WinCE 5.0 Professional Plus operating system
●
WLAN 802.11b/g and Bluetooth connectivity built–in
●
Getting Started

2
Copyright 2009 Applied Wireless Identications Group, Inc. All rights reserved.
Package Contents
After opening the box, ensure the following accessories for the HH-6600 are present:
HH-6600 Terminal Power Adapter and Cable Battery Pack
Synchronization and Power
Cable CD-ROM User Manual
Esc
alpha
Func
Enter
a
bc
d
e
fgh
m
r
q
i
j
n
ok
p
Del
t
x
yz
BkSp
uvw
l
s
123
456
7
89
0
@
%
“
<
,
/
.
.-
+
=
(
[
[
Cradle (optional)
If anything is missing or appears damaged in any way, please contact your AWID service team.
Esc
alpha
Func Enter
a
bc
d
e
fgh
m
r
q
i
j
n
ok
p
Del
t
x
yz
BkSp
uvw
l
s
123
456
7
89
0
@
%
“
<
,/
.
.-
+
=
(
[
[

Chapter 1 Getting Started
3
A Tour of the HH-6600
The following sections describe the main components and features of the HH-6600.
Front Right View
Esc
alpha
Func
Enter
a
bc
d
e
fgh
m
r
q
i
j
n
ok
p
Del
t
x
yz
BkSp
uvw
l
s
123
456
7
89
0
@
%
“
<
,
/
.
.-
+
=
(
[
[
1
7
4
3
2
56
No. Component Description
1. Status Indicator Indicates the battery charging and barcode scanning
status.
Green - Battery is fully charged or barcode scanning
process is completed without error.
Red - Battery is charging, barcode scanner is activated
and processing.
2. LCD Touch Screen Displays the applications and data stored on your
device. It is touch-sensitive and responds to the stylus
or nger.
3. Alpha Mode Indicator Indicates the Alpha Mode status.
4. Keypad Keypad interface for controlling the HH-6600. See
Using the Hardware on page 13 for more information.
5. Power Button If the device is off, press this button to turn it on.
Alternatively, when the unit is on, this key must be
pressed and held down for about two seconds in order
to turn the device off.
6. Microphone Used to receive sound.
7. Right scanner trigger button Press to activate the barcode laser scanner.

4
Copyright 2009 Applied Wireless Identications Group, Inc. All rights reserved.
Back View
10
12
13
8
11
14
9
15
16
No. Component Description
8. Stylus Enables you to interact with the operating system. To
use the stylus, remove it from its holder and hold it the
same way you hold a pen or pencil.
9. Barcode Scanner Window Used to scan barcodes.
10. Infrared (IR) Port Uses infrared technology to transmit and receive data
from other IR-enabled devices.
11. Left Scanner Trigger Button Press to activate the barcode laser scanner.
12. Reset Button Uses paper clip press into the button to reset your
device.
13. Bar Code Scanner Trigger Press to activate the barcode scanner.
14. Battery Compartment Houses the removable and rechargeable 7.4V
4050mAh lithium-ion battery pack
15. Strap Lug Attach the strap with the termial.
16. RFID Antenna Used to receive data from RFID tag.

Chapter 1 Getting Started
5
Bottom View
17
18
No. Component Description
17. Battery Pack Houses the rechargeable lithium-ion battery pack
18. Universal connector Connects your device to a synchronization power cable,
which in turn connects to the computer’s USB port and
through the AC adapter to an electrical outlet.
This allows you to recharge your device and perform an
ActiveSync operation.
Setting up the HH-6600
This section explains how to install and charge the battery, how to check battery status, how to
connect the HH-6600 to a PC, how to turn on the HH-6600 for the rst time, how to install an
optional Wireless Local Area Network PCMCIA card, and how to calibrate the screen.
Installing the Battery Pack
WARNING!
There is a risk of re and burns if the battery pack is handled improperly. DO NOT
disassemble, crush, puncture, short external contacts, or dispose the battery pack in
re or water. DO NOT attempt to open or service the battery pack. Dispose of used
batteries according to local recycling guidelines in your area.
A backup battery cell is embedded into your device to prevent data loss in instances when the
removable battery pack is removed or completely discharged. This backup battery cell will only
support the system for a maximum of 72 hours.
NOTE:
To enable the internal battery cell to provide backup power supply, charge your device with●the main battery pack for at least 16 hours.
The rst time you use the HH-6600, you must turn on the backup battery switch. ●See turn on
the backup battery & grip battery switch on page 6 for more information.
The first time you use the HH-6600, you must activate the LCD heater switch. When●activated, LCD heater will turn on automatically when the temperature is lower than 14° F /
-10°C.

6
Copyright 2009 Applied Wireless Identications Group, Inc. All rights reserved.
1. Open the battery compartment using the slide tabs in the direction shown in the illustration.
2. Locate the grip battery switch and turn left to power on.
ON OFF
3. Position the battery pack, making sure the battery contacts are aligned with the contacts in the
compartment, as shown in the following illustration.
Backup battery & grip
battery switch
Battery contacts

Chapter 1 Getting Started
7
4. Place the battery pack into the battery bay and press the battery securely into the
compartment.
5. Replace the battery compartment cover, push down the tabs and slide them back into place
as shown in the illustration.

8
Copyright 2009 Applied Wireless Identications Group, Inc. All rights reserved.
Charging the Battery
Before using the HH-6600 for the rst time, you need to charge it for about 16 hours. After that,
you can charge the HH-6600 every day to recharge the battery to full capacity. Charge the HH-
6600 using the synchronization power cable or the docking station.
CAUTION!
Operating the HH-6600 for the rst time without the AC adapter, and without fully
charging the backup battery may result in loss of data stored in RAM memory.
When the main battery is removed, the backup battery retains RAM data in memory
for 72 hours; charge the battery as soon as possible to avoid the data loss in RAM
memory.
NOTE:
Turn the backup battery swith on before charging the battery. Data you enter may not be
properly stored until the built-in backup battery has been adequately charged.
Charging the Battery using the Synchronization Power Cable
1. Connect the synchronization power cable connector to the HH-6600 (1).
2. Plug the AC adapter cable into the power jack on the USB connector (2).
3. Connect the AC adapter into an electrical outlet (3).
3
2
1
Esc alphaFunc Enter
123
6
9
(/
*
-
+
[
[
Del
,
<=
“
8
7
0
@
%
.5
4
abc
e
d
i
n
st
o
j
xy
u
p
k
fg
l
q
v
z
w
Bksp
r
m
h
Charging the Battery with the Docking Station
1. Plug the AC adapter cable into the power jack on the docking station, then connect the AC
adapter into an electrical outlet.

Chapter 1 Getting Started
9
2. Slide the device into the docking station until it clicks into
place.
3. The connection is secure when the bottom edge of the
device is aligned with the docking station, and the LED
indicator on the device lights up red.
LED Status
LED Meaning
HH-6600 Solid Red Charging
Solid Green Charging complete
Docking Station Solid Green Power is on
Checking the Battery Status
If the main battery level becomes low in the course
of normal use, a status icon appears on the
device screen system tray indicating low or very low
battery status. In both cases, perform an ActiveSync
operation to back up your data, then recharge your
device as soon as possible. If the battery level
reaches low status, the device will enter suspend
mode; if the battery level reaches very low status, the
device will enter deep sleep mode. In this case, you
have about 72 hours to recharge your device after
which you risk losing all data on your device’s internal
memory.
When the backup battery charge is low, an icon
appears in the system tray indicating that you
should replace the backup battery as soon as
possible.
Connecting the HH-6600 to a PC
Use the synchronization power cable to connect the HH-6600 to a PC to use with ActiveSync.
1. Connect the USB connector jack to the HH-6600 (1).
2. Plug the USB connector into a serial port on the PC and connect the AC adapter into the USB
connector (2).
3. Connect the AC adapter into an electrical outlet (3).
Esc
alpha
Func
Enter
a
bc
d
e
fgh
m
r
q
i
j
n
ok
p
Del
t
x
yz
BkSp
uvw
l
s
123
456
7
89
0
@
%
“
<
,
/
.
.-
+
=
(
[
[

10
Copyright 2009 Applied Wireless Identications Group, Inc. All rights reserved.
3
2
1
Esc alpha Func Enter
123
6
9
(/
*
-
+
[
[
Del
,
<=
“
8
7
0
@
%
.5
4
abc
e
d
i
n
st
o
j
xy
u
p
k
fg
l
q
v
z
w
Bksp
r
m
h
Turning the HH-6600 on for the First Time
After you have initially charged your device for about 16 hours, the device is ready to be used.
You can now start up your device where you’ll adjust the screen brightness, calibrate the display,
and set up the system time zone, date and time.
Powering On
1. Turn on your device by pressing the power buttonon the front panel.
2. TheAWID HH-6600 welcome screen appears for a moment followed by the calibration screen.
Esc alpha Func Enter
123
6
9
(/
*
-
+
[
[
Del
,
<=
“
8
7
0
@
%
.5
4
abc
e
d
i
n
st
o
j
xy
u
p
k
fg
l
q
v
z
w
Bksp
r
m
h
Power Button

Chapter 1 Getting Started
11
Calibrating the HH-6600 Screen
The calibrate screen automatically
appears when the unit is powered-on
for the rst time or after the system is
reset.
This screen will automatically appear
when the unit is powered-on for the
first time or after the system is reset.
This screen can also be accessed
at any time by pressing the hot key
[FUNC] and the [ESC] key.
The HH-6600 prompts you to calibrate the unit by
tapping a sequence of screen locations. Tap gently
but rmly.
When you have completed the series of taps,
press the [ENT] key to confirm calibration or
press the [ESC] key to cancel it. After confirming
calibration, the Date/Time Properties screen
appears prompting you to set the date and time.
Esc alpha Func Enter
123
6
9
(/
*
-
+
[
[
Del
,
<=
“
8
7
0
@
%
.5
4
abc
e
d
i
n
st
o
j
xy
u
p
k
fg
l
q
v
z
w
Bksp
r
m
h
Function Kay
ESC key

12
Copyright 2009 Applied Wireless Identications Group, Inc. All rights reserved.
Setting the Time and Date
In the Date/Time Properties window, use the stylus
to select the current date and time, time zone, and
daylight saving time option.
Adjusting the Screen Brightness
Adjust the screen brightness by pressing the
Function button [FUNC] to enable the soft keys
and pressing the left (decrease brightness) or right
(increase brightness) cursor buttons.
Esc alpha Func Enter
123
6
9
(/
*
-
+
[
[
Del
,
<=
“
8
7
0
@
%
.5
4
abc
e
d
i
n
st
o
j
xy
u
p
k
fg
l
q
v
z
w
Bksp
r
m
h
Function Button
Increase Brightness
Decrease Brightness
Other manuals for HH-6600
1
This manual suits for next models
1
Table of contents
Other AWID RFID System manuals