AXC TrueBrake User manual

TrueBrake Installation Manual v1.0 -November 2019
© Aeroxcraft Ltd 2019
AXC Logo is registered trademark of Aeroxcraft Ltd. Logitech the Logitech logo and other Logitech marks are owned by Logitech and may be
registered.
*Aeroxcraft Ltd will not be held responsible for any damage to your Logitech pedals or steering wheel.
www.axc-sim.com
Installation Manual
For Logitech G29/G920 Pedals

TrueBrake Installation Manual v1.0 -November 2019
© Aeroxcraft Ltd 2019
AXC Logo is registered trademark of Aeroxcraft Ltd. Logitech the Logitech logo and other Logitech marks are owned by Logitech and may be
registered.
*Aeroxcraft Ltd will not be held responsible for any damage to your Logitech pedals or steering wheel.
Introduction
We recommend you read these instructions in full
before starting to
install TrueBrake.*
Make sure you have all the correct tools
before
starting.
Take notes and/or photos
during disassembly that you
can refer to when re
-assembling the pedals.
Do not over
-tighten screws as you can strip the
threads.
If you are under 18 years old seek the help of a
responsible and competent adult
.
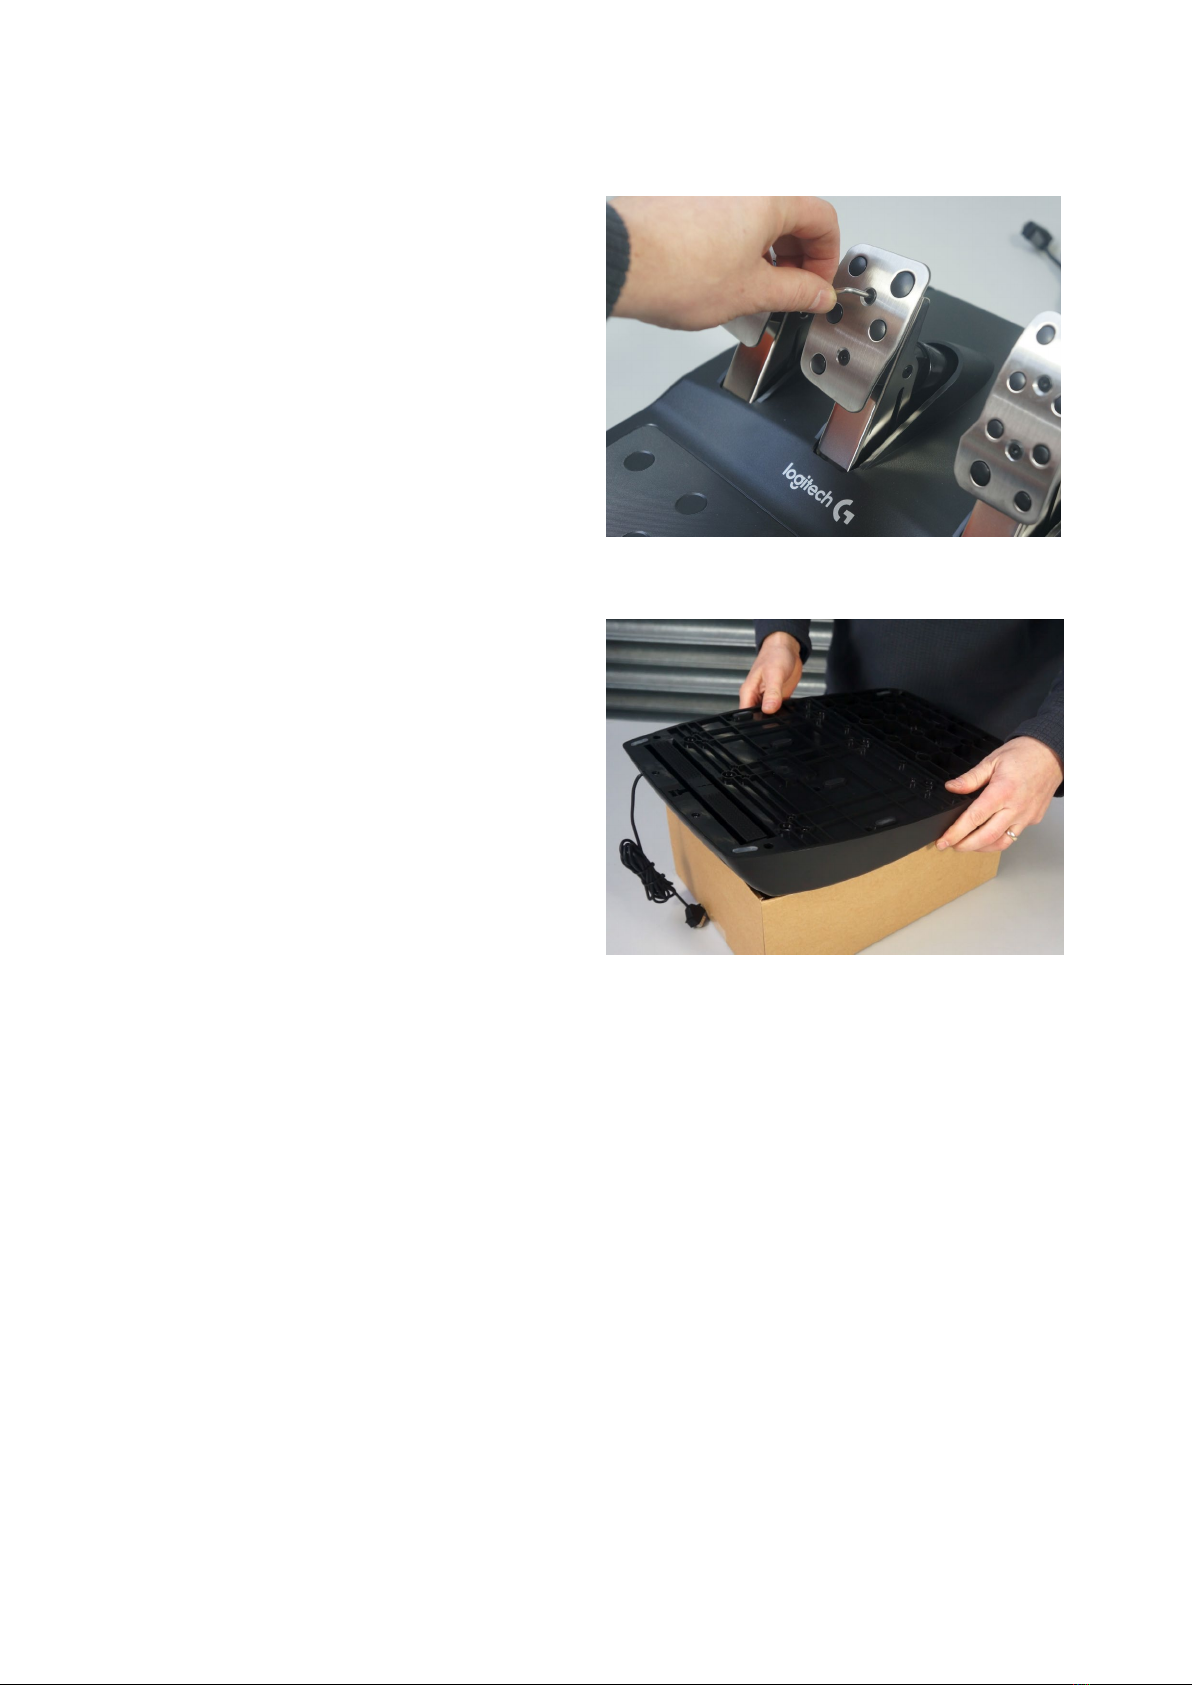
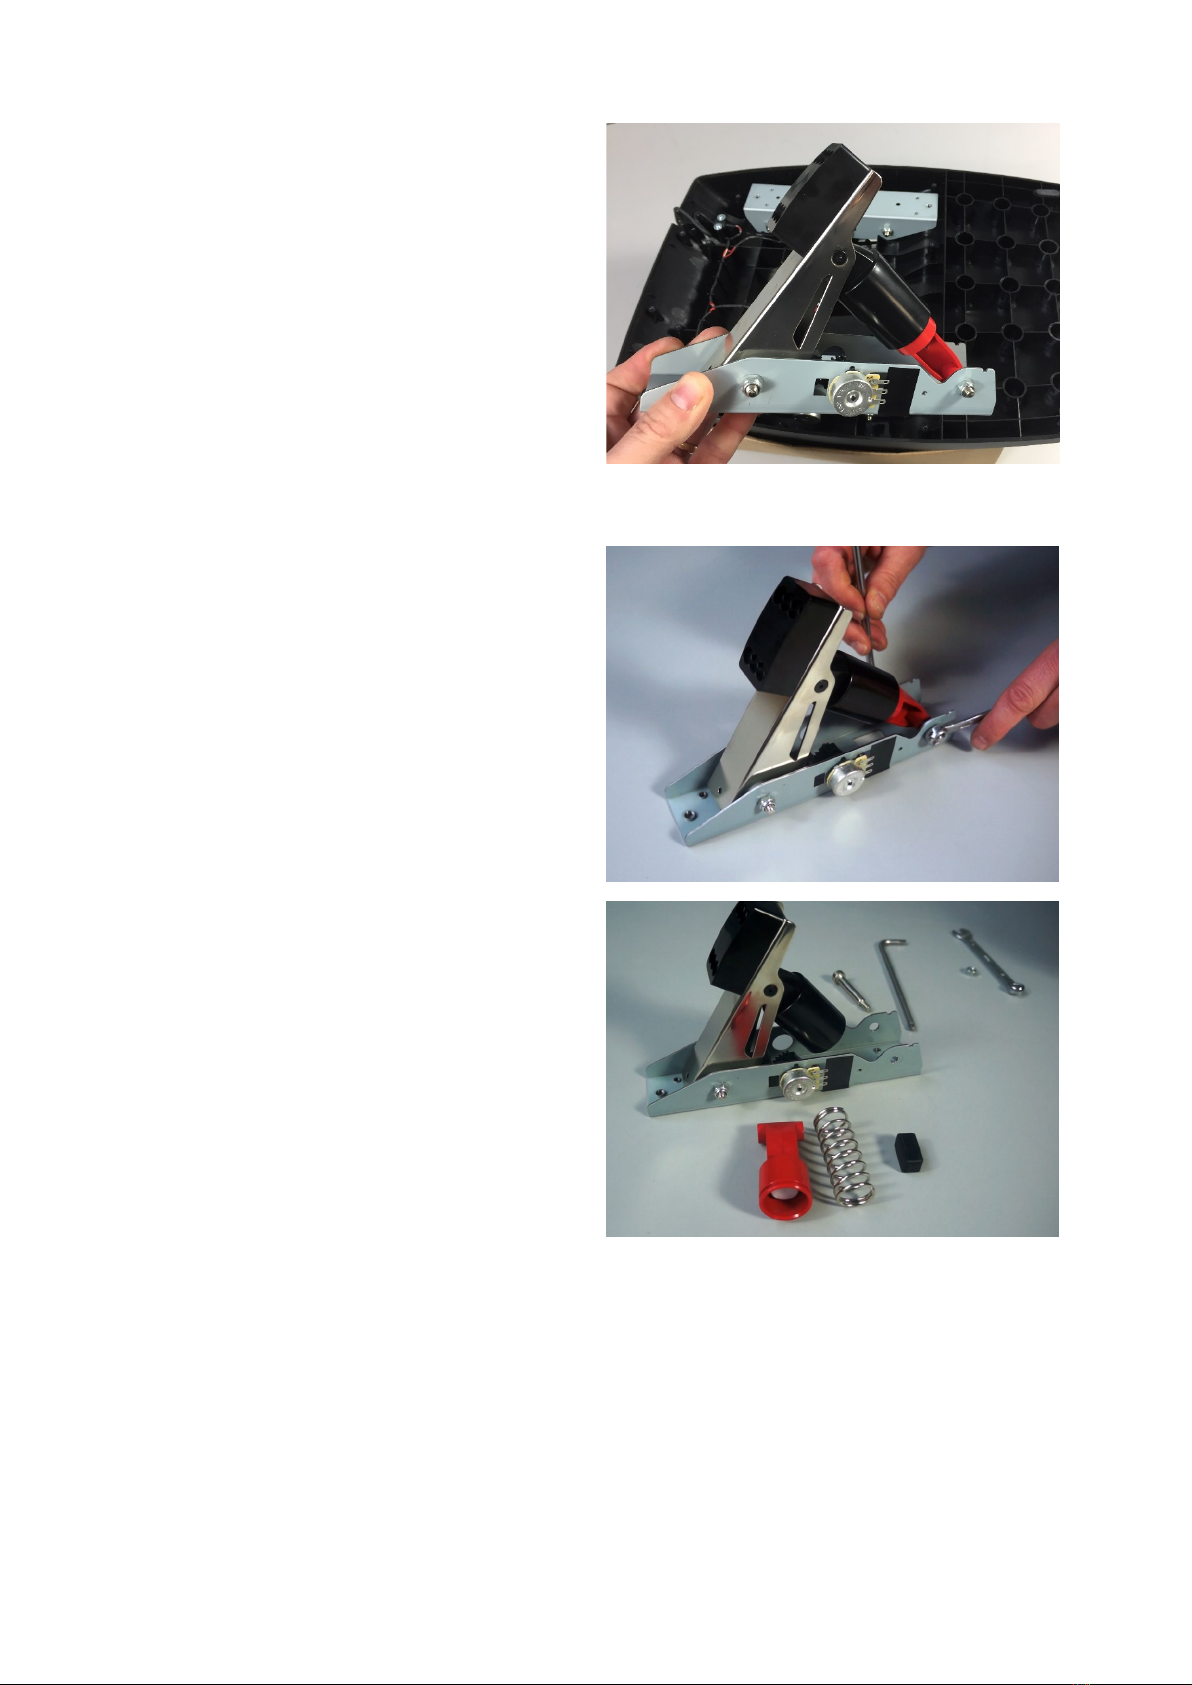
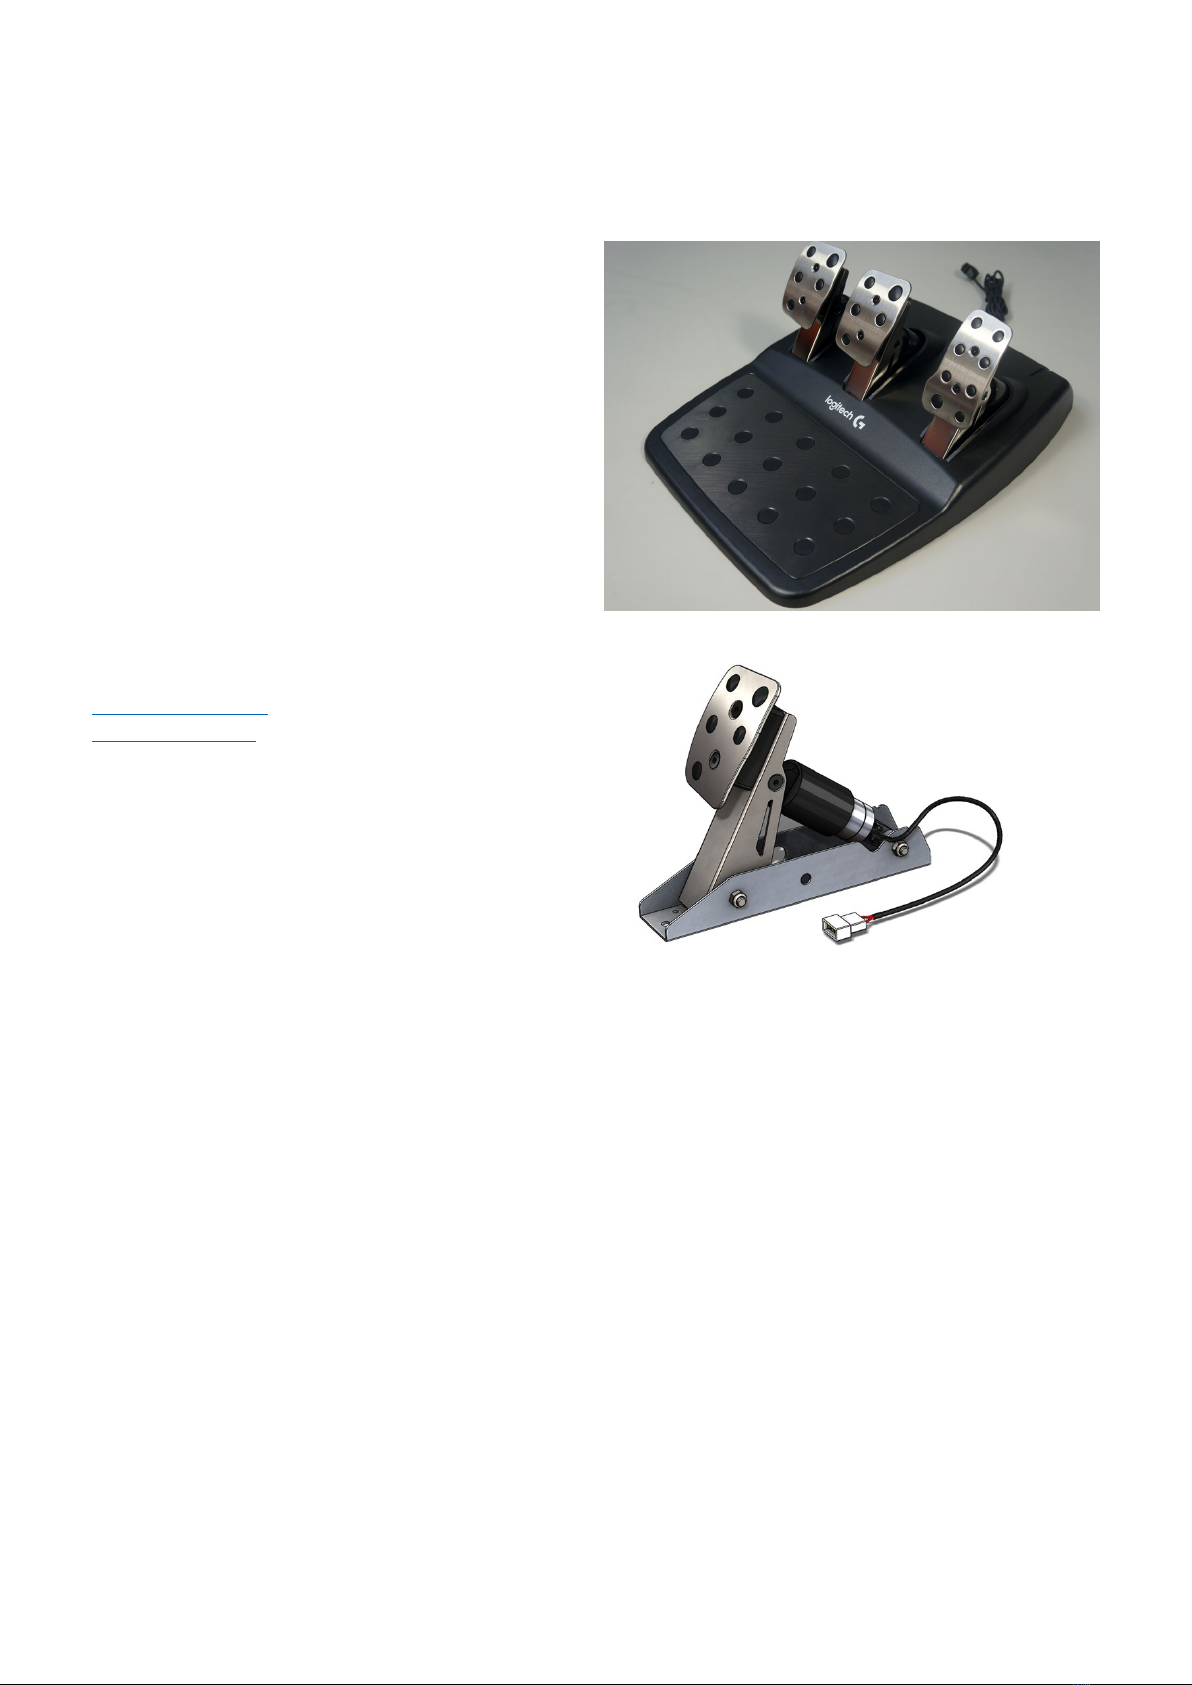
Logitech G29 / G920 Pedals
If you need any assistance please contact us at
drive@axc
-sim.com or contact us via our website at
www.axc
-sim.com.
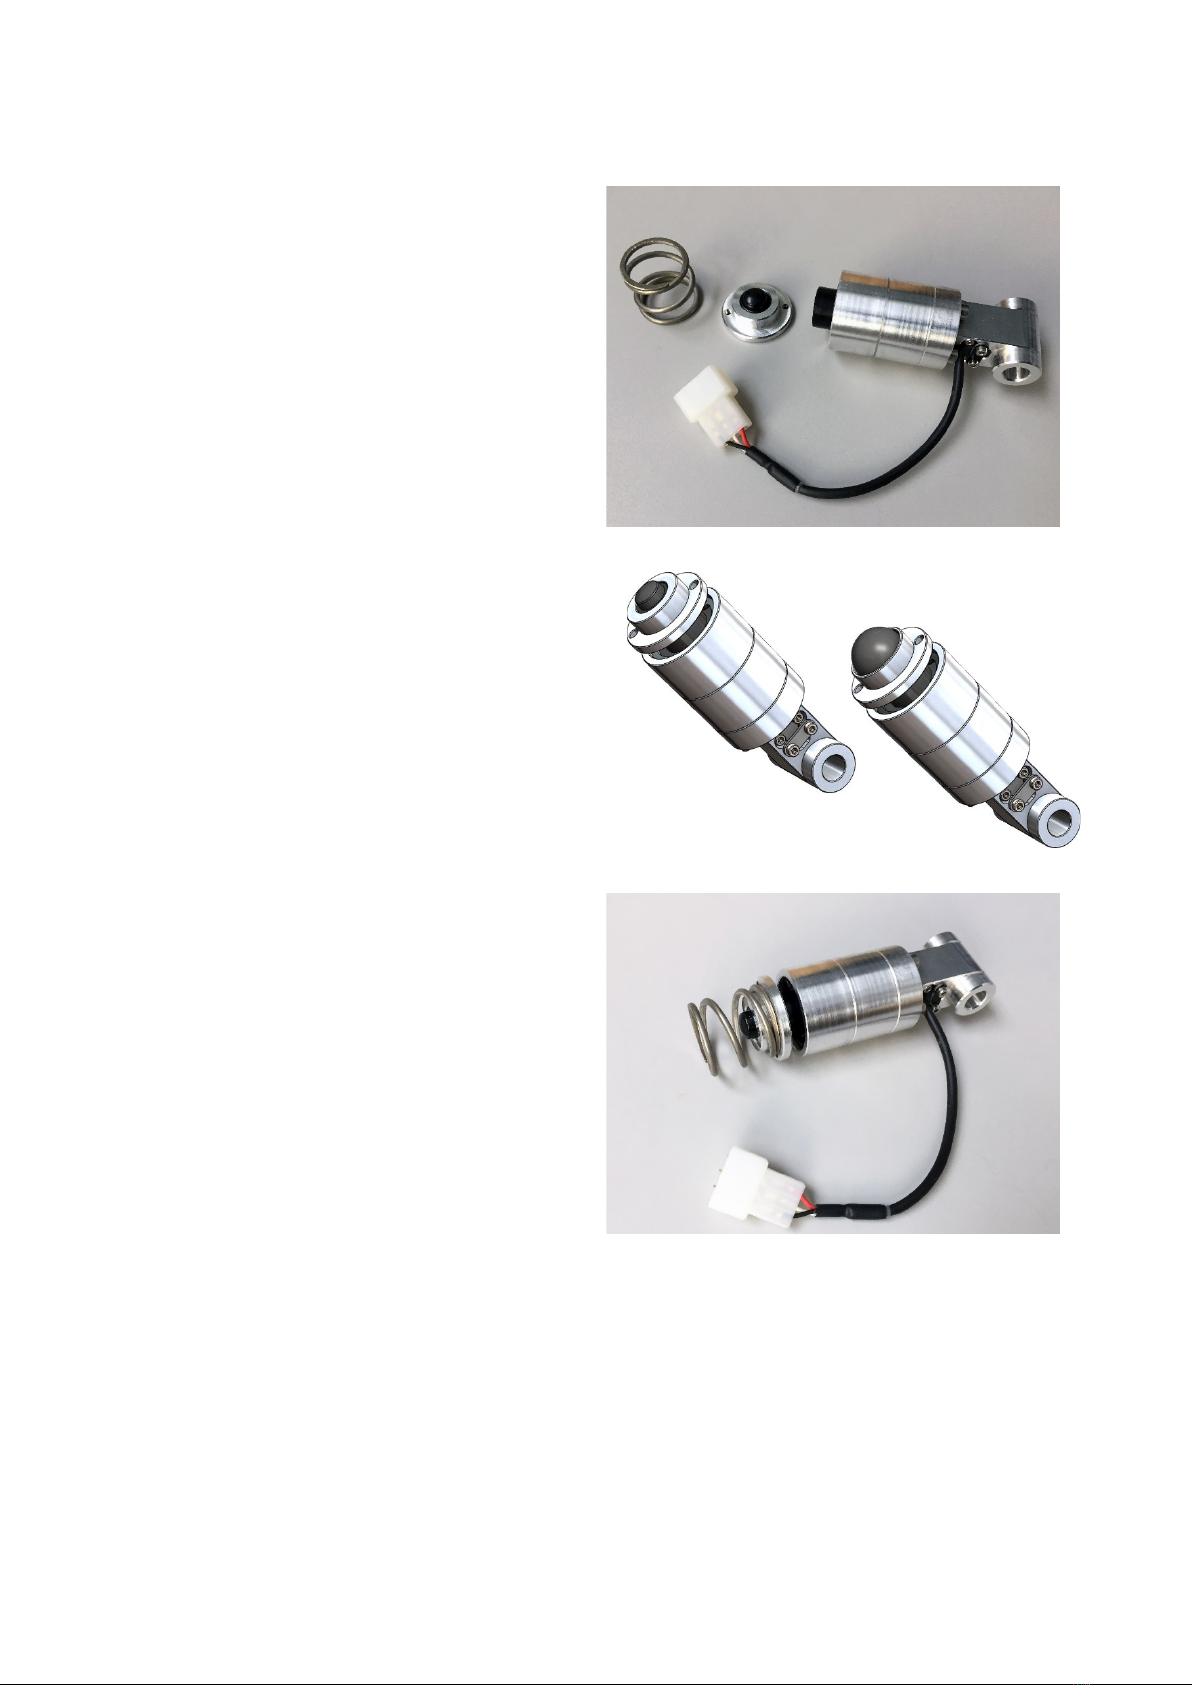
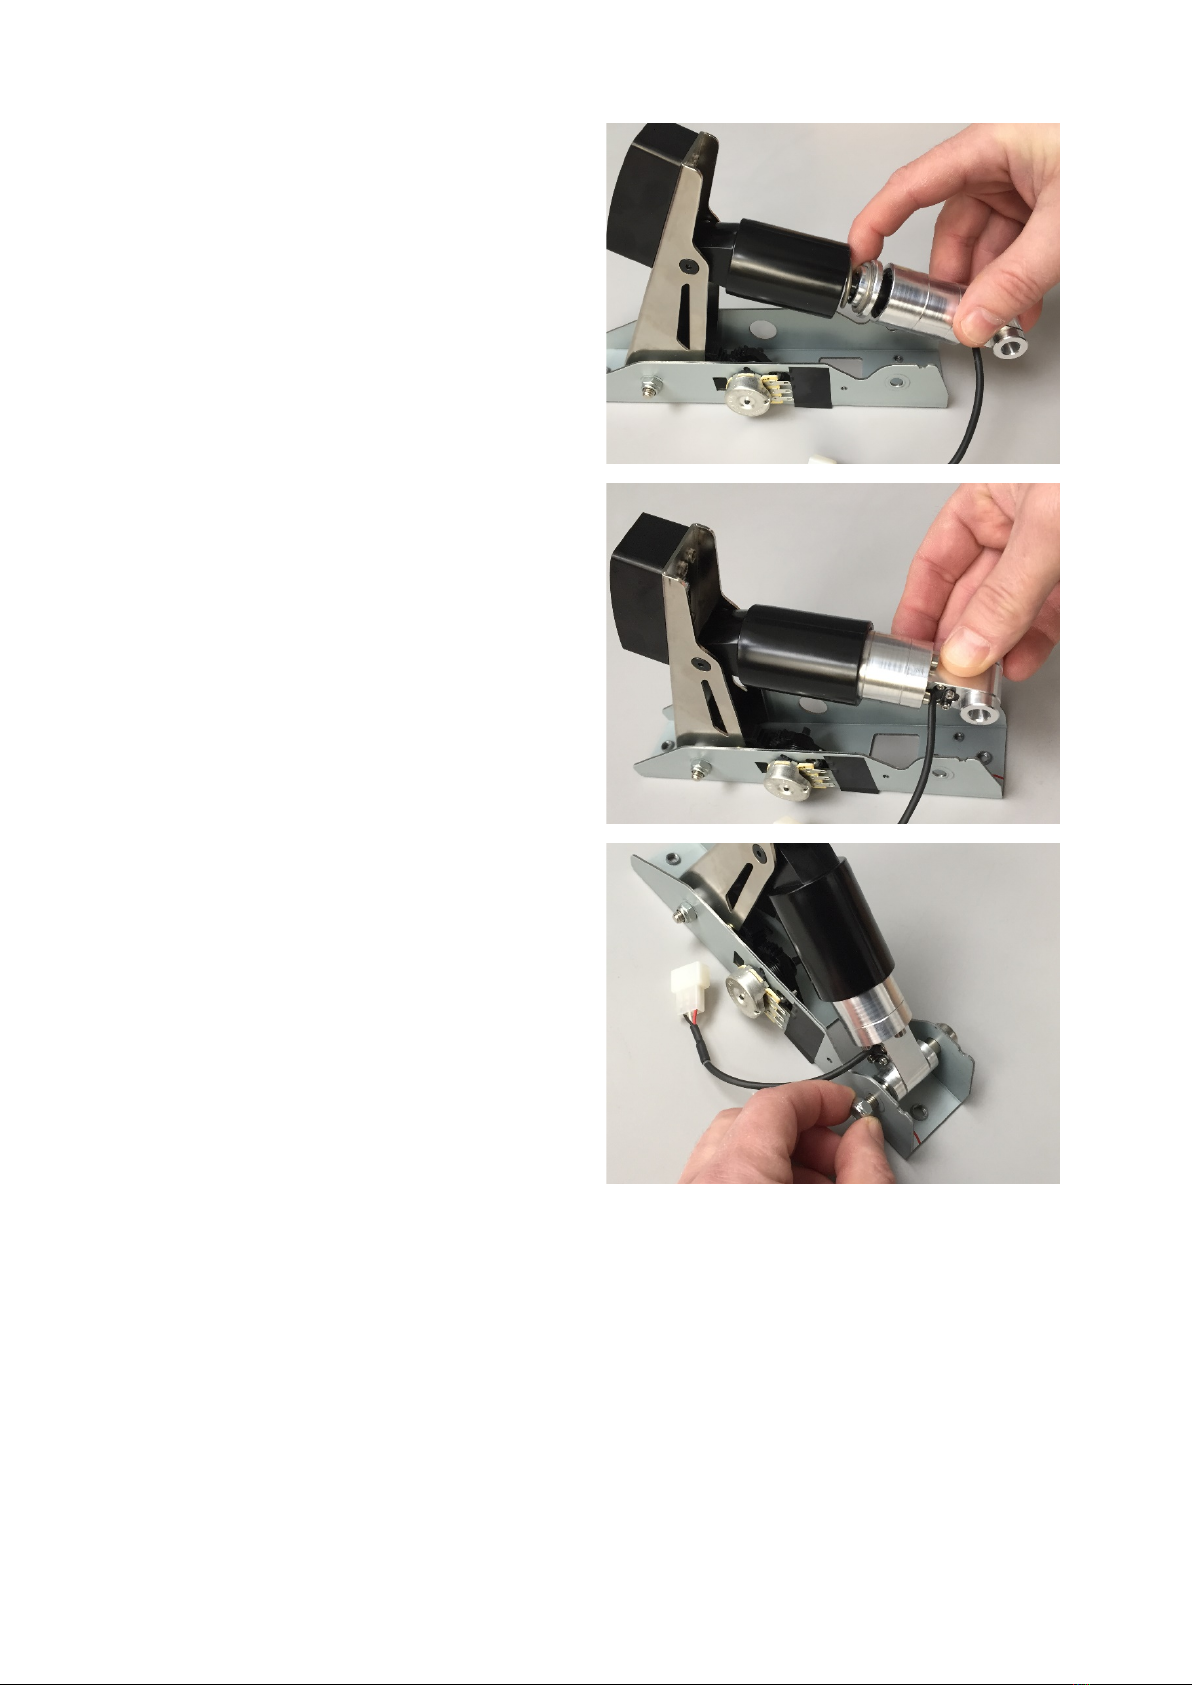
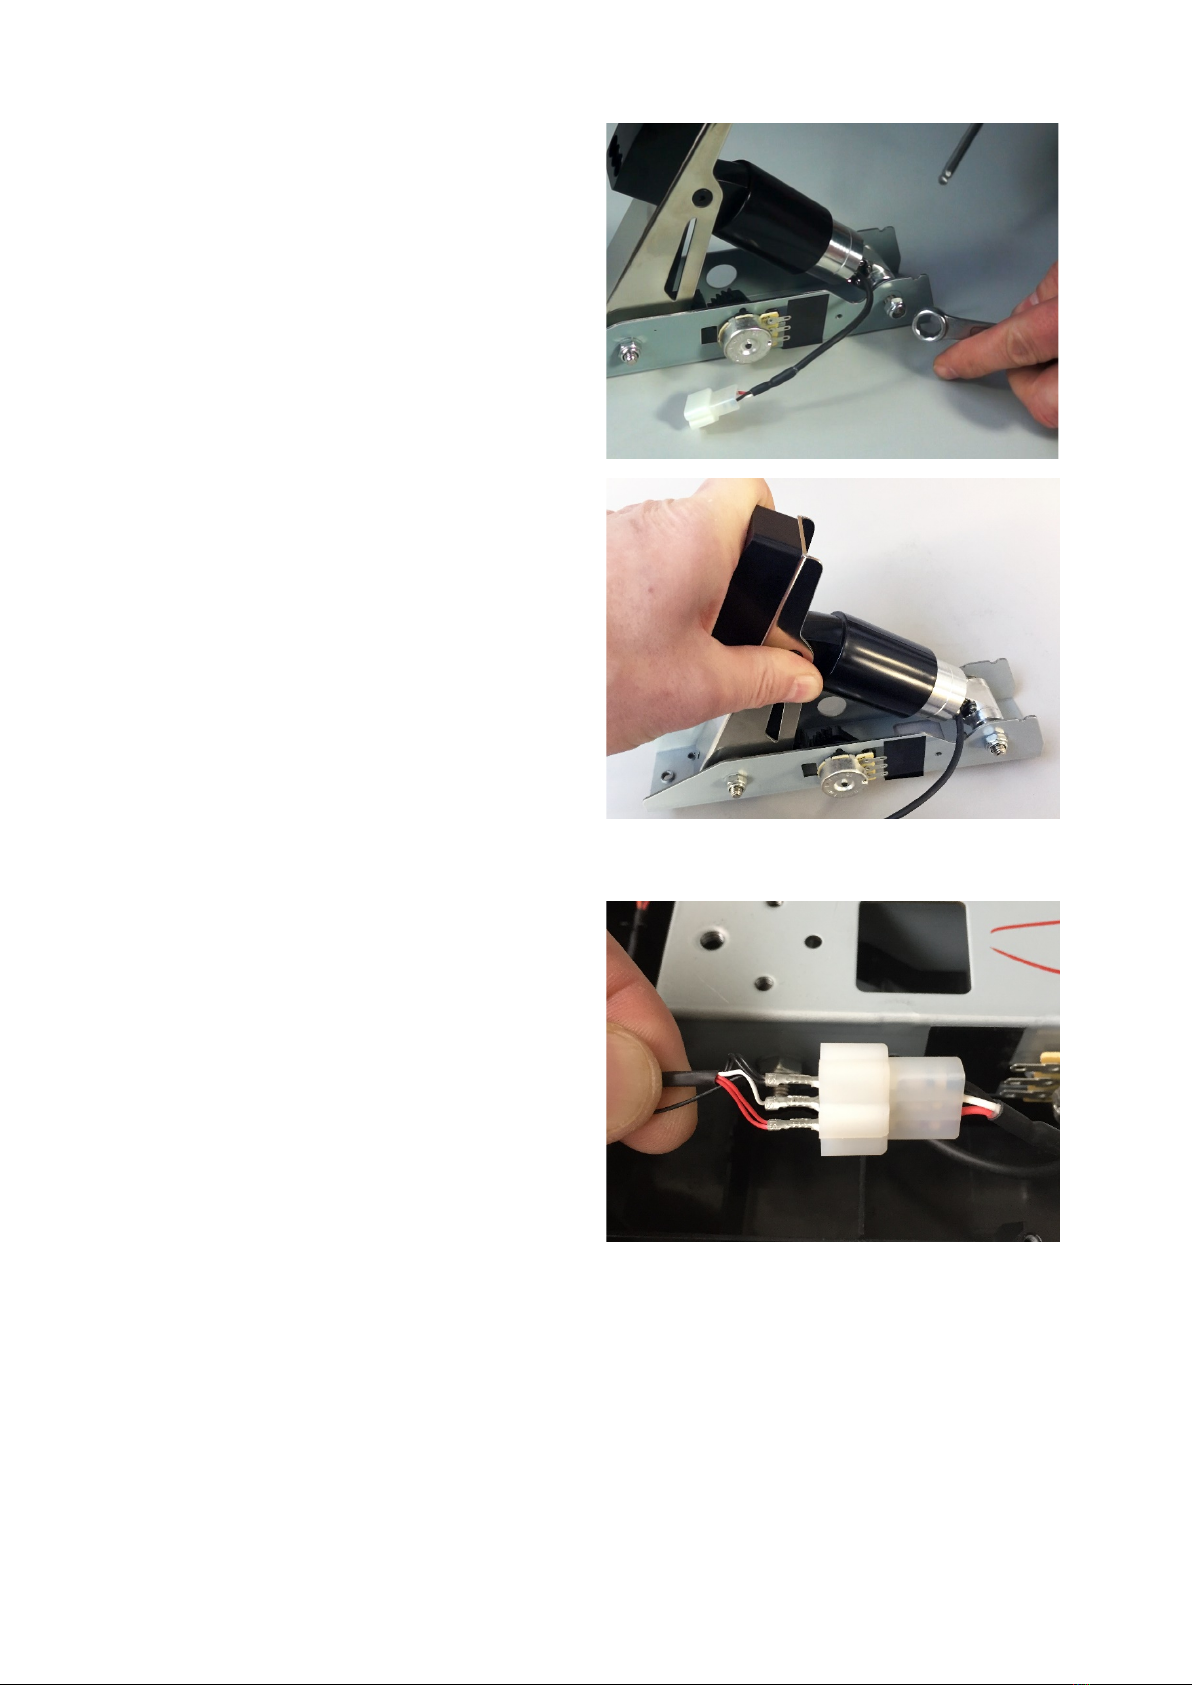
Logitech Brake Pedal Unit with TrueBrake installed
Tools required:
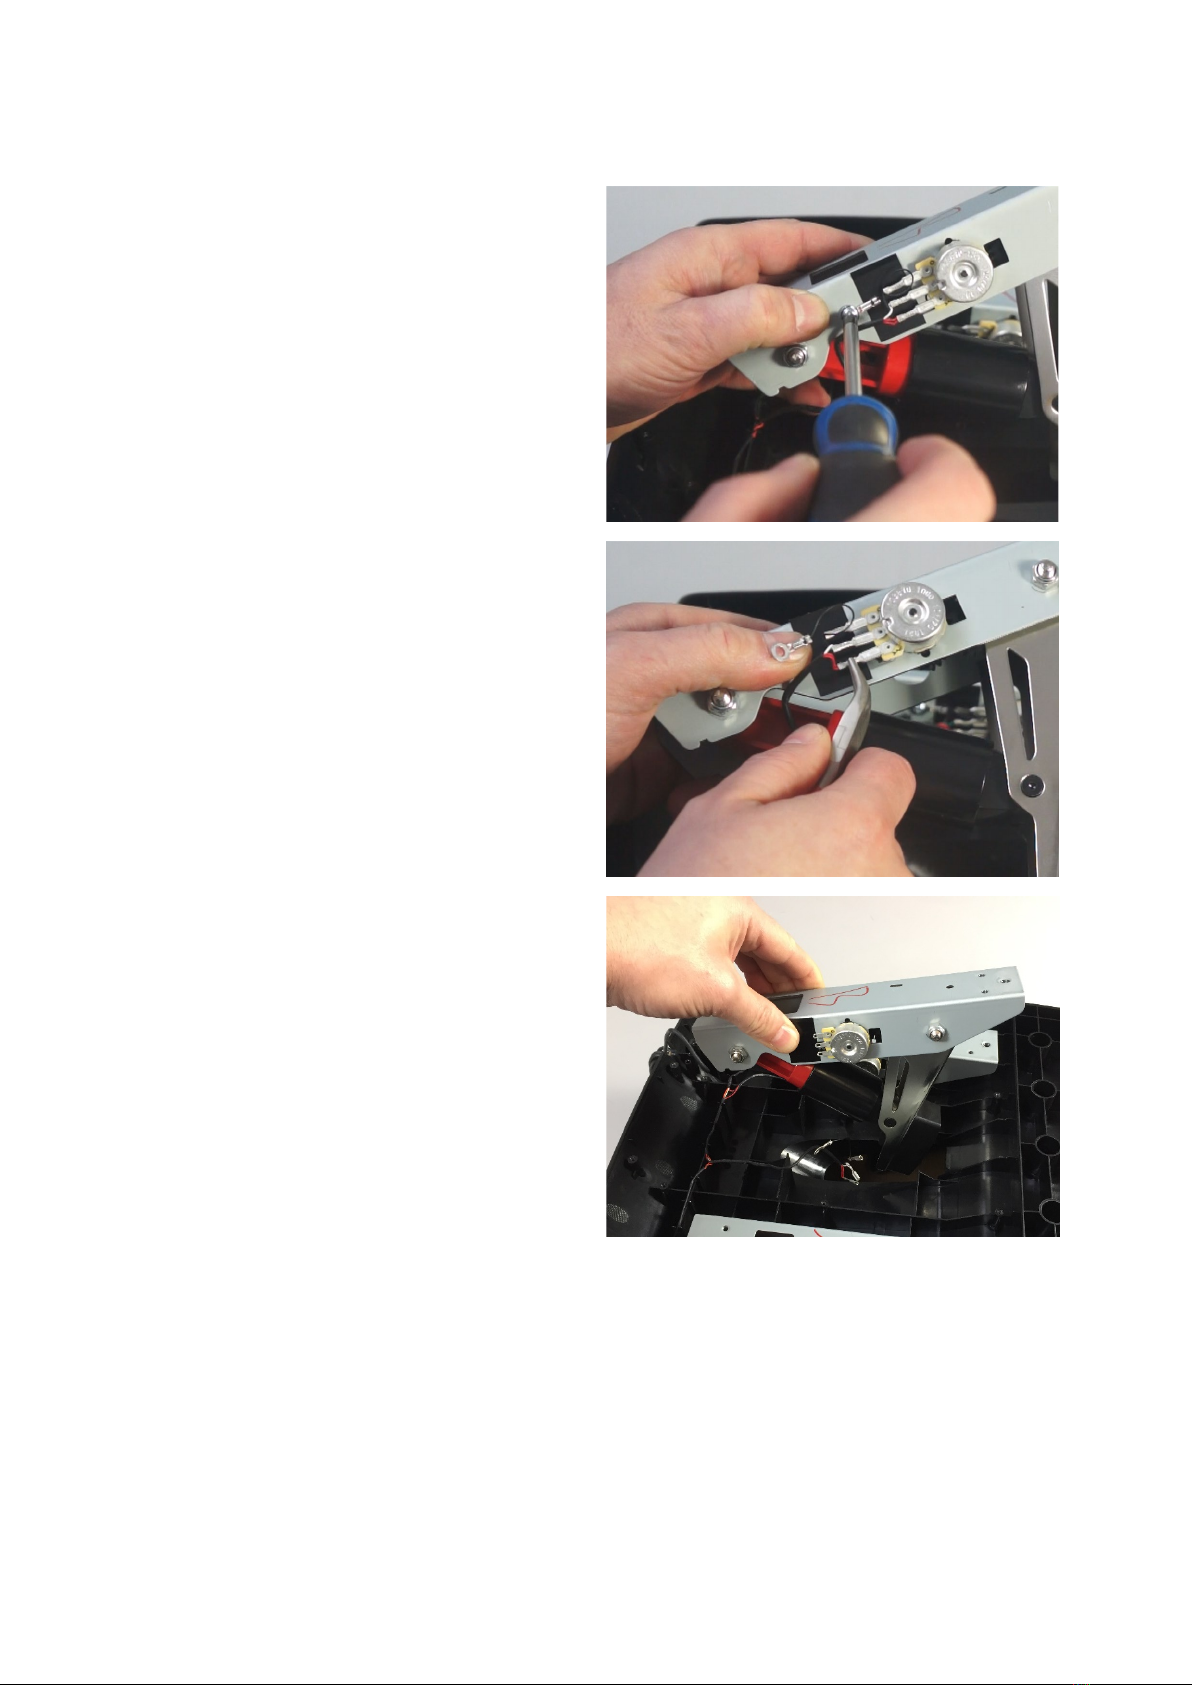
•2.5mm and 5mm allen hex keys
•No.1 and No.2 Phillips screwdrivers
•10mm spanner or adjustable wrench
•
Long Nose Pliers

TrueBrake Installation Manual v1.0 -November 2019
© Aeroxcraft Ltd 2019
AXC Logo is registered trademark of Aeroxcraft Ltd. Logitech the Logitech logo and other Logitech marks are owned by Logitech and may be
registered.
*Aeroxcraft Ltd will not be held responsible for any damage to your Logitech pedals or steering wheel.
Step 1 – Remove foot pad
Take out the 2 hex screws on the brake pedal foot pad.
Remove the foot pad from the brake pedal.
The clutch and accelerator foot pads can remain in
place.
Step 2 – Support the pedal assembly
Use a suitable cardboard box to support the main
pedal
assembly whilst working on the underside of the
unit.
Missing this step out makes it much more difficult
to work on the inside of the pedal assembly.

TrueBrake Installation Manual v1.0 -November 2019
© Aeroxcraft Ltd 2019
AXC Logo is registered trademark of Aeroxcraft Ltd. Logitech the Logitech logo and other Logitech marks are owned by Logitech and may be
registered.
*Aeroxcraft Ltd will not be held responsible for any damage to your Logitech pedals or steering wheel.
Step 3 – Remove bottom cover
Use a Phillips No.1 screwdriver to remove the 2 small
screws that are under the carpet gripper. The positions
are shown in the diagram opposite.
Use a Phillips No.1 screwdriver to remove the 12 small
screws shown opposite.

TrueBrake Installation Manual v1.0 -November 2019
© Aeroxcraft Ltd 2019
AXC Logo is registered trademark of Aeroxcraft Ltd. Logitech the Logitech logo and other Logitech marks are owned by Logitech and may be
registered.
*Aeroxcraft Ltd will not be held responsible for any damage to your Logitech pedals or steering wheel.
Use a Phillips No.2 screwdriver to remove the 12 large
screws shown opposite.
Once all the screws are removed and safely put to one
side then you can remove the bottom cover to gain
access to the inside.
Take note of how the wiring loom is arranged and
attached to the plastic moulding.

TrueBrake Installation Manual v1.0 -November 2019
© Aeroxcraft Ltd 2019
AXC Logo is registered trademark of Aeroxcraft Ltd. Logitech the Logitech logo and other Logitech marks are owned by Logitech and may be
registered.
*Aeroxcraft Ltd will not be held responsible for any damage to your Logitech pedals or steering wheel.
Step 4 – Remove brake pedal unit
Use a No.2 Phillips screwdriver to remove the screw
that secures the black ground wire to the brake pedal
metal base.
Be careful not
to damage the wires.
Use your thin nosed pliers to disconnect the spade
connectors
from the potentiometer.
Be careful so you do not damage the wires.
(You might want to make a note of where the wires go
in case you want to revert to t
he original setup.)
You can now remove the brake pedal unit from the
main
assembly.

TrueBrake Installation Manual v1.0 -November 2019
© Aeroxcraft Ltd 2019
AXC Logo is registered trademark of Aeroxcraft Ltd. Logitech the Logitech logo and other Logitech marks are owned by Logitech and may be
registered.
*Aeroxcraft Ltd will not be held responsible for any damage to your Logitech pedals or steering wheel.
Step 5 – Remove lower spring housing
Remove the nut and bolt that secures the lower spring
housing.
Remove the lower spring housing along with the spring
and rubber bung.
Put the spring housing, spring and rubber bung
somewhere safe so you can revert your pedals back to
stock if required.

TrueBrake Installation Manual v1.0 -November 2019
© Aeroxcraft Ltd 2019
AXC Logo is registered trademark of Aeroxcraft Ltd. Logitech the Logitech logo and other Logitech marks are owned by Logitech and may be
registered.
*Aeroxcraft Ltd will not be held responsible for any damage to your Logitech pedals or steering wheel.
Step 6 - Install TrueBrake
TrueBrake consists of three parts:
•Cylinder
•Buffer (choice of 2 sizes)
•Spring
There are two sizes of buffer cap supplied with
TrueBrake.
The two sizes determine the amount of pedal
movement before the pedal engages with the
polyurethane
buffer. The small buffer cap gives 3mm
more movement than the large buffer cap.
The author
personally prefers using the small buffer
cap. This gives the pedal a little more travel before it
engages, more like a
sporty road car than a full-on
race
car.
Assemble the three TrueBrake components into a
stack.
•Cylinder > Buffer > Spring

TrueBrake Installation Manual v1.0 -November 2019
© Aeroxcraft Ltd 2019
AXC Logo is registered trademark of Aeroxcraft Ltd. Logitech the Logitech logo and other Logitech marks are owned by Logitech and may be
registered.
*Aeroxcraft Ltd will not be held responsible for any damage to your Logitech pedals or steering wheel.
Insert the stack into the upper spring housing as
shown.
Re-insert the lower bolt to secure the True Brake in
place.

TrueBrake Installation Manual v1.0 -November 2019
© Aeroxcraft Ltd 2019
AXC Logo is registered trademark of Aeroxcraft Ltd. Logitech the Logitech logo and other Logitech marks are owned by Logitech and may be
registered.
*Aeroxcraft Ltd will not be held responsible for any damage to your Logitech pedals or steering wheel.
Tighten up the nut and bolt.
Now is a good time to check the feel of the pedal.
It’s easier to change your mind now
about which
buffer size to use!
Step 7 – Re-install Brake Pedal Unit
Place the brake pedal unit back in the main pedal
assembly.
Connect the red, white and black wires to the
matching wires in the True Brake connector.

TrueBrake Installation Manual v1.0 -November 2019
© Aeroxcraft Ltd 2019
AXC Logo is registered trademark of Aeroxcraft Ltd. Logitech the Logitech logo and other Logitech marks are owned by Logitech and may be
registered.
*Aeroxcraft Ltd will not be held responsible for any damage to your Logitech pedals or steering wheel.
Re-attach the black ground wire with the Phillips #2
screw.
Use the double-sided adhesive tape to attach the
connector to the
black plastic moulding.
Make sure all the cables are neatly clipped into place.

TrueBrake Installation Manual v1.0 -November 2019
© Aeroxcraft Ltd 2019
AXC Logo is registered trademark of Aeroxcraft Ltd. Logitech the Logitech logo and other Logitech marks are owned by Logitech and may be
registered.
*Aeroxcraft Ltd will not be held responsible for any damage to your Logitech pedals or steering wheel.
Make sure the cable is properly seated as it exits the
main pedal assembly.
Step 8 – Replace Bottom Cover
Replace the bottom cover.
Replace the 2x Phillips No.1 screws under the carpet
gripper
, as shown opposite.

TrueBrake Installation Manual v1.0 -November 2019
© Aeroxcraft Ltd 2019
AXC Logo is registered trademark of Aeroxcraft Ltd. Logitech the Logitech logo and other Logitech marks are owned by Logitech and may be
registered.
*Aeroxcraft Ltd will not be held responsible for any damage to your Logitech pedals or steering wheel.
Replace the 12x Phillips No.1 screws shown opposite.
Replace the 12x Phillips No.2 screws shown opposite.

TrueBrake Installation Manual v1.0 -November 2019
© Aeroxcraft Ltd 2019
AXC Logo is registered trademark of Aeroxcraft Ltd. Logitech the Logitech logo and other Logitech marks are owned by Logitech and may be
registered.
*Aeroxcraft Ltd will not be held responsible for any damage to your Logitech pedals or steering wheel.
Step 9 – Replace Brake Pedal Foot Pad
Finished!
Make sure your steering wheel is powered off and
disconnected from your games console/PC.
Connect the pedals to the steering wheel.
When your steering wheel powers up and is connected
to a console/PC it will recalibrate the zero position of
the
pedal.
Check the operation of the pedal.
Have fun!
If you need assistance, please don’t hesitate to get in
touch.
Table of contents
Other AXC Video Gaming Accessories manuals