r
Turn on the transmitte .
1 2
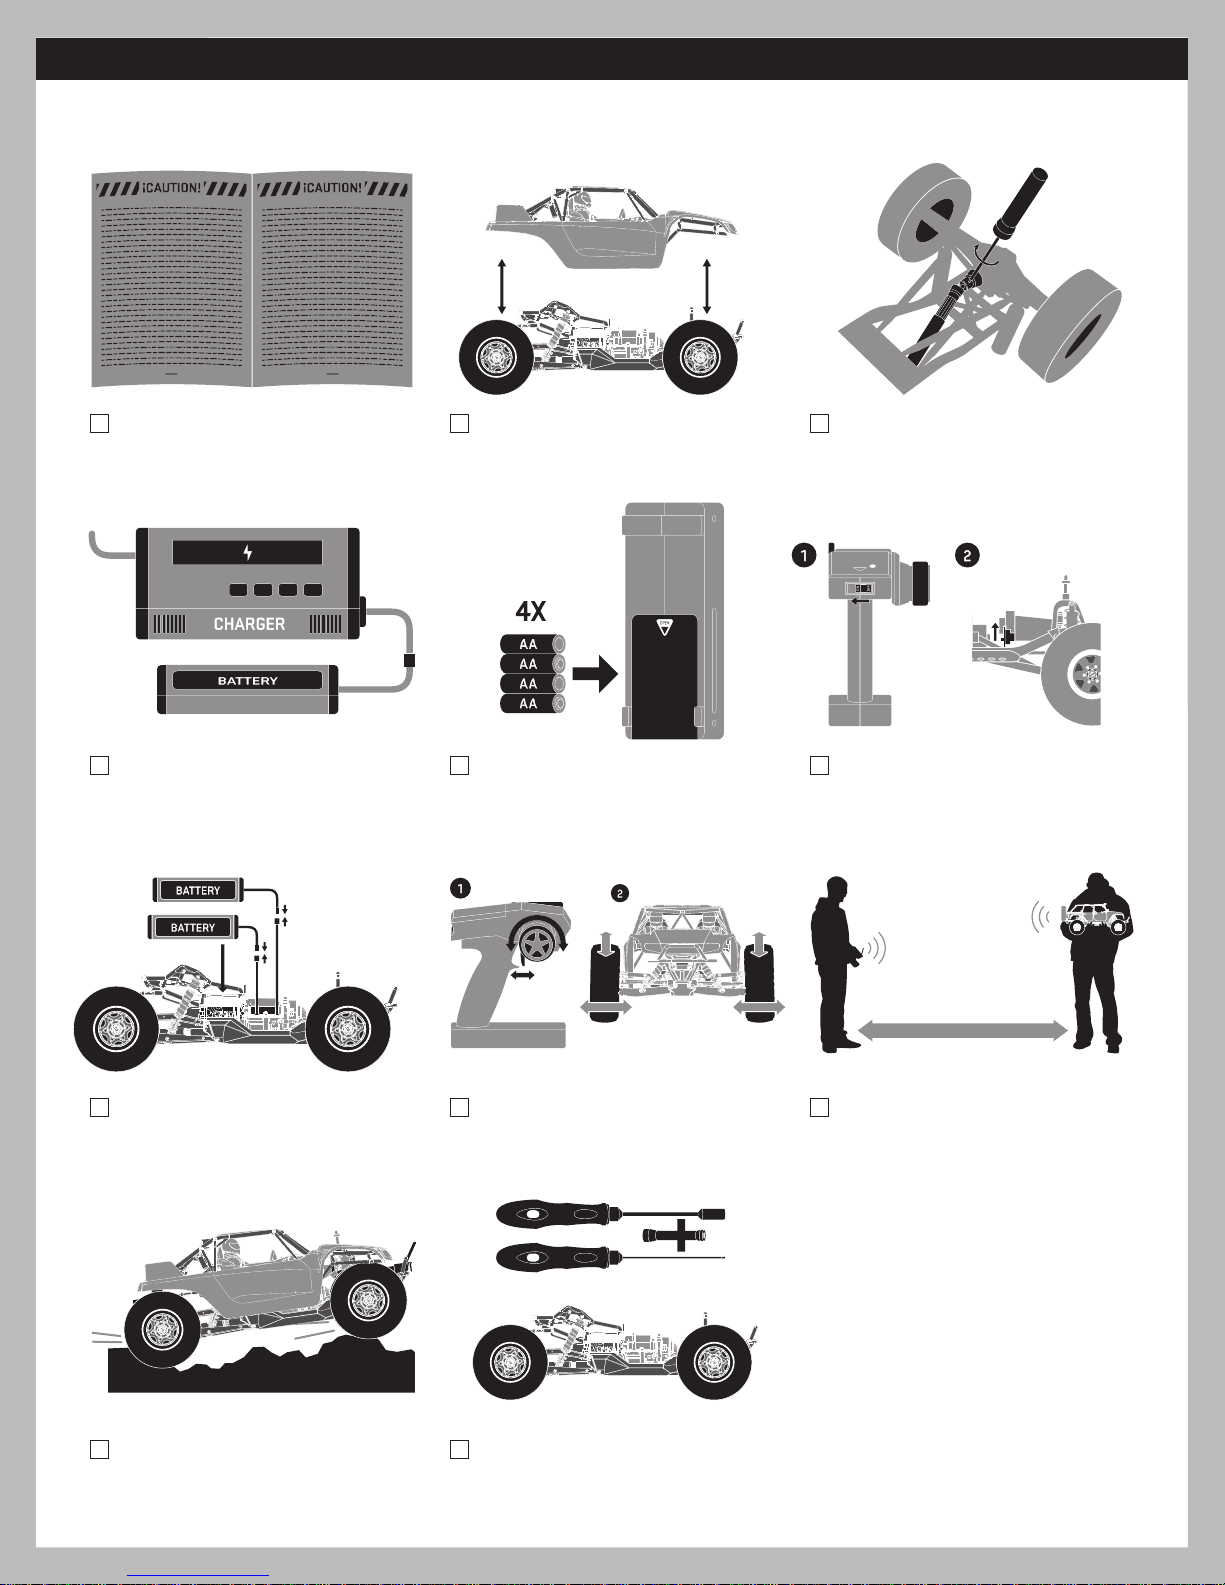
Range-Checking Your Radio System
The radio system should be checked before operating the vehicle to ensure it’s operating properly and has adequate range.
1. Turn on the transmitter first and then the vehicle.
2. Have a friend hold the vehicle while keeping hands and loose clothing away from moving parts.
3. Walk away until you are at the farthest distance you plan to operate the vehicle.
4. Steer the vehicle back and forth and throttle both forward and reverse making sure there is no erratic behavior.
5. If any erratic behavior is exhibited do not operate the vehicle, call customer service for further assistance.
RANGE-CHECKING FOR DISTANCE
THIS VEHICLE DOES NOT HAVE A POWER SWITCH -
ALWAYS DISCONNECT THE BATTERIES BEFORE
TURNING OFF THE CONTROLLER AND WHEN THE
VEHICLE IS NOT IN USE
Place vehicle on a stand or box to
help prevent accidental run-away
Firmly connect both ESC leads to one battery on each side of vehicle
Do not use a Nickel Cadmium or Nickel Metal Hydride battery charger to
charge LiPo batteries. Damage to the batteries and charger will likely
occur resulting in a fire.
Verwenden Sie keine Nickel-Cadmium-oder Nickel-Metall-Hydrid-Akku
Ladegerät LiPo-Akkus aufladen. Schäden an den Batterien und
Ladegerät wird wahrscheinlich auftreten, was zu einem Brand.
Ne pas utiliser un chargeur de batterie au nickel-cadmium ou
nickel-métal-hydrure pour recharger les batteries LiPo. Les dommages
aux batteries et le chargeur se produira probablement de provoquer un
incendie.
Use the included foam pads to secure the battery and prevent
shifting during running
Position forward for more front traction
Position battery rearward for more rear traction
Front or rear wire
openings allow you
to choose positioning
7