manuals.online logo
Brands
  1. Home
  2. •
  3. Brands
  4. •
  5. Axiom
  6. •
  7. Speakers
  8. •
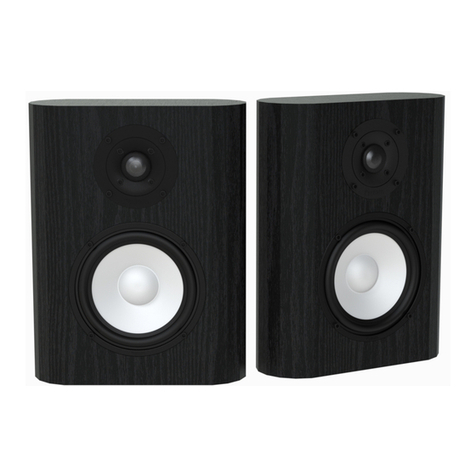
  9. Axiom T2 User manual

Axiom T2 User manual

This manual suits for next models

1

Other Axiom Speakers manuals

Axiom VP100 v3 User manual

Axiom

Axiom VP100 v3 User manual

Axiom AX800A NEO User manual

Axiom

Axiom AX800A NEO User manual

Axiom LFR660 v4 User manual

Axiom

Axiom LFR660 v4 User manual

Axiom FMS 16 Specification sheet

Axiom

Axiom FMS 16 Specification sheet

Axiom ED60P User manual

Axiom

Axiom ED60P User manual

Axiom M3 User manual

Axiom

Axiom M3 User manual

Axiom VP160 User manual

Axiom

Axiom VP160 User manual

Axiom W100 User manual

Axiom

Axiom W100 User manual

Axiom M2 User manual

Axiom

Axiom M2 User manual

Axiom M50 v3 User manual

Axiom

Axiom M50 v3 User manual

Axiom AX4CL User manual

Axiom

Axiom AX4CL User manual

Axiom ED150A User manual

Axiom

Axiom ED150A User manual

Axiom VP100 v2 User manual

Axiom

Axiom VP100 v2 User manual

Axiom Audiobyte User manual

Axiom

Axiom Audiobyte User manual

Axiom VP180 v3 User manual

Axiom

Axiom VP180 v3 User manual

Axiom LFR1100 User manual

Axiom

Axiom LFR1100 User manual

Axiom M22 v3 User manual

Axiom

Axiom M22 v3 User manual

Axiom VP100 v2 User manual

Axiom

Axiom VP100 v2 User manual

Axiom M80 User manual

Axiom

Axiom M80 User manual

Axiom M2 User manual

Axiom

Axiom M2 User manual

Axiom VP160 User manual

Axiom

Axiom VP160 User manual

Axiom M80 v4 User manual

Axiom

Axiom M80 v4 User manual

Axiom QS8 v3 User manual

Axiom

Axiom QS8 v3 User manual

Axiom VP100 User manual

Axiom

Axiom VP100 User manual

Popular Speakers manuals by other brands

Electro-Voice LR4S engineering data

Electro-Voice

Electro-Voice LR4S engineering data

Definitive Technology Sound Cylinder user guide

Definitive Technology

Definitive Technology Sound Cylinder user guide

AudioSource LS545 user manual

AudioSource

AudioSource LS545 user manual

Paso C402-T Instructions for use

Paso

Paso C402-T Instructions for use

Altec Lansing 416-8C LF SPEAKER manual

Altec Lansing

Altec Lansing 416-8C LF SPEAKER manual

Kenwood KFC-1072 Servise manual

Kenwood

Kenwood KFC-1072 Servise manual

Peavey ProSys 112 user guide

Peavey

Peavey ProSys 112 user guide

JBL Control Contractor 60 Series installation instructions

JBL

JBL Control Contractor 60 Series installation instructions

Aura STORM-8 owner's manual

Aura

Aura STORM-8 owner's manual

Oontz ANGLE 3 PLUS quick start guide

Oontz

Oontz ANGLE 3 PLUS quick start guide

Electro-Voice LR4A engineering data

Electro-Voice

Electro-Voice LR4A engineering data

Rave RK-650-ICA-B owner's manual

Rave

Rave RK-650-ICA-B owner's manual

Flux Reference Series installation manual

Flux

Flux Reference Series installation manual

Lanzar AQAWBS64BK installation manual

Lanzar

Lanzar AQAWBS64BK installation manual

DAPAudio DCS-6230 manual

DAPAudio

DAPAudio DCS-6230 manual

Aluratek ABS03F quick start guide

Aluratek

Aluratek ABS03F quick start guide

Kenwood KES-5A instruction manual

Kenwood

Kenwood KES-5A instruction manual

Sonance ORIGINAL SERIES instruction manual

Sonance

Sonance ORIGINAL SERIES instruction manual

manuals.online logo
manuals.online logoBrands
  • About & Mission
  • Contact us
  • Privacy Policy
  • Terms and Conditions

Copyright 2025 Manuals.Online. All Rights Reserved.

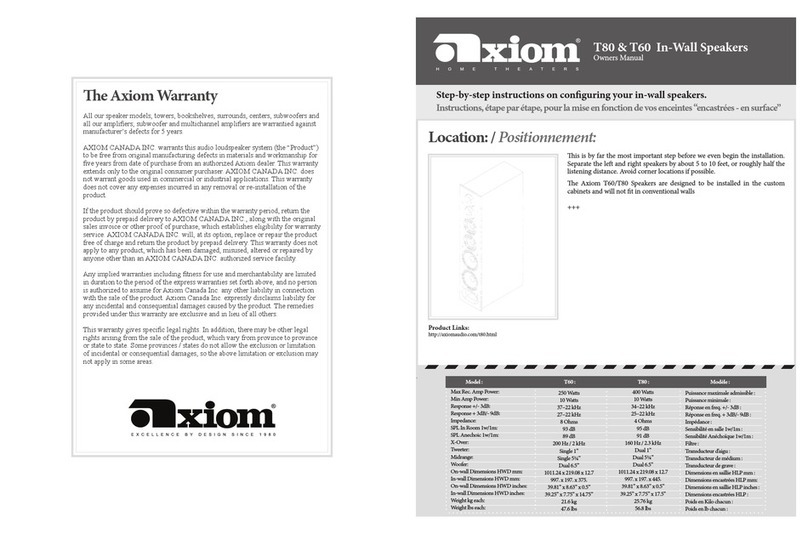
Location: / Positionnement:
is is by far the most important step before we even begin the installation.
For the most eective placement the speakers should be at roughly the same
height as the middle of the TV screen they are to be used with, one to the le
and one to the right of the screen. Otherwise, a height of ve or six feet from
the oor and in between the studs of the wall is ideal. Avoid corner locations if
possible. Separate the le and right speakers by about 5 to 10 feet, or roughly
half the listening distance. Please make sure the speaker wire has a clear path
from your stereo or A/V receiver to the placement of your speaker.
e Axiom In-Wall Speakers are designed to be installed in the common stud
wall with drywall or some similar type wall board covering. For other types of
walls special installation procedures will need to be used.
+++
Ceci est de loin l’étape la plus importante avant même le début de l’installation.
Pour un positionnement optimal, les haut-parleurs devraient être localisés, l’un
à droite et l’autre à gauche, à mi-hauteur de l’écran de télé avec lequel ils seront
associés. Alternativement, la hauteur idéale serait d’environ cinq à six pieds
au-dessus du plancher et entre les colombages. Si c’est possible, évitez les coins.
Séparez les haut-parleurs gauche et droit d’une distance d’environ cinq à dix
pieds ou de la moitié de la distance d’écoute. Veuillez vous assurer qu’il n’y ait pas
d’obstacle qui obstrue le passage des ls de haut-parleurs jusqu’ à votre récepteur
stéréophonique ou Audio/Vidéo.
Les haut-parleurs Architecture d’Axiom sont conçus pour être installés sur un
mur avec colombage et gypse communs ou sur une surface de même type. Pour
d’autres types, il faudra recourir à une procédure spéciale.
Step-by-step instructions on conguring your in-wall speakers.
Instructions, étapeparétape, pour la mise enfonctionde vosenceintes“encastrées - ensurface”
T2/T22 In-Wall Speakers
Owners Manual
e Axiom Warranty
All our speaker models; towers, bookshelves, surrounds, centers, subwoofers and
all our ampliers; subwoofer and multichannel ampliers are warrantied against
manufacturer’s defects for 5 years.
AXIOM CANADA INC. warrants this audio loudspeaker system (the “Product”)
to be free from original manufacturing defects in materials and workmanship for
ve years from date of purchase from an authorized Axiom dealer. This warranty
extends only to the original consumer purchaser. AXIOM CANADA INC. does
not warrant goods used in commercial or industrial applications. This warranty
does not cover any expenses incurred in any removal or re-installation of the
product.
If the product should prove so defective within the warranty period, return the
product by prepaid delivery to AXIOM CANADA INC., along with the original
sales invoice or other proof of purchase, which establishes eligibility for warranty
service. AXIOM CANADA INC. will, at its option, replace or repair the product
free of charge and return the product by prepaid delivery. This warranty does not
apply to any product, which has been damaged, misused, altered or repaired by
anyone other than an AXIOM CANADA INC. authorized service facility.
Any implied warranties including tness for use and merchantability are limited
in duration to the period of the express warranties set forth above, and no person
is authorized to assume for Axiom Canada Inc. any other liability in connection
with the sale of the product. Axiom Canada Inc. expressly disclaims liability for
any incidental and consequential damages caused by the product. The remedies
provided under this warranty are exclusive and in lieu of all others.
This warranty gives specic legal rights. In addition, there may be other legal
rights arising from the sale of the product, which vary from province to province
or state to state. Some provinces / states do not allow the exclusion or limitation
of incidental or consequential damages, so the above limitation or exclusion may
not apply in some areas.
Model: T2 T22 Modèle :
Max Rec. Amp Power: 50 Watts 200 Watts Puissance maximale admissible :
Min Amp Power: 15 Watts 10 Watts Puissance minimale :
Response +/- 3dB: 80 Hz – 22 kHz 70 - 22kHz Réponse en freq. +/- 3dB :
Response + 3dB/- 9dB: 70 Hz – 22 kHz 60 - 22kHz Réponse en freq. + 3dB/- 9dB :
Impedance: 8 Ohms 8 Ohms Impédance :
SPL In Room 1w/1m: 90 dB 93 dB Sensibilité en salle 1w/1m :
SPL Anechoic 1w/1m: 86 dB 89 dB Sensibilité Anéchoïque 1w/1m :
X-Over: 2.7 kHz 3.5 kHz Filtre :
Tweeter: Single 1” Single 1” Transducteur d’aigu :
Woofer: Single 5¼” Dual 5.25” Transducteur de grave :
On-wall Dimensions HWD mm: 296 x 162.6 x 21.6 453.5 x 165.5 x 21.6 Dimensions en saillie HLP mm :
In-wall Dimensions HWD mm: 280 x 144 x 87.95 433 x 145 x 87.95 Dimensions encastrées HLP mm:
On-wall Dimensions HWD inches: 11.65” x 6.4” x 0.85” 17.85” x 6.52” x 0.85” Dimensions en saillieHLP inches :
In-wall Dimensions HWD inches: 11.02” x 5.67” x 3.46” 17.05” x 5.71” x 3.46” Dimensions encastrées HLP :
Weight kg each: 2.74 kg 3.72 kg Poids en Kilo chacun :
Weight lbs each: 6.05 lbs 8.2 lbs Poids en lb chacun :
Product Links:
http://axiomaudio.com/t2.html
Requirements for painting: painters tape, paint and paint brush.
137.00 mm
5 3/8 in
266.00 mm
10 15/32 in
Apply painters tape along painted edge
keeping off the raw material.
Keep painters tape within the
recommended dimensions.
1. 2. 3.
Step 1 / Étape 1:Step 4 / Étape 4:
Step 5 / Étape 5:
e 1:
Using the supplied template and a level (not included) mark
an outline of the wall cutout to place the T2/T22 Speakers.
en carefully cut the selected area using a jigsaw or handsaw.
Warning: Make sure there aren’t any other wires, pipes, or
other xtures that might be in the wall before cutting.
+++
À l’aide du gabarit inclus et d’un niveau (non-inclus) tracez sur
le mur le contour de l’emplacement du haut-parleur de modèle
“T”. Par la suite, découpez l’endroit marqué à l’aide d’une scie
sauteuse ou à gypse.
Avertissement: Assurez-vous qu’il n’y ait pas de ls, tuyaux ou
autres accessoires qui sont à l’intérieur du mur avant de couper
ce dernier.
Step 2 / Étape 2:
If your speaker wire is not already installed in the wall you
will need to run it down inside your wall to your baseboard
and then around the room to your amplier or receiver.
+++
Si votre l de haut-parleur n’est pas déjà installé à l’intérieur
du mur; il faudra le descendre à l’intérieur du mur jusqu’à la
plinthe et de là, autour de la pièce jusqu’à votre amplicateur
ou récepteur Audio/Vidéo.
Insert the speaker wire into the hole in the binding posts of
the T2/T22 Speaker, keeping the red and black (positive and
negative) connections consistent. Use the supplied wrench
to tighten down each nut to hold the wires in place.
+++
Insérez le l d’haut-parleur à l’intérieur de l’orice du bornier
du haut-parleur de modèle “T” en prenant bien soin de
respecter l’uniformité de la polarité rouge et noir (positif et
négatif). À l’aide de la clé fournie, serrez chaque écrou pour
immobiliser les ls en place.
Step 3 / Étape 3:
Slide the speaker into the wall cutout making sure the four
clamps are folded into the speaker.
+++
Insérez le haut-parleur dans la cavité murale en prenant soin
de complètement rétracter les 4 pinces de retenue.
Take the Philps screw driver and begin screwing in the four
binding screws located in the middle of the grille plugs.
e wall clamps will begin to come out and move inwards
towards the wall. is will rmly lock the speaker securely
to the wall.
If you have any further questions or concerns please contact
one of our audio experts. 1-866-244-8796
+++
Sur la façade du haut-parleur, il y a quatre cavités qui servent
de point de retenu pour la grille. Au fond de chacune de ces
cavités se trouve une vis de pince de retenue. À l’aide de la clé
“Allen” vissez chacune de ces vis. Les pinces de retenue vont se
déployer et, de l’intérieur, se déplacer contre la paroi murale en
façade. Cette opération verrouillera le haut-parleur au mur et
il en résultera une installation sécuritaire.
En cas de doute ou pour d’autres questions, s’il-vous-plaît,
contactez un de nos conseillers Audio au 1-888-249-9143.
Step 2 / Étape 2:
Step 3 / Étape 3:
Apply paint to edge with paint brush.
When dry remove tape.