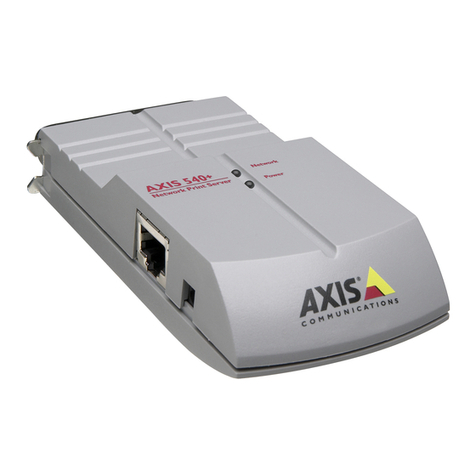
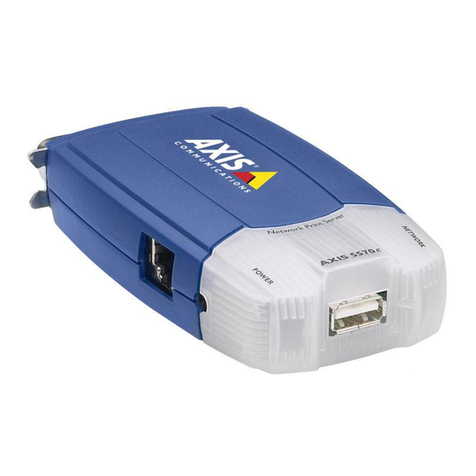
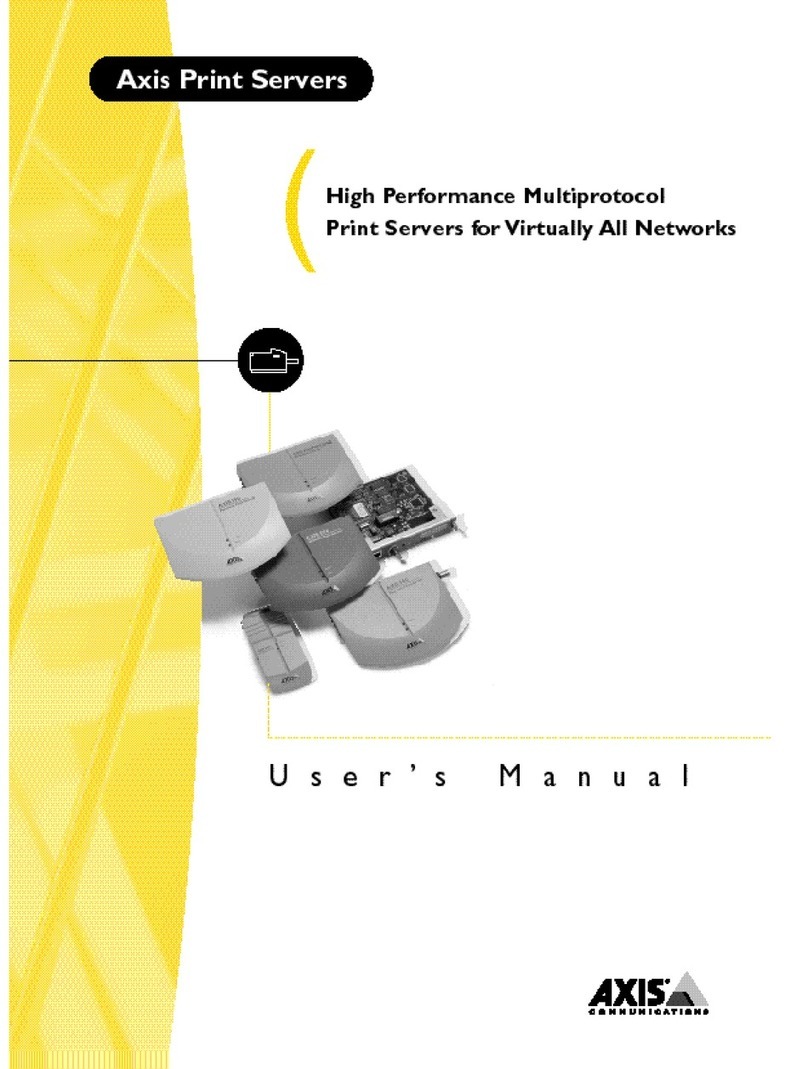
Axis 5570e User manual

ENGLISH FRANCAIS DEUTSCH ESPAÑOL
ITALIANO
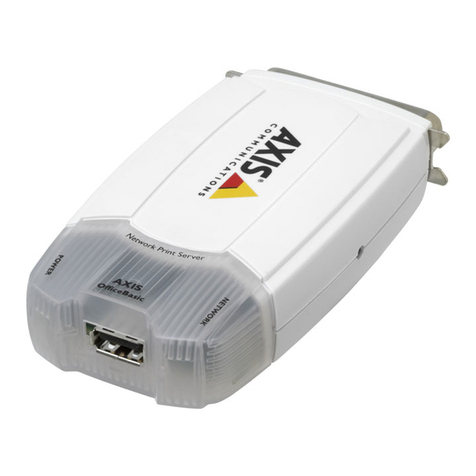
AXIS 5570e
Network Print Server
Installation Guide

Page 2 AXIS 5570e Installation Guide
Take some time to read through the safety notices before installing the AXIS 5570e. Please observe all safety markings and
instructions when using this product.
Warning!
must be observed to avoid bodily injuries.
Caution!
must be observed to avoid loss of data or damage to your equipment.
Important:
must be observed to avoid operational impairment.
Do not proceed any of the above notices, until you have fully understood the implications.
Electromagnetic Compatibility (EMC) - USA
This equipment generates and radiates radio frequency energy and if not installed and used in accordance with the instruction
manual, may cause interference to radio communications. It has been tested and found to comply with the limits for a Class A
computing device pursuant to Subpart B of Part 15 of FCC rules, which are designed to provide reasonable protection against such
interference when operated in a commercial environment. Operation of this equipment in a residential area is likely to cause
interference in which case the user at his own expense will be required to take whatever measures may be required to correct the
interference. Shielded cables should be used with this model to ensure compliance with the Class A limits.
Electromagnetic Compatibility (EMC) - Europe
This digital equipment fulfils the requirements for radiated emission according to limit B of EN55022/1998 and the requirements
for immunity according to EN55024/1998 information technology equipment (Compliance is not valid for unshielded network
and printer cables).
Liability
Every care has been taken in the preparation of this manual; if you detect any inaccuracies or omissions, please inform your local
Axis office. Axis Communications AB cannot be held responsible for any technical or typographical errors and reserves the right
to make changes to the product and manuals without prior notice. Axis Communications AB makes no warranty of any kind with
regard to the material contained within this document, including, but not limited to, the implied warranties of merchantability
and fitness for a particular purpose. Axis Communications AB shall not be liable nor responsible for incidental or consequential
damages in connection with the furnishing, performance or use of this material.
Axis’ Trademarks
AXIS ThinWizard, AXIS IPJumpStarter, AXIS PrintMonitor, axinstall
Other Trademark Acknowledgments
Adobe Acrobat Reader, Apple, Ethernet, EtherTalk, IBM, LAN Manager, LAN Server, Macintosh, Microsoft, Novell NetWare, OS/2,
OS/400, AS/400, TokenTalk, UNIX, Windows, are registered trademarks of the respective holders.
Support Services
Should you require technical assistance, please contact your Axis dealer. If your questions cannot be answered immediately, your
Axis dealer will forward your queries through the appropriate channels to ensure you a rapid response.
On www.axis.com you will find on-line manuals, technical support, software updates, application software and corporate
information.
AXIS 5570e Installation Guide Page3
ENGLISH
Product Overview
Thank you for purchasing the AXIS 5570e print server. This product has been developed to connect your printers
anywhere in your network, allowing all network users access to the shared printer resources.
The AXIS 5570e is a LAN attached multi-protocol print server that prints IBM and ASCII data streams to any ASCII
printer. Supporting IBM Mainframes, AS/400, NetWare, UNIX, LAN Server Manager, Windows and Apple
EtherTalk, these products are ideal for IBM Mainframe and AS/400 sites that are migrating from pure IBM networks
to LAN environments.
About this Installation Guide
This Installation Guide is applicable for the AXIS 5570e with firmware version 7.10 or higher, providing
introductory information on how to set up and manage the print servers in various network environments. It is
intended for everyone involved in installing and managing the print server. To fully benefit from this document,
you should be familiar with basic networking principles.
These instructions are based on the settings in a new and unconfigured print server.
To reload the default parameters, you can perform a Factory Default, which will restore most of the settings. See
Using the Test Button, on page 35.
This information is available in French, German, Spanish and Italian on the Axis Network print Servers CD
shipped with this product or on the Axis Website at www.axis.com
In the AXIS 5570e User’s Manual you will find a more extensive description of the print server. The User’s Manual
is available on the Axis Network print Servers CD shipped with this product or on the Axis Website at
www.axis.com

Page 4 AXIS 5570e Installation Guide
Hardware Inventory
Unpack and check all the items using the following check list. Contact your dealer if anything is missing or
damaged. All packing materials are recyclable.
Model Summary
The AXIS 5570e is available in two versions; IPDS SNA and TCP/IP. The table below shows the functionality of
each version.
Note:
Item Notes
Network print server AXIS 5570e
Power adapter Model PS-H, country-specific
USB cable 0.7 meter
Adhesive holder and clip Mounting kit
CD Documentation and installation software
Printed Materials • AXIS 5570e Installation Guide (this document)
• Axis Warranty Document
AXIS 5570e IPDS SNA Version TCP/IP Version
IPDS support •
SCS support • •
3270DS support • •
TN3270E • •
TN5250E • •
SNA support •
Digital Copier Support •
Both versions may not be available in all countries in which Axis operates. Please contact your local dealer /
sales representative for more information.
AXIS 5570e Installation Guide Page5
ENGLISH
The AXIS 5570e Network Print Server
Backside label on print server
Printer Ports
AXIS 5570e is equipped with one USB port that is USB 1.1 and 2.0 low and full speed compliant, and one
high-speed IEEE 1284 compatible parallel port.
Test Button
The test button is used to
•printatest page to check the connection to the printer
•printtheparameter list showing the print server settings
•performaFactory Default of the print server, which will restore most parameters and
settings to their factory default values.
Network Connector
The network print server is designed for 10baseT Ethernet or 100base TX Fast Ethernet networks and is connected
to the network via a standard RJ-45 (Category 5 twisted pair) cable.
Network Indicator
The network indicator flashes to indicate network activity.
AXIS 5570e
Network connector
Test button
Network
indicator
Parallel printer port
(LPT1)
Power indicator
Power connector
USB printer port
(USB1)
Serial number

Page 6 AXIS 5570e Installation Guide
Power Indicator
The power indicator is lit while power is applied. If it is not lit, or if it flashes, there is a problem with the print
server or its power adapter.
Configuration and Management
The print server can be configured and managed from its internal Web pages, using HTTP as well as HTTPS in the
secure mode. The print server’s internal Web pages offer you a platform independent management tool that is
suitable for all supported network environments.
AXIS Network Product CD
The AXIS Network Product CD provides an easy-to-use electronic catalog, that includes Axis software, firmware,
user documentation, etc. All documents presented on the CD are in PDF format.
Note:
Secure Management
You can assign a password to restrict login and printer access, disable protocols and force a secure mode over https.
See the AXIS 5570e User’s Manual for details, on www.axis.com.
Supported Printers
Any standard printer can be used except host-based printers (also known as CAPT, GDI, PPA or Windows-based
printers).
If Adobe Acrobat Reader is not installed on to your computer, you cannot open pdf files. Go to
www.adobe.com to download free Acrobat Reader software.

AXIS 5570e Installation Guide Page7
ENGLISH
Installation Overview
To get your print server up and running on your network, follow the instructions below:
• Connect the AXIS 5570e to your network and to your printer as described in
Connecting the Hardware.
• Proceed to Setup and Configuration to determine which setup procedures that are
relevant to your network environment.
• Proceed to Print Server Management and Configuration for information on supported
management and configuration tools.
Connecting the Hardware
Follow these instructions to make your printer network ready:
1. Switch off the printer(s) and disconnect the AXIS 5570e power adapter.
2. Locate the serial number, found on the backside label of the print server, and write it down. You will need this
number during the network configuration.
3. Connect the print server to the printer(s).
4. Connect the print server to the network using a twisted pair RJ45 cable (of category 5 or better).
5. Switch on the printer(s) and connect the power adapter to the AXIS 5570e. The power indicator lights up.
When the network indicator starts to flash, the print server is correctly connected to the network.
6. Wait 1 minute and press the test button once. A test page will be printed on the connected printer — keep it
handy during the installation. The test page will show the assigned IP address of the print server.
Mounting the AXIS 5570e
Using the supplied clip and holder, your AXIS 5570e can be mounted in many ways, e.g. on the back of the printer
or on a wall.
Proceed to Setup and Configuration to determine which setup procedures that are relevant to your network
environment.
Adhesive Clip Fasten to print server by peeling off adhesive tape.
Adhesive Holder Fasten to mounting surface by peeling off adhesive
tape.

Page 8 AXIS 5570e Installation Guide
Setup and Configuration
1. Start out with setting an IP address on the print server, described in Assign an IP address, on page 9.
2. Refer to the table below to determine which setup procedures that are relevant to your network environment.
Environment Data Stream Network Configuration Actions
AS/400
SCS / IPDS SNA See the AXIS 5570e User’s Manual for further details.
SCS TN5250E (TCP/IP) AS/400 TN5250E Printing (SCS over IP), on page 13
IPDS PPR/PPD (TCP/IP) AS/400 or Mainframe IPDS over PPR/PPD Printing, on
page 15
IBM
Mainframe
SCS / IPDS
SNA See the AXIS 5570e User’s Manual for further details.
TN3270E (TCP/IP) See the AXIS 5570e User’s Manual for further details
IPDS PPR/PPD (TCP/IP) AS/400 or Mainframe IPDS over PPR/PPD Printing, on
page 15
NetWare TCP/IP and IPX/SPX Setup for NetWare, on page 24
Windows TCP/IP,
NetBIOS/NetBEUI Setup for Windows, on page 18
Macintosh TCP/IP, AppleTalk Setup for Macintosh, on page 30
UNIX TCP/IP Setup for UNIX, on page 31

AXIS 5570e Installation Guide Page9
ENGLISH
Assign an IP address
You can set the IP address of your print server using one of the following methods, depending on your network
operating environment:
Automatic IP Address Assignment
Manual IP Address Assignment
Method Server required Comment
DHCP DHCP server Dynamic assignment of IP addresses. See Automatic IP Address Assignment
using DHCP, on page 10
RARP RARP server Static assignment of I P adresses. Cannot be used over routers. See
Automatic IP Address Assignment using DHCP, on page 10
BOOTP BOOTP server Static assignment of IP addresses. See Automatic IP Address Assignment
using DHCP, on page 10
AutoIP No server required. Automatic assignment of IP addresses in Windows environments.
See Automatic IP Address Assignment using DHCP, on page 10
AXIS AddPrinter
Wizard Installing printers using AXIS AddPrinter, on page 18
Method Platform Comment See
arp/ping
Windows
Requires the IP address for each device to be
downloaded individually. Cannot be used over
routers.
You must define the Default Router and Subnet
Mask. Log in to the print server’s Web pages
and select Admin | Network Settings |
Detailed View | TCP/IP | Default Router and
Subnet Mask. DHCP, Auto-IP, BOOTP and RARP
must first be set to No
Setting the IP address
manually using ARP/Ping,
on page 11
UNIX/Mac OS X
Setting the IP address
manually using ARP/Ping,
on page 11
AXIS AddPrinter
Wizard Windows
Axis software that allows you to find print
servers in your network and assign an IP
address to them.
Installing printers using
AXIS AddPrinter, on page 18
AXIS ThinWizard Windows 2000/XP
Axis software that assists in setting the IP
address of multiple print servers. This software
is recommended for large organizations and
enerprise networks.
Print Server Management
using AXIS ThinWizard, on
page 33

Page 10 AXIS 5570e Installation Guide
Automatic IP Address Assignment using DHCP
If you are working in a network with automatic IP address assignment, your print server will obtain an IP address
automatically when you connect it to the network. Follow the instructions on this page to verify the IP address:
1. Open a Web browser (e.g. Internet Explorer, Netscape Communicator).
2. In the Location/Address field, enter the print server’s IP address, found on the test page (see Connecting the
Hardware) and press Enter.
3. If the Network Print Server Web page appears in your Web browser, the IP address was set automatically
when you connected the AXIS 5570e to your network.
4. If the Network Print Server Web page does not appear, you need to set the print server’s IP address manually
using one of the methods described in Manual IP address assignment.
Notes:
• Use a Web browser with JavaScript support and Java enabled.
• The AXIS 5570e supports WINS (Windows Internet Name Service), which is recommended when setting
the IP address using DHCP in Windows environments.
• If you are working in a WINS/ DDNS network, you can access the print server’s Web pages using its
default host name: In the Location/Address field, enter the default print server name AXISxxxxxx
(xxxxxx are the last six digits of the serial number, found on the print server’s underside label).
Example: If the serial number is 00 40 8c 18 1c f0, type AXIS181cf0 and press Enter.
• DHCP, RARP and BOOTP can be used to set the IP address in UNIX, see the AXIS 5570e User’s Manual for
details.
• See the AXIS 5570e User’s Manual for installation instructions in a NetBIOS/NetBEUI environment. The
User’s Manual is available on www.axis.com.

AXIS 5570e Installation Guide Page 11
ENGLISH
Automatic IP Address Assignment using AXIS AddPrinter
AXIS AddPrinter Wizard is an easy-to-use Windows application that allows you to find print servers in your
network and assign an IP address to them. See Installing printers using AXIS AddPrinter, on page 18.
Manual IP address assignment
To establish communication with the TCP/IP network, an IP Address must be assigned to your AXIS 5570e. Choose
the appropriate method according to your network:
•ARP/Ping - use this method to set the IP address for each new print server individually.
This method cannot be used over routers.
Refer to Setting the IP address manually using ARP/Ping, on page 11.
•AXIS ThinWizard software is the primary recommended tool for large organizations.
It can set IP addresses, discover and group print servers, install new firmware and
configure multiple Axis products concurrently.
Refer to Print Server Management using AXIS ThinWizard, on page 33
Note:
Setting the IP address manually using ARP/Ping
Refer to the appropriate section below to assign an IP address to your AXIS 5570e using arp/ping:
Windows
Open a Command Prompt and enter the following syntax:
The host will return reply from 192.168.3.191, or a similar message. This indicates that the address has been set and
that communication is established. You are now ready to print.
UNIX, Mac OS X
Open a Terminal and enter the following syntax:
The host will return psname is alive, or a similar message. This indicates that the address has been set and that
communication is established. You are now ready to print.
Important!
If you are using host names, you can map a unique host name to the IP address. Refer to your system man-
uals for instructions on how this is performed on your system.
Syntax Example
1.
2.
arp -s <Internet address> <Ethernet address>
ping <Internet address> arp -s 192.168.3.191 00-40-8c-18-16-36
ping 192.168.3.191
Syntax Example
1.
2.
arp -s <Internet address> <Ethernet address>
ping <Internet address> arp -s 192.168.3.191.00:40:8c:18:16:36
ping 192.168.3.191
You must define the Default Router and Subnet Mask when you set a static IP address. Log in to the print
server’s Web pages and select Admin | Network Settings | Detailed View | TCP/IP | Default Router and
Subnet Mask. DHCP, Auto-IP, BOOTP and RARP must first be set to No.

Page 12 AXIS 5570e Installation Guide
Notes:
• The AXIS 5570e supports WINS (Windows Internet Name Service), which is recommended when setting
the IP address using DHCP in Windows environments.
• Setting the IP address with arp and ping is only possible in the first ten minutes after re-booting the
print server.
• When you execute the ping command for the first time, you may experience a significantly longer
response time than usual.
• The arp command varies between different UNIX systems.
• You need root privileges on your UNIX system in order to execute the arp command and run axinstall
(refer to the AXIS 5570e User’s Manual for more information).
• Some BSD type systems expect the host name and serial number in reverse order. Furthermore IBM AIX
systems will require the additional argument ether.
Example: arp -s ether <host name> <Ethernet Address> temp

AXIS 5570e Installation Guide Page 13
ENGLISH
AS/400 TN5250E Printing (SCS over IP)
To establish communication with the TCP/IP network, you must first assign an IP address to your AXIS 5570e print
server. Refer to Assign an IP address.
Follow these instructions to configure your AS/400 and AXIS 5570e for TN5250E printing:
Important!
The AS/400 Host System Checklist
Note:
1. Type WRKCTLD *VWS on the AS/400 command line and press Enter. Determine the number of
auto-configured virtual devices on your AS/400 system. Press F3.
2. Type DSPSYSVAL QAUTOVRT and press Enter. Make sure that the parameter is greater than the number of
auto-configured virtual devices. Press F3.
3. Type DSPSYSVAL QCHRID and press Enter.Note the system language (code page) for future reference. Press
F3.
4. Type WRKTCPSTS *IFC and press Enter to determine the IP address of the AS/400.
Press F3.
Configuring the AXIS 5570e
Follow the instructions below to configure the AXIS 5570e for TN5250E printing in the AS/400 environment using
a Web browser:
1. Start a Web browser and enter the IP address or the host name of the AXIS 5570e in the Address/Location
Step Action Described in
1. Configuring the AS/400 host system The AS/400 Host System Checklist
2. Configuring the AXIS 5570e Configuring the AXIS 5570e
3. Completing the installation Verifying the Communication Link
• Make sure that the AS/400 host is running OS/400 V3R2 or higher with TCP/IP support installed and configured.
• Make sure that the latest PTFs are installed. Information about which PTFs to use can be obtained from
http://as400service.rochester.ibm.com/
For future reference, enter the values below in the AS/400 and Mainframe Parameter Checklist.

Page 14 AXIS 5570e Installation Guide
field. Press Enter. The internal Web pages of the AXIS 5570e will appear.
Notes:
2. Click the Configuration Wizard for IBM sessions button.
3. Click the Add Session button. This takes you to the Configuration Wizard which is a step-by-step guide
through the required configuration settings.
Notes:
Verifying the Communication Link
1. Type WRKCFGSTS *DEV xxxx*, where xxxx are the first four characters of the printer device name, on the
AS/400 command line. A list of printers will be displayed. Make sure that the printer session is Active.
2. Direct a printout to this printer device to check the integrity of the communication link.
3. Press the AXIS 5570e test button once to print a test page. Make sure that the TN5250E status is defined on the
test page as Idle, Actv or LU-1.
Note:
• To protect the admin pages and the Configuration Wizard from unauthorized use, enter a password
(which is pass by default) in the Root Password field under Admin | General Settings.
• The AXIS 5570e supports eight concurrent TN5250E host sessions.
• In the Configuration Wizard, you must choose a new and unused name for the printer (in the ‘Printer
Name’ field) in the ‘TN5250E Protocol Configuration’ window.
• In the Configuration Wizard’s Printer Driver window, PCL is used for laser printers, all other values apply
to matrix printers.
If the setup fails, please refer to the troubleshooting section in the AXIS 5570e User’s Manual, supplied on
www.axis.com

AXIS 5570e Installation Guide Page 15
ENGLISH
Proceed to Print Server Management and Configuration for information on supported management and
configuration tools.
AS/400 or Mainframe IPDS over PPR/PPD Printing
Note:
To establish communication with the TCP/IP network, you must first assign an IP address to your AXIS 5570e print
server. Refer to Assign an IP address.
Follow these instructions to configure your AS/400 or Mainframe and AXIS 5570e for IPDS over PPR/PPD printing:
Configuring the AS/400 Host System
When configuring the AS/400 host system you must create a printer device description as described below:
1. Issue the command CRTDEVPRT.
2. Select a name for the printer device and enter it on the Device Description (DEVD) line. The name may
comprise the letters A-Z and the numerals 0-9, but must begin with a letter. A maximum of 10 characters are
allowed. In the following instructions, the printer device name will be referred to as AXISPR1.
3. Enter *LAN at the Device class (DEVCLS) line.
4. Enter *IPDS at the Device type (TYPE) line.
5. Enter 0on the Device model (MODEL) line.
6. Enter *IP at the LAN attachment (LANATTACH) line.
7. Enter a port number at the Port number (PORT) line. The Axis print server is pre-configured with the port
number 5001 for IPDS printing.
8. Enter a FGID number at the Font Identifier (FONT) line, e.g. 11 (Courier).
9. Enter the Remote location (RMTLOCNAME). Use the IP address of the AXIS 5570e. Press Enter on your
keyboard to create the printer device description.
Configuring the Mainframe Host
1. Specify the TCP/IP address space name.
2. Define the Communication Control Unit, e.g. 3172, to MVS.
3. Modify the TCP/IP profile on your MVS system, if necessary.
• (AS/400 only) Make sure that the AS/400 host is running OS/400 V3R6 or higher, with TCP/IP support installed and con-
figured.
• (AS/400 only) PSF must be installed on your AS/400
• (AS/400 only) Make sure that the latest PTFs are installed. Information about which PTFs to use can be obtained from
http://as400service.rochester.ibm.com/
• Some AXIS 5570e models are not available with IPDS. Please refer to Model Summary.
Step Action Described in
1. Configuring the AS/400 host system Configuring the AS/400 Host System
Configuring the Mainframe host system Configuring the Mainframe Host
2. Configuring the AXIS 5570e Configuring the AXIS 5570e
3. Completing the installation Verifying the Communication Link (AS/400)

Page 16 AXIS 5570e Installation Guide
4. Verify the communication between the AXIS 5570e and the IBM Mainframe, by pinging the AXIS 5570e from
the host.
5. Define the AXIS 5570e as a writer-controlled printer to JES2 or to JES3.
JES2 Example:
JES3(using JNAME=PRT1) Example:
6. Define the printer to PSF with a PRINTDEV statement, including the IP address and port number.
For a more comprehensive description of the setup procedures, refer to the AXIS 5570e User’s Manual on
www.axis.com.
Configuring the AXIS 5570e
Follow the instructions below to configure your AXIS 5570e for AS/400 or Mainframe IPDS over PPR/PPD printing
using a standard Web browser:
1. Start a Web browser and enter the IP address or the host name of the AXIS 5570e in the location field. Press
Enter.
The internal Web pages of the AXIS 5570e will appear.
Note:
FSS (FSS1) PROC=SAMPPROC,HASPFSSM=HASPFSSM,
PRT1 FSS=FSS1,MODE=FSS,PRMODE=(LINE, PAGE,),
CLASS=C,UCS=0,SEP=NO,SEPDS=NO,CKPTPAGE=100,
START=YES,MARK=NO,TRKCELL=YES
FSSDEF,TYPE=WTR,FSSNAME=FSS3,PNAME=SAMPPRO3,SYSTEM=SYS1, TERM=NO
DEVICE,DTYPE=PRTAFP1,JNAME=PRT1,JUNIT=(,SYS1,,ON),FSSNAME=FSS3,
MODE=FSS,PM=(LINE,PAGE,),CHARS=(YES,GT12),
CARRIAGE=(TES,A868),CKPNTPG=100,HEADER=YES,WC=(C)
To protect the admin pages and the Configuration Wizard from unauthorized use, enter a password (by
default set to pass) in the Root Password field under Admin | General Settings.

AXIS 5570e Installation Guide Page 17
ENGLISH
Note for IPDS printing:
2. Click the Configuration Wizard for IBM sessions button.
3. Click the Add Session button. This will start the Configuration Wizard which is a step-by-step guide through
the required configuration settings.
Verifying the Communication Link (AS/400)
Follow the instructions below to verify the communication to the AXIS 5570e:
1. Type WRKCFGSTS *DEV AXISPR1 on the AS/400 command line and press Enter. The previously created
printer device will be displayed. The status of the printer device should be VARIED OFF.
2. Vary on the printer device by typing 1in the Opt field. Press Enter.
3. Press F5 to refresh the display. The printer device should now be VARIED ON.
4. Start the printer writer by typing STRPRTWTR AXISPR1 on the AS/400 command line. Press Enter.
5. Press F5 to refresh the display. The printer device should now be ACTIVE/WRITER.
6. Direct a printout to this printer device. A successful printout verifies the communication link between the
AS/400 and the AXIS 5570e.
Note:
Proceed to Print Server Management and Configuration for information on supported management and
configuration tools.
In the Configuration Wizard, you can choose between PCL or PostScript printing. Choose the printer lan-
guage that corresponds to your printer.
If the setup fails, please refer to the troubleshooting section in the AXIS 5570e User’s Manual, on
www.axis.com

Page 18 AXIS 5570e Installation Guide
Setup for Windows
To establish communication with the TCP/IP network, you must assign an IP address to your AXIS 5570e print
server. See Assign an IP address.
Installing printers using AXIS AddPrinter
AXIS AddPrinter is available on www.axis.com. When you have completed the AXIS AddPrinter Wizard, the
network printer is ready for use. To install a network printer you must be logged in as an Administrator or be a
member of the Administrators' group. Install AXIS AddPrinter on all Windows 2000, XP, Vista and Windows Server
2003 workstations that will print via the print server.
1. Before you continue, ensure that the print server is properly connected to the printer, network and power.
2. Start AXIS AddPrinter. Click Next. The Wizard will perform an automatic search for all Axis network printers,
which is indicated by the progress bar at the bottom of the screen.
3. Select a printer from the Select Network Printer list and click Next. (If the printer does not appear, see the
AXIS 5570e User’s Manual.)
4. The Wizard searches for a suitable printer driver. If it is not found, you will be asked to select a driver,
otherwise the Wizard suggests which Printer Model and Printer Driver to use. Click Change driver to select
another driver if needed, or click Finish to accept and install the suggested driver.
The installation is now complete and you can start using the network printer.
Note:
Installing Printers in Windows Vista using Windows Add Printer Wizard
1. Go to Start | Control Panel | Hardware and Sound.
2. Click Add a printer to start the Add Printer Wizard.
3. Click Add a local printer.
If your print server does not appear in the list or if you want to use the wizard to change between a
static/dynamic IP address, see the AXIS AddPrinter online help files or the AXIS 5570e User’s Manual which is
available on www.axis.com.

AXIS 5570e Installation Guide Page 19
ENGLISH
4. Click Create a new port. In the dropdown list, select Standard TCP/IP Port. Click Next.
5. Enter the IP address (or host name) of the print server in the field Hostname or IP Address. (Example:
192.168.0.90) The Port name will be filled in automatically when you enter the IP address, optionally, add the
port you want to use as a suffix. (Example: 192.168.0.90_USB1)
Ensure that Query the printer and automatically select the driver to use is selected and click Next.
6. If you have a multiport print server you will be prompted for Additional Port Information. Select the port to
which the printer is connected. (Example: USB1) Click Next.

Page 20 AXIS 5570e Installation Guide
7. If you already have the printer's driver installed, you will be asked whether to keep it or to replace it. Select
manufacturer and model of your printer. If you have the printer driver on an installation disk/CD, then click
Have Disk and browse to the directory where you have the driver.
Click Next.
8. Enter a Printer name and choose whether you want to make it your default printer.
Click Next.
9. Click Print a test page to verify your installation.
Click Finish.
You have now successfully completed the installation.
Installing Printers in Windows 2000 and Windows XP
Follow the instructions below to use the standard Windows method (TCP/IP over LPR) for adding a network printer
in Windows 2000/ Windows XP.
Windows XP:
1. Go to Start | Printers and Faxes and click the Add a Printer icon to start the Add Printer Wizard. Click Next.
Windows 2000:
Other manuals for 5570e
3
Table of contents
Languages:
Other Axis Print Server manuals
Popular Print Server manuals by other brands

Epson
Epson C32C824461 - UB R03 Print Server Technical reference guide

SMC Networks
SMC Networks EZ Networking SMC2621W-U Specifications

TRENDnet
TRENDnet TEW-P21G Quick installation guide

CNET
CNET CNP-101UW Specifications

Brother
Brother NC-7100W Network user's guide

Airlinkplus
Airlinkplus APSUSB201 Quick installation guide