Auto Detect Day/Night
In greenhouse application, CO2 control
is not necessary while light is weak.
The built-in Photo-Cell sensor in
can automatically detect
whether it is Day (above 60 Lux) or
Night(less than 20Lux). It can override
the CO2 control and shut off the CO2
generator by turning off the output power
during the night. Conversely, if the
Photo-Cell detects light (>60Lux) and
the CO2 level is consistently low for 30
seconds, the device will start the CO2
generator by turning on output power.
Above auto detect Day/Night function
is ignored while users pick up “ Human”
mode in advanced setting. With auto
detection is ignored, the relay output
control is only decided by CO2 value,
only. Day or Night has no influence on it
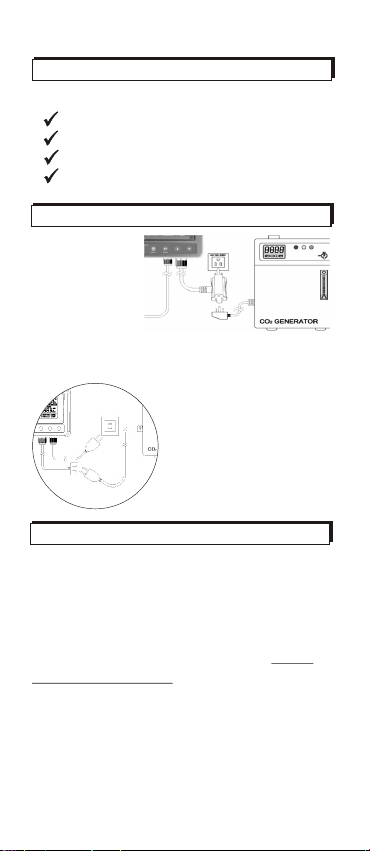
Output Control
Output power is on when CO2 value is
lower Set Center-(1/2) Set zone, and off
when CO2 concentration is above
Set Center+(½) Set zone. For example,
if the Set Center is 1200ppm, and the
Set zone is 400ppm, the output power
will shut off when CO2 over 1200+
(1/2)*(400)=1400ppm, and power on
when CO2 below 1200-(½)*(400)=
1000ppm.
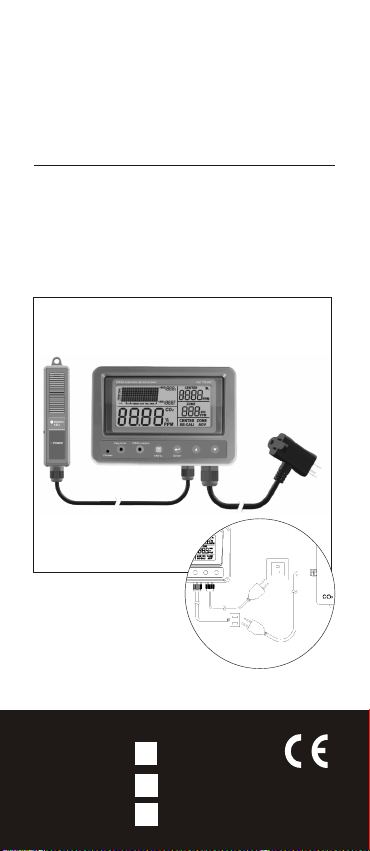
CO2
sensing probe
Above output control pattern is opposite
6
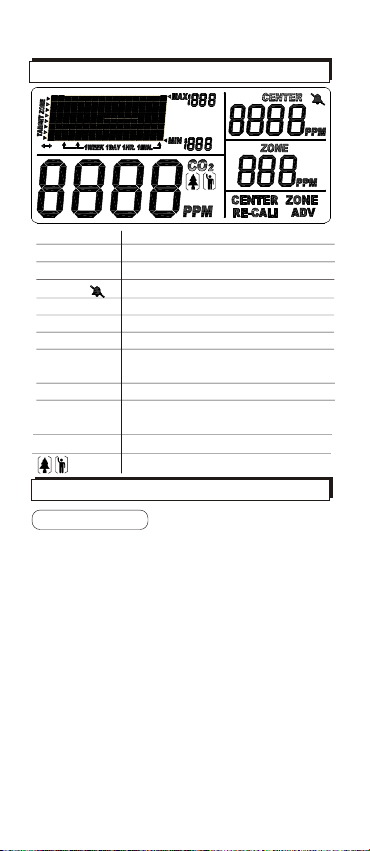
and minimum values on the displayed
chart. While you press down key to
change the chart time scale, these value
update as well.
Display Backlight
By pressing any key can activate the
backlight for 30 seconds to help you
operate in dark environment.