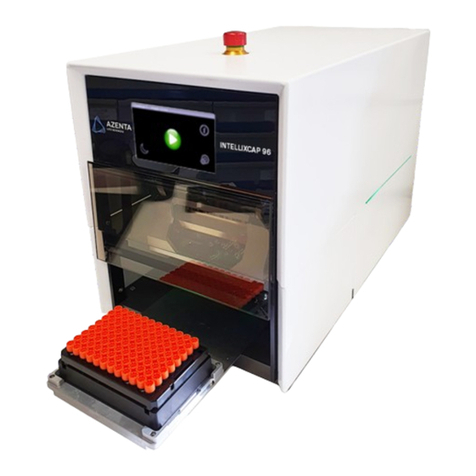
AZENTA Direct Tube Marker User manual

Direct Tube Marker
Operation Manual
383555 Revison A

Cover Direct Tube Marker
Part Number: 383555 Rev. A
Azenta, Inc.
Information provided within this document is subject to change without notice, and although believed to be accurate,
Azenta, Inc. assumes no responsibility for any errors, omissions, or inaccuracies.
BioStore™, BioWarehouse™, SampleStore™, Strata™, Tube Auditor™, Azenta™, Azenta Life Sciences™, and the Azenta
logo are trademarks of Azenta, Inc.
CryoExchange®, CryoPod®, FrameStar®, FreezerPro®, and IntelliXcap® are registered U.S. trademarks of Azenta, Inc.
All other trademarks are properties of their respective owners.
© 2023 Azenta, Inc. All rights reserved. The information included in this manual is proprietary information of Azenta, Inc.
and is provided for the use of Azenta, Inc. customers only and cannot be used for distribution, reproduction, or sale
without the express written permission of Azenta, Inc.
This technology is subject to United States export Administration Regulations and authorized to the destination only;
diversion contrary to U.S. law is prohibited.
Original manual printed in English.
These are the original instructions for the Direct Tube Marker.
2Copyright © 2023, Azenta, Inc.

Azenta Life Sciences Cover
Part Number: 383555 Rev. A
Corporate Headquarters
200 Summit Drive, 6th Floor
Burlington, MA 01803 U.S.A.
European Union Representative
Im Leuschnerpark 1B
64347 Griesheim, Germany
ForCustomer Service/Sales Inquiries:
Location Contact Number Website
North America +1-888-2AZENTA (+1-888-229-3682)
www.azenta.comEurope +44-161-777-2000
Japan +81-3-6628-2950
For Technical Support:
Location Contact Number Website
North America +1-800-379-7221
www.azenta.comEurope +41-31-770-7373 / +44-161-777-2107
Japan +81-3-6628-2950
Copyright © 2023, Azenta, Inc. 3

Cover Direct Tube Marker
Part Number: 383555 Rev. A
Table of Contents
Cover 1
1. Safety Information 6
Safety Instructions 7
Regulatory Compliance and Declaration of Conformity 8
2. Introduction 9
The Instrument 10
Package Contents 11
Direct Tube Marker Parts 12
Direct Tube Marker External Parts 12
Direct Tube Marker Internal Parts 13
3. Software Installation 14
Installing Direct Tube Marker Software 15
4. Hardware Installation 24
How to Install a Ribbon for Printing 25
How to Set-up Tube Support 27
Selecting and Installing Tube Adapter 27
Setting Adjustable Support Platform 29
Using Magnetic Pole Adapter 30
Setting the Sled Pivot Point 32
How to Connect Printer to a PC 35
5. Preparation for Printing 36
How to Create Label Content 37
How to Set the Tube Label Dimensions 37
How to Create Text Cells 40
How to Create Linear Barcode Cells 42
How to Create Datamatrix Cells 44
How to Create Graphic Files 46
How to Edit Cell Content Manually 48
How to Bind Cell Content to Data Spreadsheet .CSV 51
How to Edit Cell Size and Placement 54
How to Save and Load Labels 56
How to Manually Enter Data into Direct Tube Marker Spreadsheet .CSV 57
How to Enter Data into the Direct Tube Marker Spreadsheet .CSV 60
How to Import Data from Microsoft® Excel into Direct Tube Marker Spreadsheet .CSV 61
How to Set the Printer Settings 63
How to Set Printer Settings 63
How to Enable Tube Lift (On/Off) 65
How to Control the Sled Movement 66
How to Perform a Firmware Update 67
6. Printing Modes 69
How to Use Print Mode – All 70
How to Use Print Mode – Selected 71
4Copyright © 2023, Azenta, Inc.

Azenta Life Sciences Cover
Part Number: 383555 Rev. A
How to Use Print Mode – Single 72
How to Adjust the Ribbon during Print Mode 73
7. How to Print using Multiple Printers 74
How to Connect a Printer to Software 75
How to Print using Multiple Printers 77
How to Disconnect a Printer from Software 78
8. Error Messages/Troubleshooting 79
Error Messages 80
Troubleshooting 81
Troubleshooting - General 81
Troubleshooting ‒ Insufficient Printing Quality 83
9. Appendices 84
Appendix A: Technical Specifications 85
Appendix B: Accessories - Ordering Information 86
Accessories 86
Ordering Information 86
Appendix C: Warranty 88
Appendix D: Shipping Instruction 90
Appendix E: WEEE Statement (European Union) 91
10. Maintenance 92
Cleaning the Printhead 93
Copyright © 2023, Azenta, Inc. 5

1. Safety Information
ReadtheSafetyChapter
Failure to review the Safety chapter and follow the safety warnings can result in death or
serious injury.
lAll personnel involved with the operation or maintenance of this product must read
and understand the information in this safety chapter.
lFollow all applicable safety codes of the facility as well as national and international
safety codes.
lKnow the facility safety procedures, safety equipment, and contact information.
lRead and understand each procedure before performing it.
This operation manual contains important operating and maintenance instructions which must be read,
understood, and followed by the product user. Failure to use this product according to this operation
manual may degrade or defeat the protection normally provided by this product. Read this manual prior
to product use and keep it for future reference.
6Part Number: 383555 Rev. A

Azenta Life Sciences 1. Safety Information
Part Number: 383555 Rev. A Safety Instructions
Safety Instructions
NOTE: This product has been tested to meet the requirements of IEC/EN 61010-1:2010,
UL 61010-1 (2012) and CAN/ CSA-C22.2 No. 61010 (2012).
If the equipment is used in a manner not specified by the manufacturer, the protection provided by the
equipment may be impaired.
Reference the following list of safety instructions:
lKeep the device away from humidity.
lCheck the voltage of the power source before you connect the equipment to the power outlet.
lTake care not to spill any liquid on the printer.
lOnly qualified service personnel should unscrew the base of the instrument or touch the back the LCD
display.
lTurn off the power and unplug the device before maintenance.
lDo not touch any moving parts.
lOnly use the Direct Tube Marker with the AC/DC adapter provided with the equipment.
lIf the power supply is damaged please do not attempt to use the Direct Tube Marker.
lDo not position the Direct Tube Marker so that it is difficult to operate the disconnecting device (detachable
plug).
Copyright © 2023, Azenta, Inc. 7

1. Safety Information Direct Tube Marker
Regulatory Compliance and Declaration of
Conformity Part Number: 383555 Rev. A
Regulatory Compliance and Declaration of Conformity
The Direct Tube Marker meets the requirements of the European Union’s Machinery Directive
2006/42/EC and 2014/30/EU as a completed machine. In accordance with the Directive, Azenta Life
Sciences has issued a Declaration of Conformity and the Direct Tube Marker has a CE mark affixed.
8Copyright © 2023, Azenta, Inc.

2. Introduction
The following chapter details the external and internal parts of the Direct Tube Marker and includes a
list of all contents within the product's package.
Part Number: 383555 Rev. A 9

2. Introduction Direct Tube Marker
The Instrument Part Number: 383555 Rev. A
The Instrument
The Direct Tube Marker allows printing directly onto the surface of a wide range of tubes including
centrifuge and cryogenic vials from 0.5 – 50 ml in volume, limiting need and use of sticky labels or
marker pens. Markings are resistant to ethanol, isopropanol, water, DMSO, liquid nitrogen and
mechanical stress. The prints are also stable over a wide temperature range (-196°C to 100°C).
Markings do not stain your hands when touching the tubes.
NOTE: Resistance varies between ribbon colors. Please refer to the Direct Tube Marker
website on www.azenta.com for an overview chart of ribbon resistance & compatibility.
Our label design software gives the user complete flexibility when creating their label layout. Each piece
of data, be it text, barcodes or graphic files can be placed independently of one another. Depending on
the printing needs, this ensures the correct data is called upon for each cell or emphasis is given to the
most important information.
The instrument also prints linear barcodes and 2D codes in various module sizes and graphic files
(.bmp, .jpg, .gif, .png) such as company logos. Print orientation can be set within 360°.
10 Copyright © 2023, Azenta, Inc.

Azenta Life Sciences 2. Introduction
Part Number: 383555 Rev. A Package Contents
Package Contents
PackageContents
Direct Tube Marker
3 X Tube Adapters
Tube Adapter Hole Diameter Product Code
Tube Adapter for 1.5 ml/2 ml tubes 11.5 mm 4ti-0681
Tube Adapter for 2D cluster tubes 8.5 mm 4ti-0683
Tube Adapter for cryo tubes 12.7 mm 4ti-0684
AC adapter 18W 18VDC (input 100-240VAC)
7 mm magnetic pole adapter
USB A-B cable
Operation manual
Shipping safety instruction
USB Flash Drive
Copyright © 2023, Azenta, Inc. 11

2. Introduction Direct Tube Marker
Direct Tube Marker Parts Part Number: 383555 Rev. A
Direct Tube Marker Parts
Direct Tube Marker External Parts
Direct Tube Marker Front
Number Description
1 Tube Adapter
2 LCDDisplay
3 Top Cover
Direct Tube Marker Back
Number Description
1 Keyboard Connector (USB/A)
2 PCConnector (USB/B)
3 DCPower Connector
12 Copyright © 2023, Azenta, Inc.

Azenta Life Sciences 2. Introduction
Part Number: 383555 Rev. A Direct Tube Marker Parts
Direct Tube Marker Internal Parts
Number Description
1 Sled
2 Solenoid
3 Adjustable Pivot Point
4 Ribbon Tensioner
5 Un-printed Ink Ribbon
6 Adjustable Support Base Knob
7 Printhead
8 Dust Collector
9 Adapter Guide Pin
10 Tube Sensor
11 Printed Ink Ribbon
12 Spool Locking Cap
Copyright © 2023, Azenta, Inc. 13

3. Software Installation
The following chapter details the installation process for the Direct Tube Marker software.
14 Part Number: 383555 Rev. A

Azenta Life Sciences 3. Software Installation
Part Number: 383555 Rev. A Installing Direct Tube Marker Software
Installing Direct Tube Marker Software
Supplied with the Direct Tube Marker is a USB stick containing a folder to the software installer. Within
this folder are two files:
lDirect Tube Marker Installer (Windows Installer package .msi)
lSet-up (Application .exe)
To install the software, you must execute the installer file. Follow the steps below to install your new
Direct Tube Marker software.
NOTE: Both the installer and set-up files must be located in the same file space for
installation to be successful. Azenta recommends you run the installer directly from the
USB stick provided within the product package.
Step Action
1. Plug the provided USB stick into your computer to access the Direct Tube Marker software.
2.
Locate the Direct_Tube_Marker_Setup_3_4_1_159.exe file and double-click it.
The Install window opens.
Copyright © 2023, Azenta, Inc. 15

3. Software Installation Direct Tube Marker
Installing Direct Tube Marker Software Part Number: 383555 Rev. A
Step Action
3.
Select the Install button.
The Install Loading window appears.
16 Copyright © 2023, Azenta, Inc.

Azenta Life Sciences 3. Software Installation
Part Number: 383555 Rev. A Installing Direct Tube Marker Software
Step Action
4.
The FTDI CDM Drivers window opens.
Select the Extract button.
The Welcome Device Drive Installation window opens.
Copyright © 2023, Azenta, Inc. 17

3. Software Installation Direct Tube Marker
Installing Direct Tube Marker Software Part Number: 383555 Rev. A
Step Action
18 Copyright © 2023, Azenta, Inc.

Azenta Life Sciences 3. Software Installation
Part Number: 383555 Rev. A Installing Direct Tube Marker Software
Step Action
5.
Select the Next button.
The License Agreement window opens.
Copyright © 2023, Azenta, Inc. 19

3. Software Installation Direct Tube Marker
Installing Direct Tube Marker Software Part Number: 383555 Rev. A
Step Action
6.
Select the radio button next to the I accept this agreement option.
20 Copyright © 2023, Azenta, Inc.
Table of contents
Other AZENTA Laboratory Equipment manuals
Popular Laboratory Equipment manuals by other brands

Zip
Zip HydroTap G4 user guide

THORLABS
THORLABS KURIOS-WB1 user guide

PolyScience
PolyScience WBE10A11B Operator's manual

Thermo Scientific
Thermo Scientific Lindberg/Blue M Mini-Mite TF55030 Installation and operating manual

iPort
iPort CONNECT PRO user guide

FARMALABOR
FARMALABOR OPTIMATIC 300 Use and maintenance manual

Xylem
Xylem WTW Turb 750 IR/T operating manual

Sheldon
Sheldon Shel Lab Installation & operation manual

POL-EKO
POL-EKO SMART ST 1 instruction manual

Tuttnauer
Tuttnauer ELV-D Operation & maintenance manual

Thermo Scientific
Thermo Scientific MaxQ 2000 CO2 Plus Operation manual

Beckman Coulter
Beckman Coulter J-Lite JLA 16.250 instruction manual