manuals.online logo
Brands
  1. Home
  2. •
  3. Brands
  4. •
  5. Aztech
  6. •
  7. Adapter
  8. •
  9. Aztech WL230USB Wireless B+G User manual

Aztech WL230USB Wireless B+G User manual

WL230USB Wireless B+G USB Adapter
User Manual
Page 2 of 37
© Cop right 2007
All rights reserved. No part of this document ma be reproduced, republished, or retransmitted in an form
or b an means whatsoever, whether electronicall or mechanicall , including, but not limited to, b wa
of photocop ing, recording, information recording, or through retrieval s stems without the express written
permission of the owner. The owner reserves the right to revise this document at an time without the
obligation to notif an person and/or entit of such revisions and/or changes. All other compan or
product names mentioned are used for identification purposes onl and ma be trademarks of their
respective owners.
User Manual
Page 3 of 37
Contents
About the Product ...................................................................................................... 4
System Requirements ................................................................................. 5
Device Design.............................................................................................. 5
Getting Started........................................................................................................... 6
Check Package Contents.............................................................................. 6
Remove or Disab e Conf icts ........................................................................ 7
Internet Sharing, Prox , and Securit Applications.................................................7
Configuring TCP/IP Settings .....................................................................................8
Configuring Internet Properties ...............................................................................8
Removing Temporar Internet Files ........................................................................9
Insta ation............................................................................................................... 10
For Windows Vista ..................................................................................... 10
For Windows XP......................................................................................... 11
For Windows 2000..................................................................................... 12
For Windows Me ........................................................................................ 13
For Windows 98SE...................................................................................... 14
For Macintosh ............................................................................................ 15
About the Wire ess B+G Uti ity ................................................................................. 21
Configuration Tab...................................................................................... 21
Advance...................................................................................................................23
Securit Enable (Privac Configuration) ................................................................24
Site Survey Tab.......................................................................................... 34
About Tab .................................................................................................. 35
Certifications ............................................................................................................ 36
User Manual
Page 4 of 37
About the Product
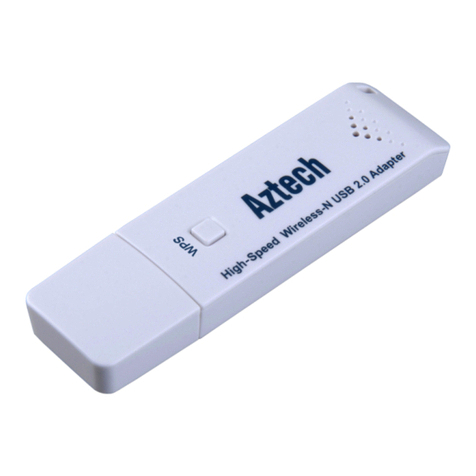
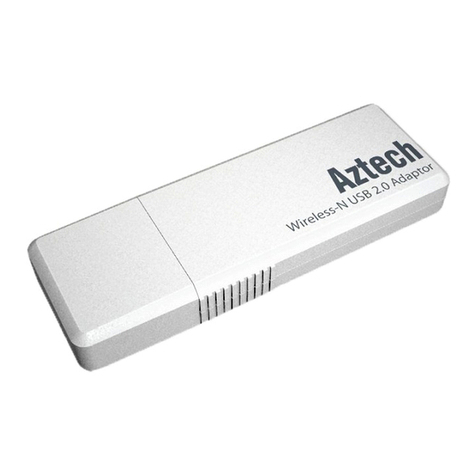
WL230USB provides wireless connectivit to desktop and laptop computers. The device
performs the function of a radio broadcaster and receiver to communicate with a
wireless network. This gives the computer connected with WL230USB the capabilit to
communicate with other devices and use the Internet service available in the wireless
network.
WL230USB is capable of connecting with wireless networks that utilize the Wireless B and
Wireless G protocols. Wireless B broadcasts data at a speed of up to 11 Megabits per
second (Mbps) while Wireless G promises a speed of up to 54 Mbps. Bear in mind that
these speeds have nothing to do with the speed of our Internet connection. Nowada s,
most high-speed Internet connections provide 3 to 5 Mbps, which is lower than the
speed of the Wireless B protocol.
WL230USB is eas to setup - connect it to a USB port, install the necessar driver
software, and then connect to a wireless network. USB ports look ph sicall the same but
there are generall two variants namel USB 1.1 and USB 2.0. Connect the device to a
USB 2.0 port because it provides twice the speed of a USB 1.1 port. In most cases
especiall for desktop computers, USB 2.0 ports are placed behind the computer case.
Connecting WL230USB behind the computer case impedes signal strength because the
device is partl hidden. In situations like this, use the USB Extension to help place
WL230USB more prominentl to the host access point.
User Manual
Page 5 of 37
System Requirements
 Pentium
®
233 processor or higher
 128MB RAM
 20MB available hard disk space (s stem files and modem driver onl )
 A free USB Port
 CD-ROM drive
Device Design
The LED lights up when the device is connected to a wireless network. The LED flickers
when the device is scanning for all available networks or transmitting/ receiving data.
User Manual
Page 6 of 37
Getting Started
Setting up the device is eas . The flowchart below provides an outline of the steps ou
need to go through. There are brief descriptions beside each step to help ou along.
Detailed instructions are provided in the subsequent pages.
Check Package Contents
Package contents include:
 Wireless B+G USB Adapter
 Eas Start Guide
 Resource CD
 USB Extension Cable
User Manual
Page 7 of 37
Remove or Disab e Conf icts
To make sure the router installation moves on smoothl , ou need to remove or disable
conflicts that ma interfere with the installation. Probable conflicts ma include:
 Internet sharing applications
 Prox software
 Securit software
 TCP/IP settings
 Internet properties
 Temporar Internet files
Internet Sharing, Prox , and Securit Applications
Internet sharing, prox software, and firewall applications ma interfere with the router
installation. These should be removed or disabled before ou install and configure the
router.
If ou have an of the following or similar applications installed on our computer,
remove or disable them according to the manufacturer’s instructions.
Internet Sharing Applications
Internet Sharing ApplicationsInternet Sharing Applications
Internet Sharing Applications
Prox Software
Prox SoftwareProx Software
Prox Software
Securit Software
Securit SoftwareSecurit Software
Securit Software
Microsoft Internet Sharing WinGate S mantec
WinProx Zone Alarm
User Manual
Page 8 of 37
Configuring TCP/IP Settings
Use the default TCP/IP settings to allow the router to provide a network address to the
computer,
To set the TCP/IP properties:
1. Select Start > Run. This opens the Run dialog box.
2. Enter control ncpa.cpl and then click OK. This opens the Network Connections in
our computer.
3. Right-click LAN and then select Properties. This opens the Local Area Connection
Properties dialog box.
4. Select Internet Protocol (TCP/IP) and then click Properties. This opens the Internet
Protocol (TCP/IP) dialog box.
5. Select Obtain an IP address automaticall .
6. Click OK to close the Internet Protocol (TCP/IP) dialog box.
7. Click OK to close the Local Area Connection Properties dialog box.
Configuring Internet Properties
To set the Internet Properties:
1. Select Start > Run. This opens the Run dialog box.
2. Enter control inetcpl.cpl and then click OK. This opens the Internet Properties
dialog box.
3. Click Connections tab.
4. In the Dial-up and Virtual Private Network settings pane, select Never dial a
connection.
5. Click OK to close the Internet Properties dialog box.
User Manual
Page 9 of 37
Removing Temporar Internet Files
Temporar Internet files are files from Web sites that are stored in our computer. Delete
these filed to purge the Internet cache and remove footprints left b the Web pages ou
visited.
To remove temporary Internet fi es:
1. Select Start > Run. This opens the Run dialog box.
2. Enter control and then click OK. This opens the Control Panel.
3. Double-click Internet Options. This opens the Internet Options dialog box.
4. In the Temporar Internet Files pane, click Delete Cookies.
5. Click Delete Files.
6. Click OK to close the Internet Properties dialog box.
User Manual
Page 10 of 37
Insta ation
For Windows Vista
To insta the driver software in Windows Vista:
1. Connect WL230USB to an available USB port.
2. The Found New Hardware opens after ou connect WL230USB to the USB port.
Select Locate and install driver software (recommended).
3. Select Don’t search online.
4. Insert the Resource CD into the CD-ROM and then click Next.
5. Select Install this driver software an wa when a message informing ou that
Windows cannot verif the publisher of the software.
6. Click Next.
7. Click Close.
8. A new icon appears in the s stem tra - . Click this icon.
9. Select Connect to a network. This opens the Connect to a network dialog box.
10. Select a wireless network and then click Connect.
If wireless securit is activated for the wireless network, enter the securit ke
and then click Connect.
User Manual
Page 11 of 37
For Windows XP
To insta the driver software in Windows XP:
Warning…
Warning…Warning…
Warning…
Do not connect the device until the Utilit is not completel installed.
1. Insert the Resource CD to the CD-ROM. This opens the WL230USB Wireless B+G
Utilit Setup. If the Utilit did not open automaticall , select Start > Run. Enter
d:\setup.exe, where d is the CD-ROM drive.
2. Click Next.
3. Click Next.
4. Click Next. The Setup Status displa s the installation progress.
5. Click Finish.
6. Connect WL230USB to an available USB port. This opens the Found New Hardware
Wizard.
7. Select No, not this time and then click Next.
8. Select Install the software automaticall (Recommended) and then click Next.
9. Click Continue An wa when the Hardware Installation dialog box appears.
10. Click Finish.
11. A new icon appears in the S stem tra - . Double-click this icon to open
WL230USB Wireless B+G Utilit .
12. Click Site Surve .
13. Select an ESSID and then click Join. The Privac Configuration dialog box opens
when a network ke is required from the selected ESSID. Enter the Network ke ,
confirm the Network ke , and then click OK. The S stem tra icon changes to
either of the following:
User Manual
Page 12 of 37
• - You have a good connection to a wireless network.
• - You have a weak connection to a wireless network.
For Windows 2000
To insta the driver software in Windows 2000:
Warning…
Warning…Warning…
Warning…
Do not connect the device until the Utilit is not completel installed.
1. Insert the Resource CD to the CD-ROM. This opens the WL230USB Wireless B+G
Utilit Setup. If the Utilit did not open automaticall , select Start > Run. Enter
d:\setup.exe, where d is the CD-ROM drive.
2. Click Next.
3. Click Next.
4. Click Next. The Setup Status displa s the installation progress.
5. Click Finish.
6. Connect WL230USB to an available USB port.
7. Click Yes when the Digital Signature Not Found dialog box opens.
8. A new icon appears in the S stem tra - . Double-click this icon to open
WL230USB Wireless B+G Utilit .
9. Click Site Surve .
10. Select an ESSID and then click Join. The Privac Configuration dialog box opens
when a network ke is required from the selected ESSID. Enter the Network ke ,
confirm the Network ke , and then click OK.
The S stem tra icon changes to either of the following:
User Manual
Page 13 of 37
• - You have a good connection to a wireless network.
• - You have a weak connection to a wireless network.
For Windows Me
To insta the device in Windows Me:
Warning…
Warning…Warning…
Warning…
Do not connect the device until the Utilit has been completel installed.
1. Insert the Resource CD to the CD-ROM. This opens the WL230USB Wireless B+G
Utilit Setup. If the Utilit did not open automaticall , select Start > Run. Enter
d:\setup.exe, where d is the CD-ROM drive.
2. Click Next.
3. Click Next.
4. Click Next. The Setup Status displa s the installation progress.
5. Click Finish.
6. Connect WL230USB to an available USB port.
7. A new icon appears in the S stem tra - . Double-click this icon to open
WL230USB Wireless B+G Utilit .
8. Click Site Surve .
9. Select an ESSID and then click Join. The Privac Configuration dialog box opens
when a network ke is required from the selected ESSID. Enter the Network ke ,
confirm the Network ke , and then click OK.
The S stem tra icon changes to either of the following:
• - You have a good connection to a wireless network.
User Manual
Page 14 of 37
• - You have a weak connection to a wireless network.
For Windows 98SE
To insta the device in Windows 98SE:
Warning…
Warning…Warning…
Warning…
Do not connect the device until the Utilit has been completel installed.
1. Insert the Resource CD to the CD-ROM. This opens the WL230USB Wireless B+G
Utilit Setup. If the Utilit did not open automaticall , select Start > Run. Enter
d:\setup.exe, where d is the CD-ROM drive.
2. Click Next.
3. Click Next.
4. Click Next. The Setup Status displa s the installation progress.
5. Click Finish.
6. Connect WL230USB to an available USB port.
7. Click OK when the Insert Disc dialog box opens and then insert our Windows
98SE CD in the CD-ROM.
8. A new icon appears in the S stem tra - . Double-click this icon to open
WL230USB Wireless B+G Utilit .
9. Click Site Surve .
10. Select an ESSID and then click Join. The Privac Configuration dialog box opens
when a network ke is required from the selected ESSID. Enter the Network ke ,
confirm the Network ke , and then click OK.
The S stem tra icon changes to either of the following:
User Manual
Page 15 of 37
• - You have a good connection to a wireless network.
• - You have a weak connection to a wireless network.
For Macintosh
These instructions are provided for installing WL230USB in the Mac OS X platform.
Minimum requirements inc ude:
• G4 or higher
• 128MB RAM
• 20MB free hard disk space
• A free USB Port
• CD-ROM drive
• Mac OS 10.3 and above
Install the Driver and the Utilit
A driver is a software program created to allow our device to work in our computer.
The Utilit , on the other hand, is used to configure and control the device functions.
Note:
Note:Note:
Note: Do not connect WL230USB until ou complete the driver software installation.
To insta the driver and uti ity:
1. Exit all programs.
2. Insert the Resource CD into our CD-ROM. A disk image file appears on the
desktop entitled WL230USB.
3. Double-click WL230USB and then open Mac Driver.
4. Open the open folder entitled with the version of our operating s stem.
User Manual
Page 16 of 37
5. Double-click WL230USB_MacUSB_install.dmg. This creates a new object on the
desktop called WL230USB_MacPkg_install.
6. Double click WL230USB_MacPkg_install file to start the installation of the Mac
driver. This opens the Introduction step.
7. Click Continue in the Introduction step.
8. Click Continue in the Read Me step.
9. Select a destination and then click Continue.
10. Click Install in the Installation T pe step.
User Manual
Page 17 of 37
11. When the Macintosh Administrator authentication window appears, enter the
administrator Name and password or phrase, and then click OK.
12. Click Continue Installation when a message appears informing ou that the
computer will restart after the installation.
13. Click Restart to finish installing the driver software.
User Manual
Page 18 of 37
14. Click Restart to finish installing the driver software.
Connect the Device and Set the Network Settings
To connect the device and update the network settings:
1. Connect WL230USB to a USB port.
2. Go to S stem Preferences and then select Network.
3. Select Automatic as the Location.
4. Show the latest installed Ethernet Adapter.
5. Click TCP/IP.
6. Select Using DHCP to Configure Ipv4.
User Manual
Page 19 of 37
7. Click Appl Now.
8. Close the screen.
Connect to a Wireless Network
1. Go to S stem Preferences. WL230USB appears in the categor entitled Other.
2. Double-click WL230USB.
3. Double click on an available network.
4. Click No to enter the securit ke setting. This opens the WEP ke setting screen.
Otherwise, click Yes if there is no securit implemented in the available wireless
network.
User Manual
Page 20 of 37
5. Select the Ke Length, Ke Format, Default Ke , and Ke Value for the wireless
network.
6. Click Appl .
7. Click OK.
Uninstall
To uninsta :
1. Exit all programs.
2. Insert the Resource CD into our CD-ROM. A disk image file appears on the
desktop entitled WL230USB.
3. Double-click WL230USB and then open Mac Driver.
4. Double click WL230USB_MacPkg_uninstall.
5. Remove the device and then reboot the s stem.

Other manuals for WL230USB Wireless B+G

2

Other Aztech Adapter manuals

Aztech 200Mbps HomePlug AV Ethernet Adaptor User manual

Aztech

Aztech 200Mbps HomePlug AV Ethernet Adaptor User manual

Aztech WL950USB Guide

Aztech

Aztech WL950USB Guide

Aztech HomePlug AV User manual

Aztech

Aztech HomePlug AV User manual

Aztech HL110E User manual

Aztech

Aztech HL110E User manual

Aztech HL117EP Instructions for use

Aztech

Aztech HL117EP Instructions for use

Aztech HL117E Instructions for use

Aztech

Aztech HL117E Instructions for use

Aztech 200Mbps HomePlug AV Ethernet Adaptor User manual

Aztech

Aztech 200Mbps HomePlug AV Ethernet Adaptor User manual

Aztech Wireless N USB Adapter User manual

Aztech

Aztech Wireless N USB Adapter User manual

Aztech HomePlug AV User manual

Aztech

Aztech HomePlug AV User manual

Aztech WL552USB Instructions for use

Aztech

Aztech WL552USB Instructions for use

Aztech WL230USB Wireless B+G Instructions for use

Aztech

Aztech WL230USB Wireless B+G Instructions for use

Aztech Easy Guide

Aztech

Aztech Easy Guide

Aztech WL562 User manual

Aztech

Aztech WL562 User manual

Aztech WL558USB User manual

Aztech

Aztech WL558USB User manual

Aztech HL113EW Instructions for use

Aztech

Aztech HL113EW Instructions for use

Aztech 500Mbps 4-Port HomePlugAV Ethernet Adaptor User manual

Aztech

Aztech 500Mbps 4-Port HomePlugAV Ethernet Adaptor User manual

Aztech HL115EP Instructions for use

Aztech

Aztech HL115EP Instructions for use

Aztech WL582USB Instructions for use

Aztech

Aztech WL582USB Instructions for use

Aztech HL110E Instructions for use

Aztech

Aztech HL110E Instructions for use

Aztech HL113EP Instructions for use

Aztech

Aztech HL113EP Instructions for use

Aztech WL590E User manual

Aztech

Aztech WL590E User manual

Aztech WL593USB User manual

Aztech

Aztech WL593USB User manual

Aztech Easy Guide

Aztech

Aztech Easy Guide

Aztech HomePlug AV User manual

Aztech

Aztech HomePlug AV User manual

Popular Adapter manuals by other brands

One Stop Systems Max Express OSS-PCIe-HIB2-EC-x4 user manual

One Stop Systems

One Stop Systems Max Express OSS-PCIe-HIB2-EC-x4 user manual

Helmholz SSW7-RK512 user manual

Helmholz

Helmholz SSW7-RK512 user manual

Sony BKM-FW50 operating instructions

Sony

Sony BKM-FW50 operating instructions

Microsoft MN-740 user guide

Microsoft

Microsoft MN-740 user guide

D-Link DWA-127 user manual

D-Link

D-Link DWA-127 user manual

TP-Link TL-PA411 user guide

TP-Link

TP-Link TL-PA411 user guide

JVC KS-BTA100 instructions

JVC

JVC KS-BTA100 instructions

Goobay 60606 user manual

Goobay

Goobay 60606 user manual

Cisco Linksys PCM1000 user guide

Cisco

Cisco Linksys PCM1000 user guide

TP-Link TL-PA4010P KIT EU user guide

TP-Link

TP-Link TL-PA4010P KIT EU user guide

Noritz CK-56 installation guide

Noritz

Noritz CK-56 installation guide

Olympia HomePlug 8500w Operating	 instruction

Olympia

Olympia HomePlug 8500w Operating instruction

Diamond Multimedia UE3000 user manual

Diamond Multimedia

Diamond Multimedia UE3000 user manual

NETGEAR WNA1000M installation guide

NETGEAR

NETGEAR WNA1000M installation guide

MEE AUDIO BTC1 user manual

MEE AUDIO

MEE AUDIO BTC1 user manual

Joovy Zoom instruction manual

Joovy

Joovy Zoom instruction manual

3idee hp-34f Assembly instructions

3idee

3idee hp-34f Assembly instructions

TRENDnet TEG-PCISXplus Specifications

TRENDnet

TRENDnet TEG-PCISXplus Specifications

manuals.online logo
manuals.online logoBrands
  • About & Mission
  • Contact us
  • Privacy Policy
  • Terms and Conditions

Copyright 2025 Manuals.Online. All Rights Reserved.