manuals.online logo
Brands
  1. Home
  2. •
  3. Brands
  4. •
  5. Baby Lock
  6. •
  7. Measuring Instrument
  8. •
  9. Baby Lock Dress Form User manual

Baby Lock Dress Form User manual

Baby Lock
dress form
Assembly
Instructions
Base Set-up guide
Assembly Instructions
1. Attach the metal legs to form the X shape shown in Figure 1.
Detach the plastic leg base from the
main pole.
2. You will find these pieces of leg
frames inside the package.
3. Insert Leg B onto Leg A in an angle as shown.
5. Leg A’s frame must
be rested on the
groove of Leg B.
7. Turn plastic leg base
in a clockwise
motion to lock metal
frame into plastic
leg base’s locking
groove.
8. Insert the main pole
securely into the
completed base
stand.
4. Swing Leg B in a clockwise motion to form the base.
6. Insert plastic leg
base onto the metal
base frame as
shown.
Figure 1
Leg A
Leg B
How to use the Neck, Bust, Waist and Hip Adjustments:
How to use the Hem Guide
Position the height adjuster to its proper level and slide the
body of the dress form onto the stand. Tighten the wing nut
to secure the dress form to the main pole. To turn the Dress
Form, simply loosen the wing nut. (Figure 2)
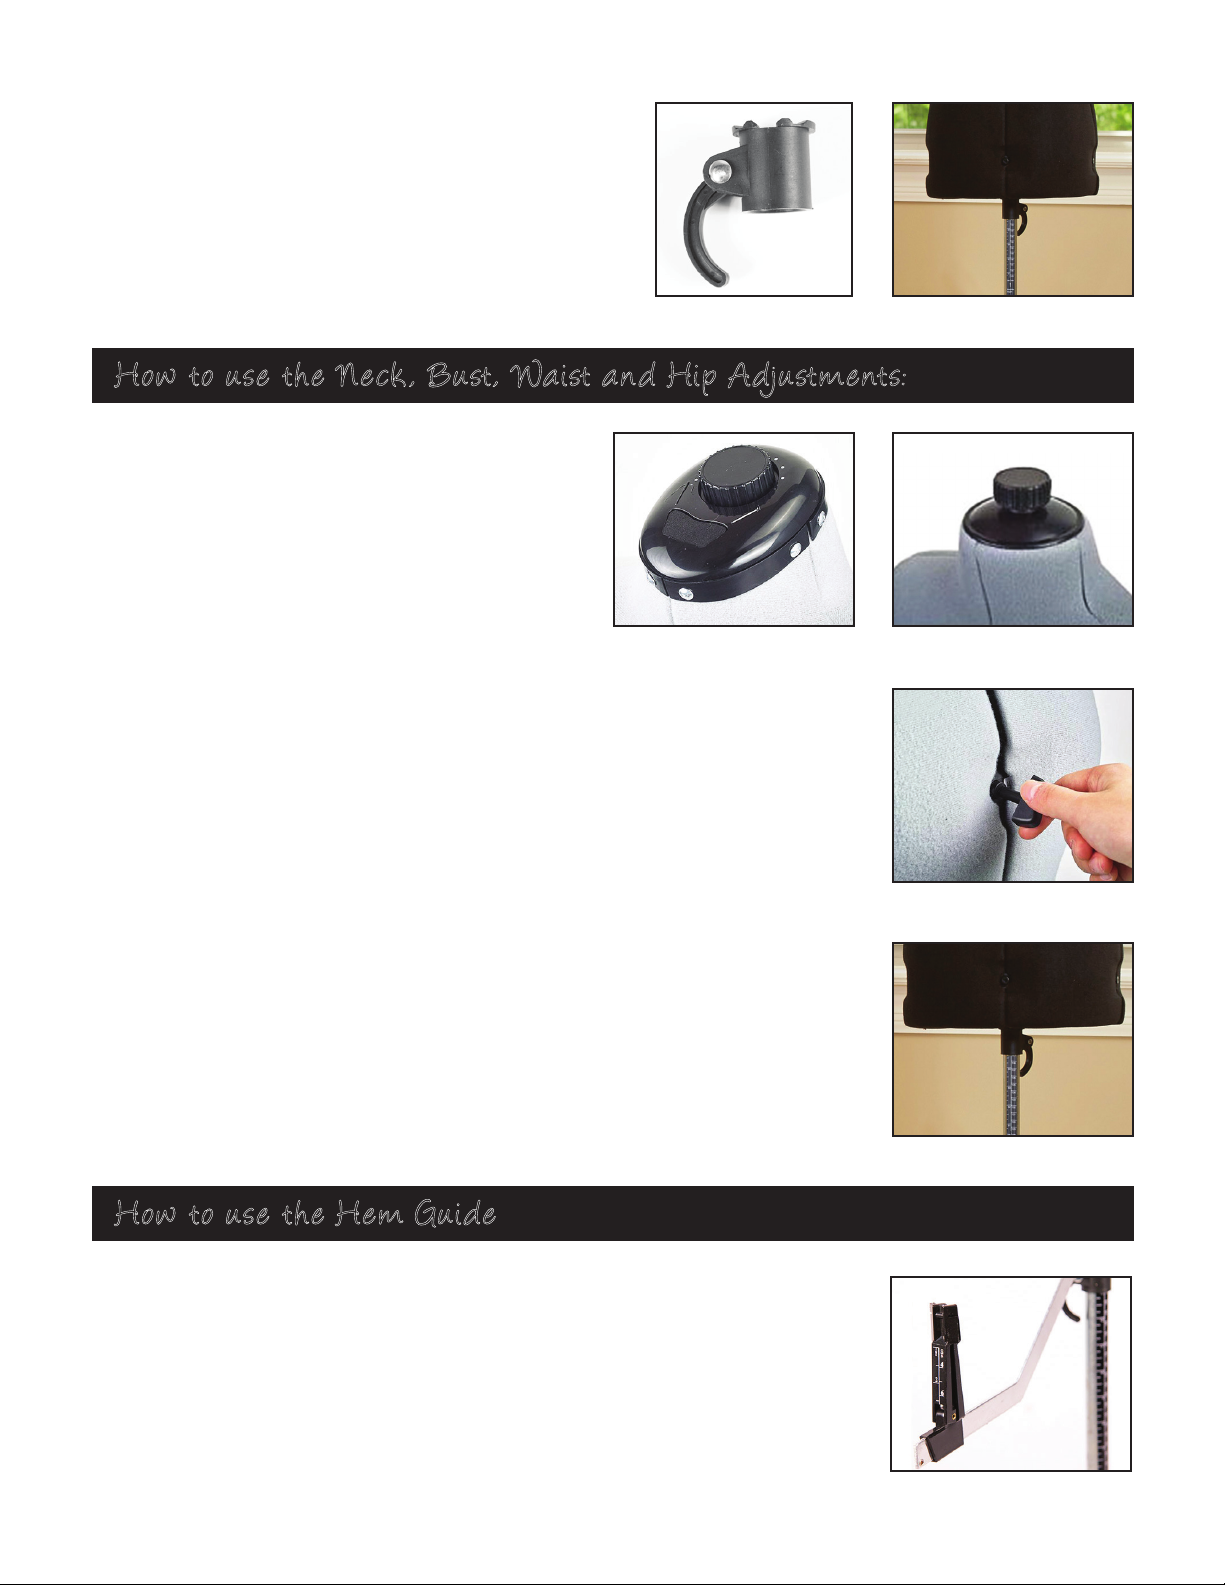
neck - To adjust the neck size, simply turn the dial
clockwise or counterclockwise to match your neck
measurement. The size will change in small
increments. Do not overstretch the size (Figure 3).
Loosen Neck Piece to adjust (Figure 3A).
bust & hips - The Baby Lock Dress Form features four bust adjustment points and
four hip adjustment points for an accurate fit. To adjust the bust and hip sizes, insert
the included key at each adjustment station and turn it to adjust at small increments.
(Figure 4).
For even hemming - Start by lowering the hem bar to the horizontal position and
selecting the hemline position. Unlock the hem marker and slide it up or down on the
pole until the pin slot matches your desired hem length. Lock the hem marker in place.
(Figure 6).
waist - This Dress Form features two adjustment points at the waist for precision
sizing. As with the bust and hip adjustments, insert the key at each adjustment point
and turn it to your specific measurement. For best results, adjust in small increments
and alternate with bust and hip adjustments. Do not overstretch when increasing
the size.
to mark the hem - Place your garment between the plastic clamps and insert a pin
through the slot near the top of the clamp. Turn the Dress Form to repeat the process
around the hem. (Figure 6).
height - To adjust the height, loosen the height adjuster on the pole and adjust to your
full-body length measurement (floor to shoulders). (Figure 5)
Figure 2
Figure 4
Figure 6
Figure 5
Figure 3A (Petite size only)Figure 3
important:
Assembly Instructions
important:
Assembly Instructions
Always adjust your Baby Lock Dress Form gradually, changing the size in small increments and working evenly across
all adjustment points to avoid damaging or overstretching the Dress Form. If you find you need a larger or smaller
unit, it is recommended that you contact your retailer and exchange it for a different size. Damage caused by
overstretching a particular point is not covered by the manufacturer’s warranty.*
ADDITIONAL FITTING TIPS:
You can add padding to accommodate certain body features such as a curved back, high hip or protruding
abdomen. Simply attach the padding (not included) to the area and secure it with pins or double-sided tape.
GETTING READY TO USE YOUR BABY LOCK ADJUSTABLE DRESS FORM:
- Record your body’s measurements before adjusting and using your new Dress Form. To get the most accurate
measurements, wear your normal undergarments and shoes.
- Record your measurements on the chart below.
Before attempting to assemble your new Baby Lock Dress Form, please insure that all parts and accessories are included in the package.
Please contact your retailer if any parts or accessories are missing or damaged.
Failure to report damages and/or missing accessories immediately will hinder the ability to replace the product.
Neck:
babylock.com
Full Body Length:
(floor to shoulders)
Bust:
Waist:
Hips:
CHINA FEIYUE USA INC. • Adjustable Dress Form • *Limited 1 Year Warranty
This product is warranted against defects in materials and workmanship for the
period of one year from the date of purchase. If used under normal home, non-
commercial use, this product will be repaired or replaced at our discretion at no
labor/parts cost. Shipping costs are not included in replacement orders. If you
have any questions regarding this warranty, please contact us at:
China Feiyue USA Inc. • 5556 Edison Ave, Chino, CA 91710
FAX: (909) 613-1817 • Email: [email protected]

Popular Measuring Instrument manuals by other brands

Powerfix Profi 278296 Operation and safety notes

Powerfix Profi

Powerfix Profi 278296 Operation and safety notes

Test Equipment Depot GVT-427B user manual

Test Equipment Depot

Test Equipment Depot GVT-427B user manual

Fieldpiece ACH Operator's manual

Fieldpiece

Fieldpiece ACH Operator's manual

FLYSURFER VIRON3 user manual

FLYSURFER

FLYSURFER VIRON3 user manual

GMW TG uni 1 operating manual

GMW

GMW TG uni 1 operating manual

Downeaster Wind & Weather Medallion Series instruction manual

Downeaster

Downeaster Wind & Weather Medallion Series instruction manual

Hanna Instruments HI96725C instruction manual

Hanna Instruments

Hanna Instruments HI96725C instruction manual

Nokeval KMR260 quick guide

Nokeval

Nokeval KMR260 quick guide

HOKUYO AUTOMATIC UBG-05LN instruction manual

HOKUYO AUTOMATIC

HOKUYO AUTOMATIC UBG-05LN instruction manual

Fluke 96000 Series Operator's manual

Fluke

Fluke 96000 Series Operator's manual

Test Products International SP565 user manual

Test Products International

Test Products International SP565 user manual

General Sleep Zmachine Insight+ DT-200 Service manual

General Sleep

General Sleep Zmachine Insight+ DT-200 Service manual

Sensa Core Lacto Spark user manual

Sensa Core

Sensa Core Lacto Spark user manual

VOLTCRAFT UTS-1980 operating instructions

VOLTCRAFT

VOLTCRAFT UTS-1980 operating instructions

EBCHQ 94915 Operation manual

EBCHQ

EBCHQ 94915 Operation manual

Balluff BIP LD2-T017-01-EP-S4 Series user guide

Balluff

Balluff BIP LD2-T017-01-EP-S4 Series user guide

Pulsar IMP Lite Series instruction manual

Pulsar

Pulsar IMP Lite Series instruction manual

ETCR 6800 user manual

ETCR

ETCR 6800 user manual

manuals.online logo
manuals.online logoBrands
  • About & Mission
  • Contact us
  • Privacy Policy
  • Terms and Conditions

Copyright 2025 Manuals.Online. All Rights Reserved.