Babytone S1 User manual

制作工艺:
80g书写纸;骑马钉,黑白印刷
尺寸: 95*147mm
此页不印刷

Contents
NOTICE ................................................................................1
1 Tips for Safe Sleep ........................................................1
2 Warnings and Cautions..................................................1
3 Unpacking .....................................................................2
4 Using the device and App..............................................2
5 Maintenance ..................................................................7
6 Troubleshooting ............................................................8
7 Specifications................................................................9
8 Symbols.......................................................................10

1
NOTICE
This product is not a medical device. It is not intended for use
as a medical device or to replace a medical device. It does not
and is not intended to diagnose, cure, treat, alleviate or prevent
any disease or health condition or investigate, replace or
modify anatomy or any physiological process. This product is
only intended to assist you in tracking your baby’s wellbeing
and is not intended to replace you as a caregiver.
1Tips for Safe Sleep
Room-share instead of co-sleeping
Place your baby alone and on their back to sleep.
Use a firm sleep surface. Keep soft objects out of crib.
Use a crib that meets safety standards. Do not use cradle for sleep.
Don’t use the monitor as an excuse for unsafe sleep.
2Warnings and Cautions
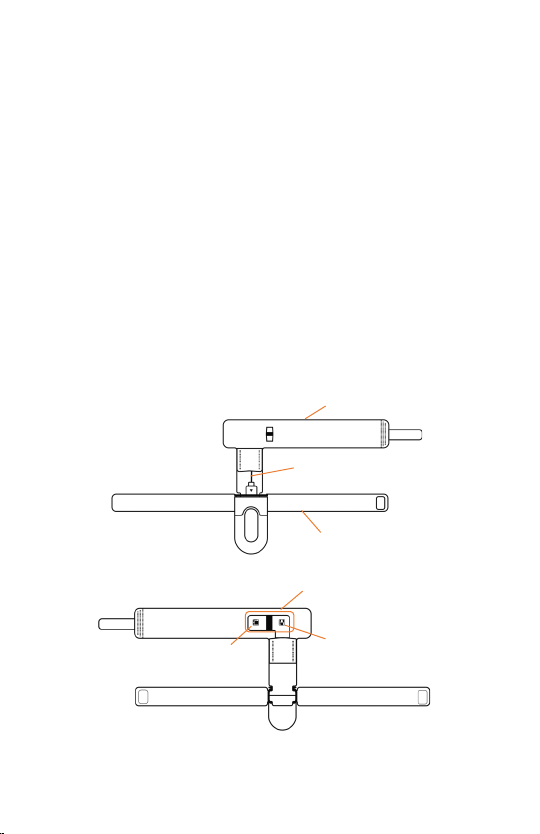
DO NOT twist the sensor and the wrap or apply excessive force on
them.
Do not use this device during MRI examination.
Do not store the device in the following locations: locations in which
the device is exposed to direct sunlight, high temperatures or levels
of moisture, or heavy contamination; locations near to sources of
water or fire; or locations that are subject to strong electromagnetic
influences.
Do not use the device in a combustible environment.
Never submerge the device in water or other liquids.
Do not clean the device with acetone or other volatile solutions.
Do not drop this device or subject it to strong impact.
The device and accessories are provided non-sterile.
Do not place this device in pressure vessels or gas sterilization
device.
Do not dismantle the device, as this could cause damage or
malfunctions or impede the operation of the device.
Consult your doctor immediately if you experience symptoms that
could indicate acute disease.
Do not self-diagnose or self-medicate on the basis of this device

2
without consulting your doctor. In particular, do not start taking any
new medication or change the type and/or dosage of any existing
medication without prior approval.
Use only cables, sensors and other accessories specified in this
manual.
Prolonged using may increase the risk of undesirable changes in skin
characteristics, such as irritation, reddening, blistering or burns.
Do not open the device cover without authorization. The cover
should only be opened by a qualified service personnel.
3Unpacking
Device (main unit)
Sensor cable
Soft wraps
User Manual
Data/Charging Cable
4Using the device and App
4.1 Download App
App name: ViHealth
iOS: App Store
Android: Google Play
Notice: if you have installed the App before, please update it
to the latest version.
4.2 Charging
Charge the battery before using.
Connect the device to USB of computer or USB charging
adapter with the supplied cable.
After fully charged, the device will power off automatically.
4.3 POWER ON/OFF
POWER ON:

3
Press the side button for 2 seconds.
POWER OFF:
3 ways:
Press the side button for 2 seconds.
Unplug the sensor cable, it will power off automatically
if not connected to phone for 2 minutes.
Even with sensor cable connected, it will power off
automatically if no working for 10 minutes.
4.4 Placement Guide before working
To ensure that the measurement is performed normally, please
follow the steps below to wear the device.
1) Plug the sensor cable into the device
2)Secure the sensor
Sensor cable
Foot wrap
Ankle wrap
Light detector
Light emitter
(Turns red
when working)
Sensor

4
A. Place the foot wrap on the foot (either foot works),
with the sensor part running on the outside edge of
the foot. The device should be oriented to the
baby’s leg.
B. Put the foot wrap around the foot and attach the
velcro securely with no gap between the foot wrap
and the baby’s skin. The light emitter and the
light detector should be opposite to each other
on the two sides of the foot.
Note:
For the right foot, the Light Emitter should be on
the top; for the left foot, the Light Emitter should
be on the bottom.
3)Put the ankle wrap around the ankle, attach the
velcro to secure the device.
Light emitter
Light detector

5
4.5 Start working
After the placement, press the side button for 2 seconds to
power on. There should be red light inside the soft wrap.
After a few seconds, readings will be displayed on the screen.
If the screen display “poor signal”, please check if the sensor
has been positioned and secured properly.
When the above symbol displays on device screen, it
indicates the readings is unavailable right now.
When at rest, there will be readings in a few seconds. If you
can’t get readings for a long time, it may be caused by:
Improper sensor placement
Frequent movement
Foot is too cold
Notice:
If the working time is less than 2 minutes, the data will
not be saved.
Motion may cause readings unavailable. Readings
recover very soon at rest.
Please avoid strong ambient light condition.

6
4.6 Stop working
Unplug the sensor cable, the countdown on the screen will
begin.
During the countdown, if you plug the sensor cable again, the
record will be resumed.
Notice:
If the working time is less than 2 minutes, there will be
no data saved
If the device power off during working, the data should
have been saved.
4.7 Screen wake up / change display
During measurement, the screen will go off automatically for
saving power; you can press the side button to wake up the
screen or change display.
4.8 Bluetooth Connection
The device Bluetooth will be enabled automatically after it’s
turned on.
To establish a Bluetooth connection,
1) Power on the device.
2) Make sure the phone Bluetooth is enabled.
3) Run the App.
4) Allow the App to use Bluetooth.
Notice:
DO NOT PAIR in the settings of your smartphone.

7
4.9 Add a new device
For the initial use, you need to add a new device.
1) Turn on device, run App, select <Baby Sleep Monitor>.
2) Follow the App instruction to add the new device.
4.10 App Offline Mode | Multiple Devices
If you enter App Offline Mode, you can view history data, in
App Settings->Select Device, you can select device if you
have multiple devices. In this Mode, device is not connected
so you cannot sync data or set device.
5Maintenance
5.1 Time & Date
After connection with App, device time will sync from your
phone time automatically.
5.2 Cleaning
Clear the wrap with water. Water temperature should be lower
than 104℉ (40℃)
Use a soft cloth moistened with water or alcohol to clean the
device surface.

8
6Troubleshooting
Problem Possible Cause Possible Solution
No readings
on screen
the sensor is not
positioned and
secured properly
check if the sensor has been
positioned and secured
properly
Baby is moving
frequently It will recover when at rest
Device
does not
turn on or
no response
Battery may be low. Charge battery and try
again.
Device might be
damaged.
Please contact your local
distributor.
The app
cannot find
the device
The Bluetooth of
your phone is off.
Turn on the Bluetooth in the
phone.
The device Bluetooth
is off. Turn on device
The App is not
allowed to use
Bluetooth
Allow the App to use
Bluetooth
For Android,
Bluetooth cannot
work without location
permission
Allow location access

9
7Specifications
Environmental
Operating Storage
Temperature
5 to 40°C -25 to 70°C
Relative humidity
(noncondensing)
10% to 95% 10% to 95%
Barometric
700 to 1060hPa 700 to 1060hPa
Degree of dust &
water resistance IP22
Weight
31g (main unit with band and sensor)
Size
49×27×14 mm (main unit)
Battery
3.7Vdc, Rechargeable Lithium-polymer
Charge time
2-3 hours
Battery life
16 hours for typical use
Wireless
Bluetooth 4.0 BLE
Heart Rate range
30 to 250 bpm
Heart Rate accuracy
±2 bpm or ±2%, whichever is greater
Data storage
4 sessions, up to 10 hours for each
Mobile App for iOS
iOS 9.0 or above,
iPhone 4s/ iPad 3 or above
Mobile App for
android
Android 5.0 or above,
with Bluetooth 4.0 BLE

10
8 Symbols
Symbol Description
Manufacturer
Date of manufacture
SN Serial number
Indicates a device that is not to be disposed of as
unsorted municipal waste.
Follow Instructions for Use.
MRI unsafe. Presents hazards in all MR environments
as device contains strongly ferromagnetic materials.
IP22 Resistant to liquid ingress
This product complies with the rules and regulations of
the Federal Communication Commission.
Non-ionizing radiation

11
FCC Statement
FCC Warning:
FCC ID: 2ADXK-1661
Any Changes or modifications not expressly approved by the party
responsible for compliance could void the user's authority to operate the
equipment.
This device complies with part 15 of the FCC Rules. Operation is subject
to the following two conditions:
(1) This device may not cause harmful interference, and
(2) this device must accept any interference received, including
interference that may cause undesired operation.
Note: This equipment has been tested and found to comply with the limits
for a Class B digital device, pursuant to part 15 of the FCC Rules. These
limits are designed to provide reasonable protection against harmful
interference in a residential installation. This equipment generates uses
and can radiate radio frequency energy and, if not installed and used in
accordance with the instructions, may cause harmful interference to radio
communications. However, there is no guarantee that interference will not
occur in a particular installation. If this equipment does cause harmful
interference to radio or television reception, which can be determined by
turning the equipment off and on, the user is encouraged to try to correct
the interference by one or more of the following measures:
-Reorient or relocate the receiving antenna.
-Increase the separation between the equipment and receiver.
-Connect the equipment into an outlet on a circuit different from that to
which the receiver is connected.
-Consult the dealer or an experienced radio/TV technician for help.
The device has been evaluated to meet general RF exposure requirement.
The device can be used in portable exposure condition without restriction.

ViHealth
Product name: Baby sleep monitor Model: S1
PN: 255-05170-00 Version: ADate: May. 2022
Shenzhen Viatom Technology Co., Ltd
4E, Building 3, Tingwei Industrial Park, No.6 Liufang Road,
Block 67, Xin'an Street, Baoan District, Shenzhen, 518101,
Guangdong, China

Table of contents
Other Babytone Baby Monitor manuals