manuals.online logo
Brands
  1. Home
  2. •
  3. Brands
  4. •
  5. Bakers Pride
  6. •
  7. Oven
  8. •
  9. Bakers Pride Cyclone CO11-E1 User manual

Bakers Pride Cyclone CO11-E1 User manual

INSTRUCTIONS TO REPLACE
INVENSYS TEMPERATURE
CONTROL WITH FAST G6
TEMPERATURE CONTROL ON
COCE/CO11E OVENS
30 Pine Street • New Rochelle • New York • 10801
1 - 914 / 576 - 0200
1 - 914 / 576 - 0605
1 - 800 - 431 - 2745
www.bakerspride.com
fax
US & Canada
web address
BAKERS
PRIDE
!
!
WARNING: Shut off the power to the oven, use lock-out, tag-out. Do not
attempt to perform this service unless the oven has been disconnected
from the power source. Injury or death may occur if the power remains
connected.
1 U4132A Instruction sheet
1 U4203QA Wire diagram
1 N/A ¼” Drill bit
1 M0110A Thermostat, G6, F.A.S.T.
1 M1555A RTD temperature probe
1 Q4021A Clip for RTD probe
2 Q1407A #10 X ½” hex, slotted screw
2 Q1001A 6-32 X ¼” slotted screw
2 Q3058A #6 internal tooth washer
2 P1085A ¼” X .032 fast on female connector with insulated shank
3 P1116A Terminal, twin adapter
6 P1106A Cable tie
1 U1428A Temperature overlay
1 N/A Jumper wire
This Field Retrofit Kit contains the following:
QUANTITY PART NUMBER DESCRIPTION
1) Remove the side access cover screws and cover and put aside.
2) Remove the front control panel as follows:
A) Remove the two upper and two lower screws and put aside.
B) Pull the knob located at the top of the control panel to remove the panel.
3) Remove the temperature probe from the inside of the oven. Put the screws aside.
4) Use the ¼” drill bit (provided) to enlarge the hole where the old probe was removed.
Do not enlarge the holes that the probe brackets were removed from.
5) Insert the new RTD probe (provided) by passing the wires from the inside of the oven
through the hole that was just enlarged, to the control panel area. Use the new probe
bracket (provided) and place it over the probe. Position the probe and bracket so the hole
in the bracket is lined up with the hole the previous probe bracket was fastened to. Install
the screw previously removed to hold the probe and bracket in place. Insert the other
screw previously removed to fill the hole that is no longer used. (new screws are provided in
the kit, if needed)
P/N U4132A 9-07
1
6) Strip the insulation from the new probe leads and attach the two ¼” insulated connectors
(provided) to the wires. Be sure to crimp the connector properly to hold the wires tight
without damaging the wires.
7) Remove the temperature control knob from the temperature control shaft and put aside.
Note that there are two screws on the knob that need to be loosened.
8) Remove the temperature control rheostat from the front panel.
9) Cut the tie wraps along the wire harness to free the temperature control wires from the
harness. Be careful not to cut any wires or insulation on wires when cutting the tie
wraps.
10) Remove the two #6 mounting screws and washers from the new FAST G6 temperature
control board and set aside. Insert the new controller into the front control panel from
behind the panel so the shaft comes through the hole in the panel. Position the board so
the six (6) terminals on the board face the outer right side of the oven. The two probe
connectors should be toward the oven chamber. Fasten the control board bracket to the
control panel with the two screws and washers removed previously.
11) Carefully install the new temperature overlay on the front panel.
12) Remove all wire connections from the existing temperature control board.
13) Remove the two screws that hold the old temperature controller to the oven and remove
the temperature controller. It may be necessary to cut more tie wraps to remove the
controller. Be careful not to cut any wires or insulation on wires when cutting the tie
wraps.
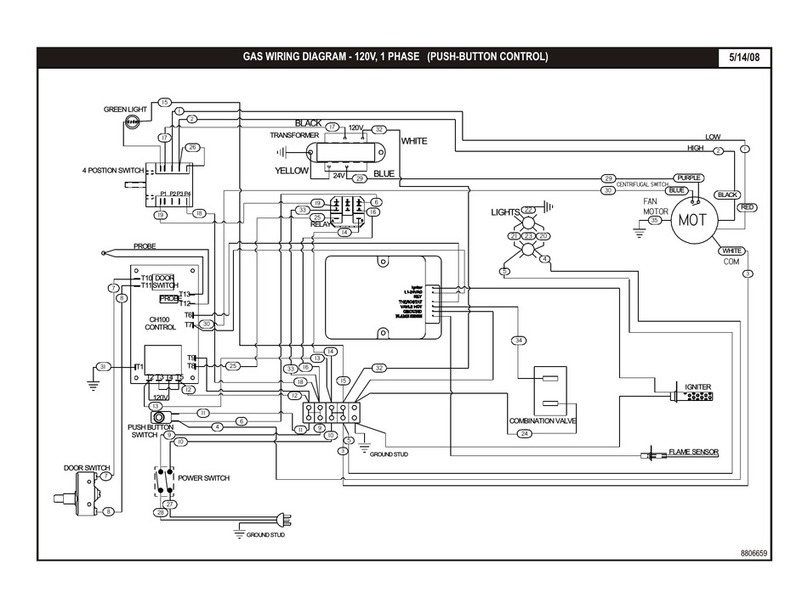
REFER TO WIRING DIAGRAM U4203QA (PAGE 4) FOR THE FOLLOWING CONNECTIONS
14) Connect the black wire (#2) from the bottom left of the 3 pole connector to A1 on the
contactor block.
15) Place a brass “piggyback” connector (supplied) onto terminals T7, T8, and T10.
16) Attach a jumper wire (supplied) from terminal T10 to terminal T6 on the temperature control
board. Attach the wire from the rotary switch terminal P1 to terminal T10 on the control
board.
17) Attach wire #9 from T8 on the control board to the top left connector on the terminal block.
Attach one wire from the heat indicator lamp to the other connection on T8.
18) Attach the other wire from the heat indicator lamp to T7 on the control board. Connect the
wire from A2 on the contactor to the other terminal on T7.
19) Remove the unused wire from the old control board to the door switch. Do not use this wire.
20) Connect the two leads from the RTD probe to the two terminals identified as “Probe” on the
new control board. It does not matter which lead is connected to which terminal.
2
21) Attach tie wraps to maintain a neat appearance and to prevent wires from catching in
places that could cause a short. Be sure the temperature probe wires do not contact the
door latch.
22) Carefully place the front control panel back into position. Make sure that none of the wire
connections on the new temperature control board contact any internal parts of the oven.
Replace the four screws previously removed.
23) Replace the side access cover and screws previously removed.
24) Turn the shaft on the temperature control fully counterclockwise. Install the control knob
so the indicator line points to the top right corner of “C” on the overlay. Lightly tighten one
set screw to hold the knob in place for test.
25) Restore power to the oven.
26) Place a probe from a digital thermometer inside the oven next to the new temperature
probe.
27) Turn the oven on and make sure the blower and the light work. The amber
temperature lamp should come on. This will go out after a few minutes and the oven will
be warm (not hot).
28) Set the blower speed on the “low” setting and turn the temperature knob to 350º F. Allow
the oven to cycle at least three times. Record the temperature when you hear the relay
turn off and when you hear the relay turn on again. There should be a 10º difference
between the two. The middle temperature between those two is the true oven
temperature.
29) If the line on the knob does not point to that temperature, CAREFULLY loosen the set
screw. Pull the knob straight out (do not turn the shaft) and replace it straight on with the
line pointing at the actual oven temperature. Tighten one set screw and repeat the
temperature measurement to make sure the knob points to the true oven temperature.
Adjust as needed.
30) Once the knob is set at the correct temperature, tighten both set screws to prevent any
further movement.
31) Increase the temperature to 425º F and verify that the oven cycles properly at that
temperature.
3
2
SPEED
MOTOR
LO
HI
COM
6
13 17
30
T4
T3
T2
T1
A2
A1
K
1
L4
L3
L2
L1
THREE PHASE
TB1 X EY Z
S1
16
R
3
3000
WATTS
25 28
Z
X
27
R
2
3000
WATTS
24 27
Y
Z
26
R
1
3000
WATTS
23 26
X
Y
28
10
S2
S1
13
C2 14
15
A5 C2
7
S1
13
4
34
32
31
18
16
S2
A6
H6
15
ROTARY
SWITCH
15
33
1
2
3
POWER
INDICATOR
HEAT
INDICATOR
SINGLE PHASE
TB1 X EY Z
TERMINAL
BLOCK
2
L1
L2
TIMER
L2
PRESENT
ON
CO11
ONLY
STEAM
SWITCH
TIME R
POTENT IOMETER
(TIMER )
STEAM
OPTION
BLU
RED
YEL
BLK
WATER
SOLENO ID
VALV E
4
1
52
3
6
LIGHT
SWITCH
31
3332
341516
1516
34323331
16 3
6 A5
13
12
30
18
433
1017
1412
40
43
42
42
41
41
44 45
46
47
H5
H5
4
2
3
1P1
P2
P3
P4
COM
DOOR
SWITCH
NO
NC
A6
A6
T4
PROBE
T5
THERMOSTAT
THERMOSTAT
RELAY
T6 T7 T8 T9 T10 T11
RTD
PROBE
77
WIRING DIAGRAM 208/240V - G6 COCE & CO11-E P/N U4203QA
4

Other manuals for Cyclone CO11-E1

2

This manual suits for next models

5

Other Bakers Pride Oven manuals

Bakers Pride EB-2-2828 Single User manual

Bakers Pride

Bakers Pride EB-2-2828 Single User manual

Bakers Pride ER-1-12-3836 User manual

Bakers Pride

Bakers Pride ER-1-12-3836 User manual

Bakers Pride PX-14 User manual

Bakers Pride

Bakers Pride PX-14 User manual

Bakers Pride P24-BL Quick start guide

Bakers Pride

Bakers Pride P24-BL Quick start guide

Bakers Pride FC-516 User manual

Bakers Pride

Bakers Pride FC-516 User manual

Bakers Pride GP-51 Series User manual

Bakers Pride

Bakers Pride GP-51 Series User manual

Bakers Pride Y-800 User manual

Bakers Pride

Bakers Pride Y-800 User manual

Bakers Pride PX-14 User manual

Bakers Pride

Bakers Pride PX-14 User manual

Bakers Pride FC-516 Manual

Bakers Pride

Bakers Pride FC-516 Manual

Bakers Pride GP-51 Series User manual

Bakers Pride

Bakers Pride GP-51 Series User manual

Bakers Pride GP-52 Double User manual

Bakers Pride

Bakers Pride GP-52 Double User manual

Bakers Pride 251 User manual

Bakers Pride

Bakers Pride 251 User manual

Bakers Pride DS-805 Single User manual

Bakers Pride

Bakers Pride DS-805 Single User manual

Bakers Pride Superdeck Y600 Series User manual

Bakers Pride

Bakers Pride Superdeck Y600 Series User manual

Bakers Pride DS-805 Single User manual

Bakers Pride

Bakers Pride DS-805 Single User manual

Bakers Pride BAKERS PRIDE D-125 User manual

Bakers Pride

Bakers Pride BAKERS PRIDE D-125 User manual

Bakers Pride Cyclone COC-E1 User manual

Bakers Pride

Bakers Pride Cyclone COC-E1 User manual

Bakers Pride D-125 DSP Single Manual

Bakers Pride

Bakers Pride D-125 DSP Single Manual

Bakers Pride EP series User manual

Bakers Pride

Bakers Pride EP series User manual

Bakers Pride EHE series User manual

Bakers Pride

Bakers Pride EHE series User manual

Bakers Pride COC-E Series Installation manual

Bakers Pride

Bakers Pride COC-E Series Installation manual

Bakers Pride E300 User manual

Bakers Pride

Bakers Pride E300 User manual

Bakers Pride BK-18 User manual

Bakers Pride

Bakers Pride BK-18 User manual

Bakers Pride SUPER DECK Y-600 User manual
Bakers Pride

Bakers Pride SUPER DECK Y-600 User manual

Popular Oven manuals by other brands

Kenmore 911.41389 owner's manual

Kenmore

Kenmore 911.41389 owner's manual

Bosch HB 78 6B Series instruction manual

Bosch

Bosch HB 78 6B Series instruction manual

AGA APRO48DFSS user guide

AGA

AGA APRO48DFSS user guide

Electrolux EOD3460AO user manual

Electrolux

Electrolux EOD3460AO user manual

AEG Electrolux B 89092-4 Instruction booklet

AEG Electrolux

AEG Electrolux B 89092-4 Instruction booklet

Kuppersberg SR 663 Technical Passport

Kuppersberg

Kuppersberg SR 663 Technical Passport

Prestige E60MF Users guide & installation handbook

Prestige

Prestige E60MF Users guide & installation handbook

Blodgett BE3240 Replacement parts manual

Blodgett

Blodgett BE3240 Replacement parts manual

Sage Smart Oven Air Fryer SOV860 quick guide

Sage

Sage Smart Oven Air Fryer SOV860 quick guide

Bosch HBA374B 0Y Series User manual and installation instructions

Bosch

Bosch HBA374B 0Y Series User manual and installation instructions

Lang DO36 Installation & operation manual

Lang

Lang DO36 Installation & operation manual

Cylinda S 6162 KVRF user manual

Cylinda

Cylinda S 6162 KVRF user manual

Beko BDVI 668 user manual

Beko

Beko BDVI 668 user manual

AEG COMPETENCE 5250 B Instruction book

AEG

AEG COMPETENCE 5250 B Instruction book

Whirlpool BUILT-IN MICROWAVE OVEN installation instructions

Whirlpool

Whirlpool BUILT-IN MICROWAVE OVEN installation instructions

CDA SC210 Series Manual for installation, use and maintenance

CDA

CDA SC210 Series Manual for installation, use and maintenance

Firenzi U25187 FDO 900 Instruction booklet

Firenzi

Firenzi U25187 FDO 900 Instruction booklet

Franke DM72M Instructions for use and installation

Franke

Franke DM72M Instructions for use and installation

manuals.online logo
manuals.online logoBrands
  • About & Mission
  • Contact us
  • Privacy Policy
  • Terms and Conditions

Copyright 2025 Manuals.Online. All Rights Reserved.